3 Houses May Be Too Much At Once
07.07.2019
Today is a little bit works in progress, a little bit random/behind the scenes. This is what happens when projects get a little carried away and look to take longer than intended.
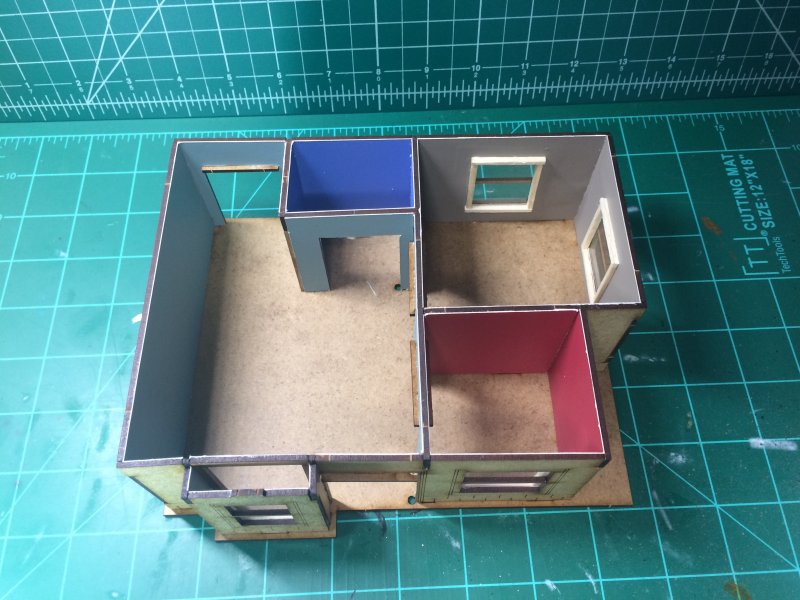
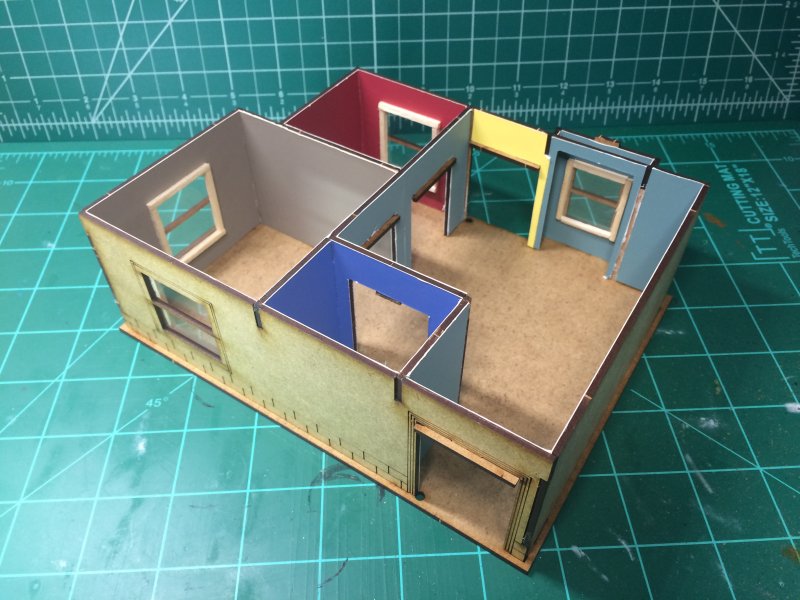
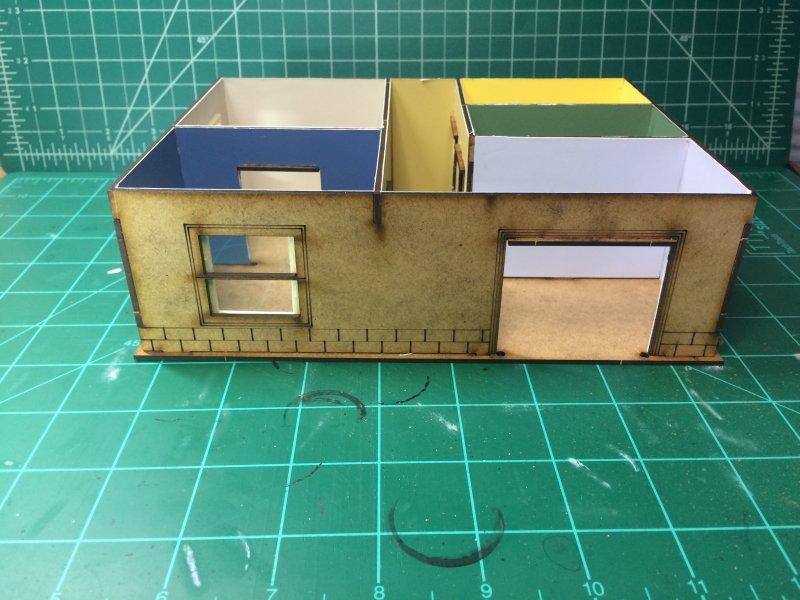
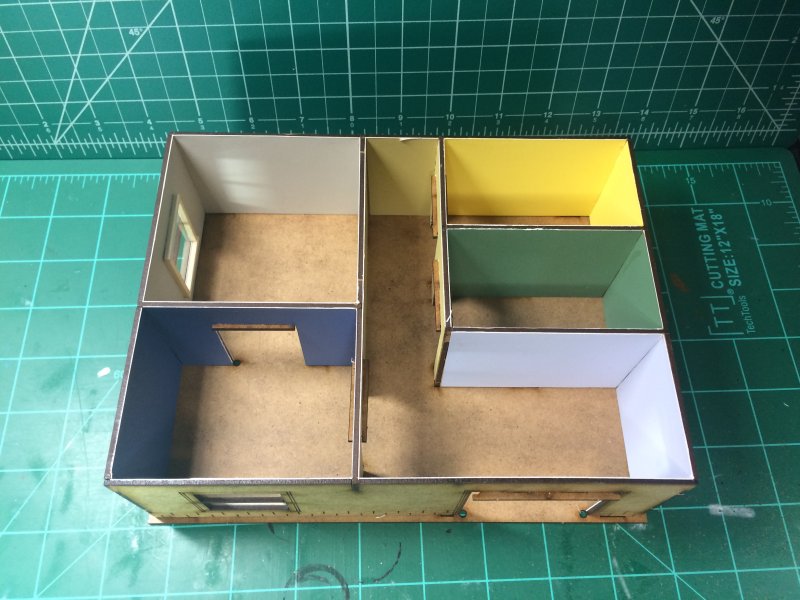
The hobby project that's turning into a big hobby project has been a trio of MDF houses. There's a 4-house set for Walking Dead of which I picked up 3 during a sale at some point or another. As my theater project got delayed (more on that some other time) I thought I'd just whip out these 3 houses. My method of whipping takes a while.
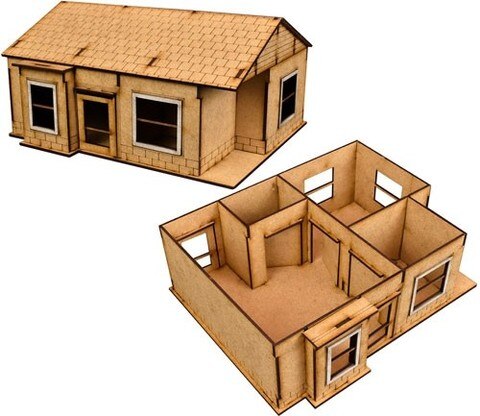
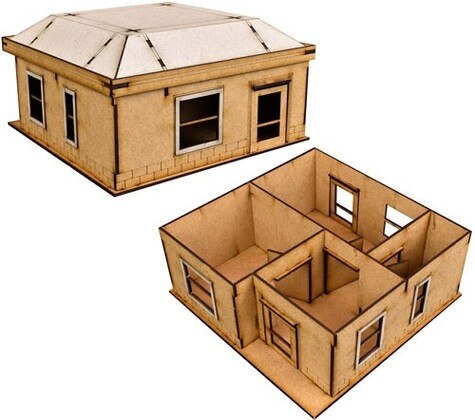
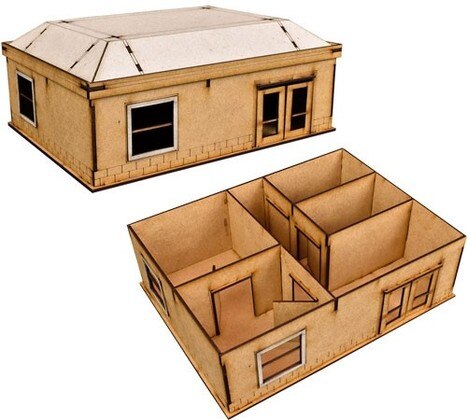
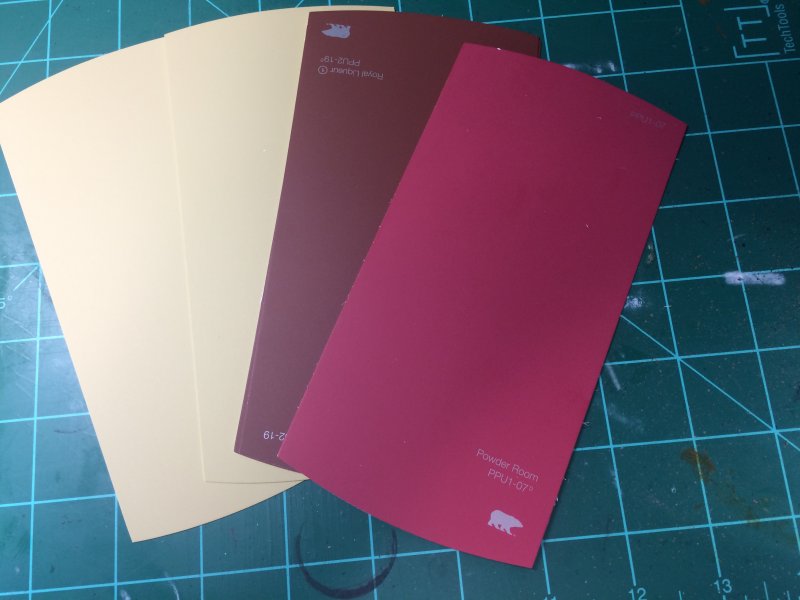
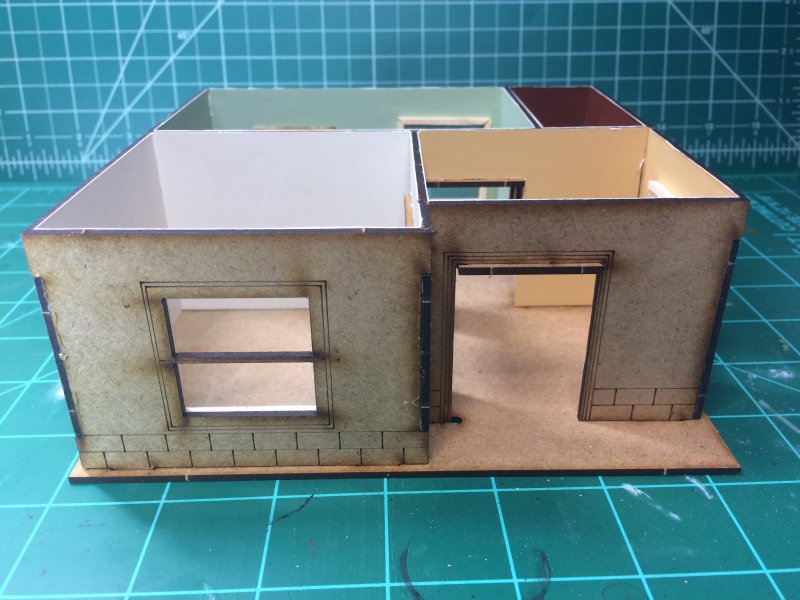
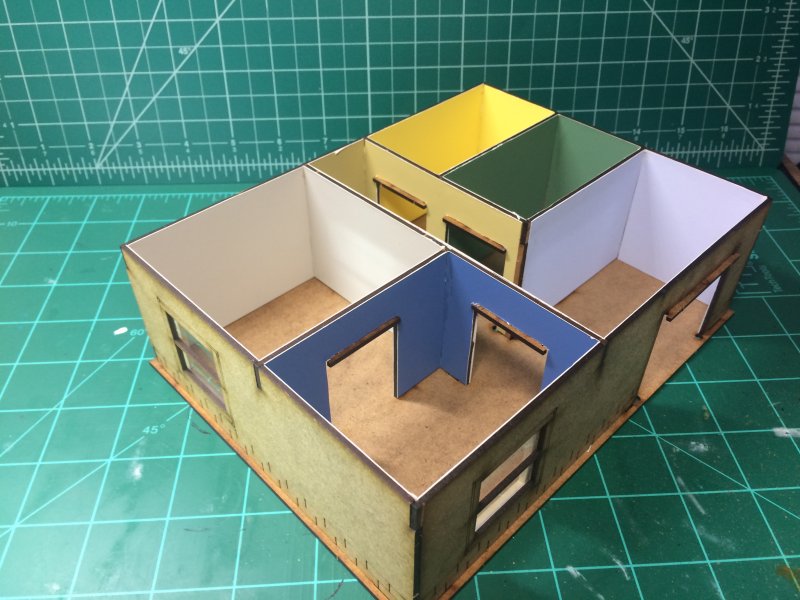
I've long been hesitant to paint MDF as stories of it drinking up paint are legendary. I've not really experienced it myself, but I've really been limited what I paint. The kits as they come are fairly plain. I went my favored route for home and instead of trying to paint interior walls, I went by Home Depot and picked up paint sample cards for Behr paint. These specific cards are really good for what I need. They're sized to cover most walls. There's a variety of colors. Nobody in Home Depot seems to notice or mind when I grab 4 samples of 10 colors and merrily walk out without buying anything.
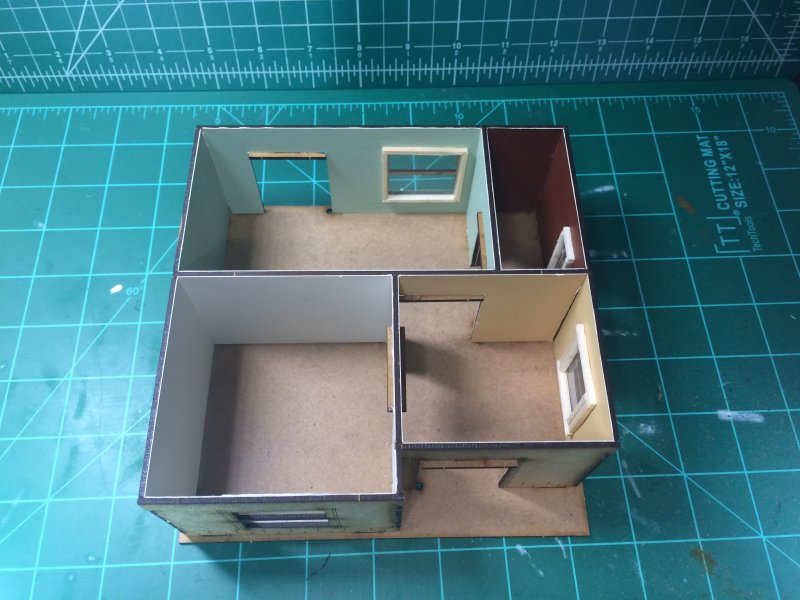
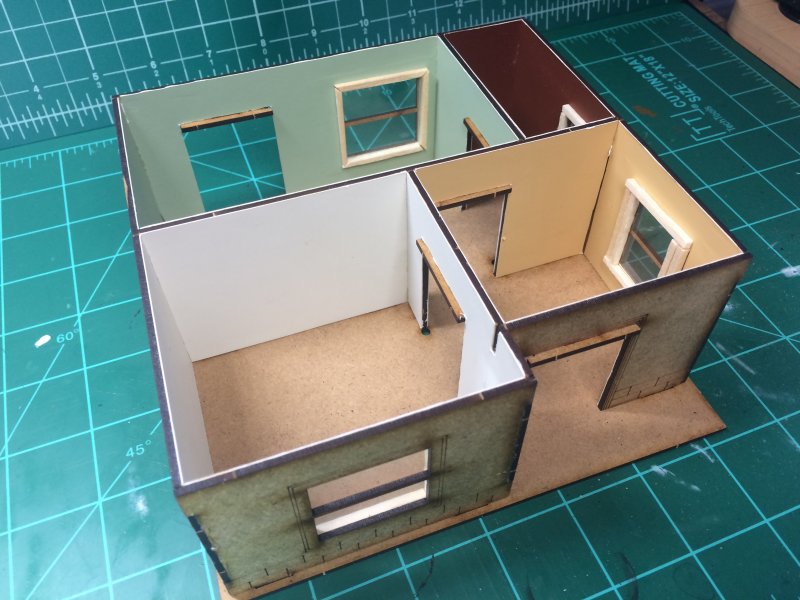
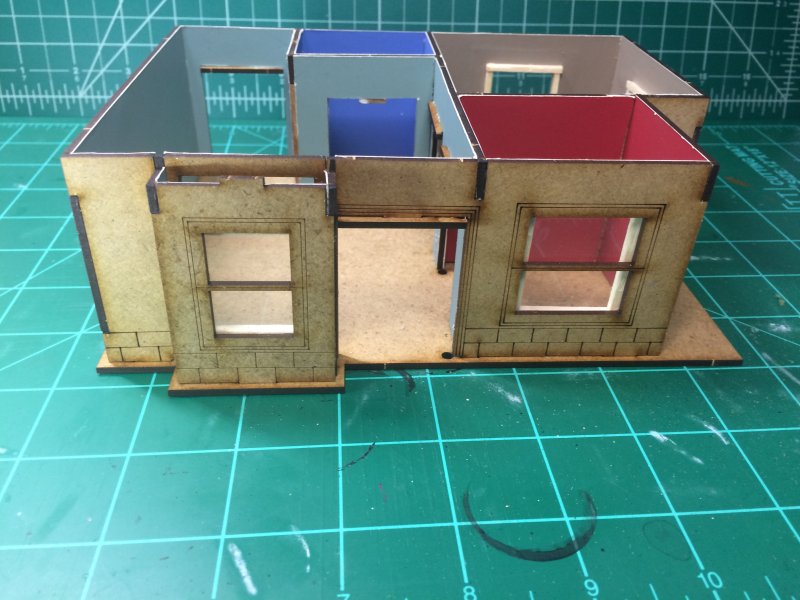
I've learned the method that works best for me is to glue the card to the wall and then cut and trim the excess. Before this, I dry-fit everything together (this will come in important on that theater project story for some other time) to make sure I get rooms with the same color. Once the glue dries, excess is trimmed so the walls will fit flush, or as flush as I can make them, with each other and the floor. I tend to get a little overboard with the color choices. My house has tan (Gourmet Mushroom) walls throughout, but here I pick a different color for every room. It's colorful, if nothing else.
Interior window openings have been tricky in the past, with lots of mistakes learned. Just a square opening, thank you square hole punch, doesn't look right. Windows have trim. I tried a couple of craft-stick, fine - square toothpick - frames with 45 ° corners, but my Chopper wasn't making consistent, flush cuts. Being lazy, I opted for and old fashioned square frame with longer top and bottom, and the sides are trimmed to fit between. With transparency film cut to fit the window and glued in before the paint card, it all makes for a decent window.
With the walls dry-fit into the base, I went ahead and glued all the walls together with some wood glue and let it all set for a day. Now it's ready for the next step. Ah, the next step. What is the next step? Notice the lack of doors? Part of not gluing walls to the base is so the doors can still be added - and this time I took extra care to make sure the holes for the door hing/axis are on the correct sides. I learn from my mistakes! Sometimes. The outer doors have openings for windows, so I'll likely go the transparency film + toothpick frame route for those. The interior doors are very plain. I'm currently planning on printing out some door textures and gluing them on. Door textures may not be the proper term. There's some nice pics of interior doors on the Home Depot website that I'll likely be cropping and printing. I use Home Depot a lot for this stuff. Maybe I can get a sponsorship?

There's some other little details I'm going to print out and see how they look, but I'll save further explanation until we see if it's worth it. The one part I will mention is how the floors of these 3 houses work horribly for house floors. While I'm tempted to just print out floors, which is Plan B, I'm going to see how 1mm felt works as a carpet replacement. That's crazy, you say. Home Depot doesn't have 1mm felt! That's true. Hobby Lobby has felt!
Seeing as it took the better part of 2 weeks to get walls covered in color and glued, I'm not really sure how long to expect this next phase to take.
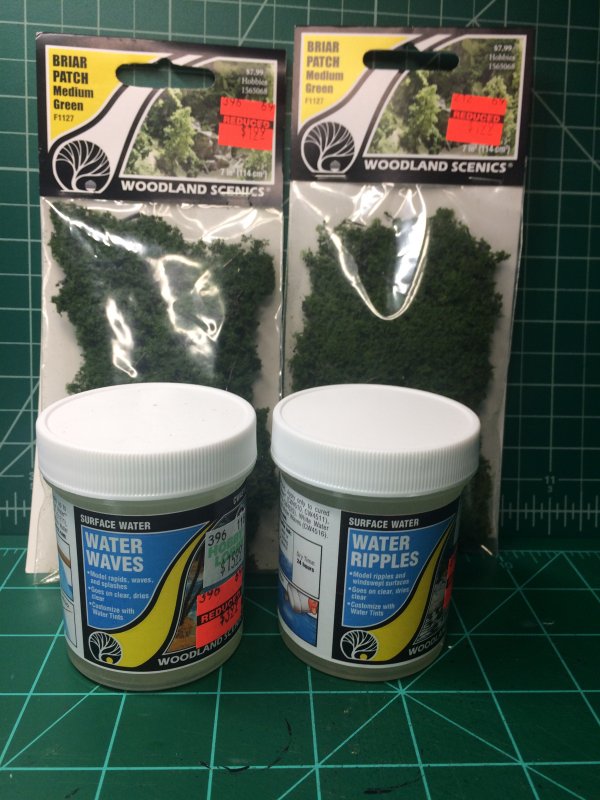
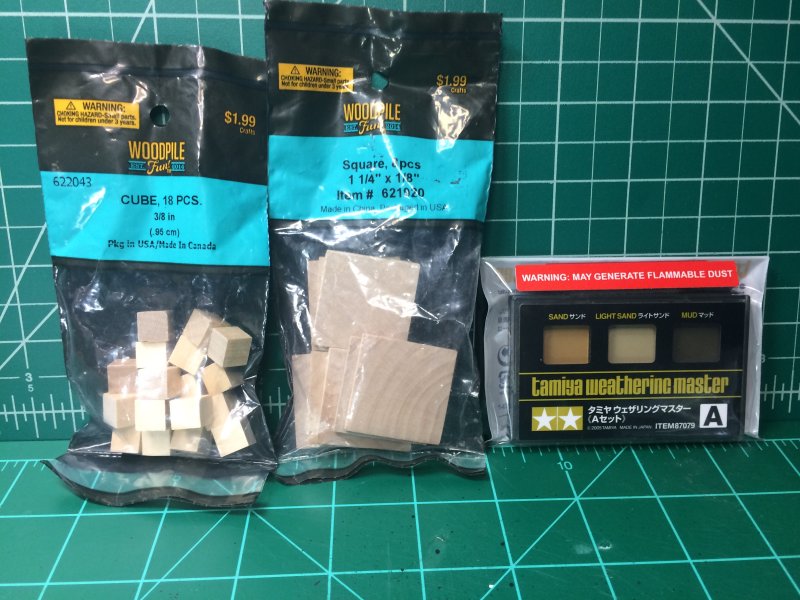
Segueing from Home Depot, it's clearance time of year. While I always drop in for coupon usage on Tamiya Primer I'll also wander the aisles looking for anything with a red sticker that I might one day use. This year that included some Brier Patch flock and a couple of water effects. I've yet to do much with water effects but if I keep watching Luke Towan I'm going to try something or other before long. I picked up some random odds and ends while roaming the aisles, too. I was starting to run out of the Sand & Mud pigment that I use, so instead of using my coupon on primer I picked up pigment. I also picked up a couple of random packs of wood pieces, because sometimes I just need random wood pieces.
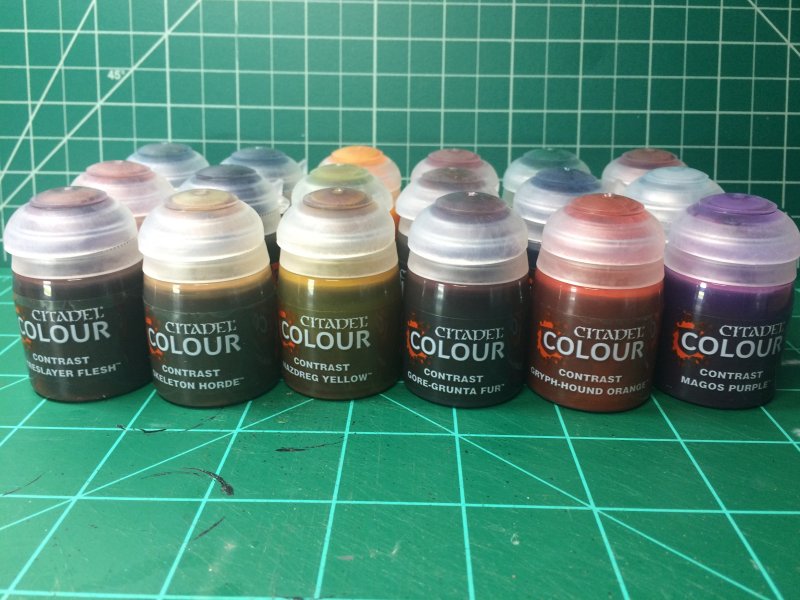
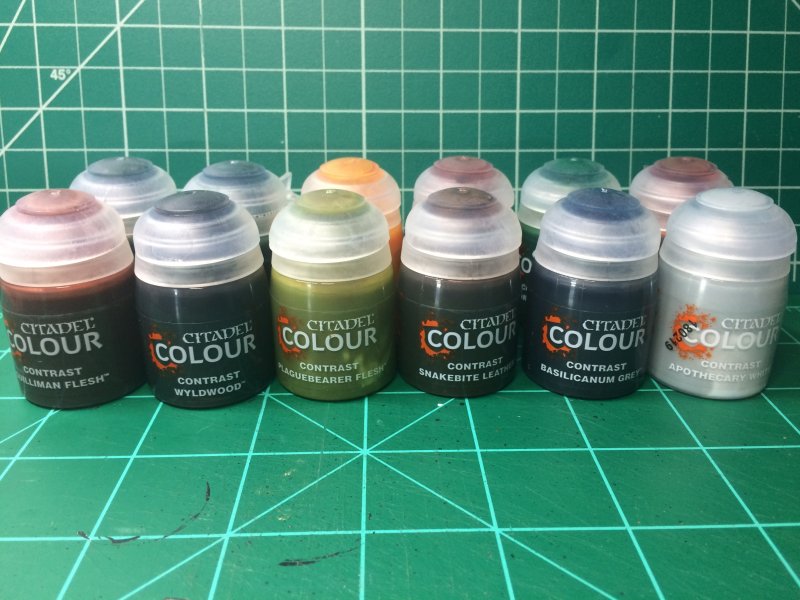
After watching way too many videos on the pros and cons of contrast paints I decided to pick some up. Most people talk about how these paints work well for painting lots of minis quickly, although the colors tend to come out flat and in pastels. The thing I noticed is that these paints seem to work well with skin tones and fabric. I paint a lot of skin tones and fabric! Contrast paints are described as a thick wash. I like to paint with a wash!
I made a list of the colors I would be most likely to use and headed out to The Deep to get what I could. They had 7 colors in stock. 5 of them were colors I wanted, so I picked them up. From there I went to the Warhammer Store, and discovered they were closed on Tuesdays. Luckily, Adam at work mentioned a Warhammer sale of some type at JCs House of Cards. I thought they were mainly a Magic The Gathering & card games of that ilk shop. Facebook listed Warhammer in their stock, so I took advantage of social media and asked if they carried/had in stock any contrast paint. They replied "yes, we have them all". That afternoon, I saw they did indeed have them all. And then I may have left with too many. But they had them all!

I'm going to practice with these on some Zombicide minis that will never see the light of day, just to get a feel for how they work.
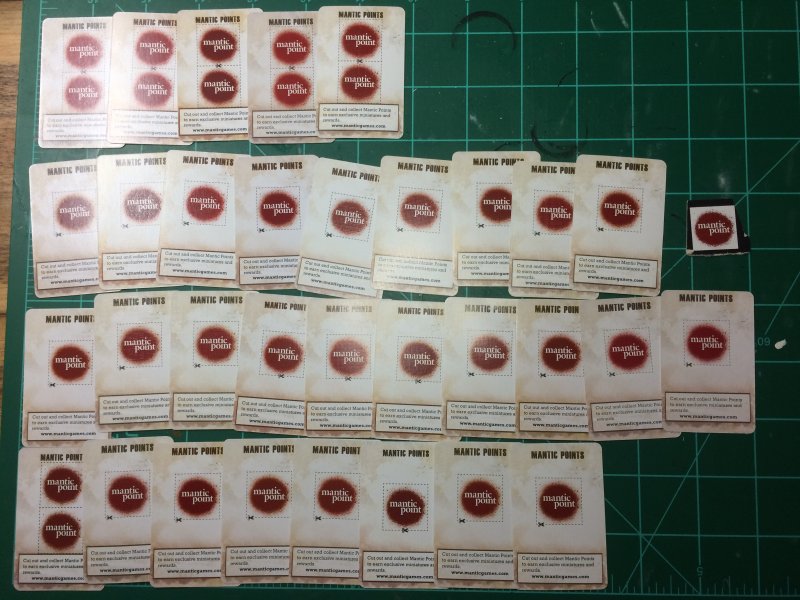
With all the Walking Dead minis I've gotten over the past couple of years, I've been racking up Mantic Points/Proof of Purchase. The Mantic web store had some more things in stock, so I finally got my points together and placed an order. I needed 40 pts, which I managed to get together - I had to raid a couple of not-yet-opened boosters. I'm not sure I've ever mailed anything to England, but I visited my local USPS to ensure I had everything packed, addressed, and properly paid. Sometime in the next 3 weeks they should receive my points. Hopefully in the ensuing 3 weeks I'll get my point paid booty.
Permalink
hobbies random walking dead
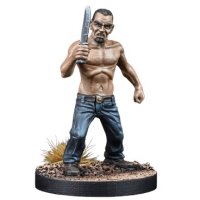
Made To Suffer - Expansion Name or My Painting Technique?
05.27.2019
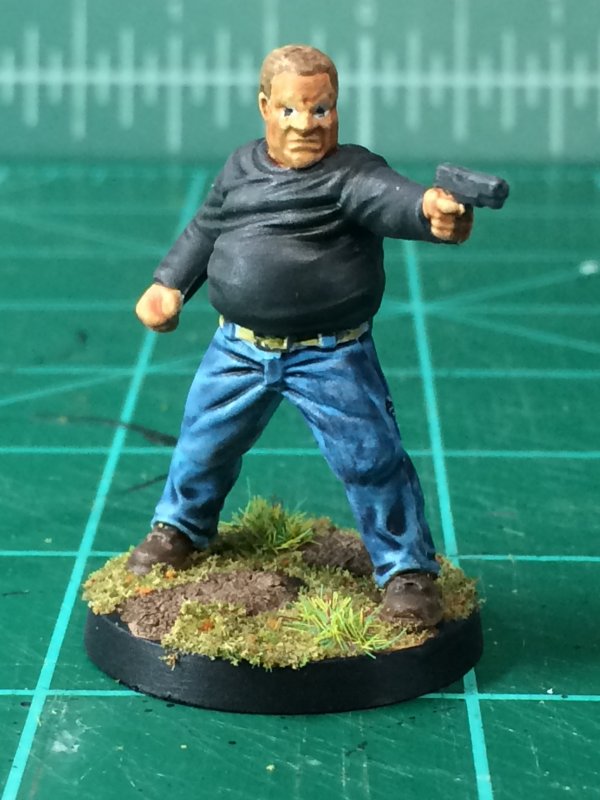
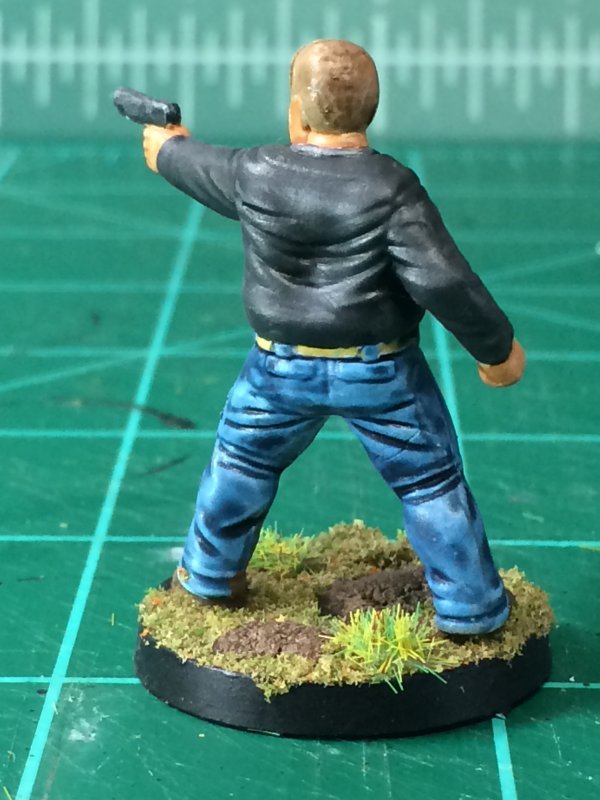
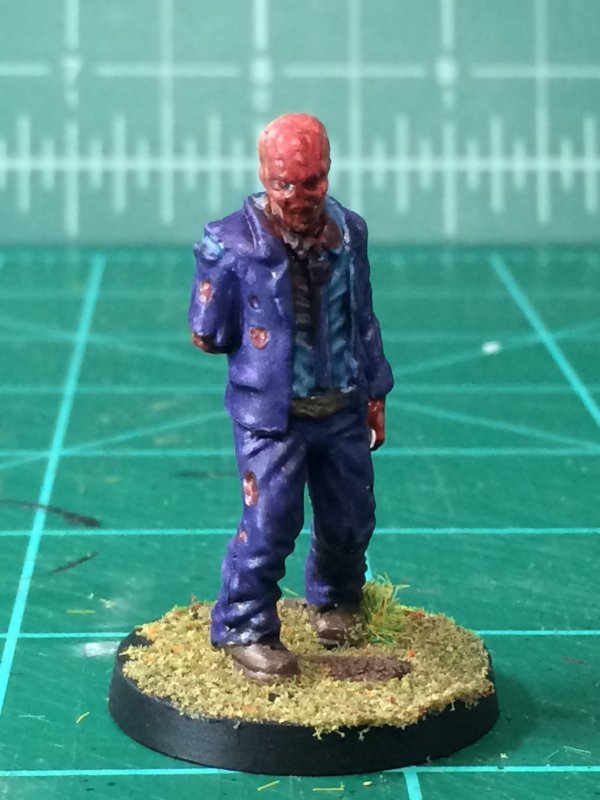
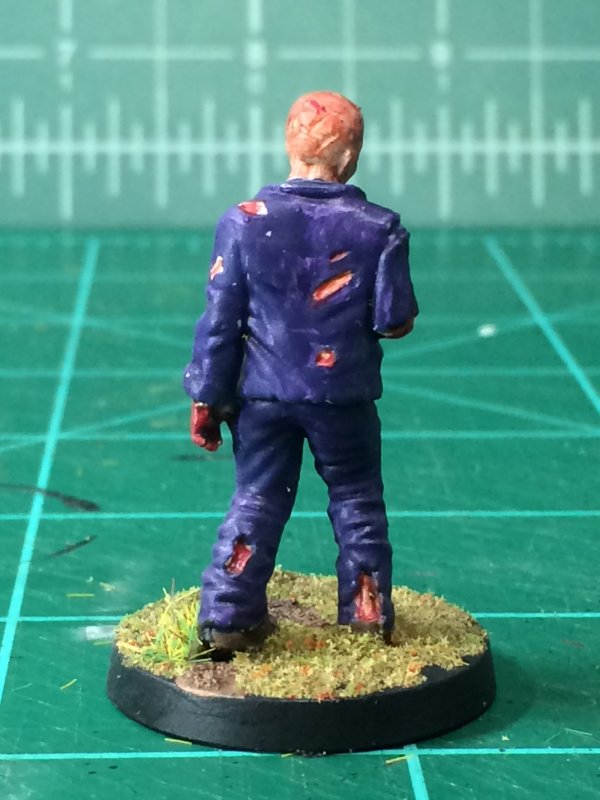
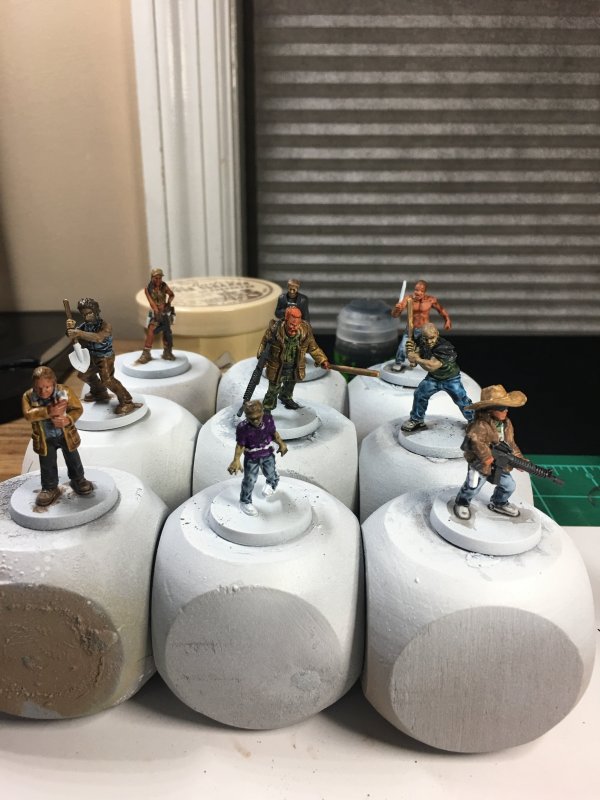
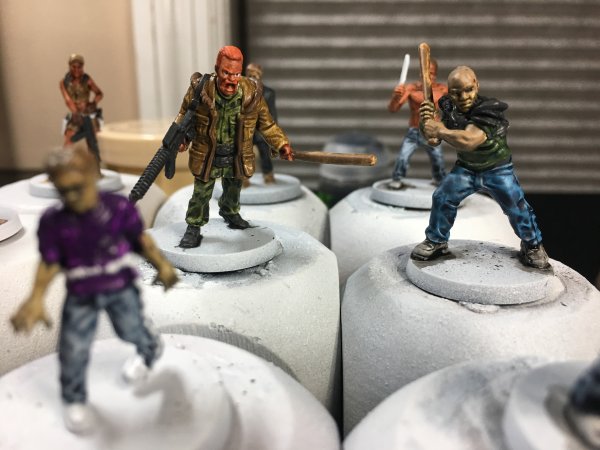
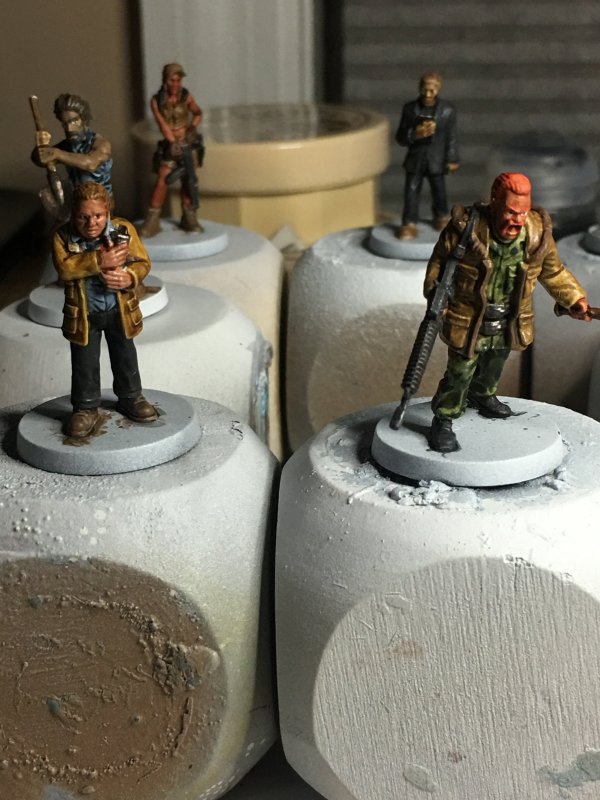
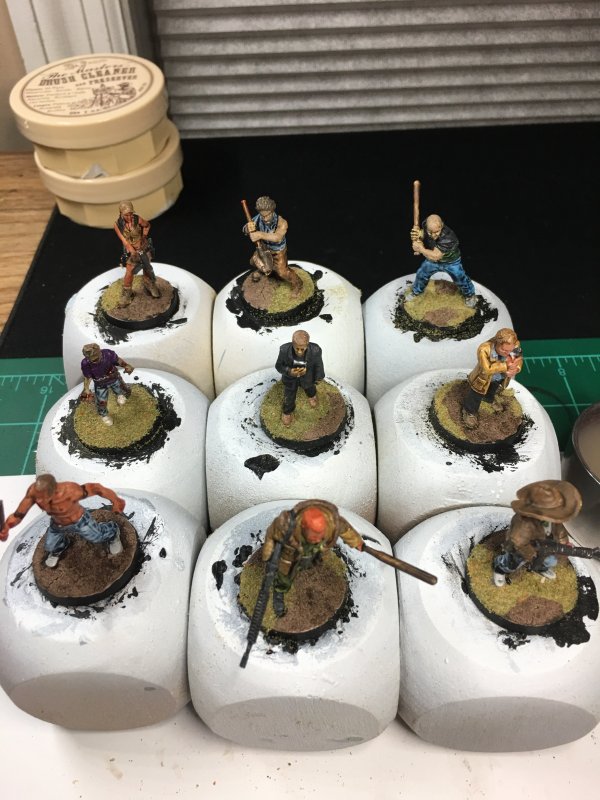
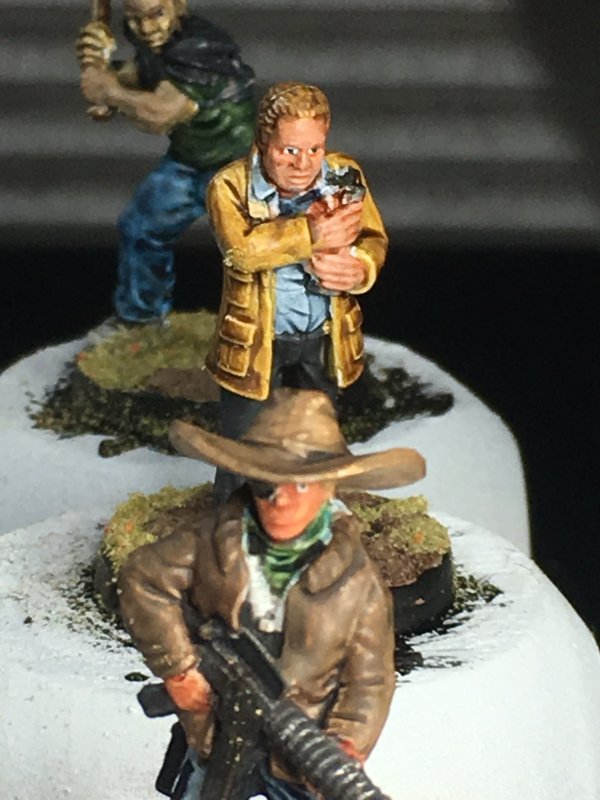
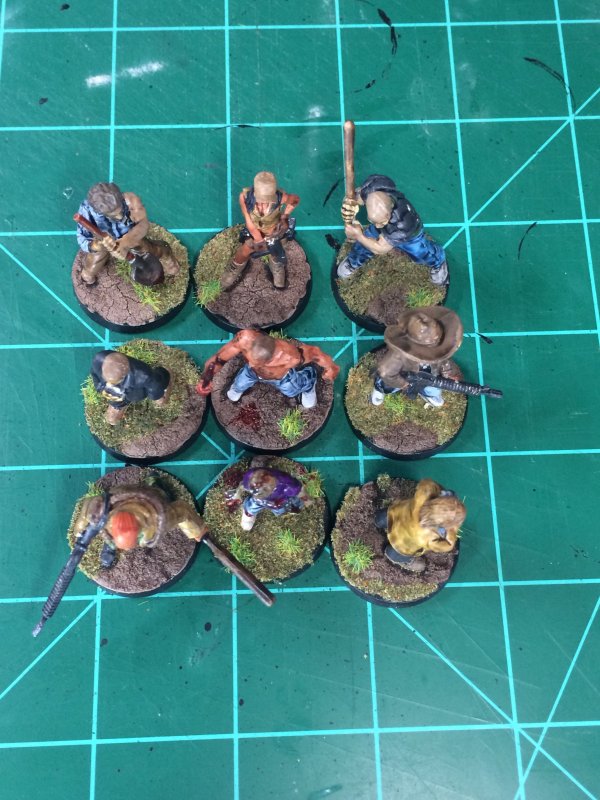
Since the last batch of Walking Dead turned out pretty well, I decided to try the same route on another batch. 9 more primed, mainly 5 from the Made To Suffer expansion which WAS NOT ON MY PROGRESS SPREADSHEET. For someone who prides himself on organizational skills, that spreadsheet has been my bane.
I strayed from keeping to reference pics this time. This is obvious when looking at Bruce, who I neglected to make black. Besides not noticing, I still have a problem with those brown skin tones so I don't feel too guilty. In trying to up my painting game after becoming a little more confident with my "eyes looking close to the same direction" technique, I tried to give everyone eyebrows. Face detail, that's what I'm working on. Mixed results on that front.
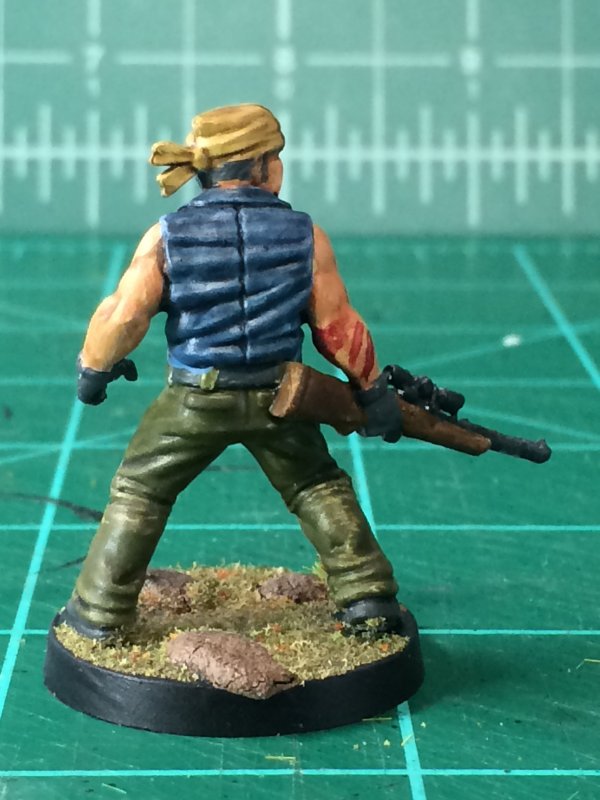
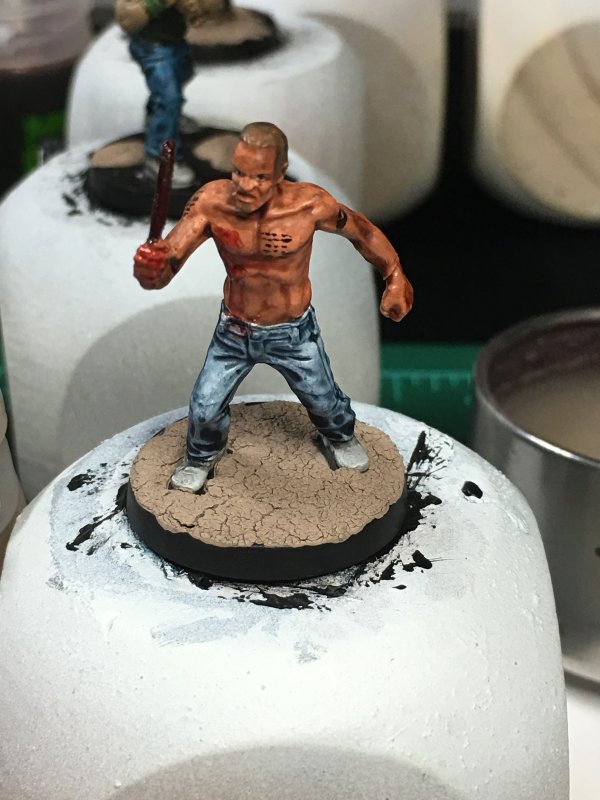
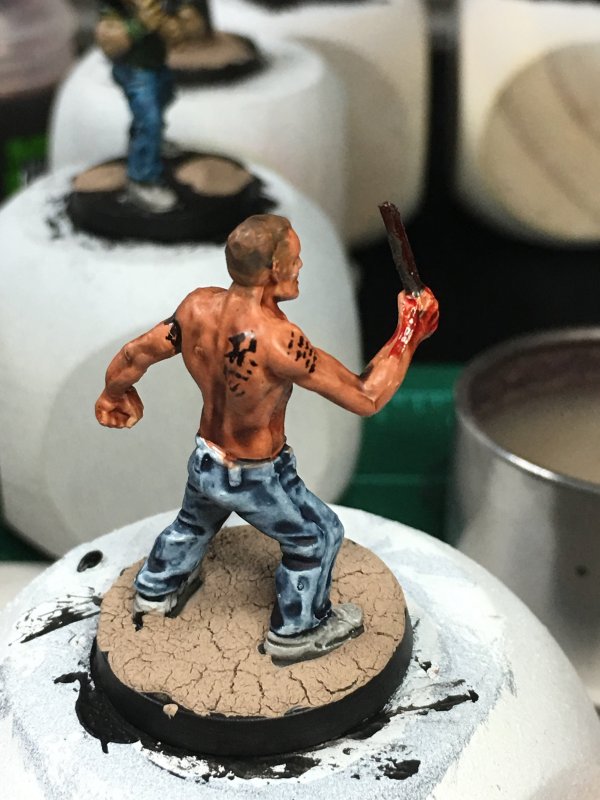
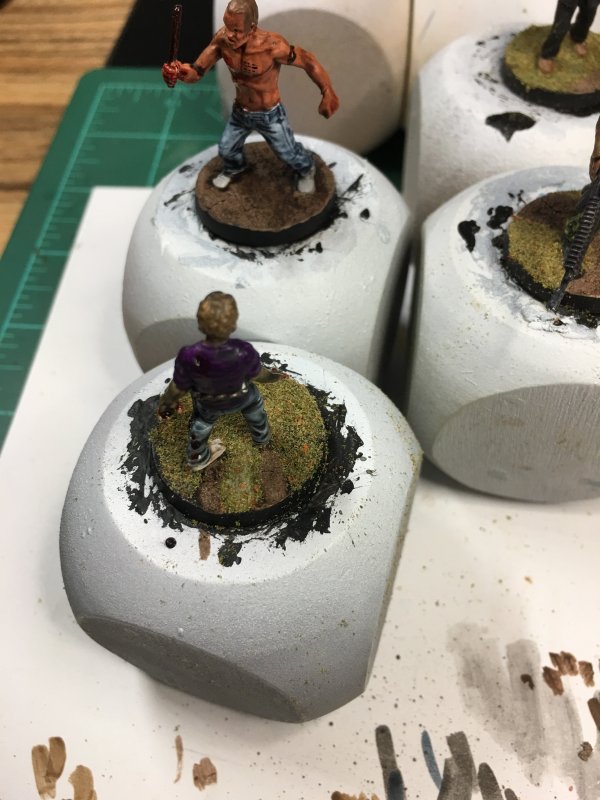
Martinez, with the headband, was my hero to focus on this time and he turned out well. There was an errant dab of paint on his elbow when I was touching up something - I have no idea what. Instead of trying to get the skin tone to match back up, that dab turned into a recent wound with some extra blood laced scratches around it. I'm all about covering up mistakes with grime and gore, after all.
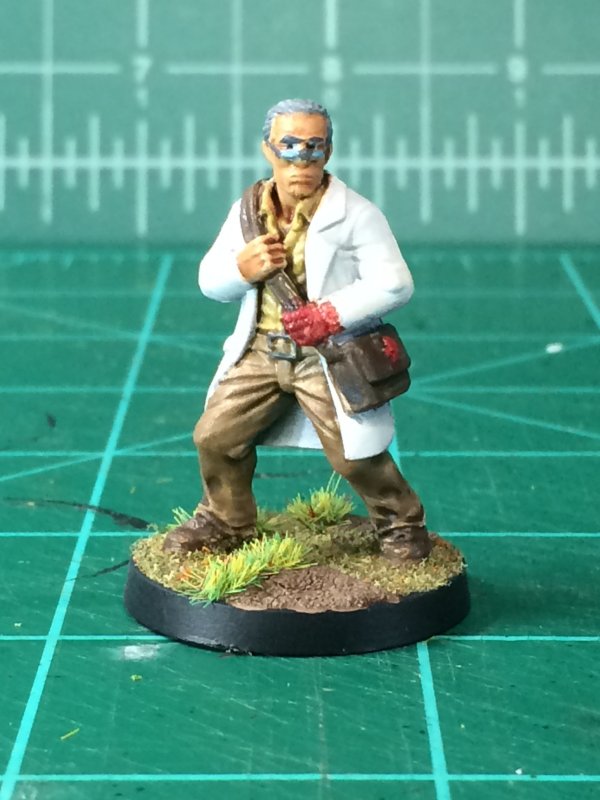
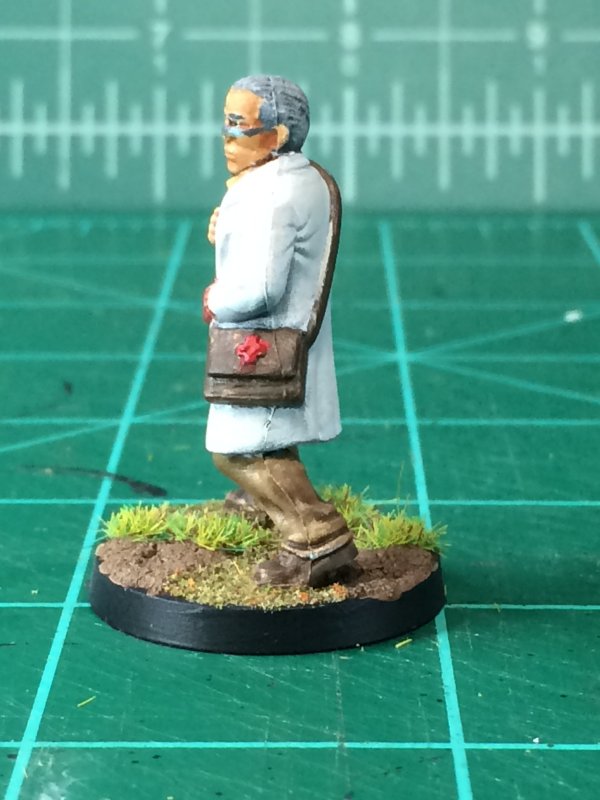
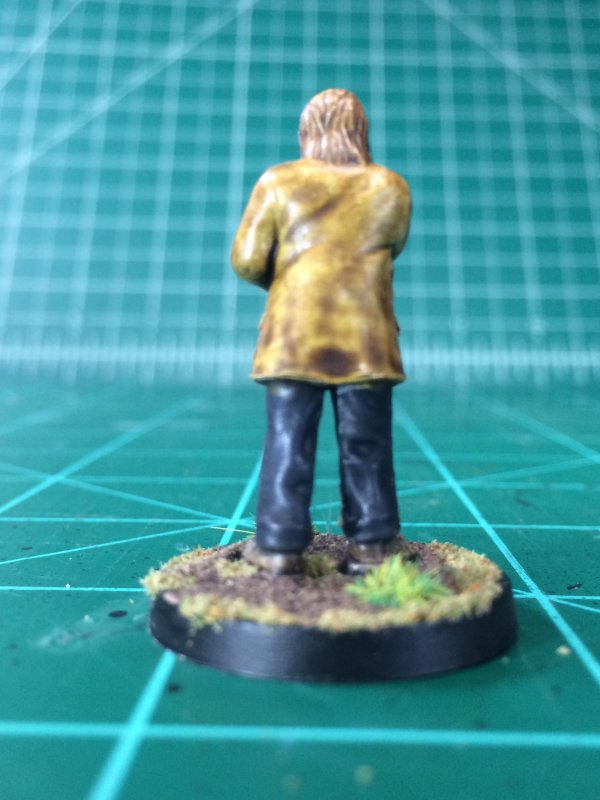
Dr Stevens was the one that turned out better than I expected. I tried to keep his coat Primer White, and mostly did, although one of the final steps on him was to apply an off-white drycoat to cover up some bleeding from other colors. Plus, the stark whiteness of the primer was a little too much.


It's never until I take pictures and look at the details that I see just how much better most people's painted minis look. If nothing else it shows that I'm looking at the right people to learn from.
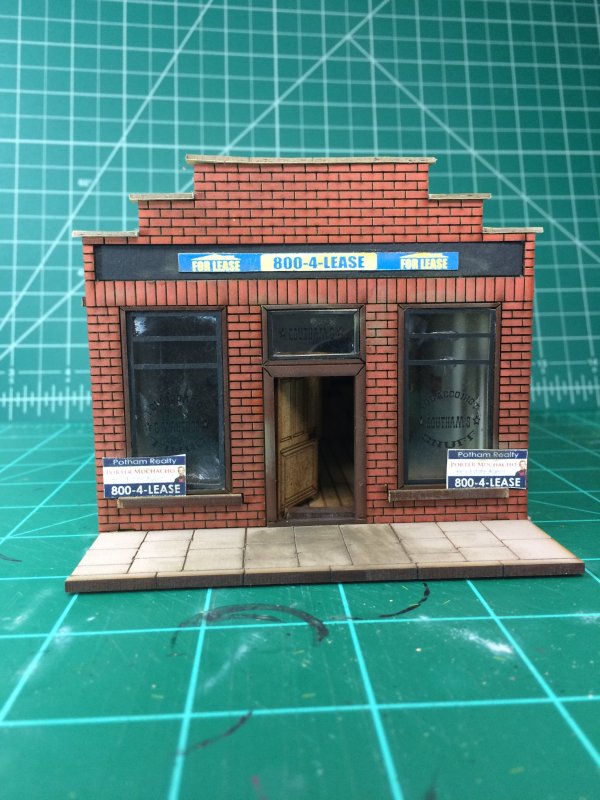
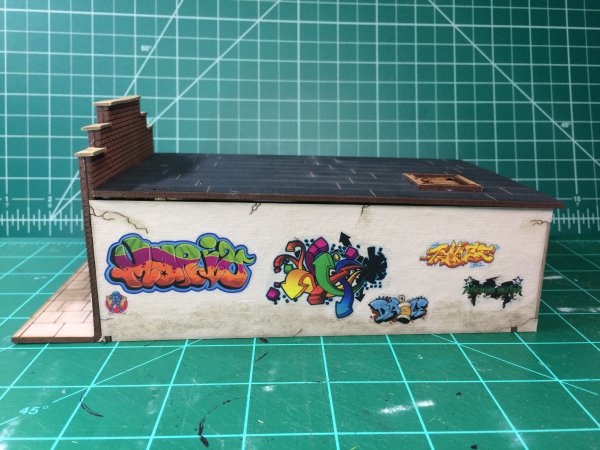
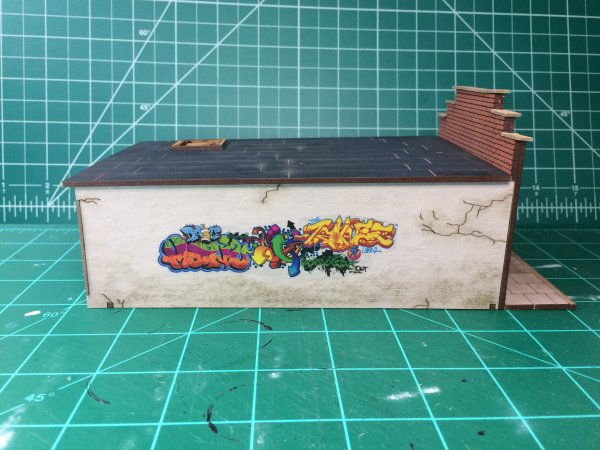
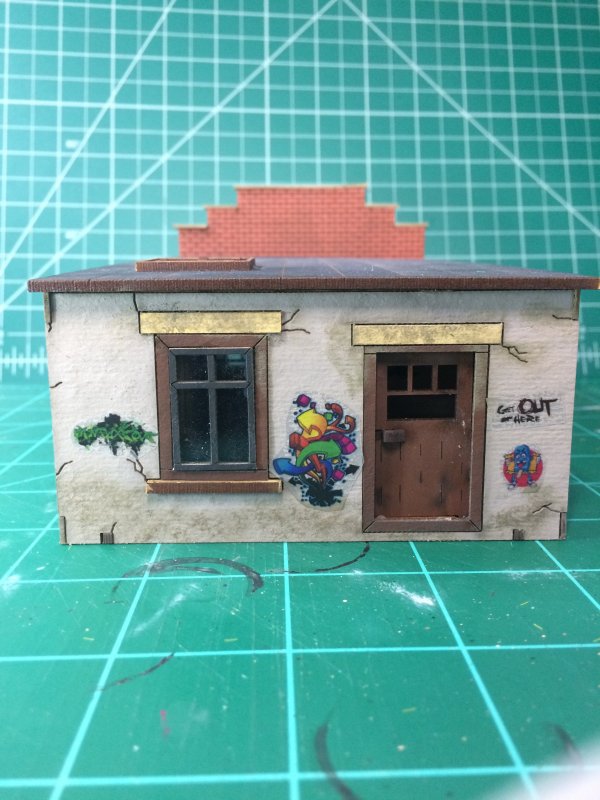
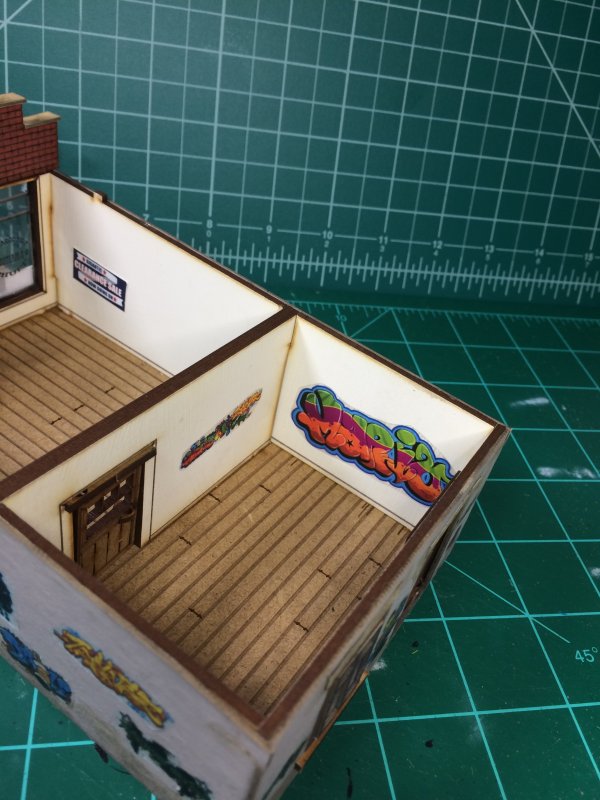
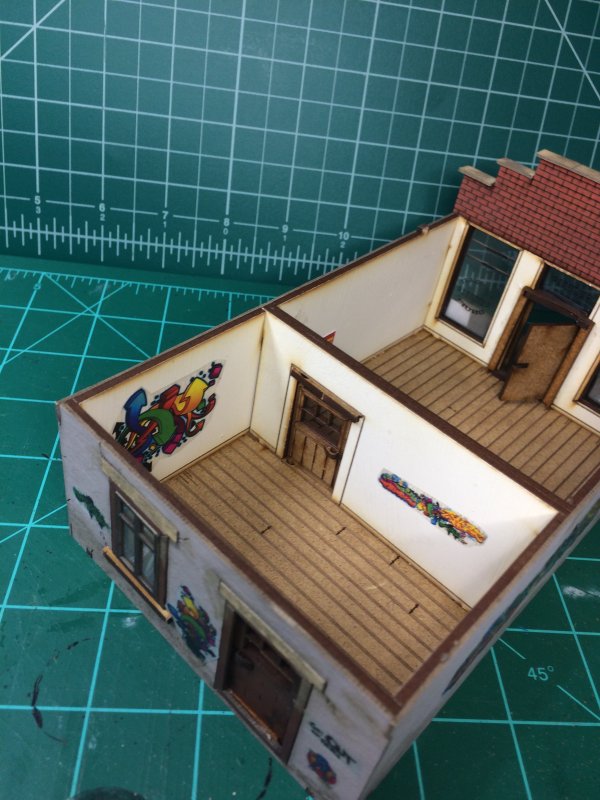
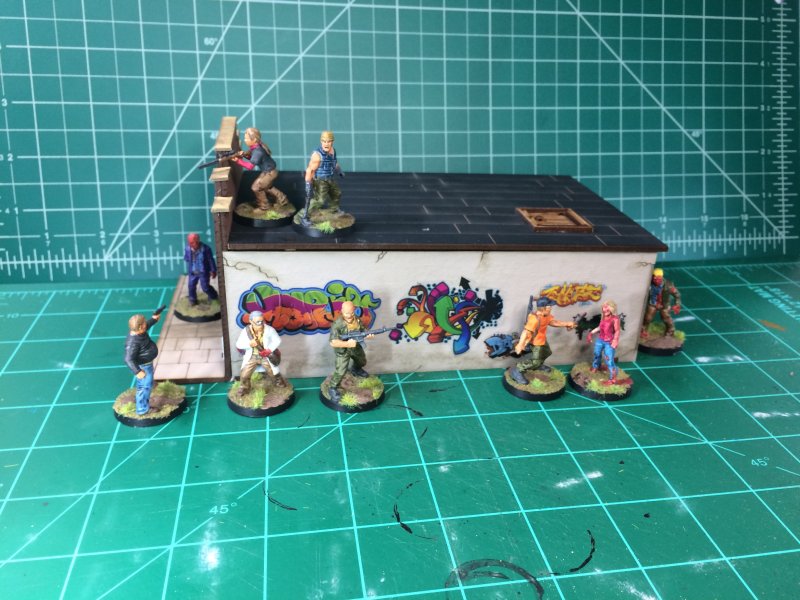
A while back I posted a few pics of the 4Ground Tobacconists Shop that I wasn't very happy with. Nothing wrong with the kit, I just did a horrible job on it. This bothered my subconscious enough to ponder what to do, and after nigh on 2 months I have an improvement I'm not as disappointed in. The shop is now a semi-derelict building for lease. It even has graffiti (applied via clear mailing stickers). It's still not something I'm proud of, but now I'm not ashamed of it.
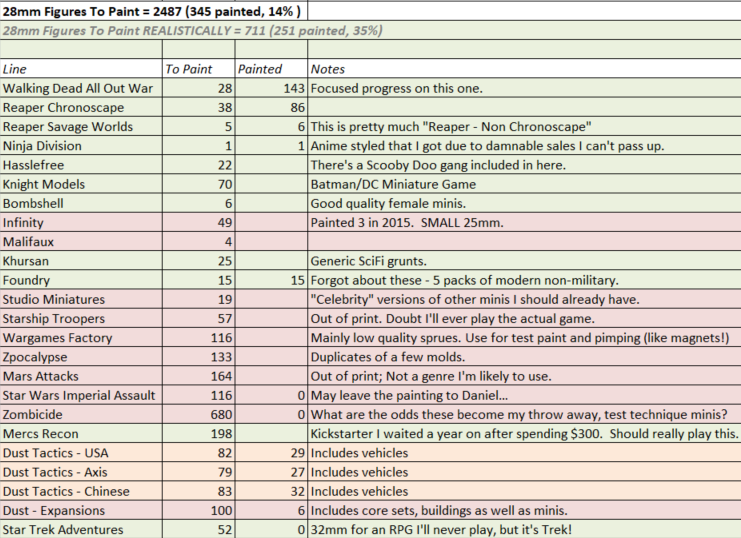
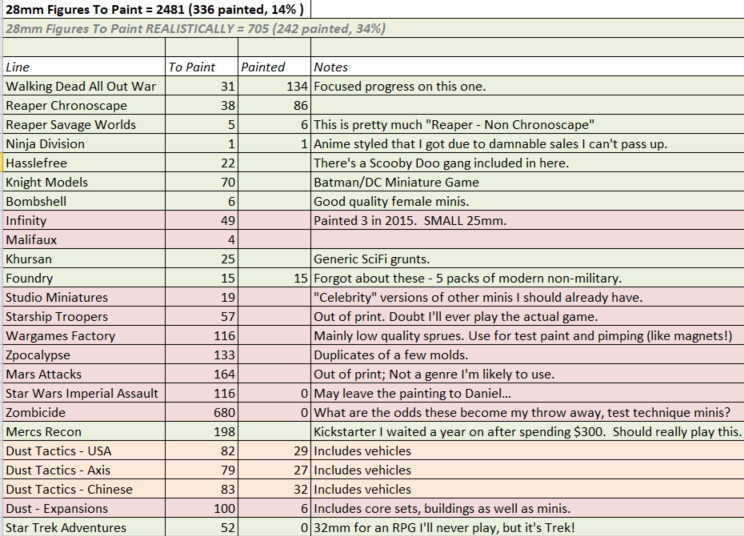
Over on the progress spreadsheet, taking into account that 5 of the minis from the expansion weren't present previously, there was another gain of 1% on the Realistic list. 251 painted minis, and 345 total. Mostly for the fun of painting. Why let games get in the way?
Next up - continuing progress on the Walking Dead minis, the Fear The Hunters expansion is up for priming. There's 5 minis in the expansion, so that leaves some room to see what else catches my eye to reach the target of 9 things to prime.
Permalink
4ground gaming miniatures hobbies walking dead
Mapquest
05.23.2019
When I was (playing around and) making Zombie Mall - at least 7 years ago - the part I had the most fun with was making map tiles. One of the things I've been putting off for my generic gaming scenery/Walking Dead game has been re-sizing the map tiles I've used in the past. While they've worked well, the 7½" size they magically started at is not expanding well as my scenery wants grow.
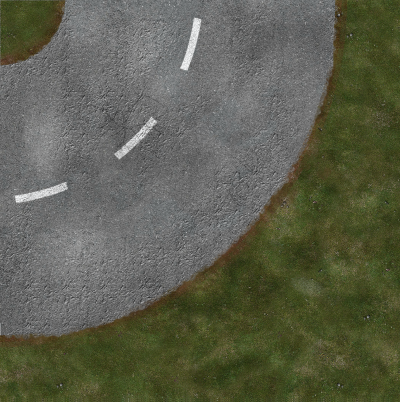
Instead of just resizing the tiles to 6", this was an opportunity to make them better. The road sections from a Fat Dragon Games paper scenery kit worked well in the beginning, and I was used to the look of their road. The sidewalk was another feature I was used to, and wanted to keep it. Resizing the sidewalk to what was appropriate wasn't much of a problem. The grass... the grass I wanted to make better.
Back in Paint Shop Pro (best $100 I forced Jerry to pitch in on in 2001 - yes, I hit "about" in PSP to double check) I used some various grass texture I'd purchased at some point through DriveThruRPG and added some layers, opacity, magic, and a tweaked eraser tool to limit straight lines. After a couple of false starts I ended up with a curved road that look improved over the previous curved road. SUCCESS!!!
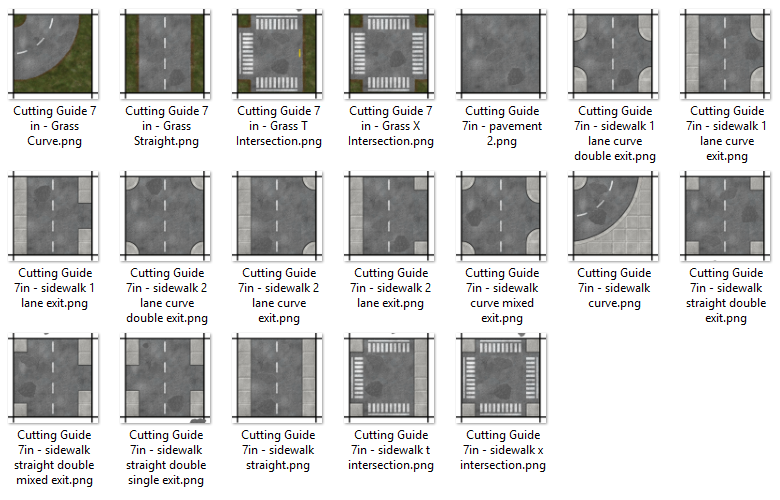
Although with a road you would normally thing Straight, Curve, T & X Intersections, I was planning ahead for different parking lot entrances. I'm still sticking to 2-lane roads, but now I've added in a 1-lane parking lot entrance on the right, a 2-lane entrance on the left, and while I'm at it let's see how many of those combinations I can mix up. A how about a variant with a curved sidewalk at a corner instead of a hard right angle? This led to 10 variations of parking lot entrances. With the original, basic road sections, there would be 19 types of map tile after factoring in bordered by sidewalk and bordered by grass.
With smaller map tiles, I would need more for those occasions I wanted to cover up table. Generally I think of the max playing area I might use as 4"x4". With the bigger tiles, 5x5 was the max I could fit. At 6" square, I could now use 8x8. 64 tiles to cover the table. As I thought about it, a little more variation in those tiles would help. Potholes, trash, road patches. That would make a 8-section road more interesting! And that's what happened.
Thanks to the original layered PDFs these roads came on, potholes, trash, and road patches were available. New variants for each of those 3 were copied and the new layer (of crap) added in. 19 types of map tile grew to 76. Actually 79, as there was a full tile of sidewalk, grass, and pavement that never got the extra clutter treatment. 79 map tiles sound like a lot more than 19. My plan was to print around 250 map tiles to make sure I had enough combinations of road, sidewalk, and grass so I could put together whatever layout I might want. 250 map tiles doesn't care if it comes from 19 files or 79 files once you get down to cutting and gluing.
Cutting and gluing is later. Now that I've got all of these files made, saved, and converted to a printer friendly format, it's time to print. There's multiples of each file to print. I made a list to help make sure I get at least the minimum of some of these printed out. Printing is step 2 (step 1 was graphicing the mess UP!). There's not a lot of viewable detail in the thumbnails below, but I was due a blog update of some type and this helps me feel like I'm making some hobby progress since the last post.

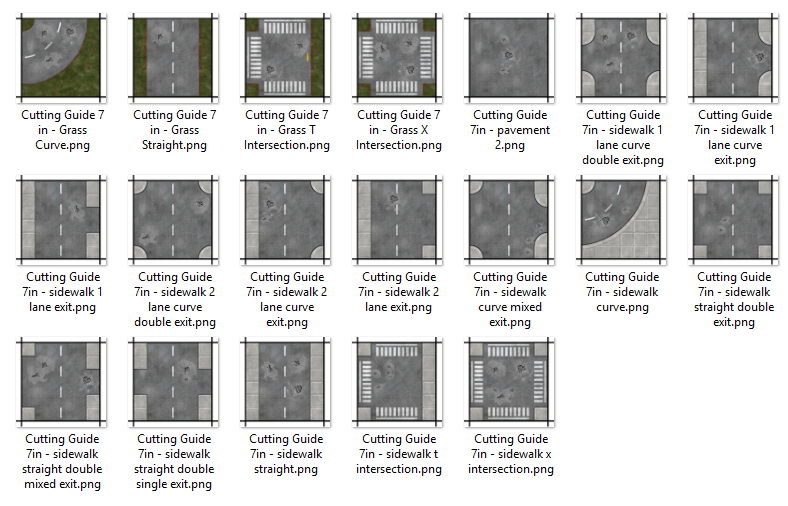
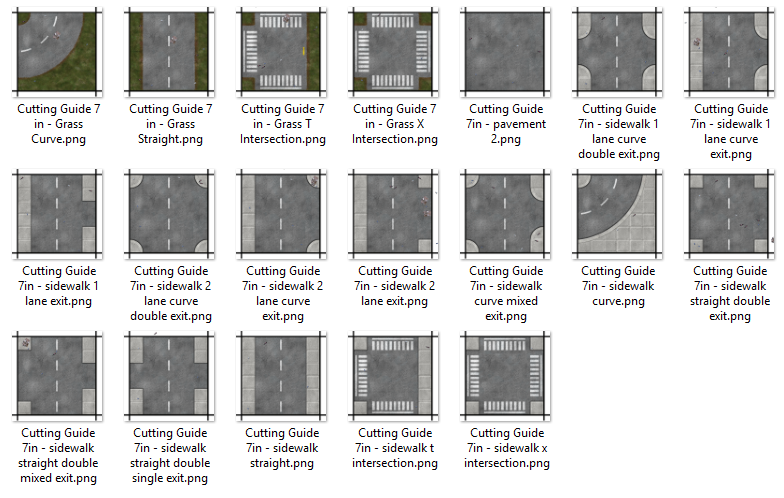
After printing, these will be cut and glued to 6"x6" cake boards, with the "sidewalk" copy on 1 side and the matching "grass" copy on the other. For the overly-happy-with-exits versions, the square and curved versions will be on opposite sides. With the fun I have on cutting (and gluing) straight lines, that part will be the time sink.
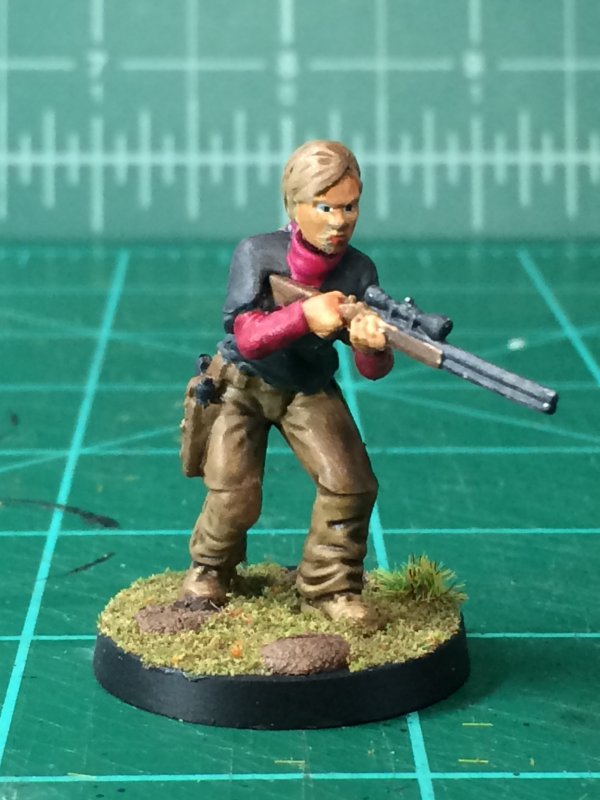
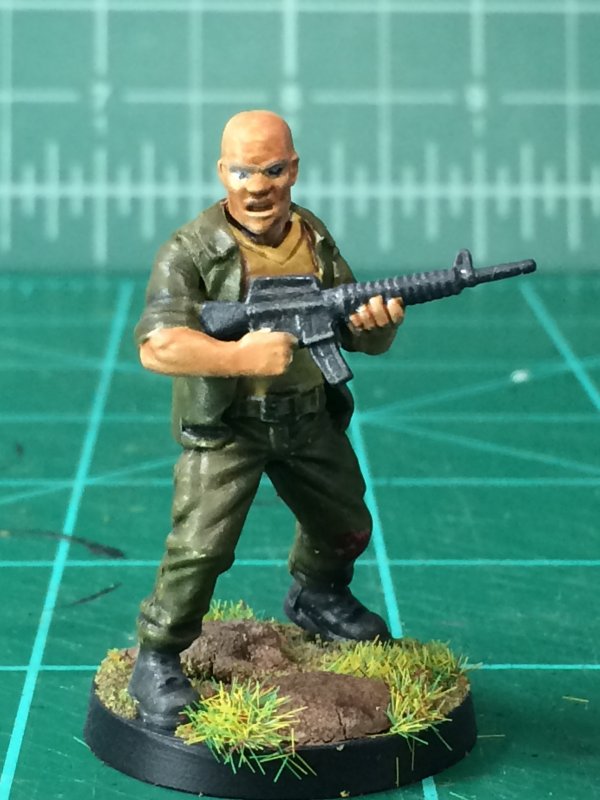
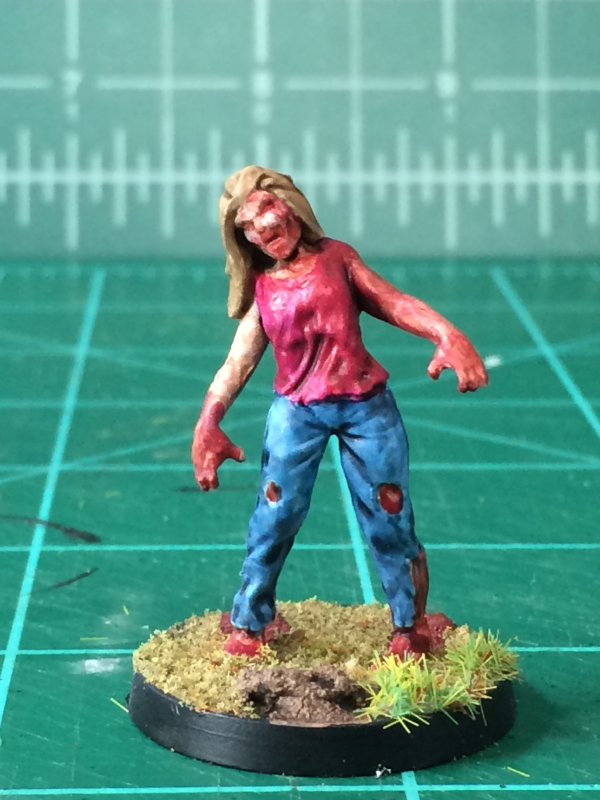
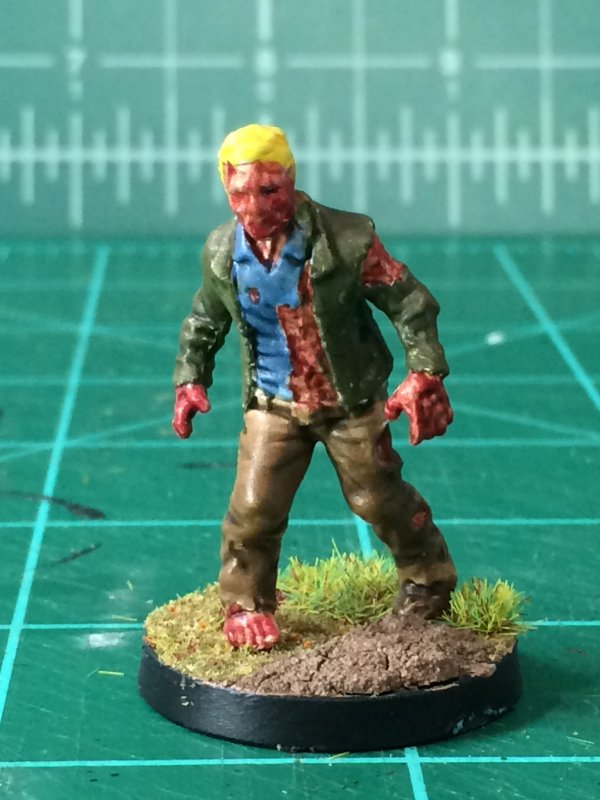
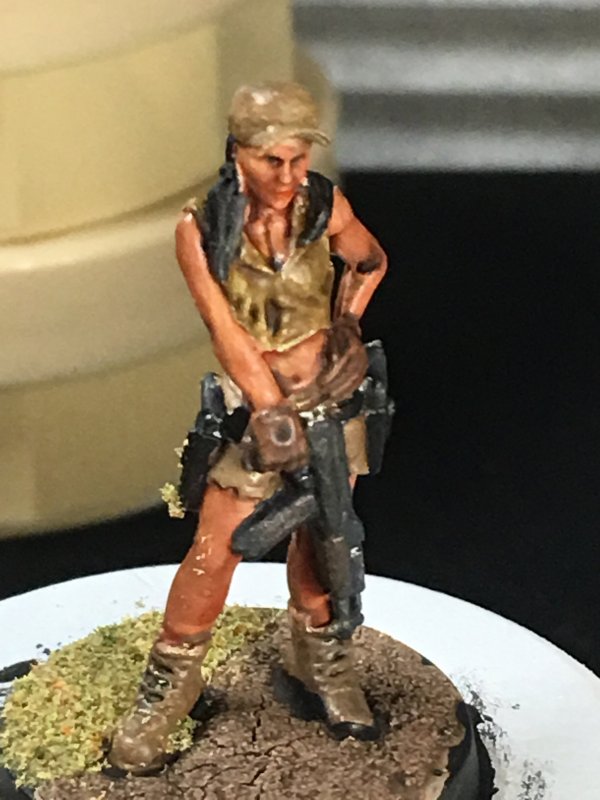
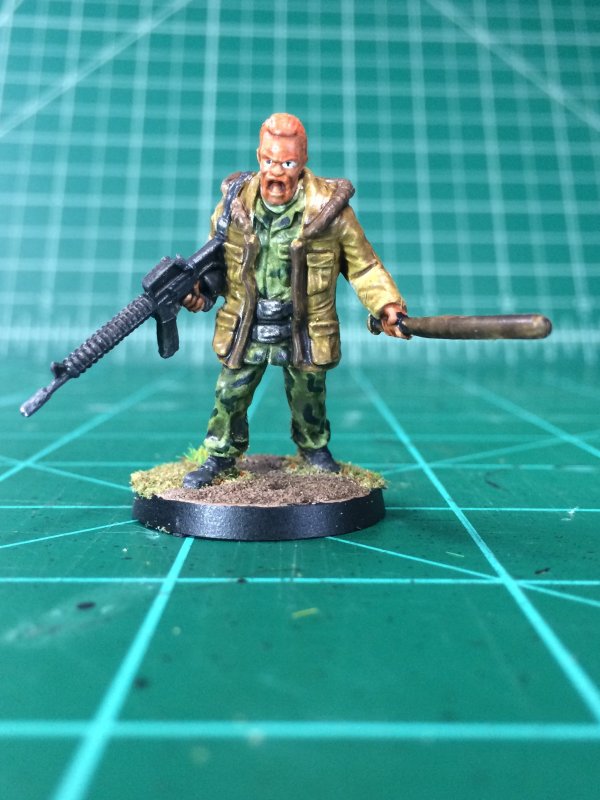
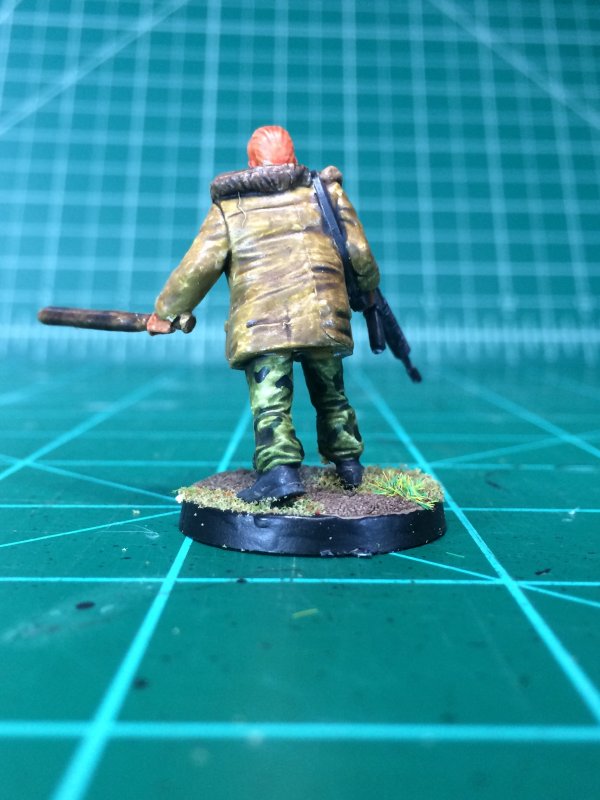
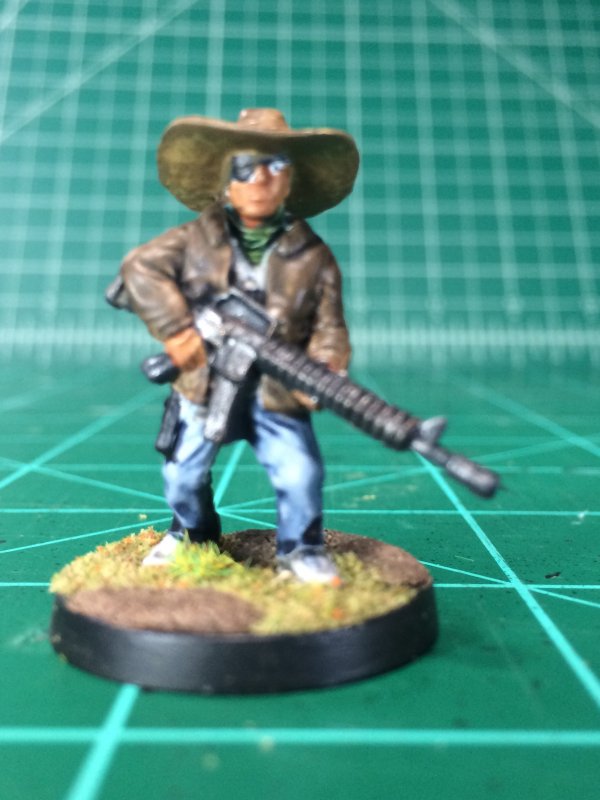
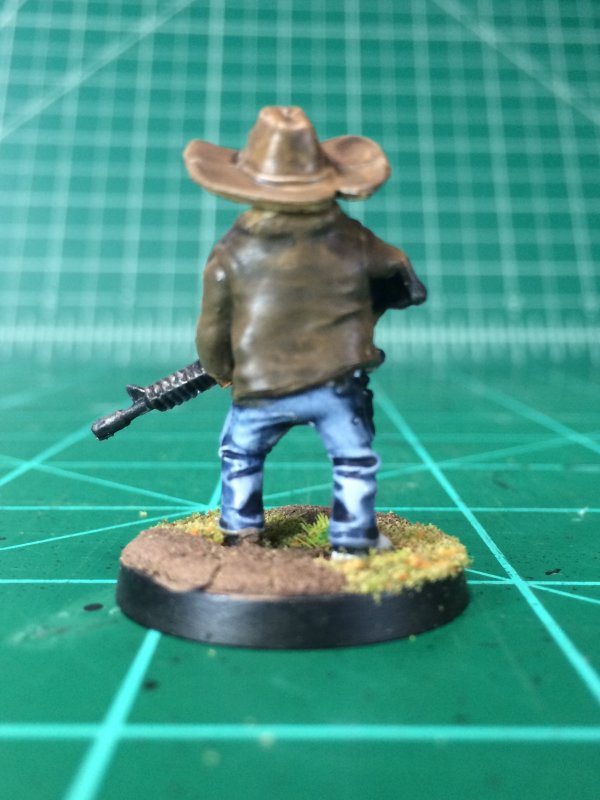
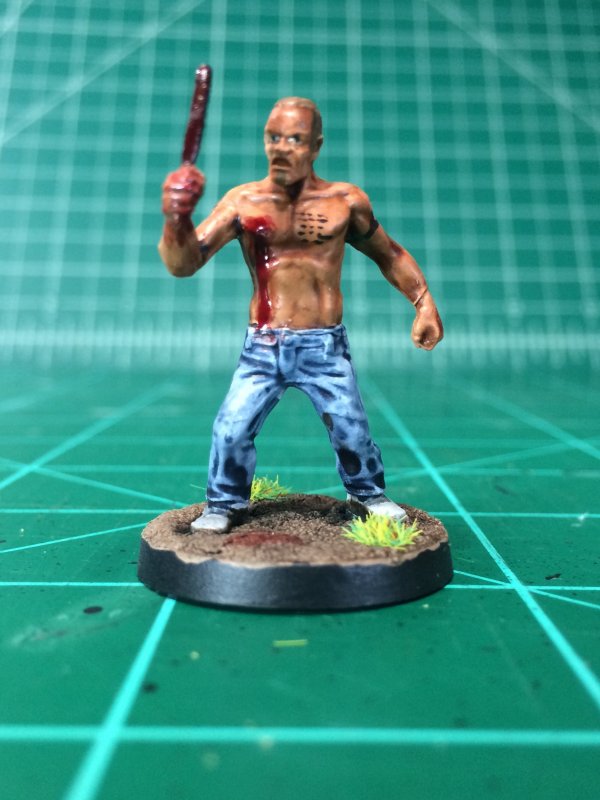
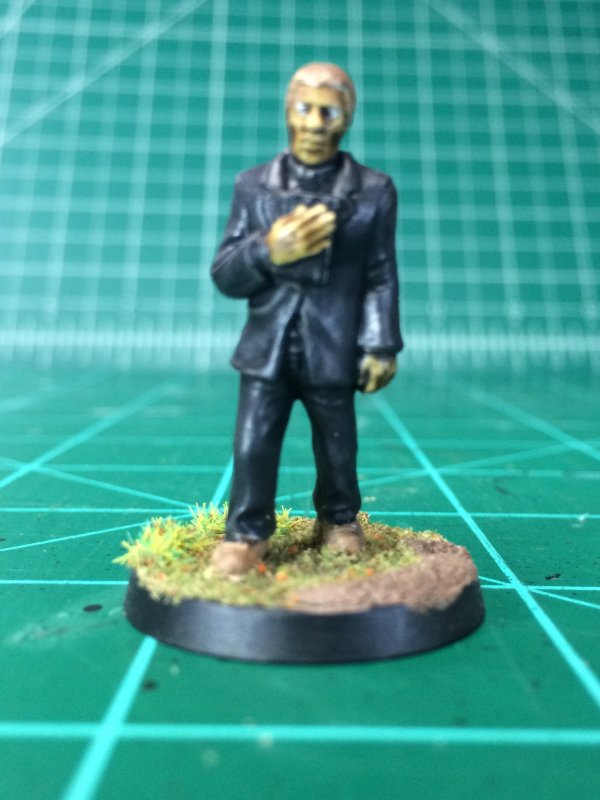
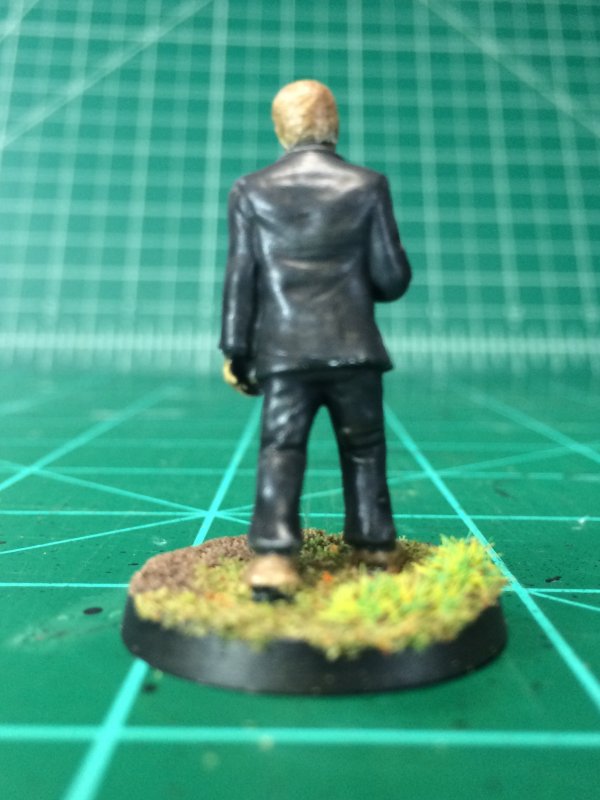
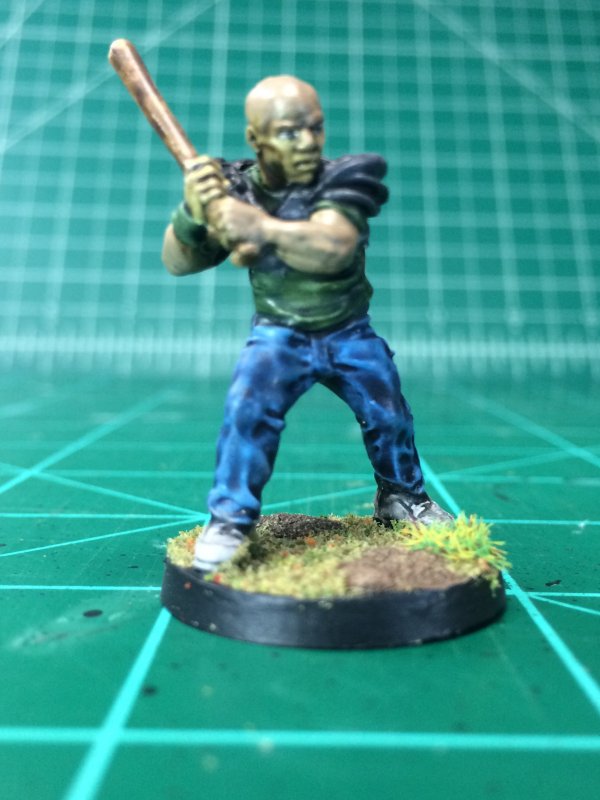
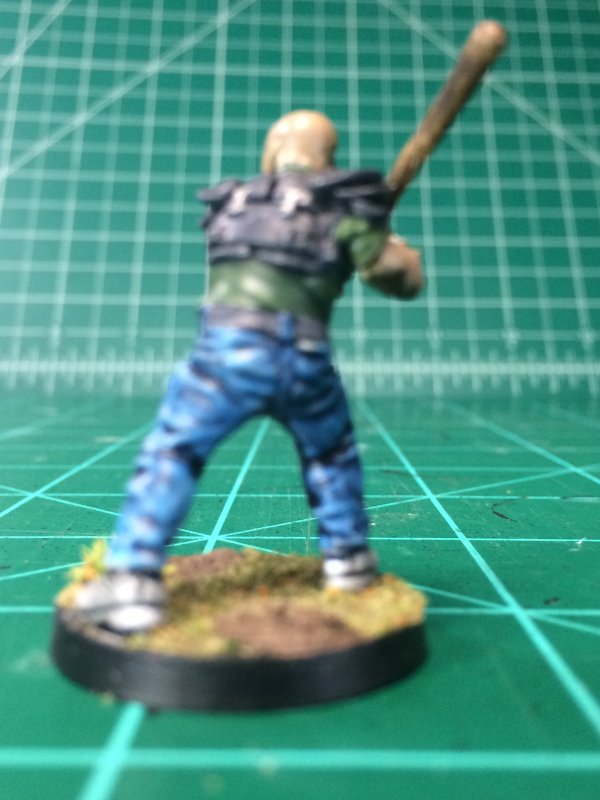
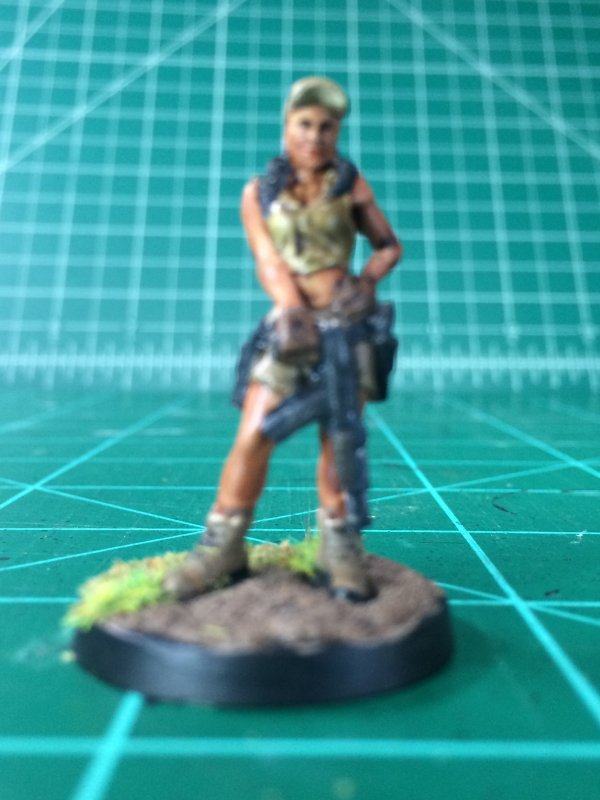
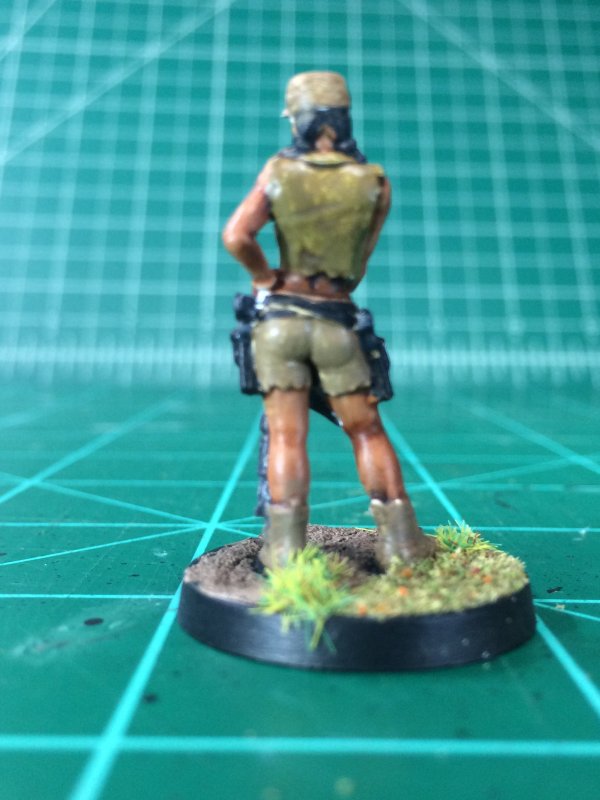
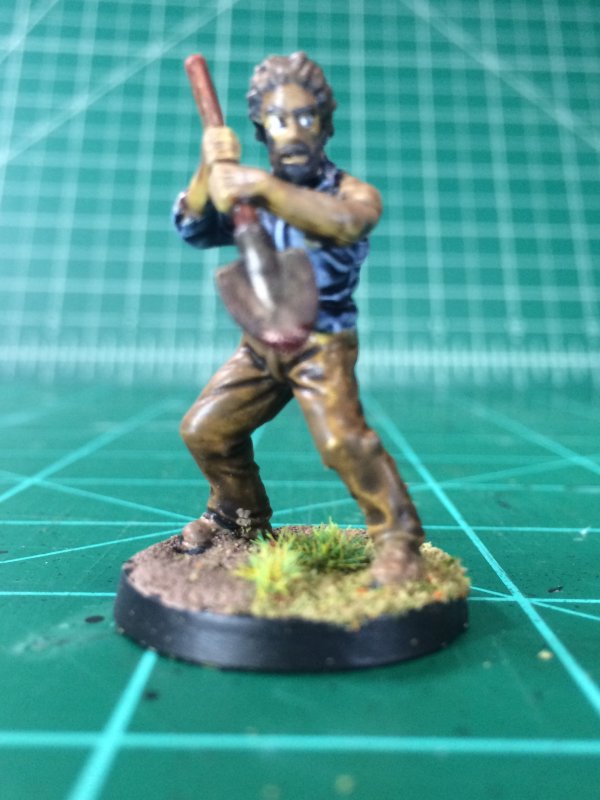
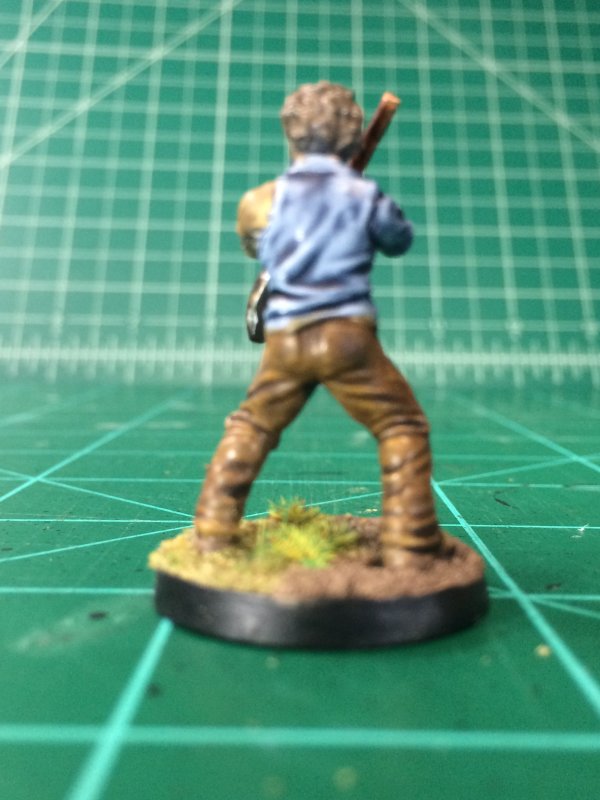
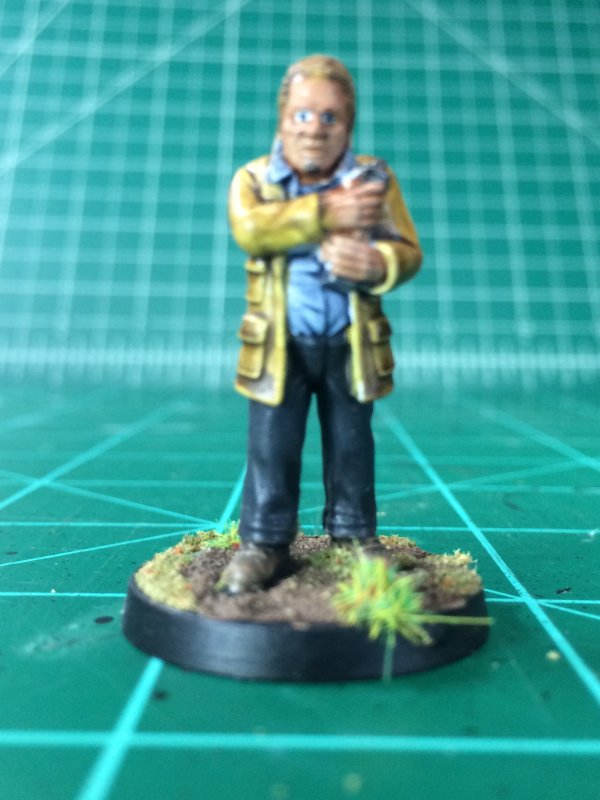
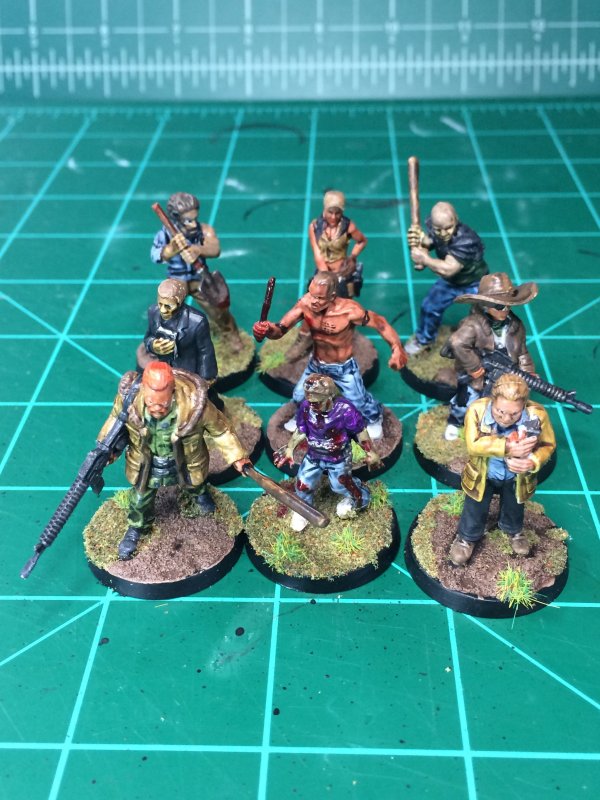
More painting - Abraham and Friends
05.11.2019
When it comes to minis for the Walking Dead game, I try to find reference pics to paint by. I'm not good with color choices so going by what someone else has that already looks good helps. In addition, using a "good" template helps my skills along.
This time, I had 3 goals. The ever present first goal of "Don't glob on paint and make them suck" was foremost. Second was "try to make some eyeballs that don't look retarded." Finally, "Change up skin tones" was a direct result of the last batch needing too many coats of paint & wash to not look from pasty death to rotted death.
The packs of minis this time didn't contain 1 "Hero" and 2 zombies. I guess they've released enough zombies? Except for Zombie Duane, son of Morgan, Distraught Father, added in to Morgan's pack of 3, the packs I opened up all had 2 "Hero" minis.
Walking Dead reference pics (from Mantic Games) that I used for reference:
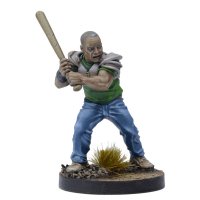
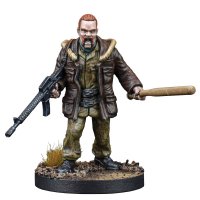
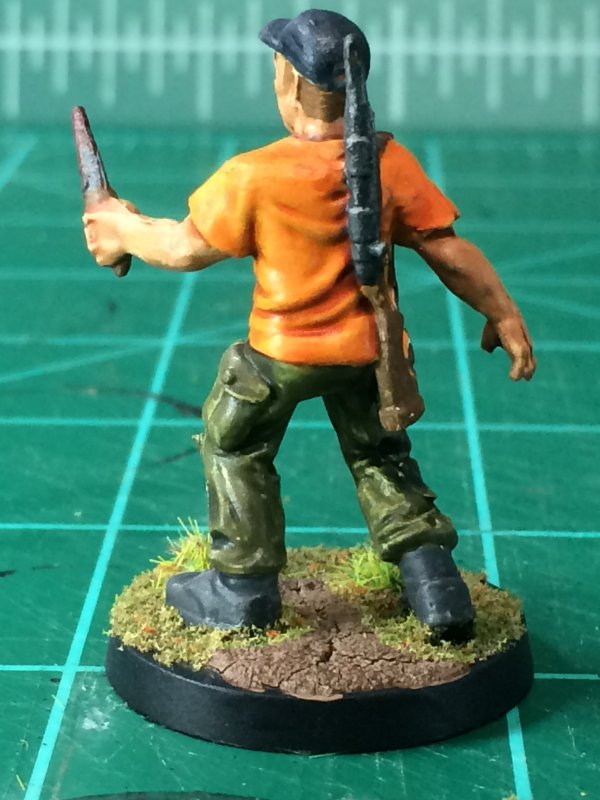
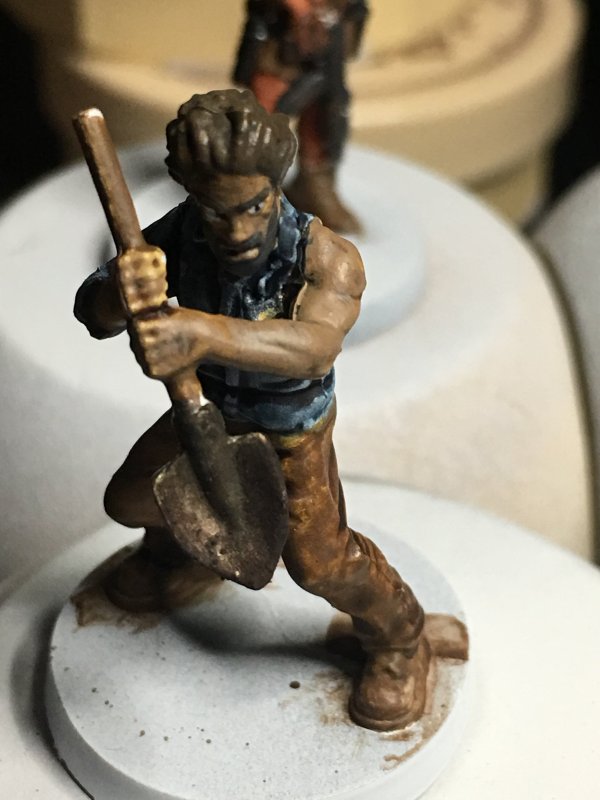
Over the course of 2 weeks, even though there were 9 minis lined up to paint, I eschewed the assembly line method of picking a color and using it on every mini that could use that color. Instead I did what (I've heard) works better - start at the bottom/hard to reach level of the mini and work up. Normally that means "skin". If a hand is holding something, that isn't necessarily true. I started with Abraham, for some reason I wanted this one to turn out the best, to make sure I took my time on. Skin, red/orange hair (easy to do with the Citadel orange wash), green camo clothes. Everything was something I'd done before, although camo painted uniforms were more of what I painted in the 80's and 90's.
Since I was trying to vary skin tones, thanks to the Juan Ton Soop incident of last month, there wouldn't just be a base skin tone and flesh wash applied. 4 black (African-whatever, I've never tried to be PC here, just ask Juan Ton Soop), 1 Latina (fine, a little PC), and the rest are normal white guys. I always have a hard time with black, as I'm wary of going too dark (covering up features) and often end up too light (hey, nice tan, bro). Even the white guys are normally too white, with me depending too much on the flesh wash.
Taking my time helped. When things didn't look right - of course the first 2 passes of my black guys were all too light - I tried to find a shade to LIGHTLY APPLY to see if it made things better. Most did. Some, of course, did not. By the time I was done, Jud was the only mini I wasn't at least halfway happy with. Jud's skin was too... sunburned is the best way to describe it. And there had been enough layers of paint and wash that he'd reached the tipping point of having enough detail showing to be presentable. When you don't make the cut, you get experimented on! Jud, welcome to the tattoo needle! The tattoo needle is really a pen tip, but that doesn't sound as ominous. Some light scribbles and Jud, whoever he is in the comics, is now a tatted up rough looking dude.
The rest stuck pretty close to the reference pics I was using. Abraham turned out the best, as I'd hoped. Eugene, holding a radio, ended up better than I expected. Almost everyone had eyes that ended up looking in the same direction. Morgan's eyes look a little weird, but I was trying to go for the "distraught/crazed" look and went a little too crazy. I knew my attempt to fix it would screw it up, so Morgan remains "super distraught and crazed".


For once I haven't noticed any obvious mathematical formula errors in the painting progress spreadsheet. I also haven't bought anything since last time. This means, for the first time in a long, long time, the spreadsheet shows PROGRESS! +9 painted! +1% progress!
There's another batch of Walking Dead minis awaiting priming so they'll be ready to paint when the mood strikes. It's rainy, humid day and I've learned that priming when it's raining leads to runny primer covering details. In keeping with the Walking Dead progress, I pulled out the Greene Family Farm scenery expansion and thought it might be nice to make their barn. There's also plenty of other, prep-work tasks I've got to keep me busy so I can have something cool to show later. Plenty to do!
Permalink
boardgames gaming miniatures hobbies walking dead
BF2018 & Hobby Check-in
11.23.2018
Ah, another bout of quiet on the blog-front. Usually that means I haven't done anything hobby-worthy. That was indeed the case. To be honest, after the disappointment of the last batch of minis I wasn't all fired up to do something else. Oh, I had a list that didn't involve painting minis (more on that further down) but I lacked the gumption to follow through on any of it.
Thanks to Jer enjoying his gaming rig and regaling me with stories of adventure in Elite Dangerous, I managed to switch my free time focus to flashing back to my teen years and sat around playing video games. I'd tried playing Elite Dangerous before but just couldn't get the hang of the controls - I could never complete the 2nd dog-fighting tutorial. Thanks to some tutelage from Jer, I spent the better part of 3 hours customizing my controls to be more intuitive, and eschewed dog-fighting and instead stuck to delivery missions. Intergalactic UPS! It's been oddly fun.
I've also been prepping for Black Friday 2018. Much like last year, I started cutting back on my DVD ordering early and had a list of what to go after, with Skyscraper being at the top of my "This isn't worth $25, but I'd pay $10" list. Thanks to Amazon, Target, and Best Buy making more sale items available online starting Wednesday I was able to get all but 1 thing on my list by the time Black Friday actually rolled around. Season 2 of Lethal Weapon is avoiding sale coverage. It will be my grail item of the season!
Outside of DVD shopping, 4Ground had another 25% off coupon sale this year. I decided this was a good time to get some Mayberry-esque commercial buildings that would fit in with the rest of the scenery I've been making. RPGNow had downloads of Star Trek Adventures, for 25% off, rules that had been sitting in my wishlist for a while. While I was there, I picked up some maps that I've got plans for (more on that further down).
Outside the realm of game stuff, I took holiday sales as an opportunity to enter the realm of the smart assistant and got some Echo Dots. I've been using my Fire tablet to stream stuff when I go to bed, and the idea of a Dot had been appealing to me for a while. There was a good sale on a 3-pack, so now I have Dots in the bedroom, kitchen, and garage. I'll be a streaming fool! Or at the very least I can ask what the weather forecast is from 50% of the house.
This Is Further Down
My hobby list has plenty to do, but as stated before I've been lacking gumption. One of the things to do that keeps staying on the list is making maps to print via Poster Ninja. My standard map tile for Potham is 7.5" square. The specialty tiles I made for the mini mart and coffee shop were 22.5" x 15". Piecing together 6 pieces of paper together didn't work as well as I hoped. Enter poster size (affordable) printing! At Poster Ninja, I can use their 36" x 48" poster and fit four of my over-sized map tile layouts. If I get 4 of those posters, I reach the free shipping threshold. 16 special tiles. I can plan that!
The easy route is to alot half (eight) for full grass or asphalt coverage. The other half will be more specialized, or more than half if I need it. I printed sidewalks and driveways for houses, and glued those to thin sheets of plastic and cut to size. While it works, it doesn't look that good. With larger tiles, I can dedicate the sidewalk and driveway per house. The same with any commercial buildings and parking. To do it right, I should make the building(s) and have the proper footprint and know where sidewalks and driveways should go. That doesn't sound crazy.
Now, instead of trying to print off everything and then make the buildings, I'll make a building, measure, and set out the lot on the map. That sounds a lot more grown up than I intended. I'll start by setting up the buildings already made (phase 1) and go from there. Hobby path forward is set!
Blog Archive
As always, correct spelling is optional in any blog entry. Keep in mind that any links more than a year old may not be active, especially the ones pointing back to Russellmania (I like to move things around!).
Tags have been added to posts back to 2005. There may be an occasional old blog that gets added to the tag list, but in reality what could be noteworthy from that far back?
Blog Tags
3D Printer (26)
4ground (32)
4ground-mall (40)
action figures/toys (10)
airbrush (7)
Aliens (1)
Amazon (12)
antenocitisworkshop (11)
Atlas O Gauge (2)
Batman Miniature Game (2)
Battletech (1)
belt sander (12)
Blood Bowl (4)
boardgames (77)
books/comics (19)
computers hate me (5)
conveyances (15)
diet (53)
dreams (7)
fallout (1)
Foundry (3)
Gale Force Nine (1)
game dev (22)
gaming miniatures (227)
gaslands (10)
gastric sleeve (34)
Green Stuff World (2)
Hasslefree (9)
Hero Forge (1)
hobbies (101)
Jailbirds Minis (1)
kevin smith (1)
Knight Models (2)
malifaux (2)
Marvel Crisis Protocol (2)
mckays (1)
models (9)
mom (32)
moon light (5)
movies/tv/dvd (60)
ninja division (1)
Pathfinder Deepcuts (1)
pilonidal cyst (5)
plastcraft (2)
programming/interweb (41)
rambling (60)
random (365)
random maintenance (3)
Reaper Bones (3)
reaper chronoscape (32)
renovation/remodelling (24)
road trip (26)
salesforce (1)
sarissa precission (2)
scenery (16)
studio miniatures (3)
ttcombat (12)
video games (51)
walking dead (36)
wargame foundry (3)
work (6)
wrestling (45)
zombicide (1)
Zombicide Invader (19)
zombie mall (23)