Printing
05.19.2013
Saturday I got the proof copies of the Zombie Mall rules that I made through CreateSpace. One of the reasons you order proofs is to check the lightness/darkness of images. I had always heard that you want to adjust when making graphics for printing, as looking at things on a (lit) monitor will make images lighter than they will appear in print.
On the back cover of my rule books, I've got a faded/semi-transparent image on the top for decoration/to take up what would otherwise be white space. I set the transparency to 35% when making it.

What I received is pretty close, but when actually printed out on a glossy cover it looks more like the printer was just running out of ink. Now I've gone back and changed the transparency to 75%, which should offest it enough from the pseudo-wrap-around picture that's on the front and back covers.
While I was at it, I noticed I entered the wrong web address on both back covers. My lesson there is to not go surfing to similar web addresses when typing things up!
I haven't committed the changes yet, as I think there are a couple of little things I might tweak. Change a little spacing here and there.
If I read everything right, these should be showing up on Amazon by the end of the week - unless my tweaking with the covers starts the process over.
Zombie Mall - POD Publishing, Formatting, and lots of Uploading
05.12.2013
It's been about a month since I had a Zombie Mall update. It's been a busy month (beach vacation not withstanding) just chock full of education to the publishing and printing process.
I was last talking about publishing through RPG Drive Thru. I went through their submission pipeline and submitted the files for Zombie Mall. A couple of days later I received the following:
Thanks for uploading a new product at DriveThruRPG.com. I have reviewed 'Zombie Mall,' and I wanted to touch base about a couple of things before we take it live on our site.
-----
Pricing
Currently, you have everything marked as free. Using free products to garner attention or to buoy sales of other products is a legitimate and proven tactic. However, giving everything away for free comes with a set of risks, not to mention it does nothing for your profit margin (and I'm not speaking from base greed here – for me, greater profit means greater ability to offer more & better products down the line).
That said, we are, to be blunt, a business who's entire purpose is to help others to sell game products, not to give them all away for free. :)
Where marginal costs are low (as in PDF production), "free" is a great launching strategy to reach the largest possible audience. However, setting a price point in the beginning is also about perceived value and expectation (and then later about customer acquisition and retention). Studies show that if you give away something for free, particularly for more than a short-term window, and then later start charging for it (or for newer versions of it), you will run the risk of alienating established customers.
Worse yet, you establish a perceived value or "reference price" for the product that is very hard to change thereafter – customers will always expect it (and your other products) to be given away rather than be sold.
There are proven alternative strategies for using "free" to generate revenue, such as making one version available for free, while another version, either with premium features or targeted at a particular audience, has a price tag associated. This premium version can be launched simultaneously or shortly afterward, but shouldn't be left too long, or customer awareness of the product can die off.
Card Products
Are you familiar with our new site, www.DriveThruCards.com? The cards site will be launching officially in about a week's time, although it has actually been active in a sort of public beta for a couple of months now. In any case, DTCards will soon be the home for all card and board game products, and we will be moving them off of RPGNow and DTRPG so that those sites can focus, as they were originally intended, on RPG products.
In any case, 'Zombie Mall' seems like a perfect product for treatment as a print-on-demand card product (rather than a downloadable 'print-and-play'). The essence, though, is that there is no cost to you up front, save the printing cost of ordering one proof copy. Once the title is available for sale, you get your royalty cut just as you would for a wholly digital product.
So, thanks for your submission. You need to charge something for it. Why don't you sell it through our POD site?
Since there was more to the email that said I could email back with any questions, I did so. I explained that I actually had a pricing strategy following how In-App purchases work - give away the base game, charge for add-ons. I've even got the first 3 expansions lined up, yet not complete and ready for publication. I followed this up with some questions about their POD service.
That was over two weeks ago. Have not heard a damn thing back.
Unfettered, I decided to try their POD service. I had made the Zombie Mall Map Tiles compatible with the DriveThruCards 6"x6" card, which I've subsequently seen a few other people use as map tiles. I followed their formatting directions and uploaded my 47 images and was able to order a proof copy (although not available for public sale, I can order a copy to make sure everything's laid out correctly). After shipping the total for the cards was right around $17, which isn't bad considering that a 54 card deck from Hong Kong is $12 + shipping, which usually drives the price over $20 if there are no coupons. A week later I received the cards, and they look pretty darn good. There's something about getting custom printed cards in the mail that I just giggle about - it's so cool!.
Drive Thru Cards/RPG offers a book printing service, and I was also wanting to get a bound & printed version of my rulebooks. I wasn't too sure how lucky I would be in getting something else from them since I still hadn't heard anything back from my first email to them, so I looked into Amazon's POD service CreateSpace. They had most of the same options as everyone else I ended up looking at for POD printing. I decided (eventually) to opt for a 6"x9" format and started to re-format the layouts for the basic rules and walkthru that I had made. With CreateSpace you upload your interior pages, then upload a cover. They have online tools for checking things out before submitting for review by an actual person. Once it goes to a person, you hear something back in 24 hours.
My initial submission was a pain. I had a Word 2010 document that I converted into PDF for uploading. I've got a nice legal version of both Word and the whole Adobe CS suite, so I thought things would go smoothly. But noooooo.
I had lots of graphics in my rules, and CreateSpace was complaining that my images were not the preferred 300DPI they asked for, but 179DPI and these may appear blurry. I was confused as I had made everything 300DPI. This led me on a few days of Googling and forum searching where I learned:
- Don't copy/paste images into Word.
- Don't drag & drop images in Word.
- To insert images, go to Insert > Picture.
- Don't ever, ever resize the picture in Word. In fact, don't do anything but move it around.
- In Word, go to File > Options > Advanced and make sure images aren't compressed.
- (my favorite!) In Word, go to Save As > Tools (next to the "Save" button) > Compress Pictures and make sure pictures aren't compressed.
After all of that I was still getting an error that my images were 179DPI once I uploaded them. I was confused beyond bounds. I eventually remembered that if you rename a .docx file to .zip, you can extract everything and see how the Word file is put together. I did this, and found that the images I inserted were still at 300DPI. Flummoxed!
It was down to a problem with the PDF creation. I went into Adobe and turned off every compression I could find. Still I got 179DPI images in the PDF. I went and used the free PDF print driver I've been using for 5+ years, and suddenly I have 300DPI images. WTF? Adobe CS 6 doesn't make what I want, but a free, 5 year old app does. I wish I had known that 4 days ago.
I submit files to CreateSpace again and hear back the next day: Everything's ok, but we had to re-size your cover because it was too big. Although everything looked ok, I guess I should have left off the bleed area of the image I uploaded. Not a problem, as I can cut off the bleed and try again. While looking at the files they approved, I noticed my bottom margin of my walkthru was too tall, but at least an inch. I went to see if the basic rules had the same problem, and they did! The exact same problem. In fact, I had uploaded the same file as both the basic rules and the walkthru, but still managed to put the right cover on each. Well there's something else for me to fix.
Next came another day of formatting with tweaking margins, footer space, and ample use of page breaks. I got everything (better) laid out and managed to cut a couple of pages off the total count. I resubmitted everything again and passed the automated check with no problem. The next day I got the reply from the person that checks things: the title you entered for your book and the title on the cover do not match.
I shook my head some more, since I didn't change the cover and it was ok yesterday. Technically the title I entered was "Zombie Mall Walkthru", and the cover has "Zombie Mall" in the font I've been using at the top, with "Zombie Mall Sample Walkthru and Tutorial" below. This time I went back to check out the CreateSpace page used when setting up your book. You can have Title, Subtitle, Volume Number. I decided to fill all of this in and resubmit. I'll find out tomorrow if this worked good enough.
After submitting the above, I got to looking at my content in more detail and noticed I wasn't consistent in some things. Sometimes I would list a dice roll result in bold, sometimes I wouldn't. Sometimes I called the dice a d10, sometimes a D10. That bugged me enough that I went through and changed everything to be consistent. Then I made sure things were consistent between the rules and the walkthru.
While I'm waiting to first hear back about the walkthru title so I can re-submit my edited files (you can't change anything once it's been submitted to a person for review), I'm filling in a template for counters to get them semi-professionally produced by Andrew. If I'm going to this much trouble to get everything else printed, I can spend a couple of bucks to get some good chipboard counters.
So what else is left? Yesterday I ordered from Amazon a nice little wooden box that will be the Deluxe Collector's Premium Edition box. I need to tweak my Player Stat Card (maybe make it into a 6"x6" card?) as it's got too much wasted space on it now. At that point, I think I'll be finished.
Oh, and I figured up how much a Deluxe Collector's Premium Edition Game would cost based on just the components to put in the box:
- 162 cards (from Hong Kong still)
- 47 Map Tiles (from Drive Thru Cards)
- Basic Rulebook
- Walkthru Guide
- Enough Tokens for a 4-player game (~700, which is overkill but gets the job done)
- 100 zombie minis
- 6 player minis
- Dice
- The box it all goes in
$140.46 if I've added everything right. Or free if you want to print and cut everything yourself.
Zombie Mall - Inching Forward
04.15.2013
I've found myself lacking inspiration over the past few days. I'm close to wrapping up Zombie Mall to the point where it's ready for Print & Play publication. The rules are written and the components are printable. Although I've got a website set up to which I can upload files and make them readily available, I've decided to go an extra step and make them available through and online publisher, in this case RPG Drive Thru. RPG Drive Thru is, in essence, a collection of about 5 publishing websites which each focused on a different gaming aspect (for something wargames heavy just head over to Wargame Vault).
Publishing through one of the above sites will allow more people to come across my game, but mainly it will continue my "what's it take to publish a game" journey. I've learned yet more about hoe to properly make a PDF, page layout, DPIs, and other stuff I can't remember right now. It's all educational!
If I've got everything ready, why am I complaining about lack of motivation? I have to make a cover. A cover for the rules. A cover that I can use as a thumbnail. Although I whipped up something that can be used, it's too bland. I've since come up with a design & layout that I like and I think will work, but it's taking some extra effort to follow through since I'm using Poser to create zombies. Lots of zombies - I've got 10 set up up so far and I need to at least double that. Each zombie has it's own textures, clothes, hair, and eventually pose. At some point I'll export the picture from Poser that I'll layout into what will be the cover image (Colorforms style!).
The setup for each figure it's what's so... boring. Each takes time, and there's not much feedback toward progress at any given point. In that, things feel like they're moving at a snails pace and I think of things I would rather do.
I need to make a list to check things off, that usually gets me motivated.
More Stores for Your Zombie Shopping Pleasure
03.19.2013
I've been making more Zombie Mall progress. After another update to the rules I went back and worked on the map that people will be able to download and print in order to play the game. I've got a big 30"x40" map. but it's not very practical to print. I could break it up into 8½"x11" sheets which would make it more printer friendly, but I find those a royal pain to put together. Plus, everyone would be stuck with the layout that I made, and I've always envisioned the map to be modular so that each game could be different.
When I put the big map together, I made 6"x6" stores thinking that would be nice and modular. I forgot about the mall sidewalks. And corners. If you don't have 6"x6" walkways (I was planning on 3" wide) the modularity part of that plan kind of falls apart. I went back to the drawing board and eventually decided to stick to a 6"x6" modular tile, but I would include the walkway on the tile. With this, a 2" wide walkway would be the norm for matching up tiles. A little more narrow than what I originally thought, but it kind of helps with the "Oh no zombies are after me/How will I ever get away?" feeling. Using the original 6"x6" stores as templates, I went back and made 6"x5" stores (for the average store) and 5"x5" stores (for stores on the corner, with a walkway on 2 sides). 38 tiles later, I consider myself 99% finished.
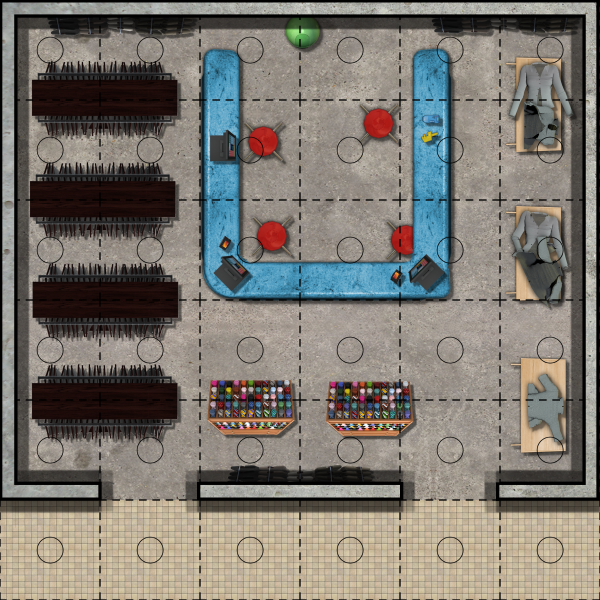
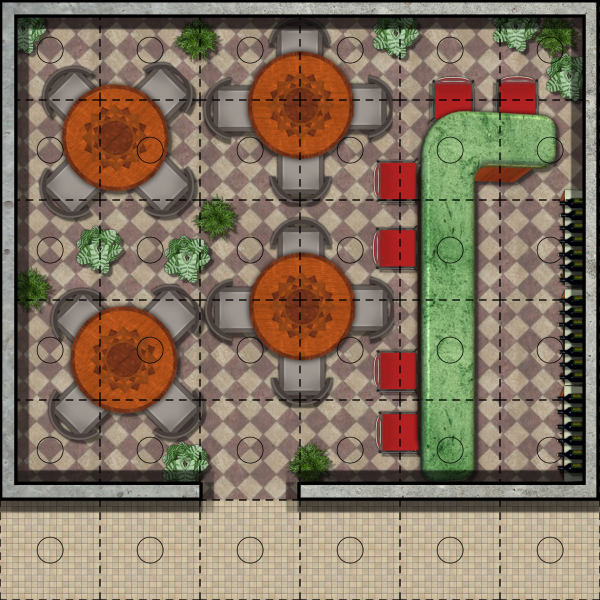
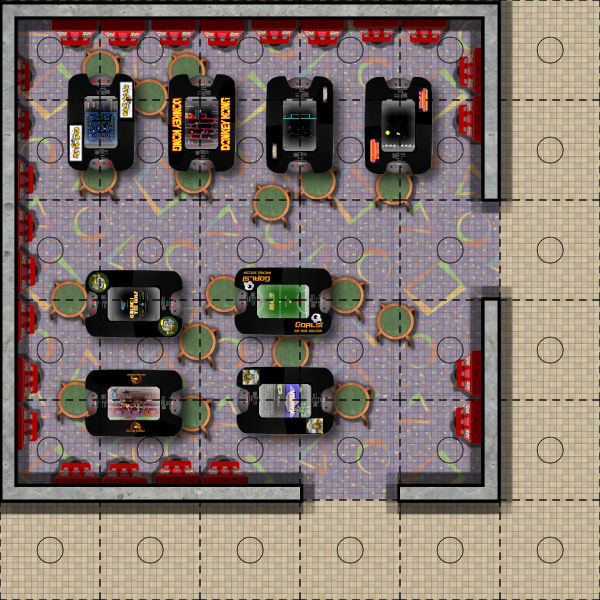
I need to go back and make stores that will fit on the outside corners. I think these may only have 1 space of walkway, so the entrance may look a little funky. I need to play around with the tiles I've made and see how everything fits together.
With the above I've made the walls on the map bigger. Thick black lines are hard to miss, so I added in a concrete texture in the core of the wall, along with some shadow effects. The wall cuts into the available space more, but I'm hoping most people see it as a slight perspective shift and having some things hidden that are up against the wall won't seem weird.
I've still got a list of things to do to finish up the downloadable version of the game. Granted, there's still more play-testing to go (I just keep putting round 3 off, trying to get as many fixes as I think are needed in first). None of my tweaks affect play, they just make the initial rules comprehension a little easier. At least I think it'll be easier.
Permalink
game dev zombie mall
Card Back Evolution
03.12.2013
I've had a couple of productive days of boardgame development. I've updated the written rules that I had been putting off for 2 weeks 3 weeks at least a month. After that I went about revamping the playing cards a little bit more. Thanks to a couple of different graphics programs and their various filters and brushes, I finally got pretty close to the look I originally envisioned.

Above is the original card back, with a nice zombie horde of arms I stole from somewhere on the internet which more than 1 person has noticed. The font for "Zombie Mall" I actually purchased! For all of $8, plus it came bundled with 3 other fonts (1 of which will make its debut in the next card). Although I couldn't use this picture for the back over the long term, I liked the look of it. I decided I would try to design something similar, yet original. Inspired by sounds good.

Thanks to a mix of Poser and Paint Shop Pro, the above was my first completely original pass at the card back. I used Poser to create a generic, green hued figure and just played around with arm poses. I took a lot (19?) screen shots of those arm poses and took them into Paint Shop Pro, where I fiddled with the hue, brightness, and added some weird cross between dirty smudges and blood. At this point the cards had been split into "Loot" and "Objective", so I color coded the card backs to match. Instead of everything having a black background, "Loot" would sport a red background while "Objective" would have green. This may have been cheating, but I just applied a colorize filter to the black background to get the red and green that I wanted. In addition, the "Loot" font is one of the extra 3 fonts that came with the Zombie Mall font. I'm getting my $8 worth!

Lastly (for now) is a more comic book inspired layout thanks to a graphics app I got that probably does all kinds of things, but it has a 1-click button that applies a filter to give the image a nice comic book color palette. Part of the filter is just boosting the vibrance of the colors, but I still like the look.
Now I've uploaded and sent off another order to Hong Kong to get this last batch of cards printed - I like printed cards. They make me feel like I'm making a game with some substance. I know it's all in my head, but I don't care.
This last version is also what I'm using to put together the PDFs for the downloadable Print-N-Play version of the game. The cards will be laid out so that the back and front fold over at the top (thus forming the front and back). A lot of people just stick the folded paper/card into normal card sleeves and play with them without worrying about the hassle of printing on proper cardstock and trying to glue everything together perfectly.
My goal is to have a complete Print-N-Play version together by the end of the weekend. I have to put the card & token PDFs together, and that's mostly fiddling with a bunch of fine-tuning the placement of already made graphics on the page. Lots of graphics. There are 162 cards, and I can fit 3 cards (front and back) per page. I've also got 5 or 6 pages of tokens, but those aren't optimized as far as their layout yet so that number will probably go down.
54 pages of cards to layout and convert into PDFs. That might take longer than I think it does.
Blog Archive
As always, correct spelling is optional in any blog entry. Keep in mind that any links more than a year old may not be active, especially the ones pointing back to Russellmania (I like to move things around!).
Tags have been added to posts back to 2005. There may be an occasional old blog that gets added to the tag list, but in reality what could be noteworthy from that far back?
Blog Tags
3D Printer (26)
4ground (32)
4ground-mall (40)
action figures/toys (10)
airbrush (7)
Aliens (1)
Amazon (12)
antenocitisworkshop (11)
Atlas O Gauge (2)
Batman Miniature Game (2)
Battletech (1)
belt sander (12)
Blood Bowl (4)
boardgames (77)
books/comics (19)
computers hate me (5)
conveyances (15)
diet (53)
dreams (7)
fallout (1)
Foundry (3)
Gale Force Nine (1)
game dev (22)
gaming miniatures (227)
gaslands (10)
gastric sleeve (34)
Green Stuff World (2)
Hasslefree (9)
Hero Forge (1)
hobbies (101)
Jailbirds Minis (1)
kevin smith (1)
Knight Models (2)
malifaux (2)
Marvel Crisis Protocol (2)
mckays (1)
models (9)
mom (32)
moon light (5)
movies/tv/dvd (60)
ninja division (1)
Pathfinder Deepcuts (1)
pilonidal cyst (5)
plastcraft (2)
programming/interweb (41)
rambling (60)
random (365)
random maintenance (3)
Reaper Bones (3)
reaper chronoscape (32)
renovation/remodelling (24)
road trip (26)
salesforce (1)
sarissa precission (2)
scenery (16)
studio miniatures (3)
ttcombat (12)
video games (51)
walking dead (36)
wargame foundry (3)
work (6)
wrestling (45)
zombicide (1)
Zombicide Invader (19)
zombie mall (23)