Itty Bitty Motorbikecycles
08.26.2018
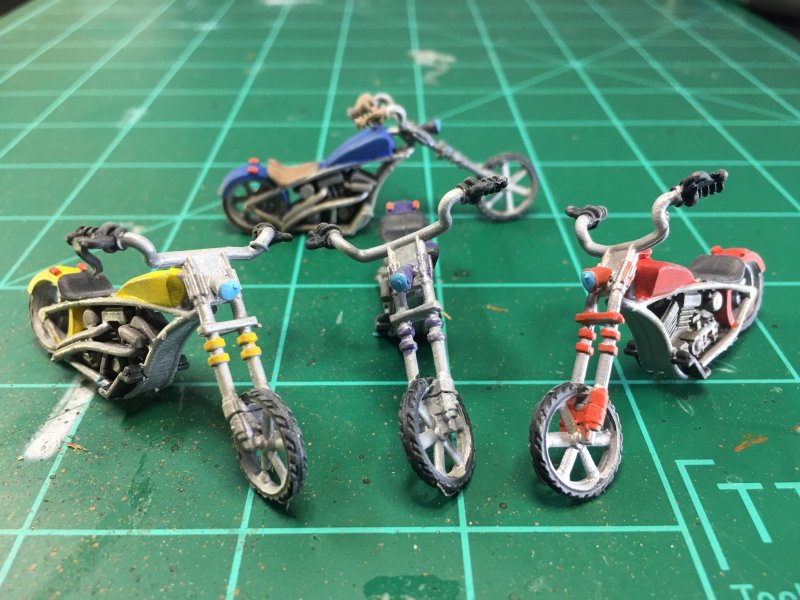
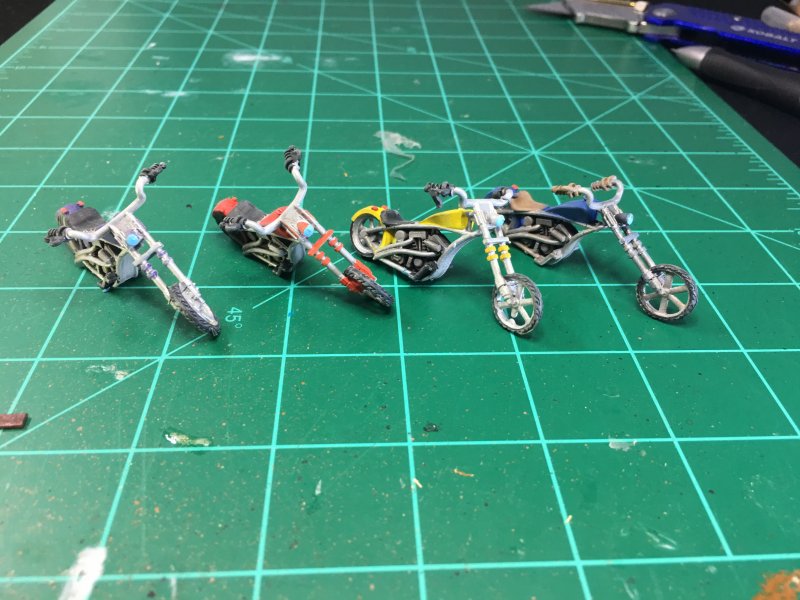
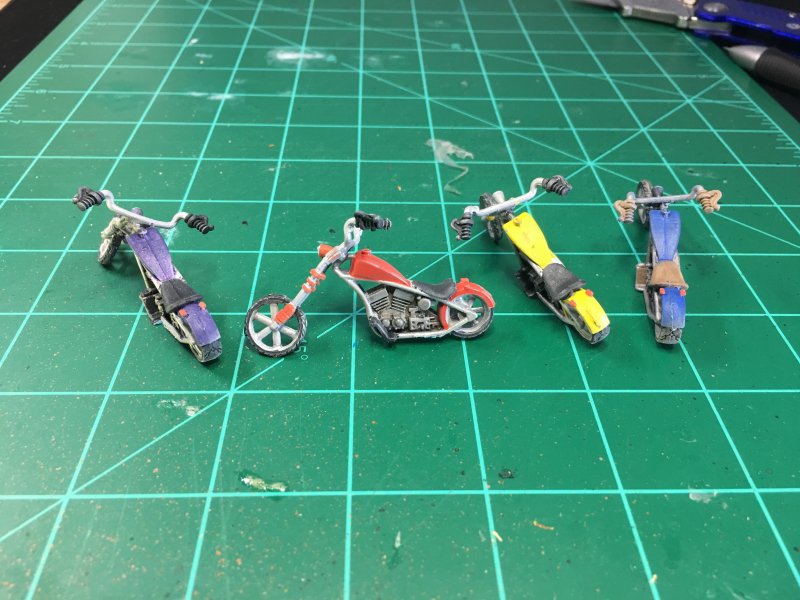
I seem to be at the cusp of starting things that are going to take longer than a week (or two) of my free time. I mentioned that next I would work on finishing motorcycles or starting one of the 1:48 models I'd picked up. I indeed finished the motorcycles, but they're nothing special. Instead of starting a model, I got lost searching various paint/camo schemes and wondering just how do I properly paint a model - gluing everything, masking parts, and painting was how I used to do it, but I think my skill set has risen to something more difficult. I'm not sure what that is yet.
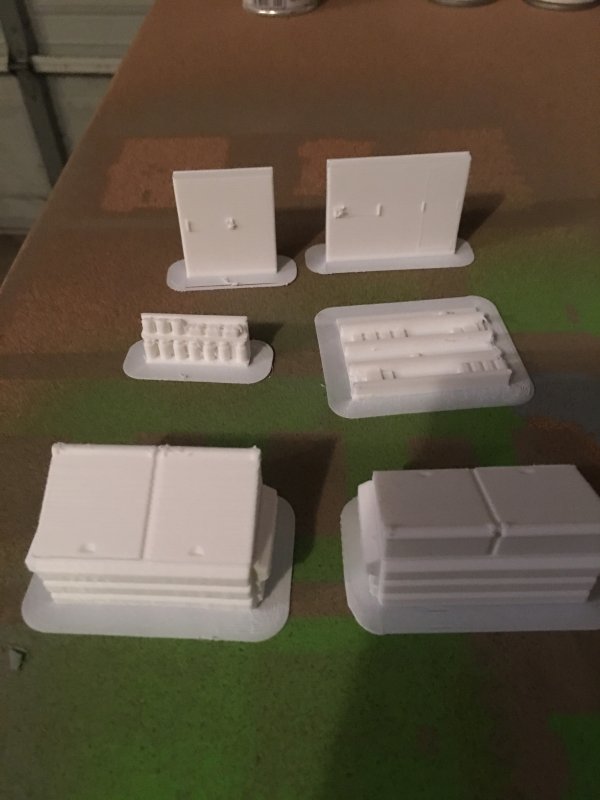
I fired up the 3D printer for the first time in a month and printed some stuff. Most of it was disposable, just to see if some scaling would work (the answer: sometimes). At some point the extruder became clogged, and the simple fix of setting the temp really high did not work. This isn't something I wanted to muck with on a Sunday afternoon, so I'm leaving it clogged until I can talk to the Printer Cabal and gain insight on their learned ways of declogging that bastard.
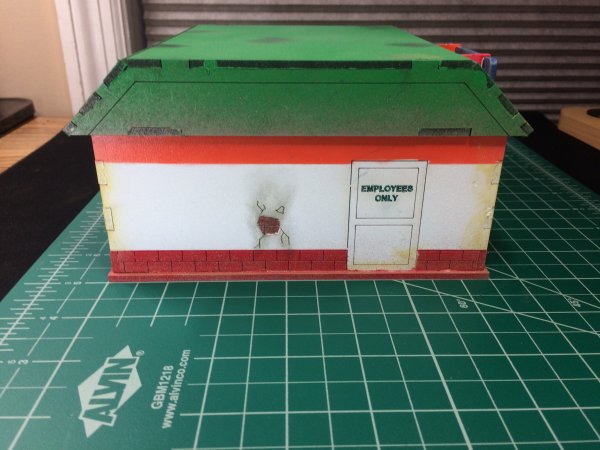
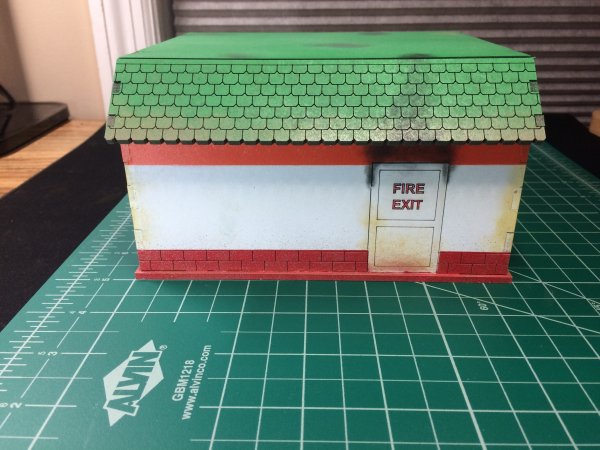
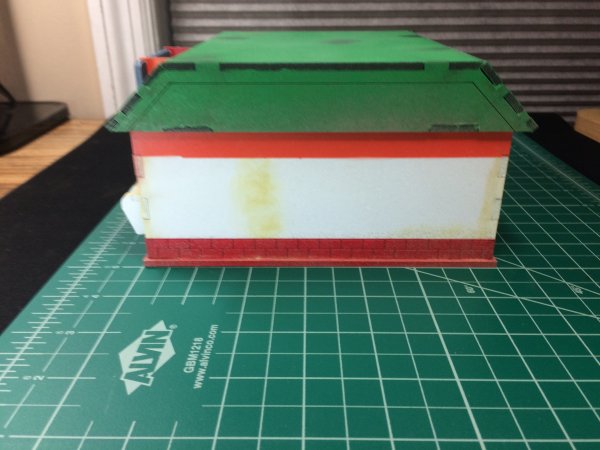
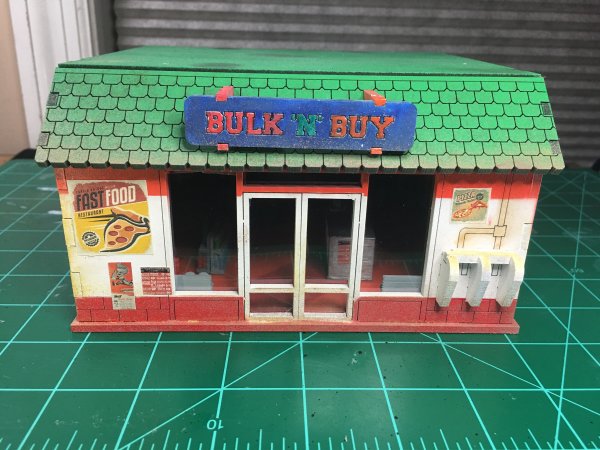
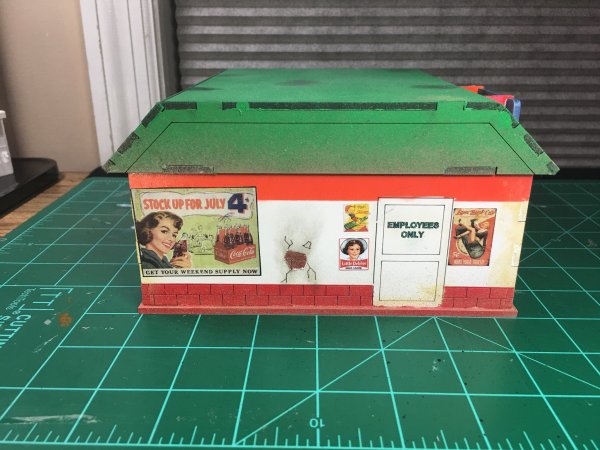
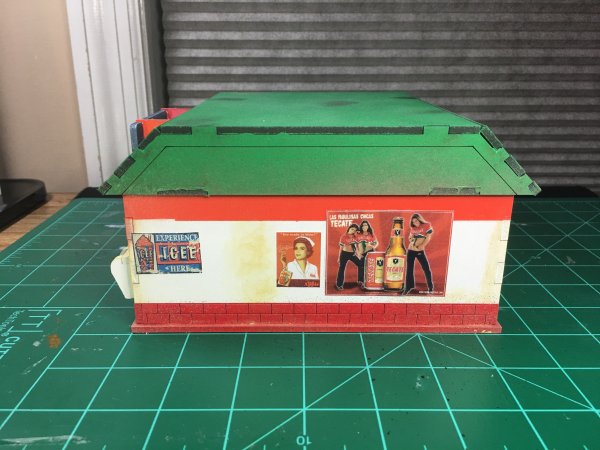
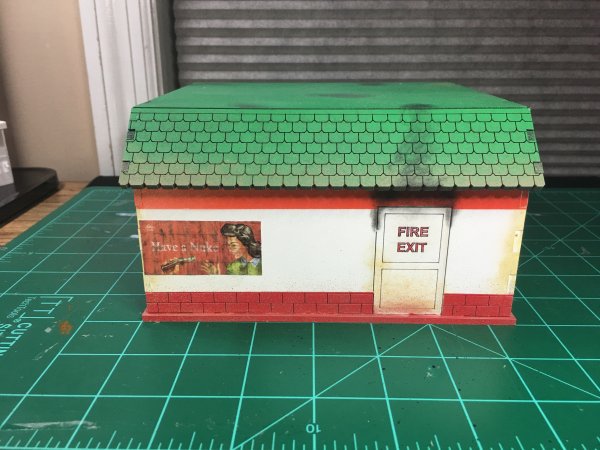
The last thing I did over the weekend was start the TTCombat Gas Station I've had for a while. I thought I had gotten the deluxe (bigger) version, but I instead got only the basic. While not a big deal, the Dinogas sign & lettering are burned into the MDF so I'm not going the customized route I was planning. I'd talked to Bob (who may be reading this on his phone) about gas station color schemes and most that I know lend themselves to some green, which I want to avoid this time since all the other buildings I've made have way too much green. The Gulf station orange and blue was a good alternate, but orange and blue dinosaur doesn't really work.
A purple and orange dinosaur though....
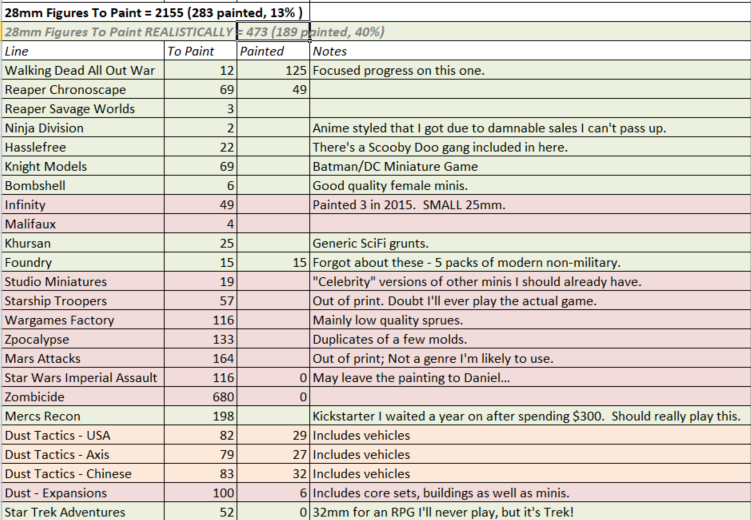
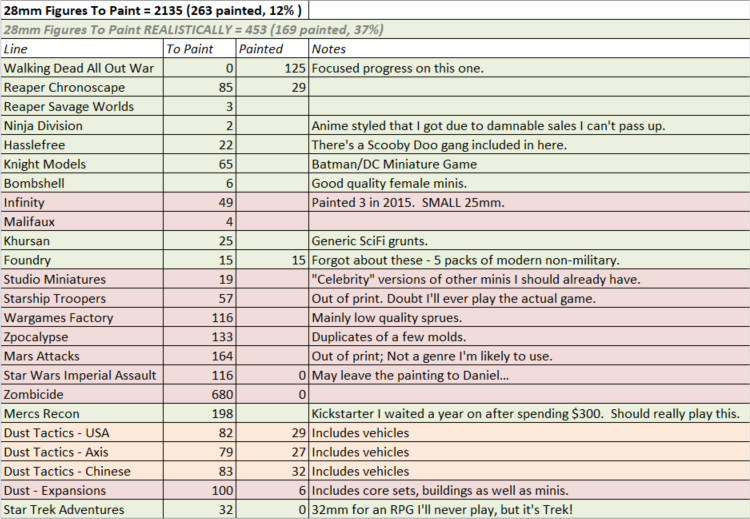
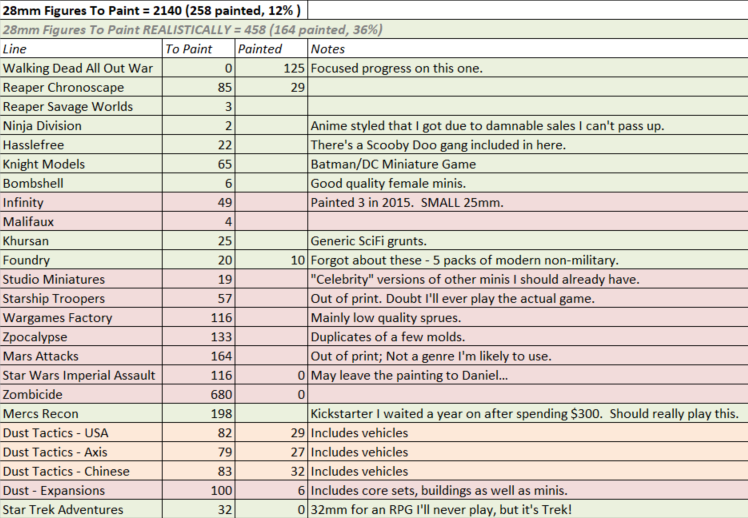
Since no new minis were bought, progress on the overall list!
Permalink
3D Printer gaming miniatures reaper chronoscape ttcombat
The A-Team. And More.
07.23.2018
Today, a little bit of everything from the past couple of weeks.
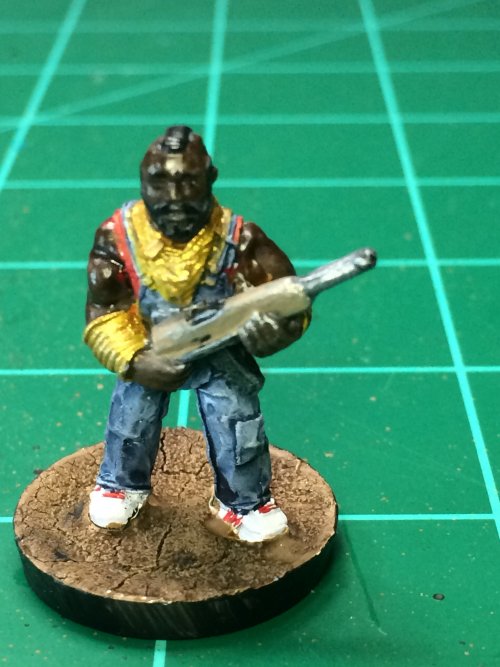
A-Team Complete!
The Wargames Foundry B-Team is all painted up and ready for the zombie apocalypse, or whatever else comes along. It's been a month or so since I painted anything, and I tried to take my time and not rush the paint job, but these still didn't turn out as good as I hoped. Part of it was the molds, but mostly I have a hard time with browns and blues - they just don't go on as even as I like. Must be something about the pigments used and me not doing something properly. I think I've got an A-Team from someone else, too.
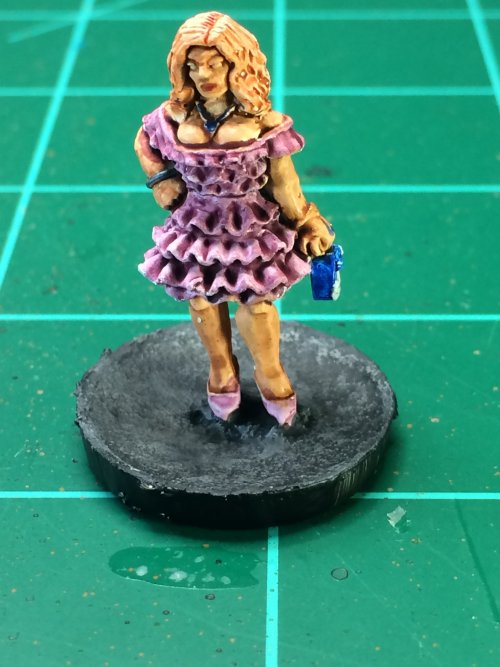
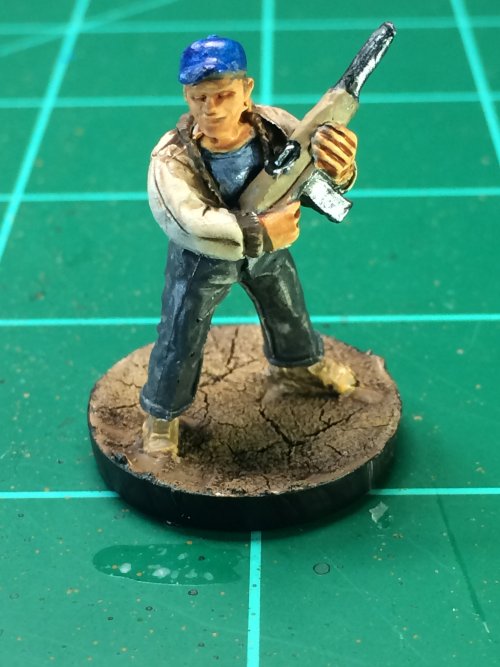
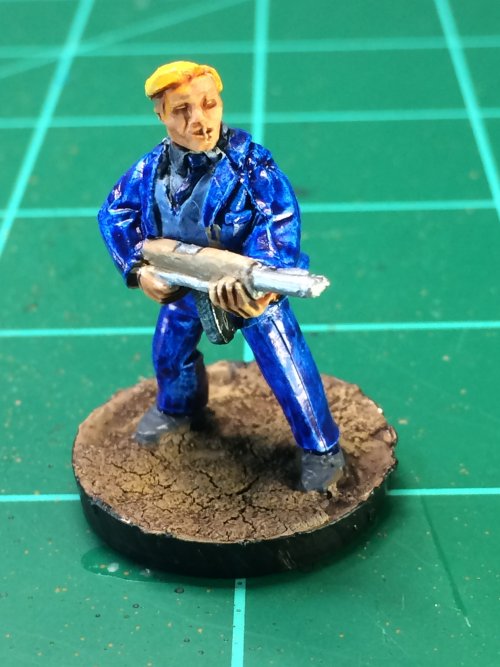
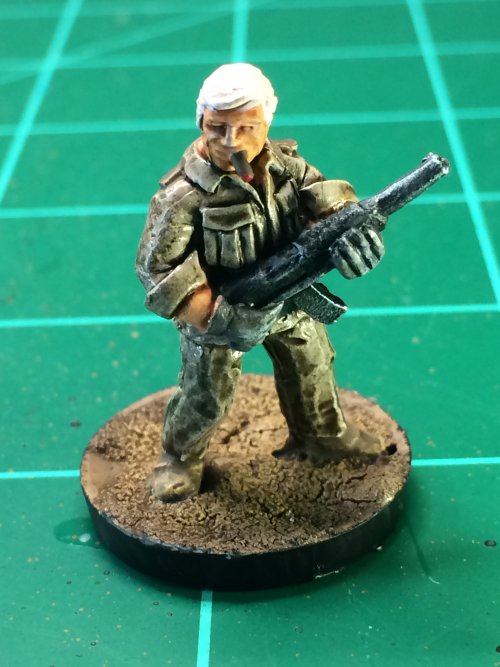
This makes a small dent in the overall painting progression.
The painting progression is going to go down sometime next week as 2 sets of minis for the Star Trek RPG game, some Borg and TNG Away Team, come in from CSI.
Sanding
As mentioned yesterday I got a cheap belt sander so mainly see about sanding down/evening out printed models. The Nascar I had to slice into 2 models to print, thanks to my limited print volume, did not have flush ends to smoosh together where there should have been. The plastic was too thick to cut as I'm still wary of slicing chunks of me off. Running sandpaper over the 2 halves would take a lot longer than I was willing to commit to. Hence, Harbor Freight and a belt sander.
First and foremost, I survived sanding with no injuries, so it's a win there no matter what. Outside of that, sanding is going to be a challenge. The printed plastic starts to melt after a while, which isn't that big of a deal other than something to be aware of and factor in. The hard part, especially for me, is that sanding in 3 dimensions when there's not an even/flat surface to go along with (each outer side of the car was curved enough to not really be flat, even the bottom). It was also the first time I've ever used a belt sander, and with that comes at least a little bit of a learning curve.
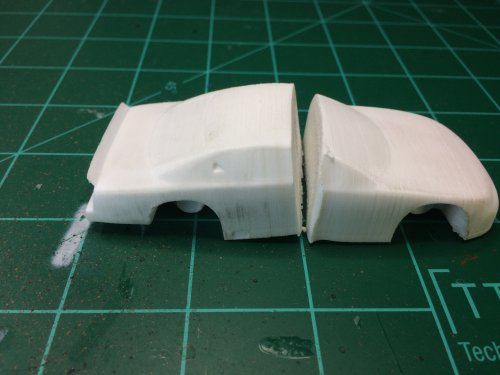
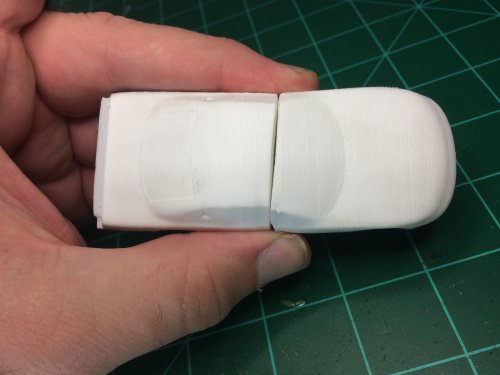
In the end, the 2 halves are closer to fitting that when they were first printed. At this point it's going to end up coming together as a wreck of some type, maybe with smoke billowing out. It's going to take some extra practice before I print the A-Team van.
Loot from Antenocitis
At the first of the month, Antenocitis Workshop was running a sale to (so they said) test out and celebrate their new shopping cart. They've had vehicles on my "oooh, those are cool" list for at least a year, and I had intended to place an order around my birthday but at the time, I just wasn't feeling it. Can I say "just wasn't feeling it" this close to 50? I'll say I can. When they had this sale, I was feeling it.
Antenocitis has 2 lines of vehicles I was interested in. They have vehicles for Infinity which I like to think would fit in my game world set 15-25 years into the future. Far enough to have some curvy, sleek, sci-fi looking cars (as long as they steel have tires) yet still not look too out of place next to a current run-of-the-mill car. They also have a Survival line, which is mostly modern cars and trucks, sometimes with a hint of Mad Max or Kill That Zombie. Even better, they have wrecked molds.
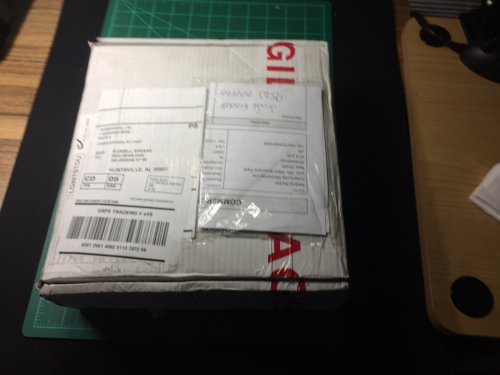
The key with this order was to maximize what I could get while minimizing shipping. They have a free shipping option which, for the US, is a special balance of overall order price and estimated weight. I tweaked what I originally had (and took out a LOT of things that I really didn't need, like an equivalent of an Aliens 2 Drop Ship) and managed to get free shipping at 35 British Cents over the minimum. Not bad! My order consisted of 21 items, which after GBP conversion and exchange fee came out to just under $170. Once shipped, it took a little over a week for the order to get processed, it took a little over a week to reach me. England to Alabama, with no problems.
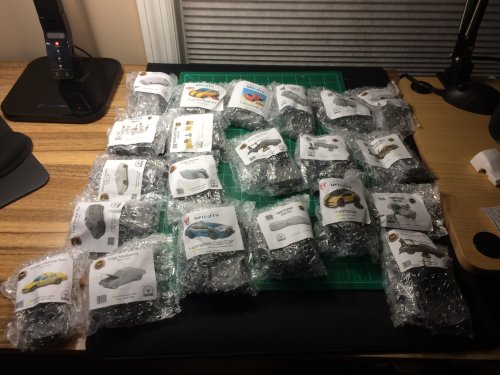
I guess I need to figure where to start on that batch?
The Airbrush
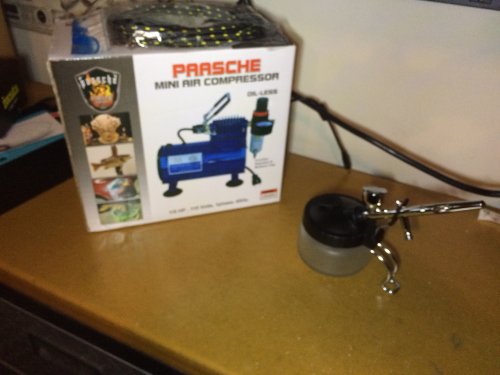
I've been wanting an airbrush for a long time. All the cool kids use an airbrush on minis and whatnot. The maintenance and cleaning required has always kept me from entering the airbrush arena. Then, one day at work, Daniel came in with a couple of his airbrushes and showed me how they were different, how they came apart, how they went back together, and then he told me a lot of interesting stuff I forgot. Then I watched some beginner YouTube videos with tutorials on how to get started, how to tell when you've screwed up all kinds of stuff and how to fix it. Important stuff. Then Hobby Lobby reduced some prices.
The Iwata HP-CS was what Daniel told me I wanted. Daniel's always right. Life has been easier since I accepted that. The Lobby dropped the price on that specific airbrush by $75. The Hobby Lobby coupon wasn't good on airbrushes - so no extra 40% off that. It was still cheaper than I could find elsewhere. Being me, I went to JeffyB and ordered the air compressor (that Daniel told me to get) and a 10ft hose. Since then I've been stopping by Hobby Lobby on the way home and using my coupon to stock up on air-friendly paints, because I'm going to need all the help I can get here.
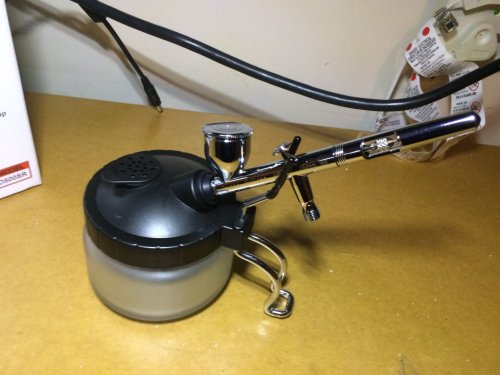
Since getting all my painting loot it's been staying between 90° and 95° in the garage whenever I think about hooking up the airbrush and actually going through the tutorials I've watched, but that's pretty damned hot out there. So for now, I watch tutorials and ponder.
I haev no idea what I'm going to work on next. Paint cars? There's a gas station that still needs to be made. Another small batch of minis? Temperature be damned, get that airbrush brushing? Is there something I need to 3D print while doing all of this?
A
It's time to organize my list, it sounds like.
Permalink
3D Printer antenocitisworkshop belt sander gaming miniatures hobbies
Mini Mart and Coffee Shop
06.30.2018
It's been almost 2 months since I first mentioned working on the TTCombat buildings. Beleive it or not
it hasn't taken that long, I just keep going back and tweaking things.
The TTCombat buildings are more of a budget line of MDF building. That's not a bad thing. While I really like the 4Ground buildings, they can get a little pricey. Nice, but pricey. TTCombat would give me a chance to exercise my skills at nicing up some buildings. The first 2 commercial buildings in what constitutes my zombie apocalypse thus far.
At some point I'm going to have to explain the setting for my scenery and how it's not just for The Walking Dead.
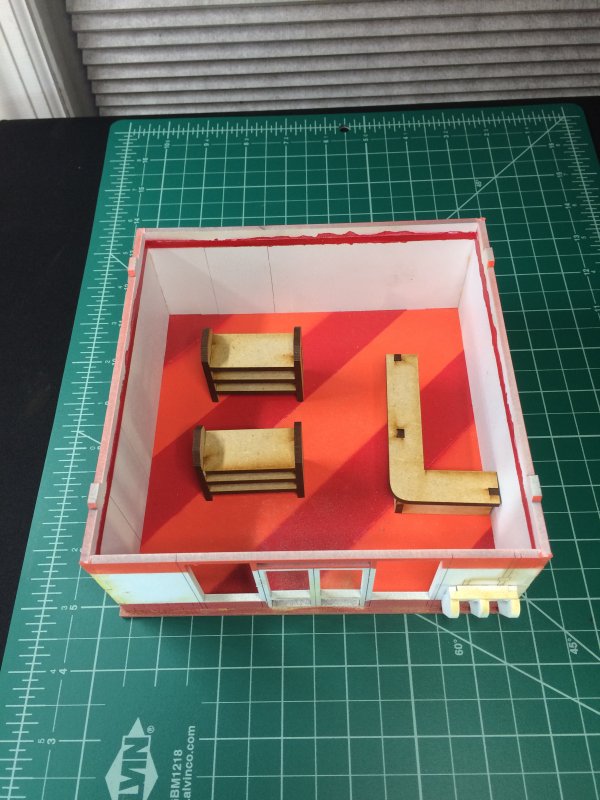
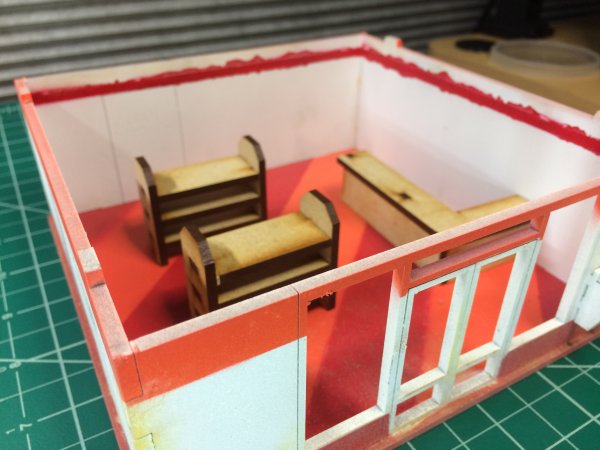
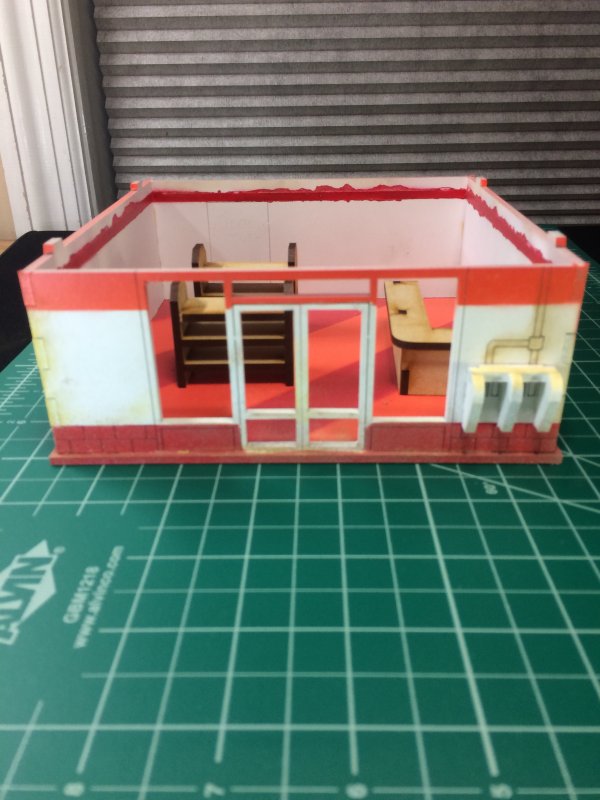
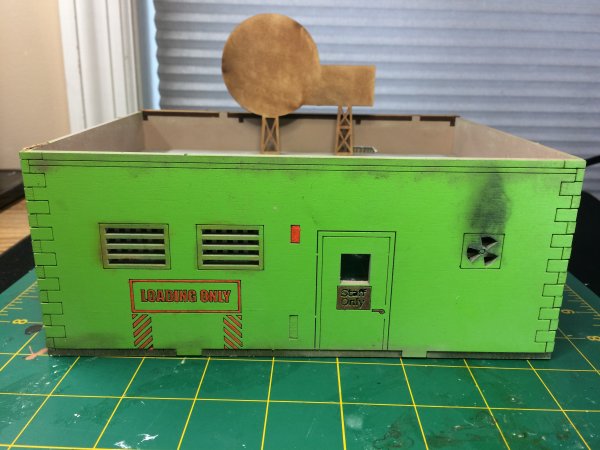
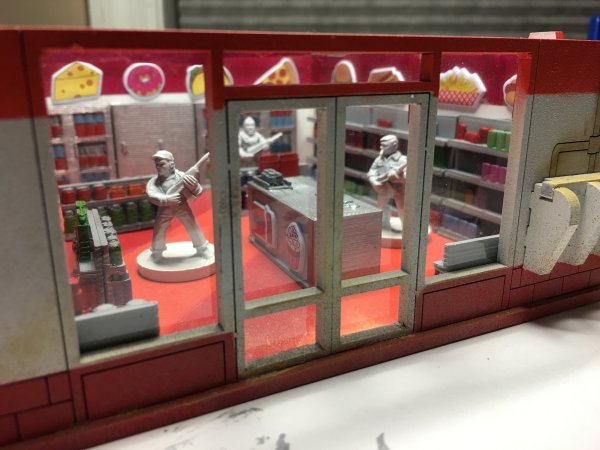
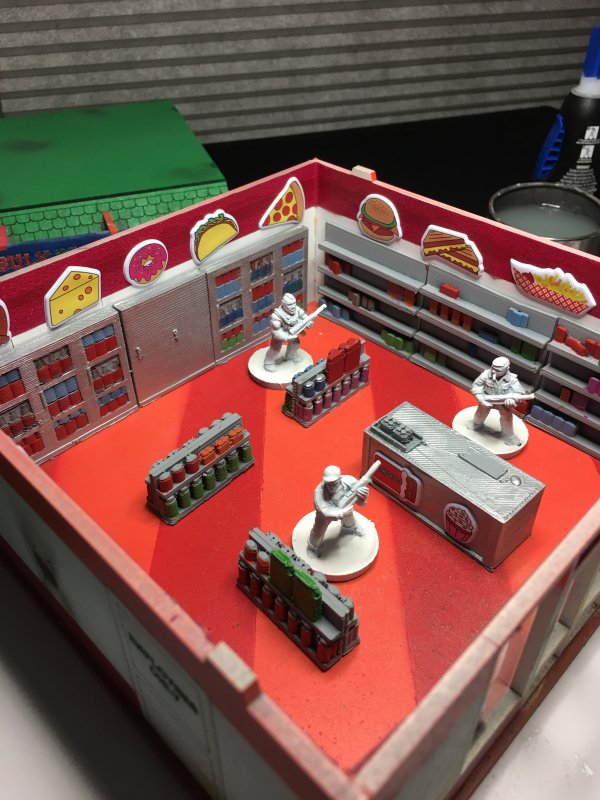
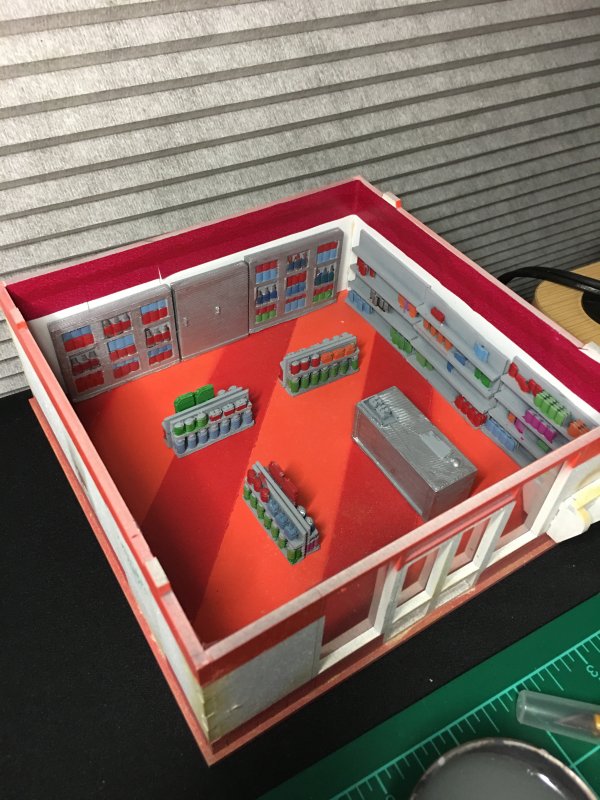
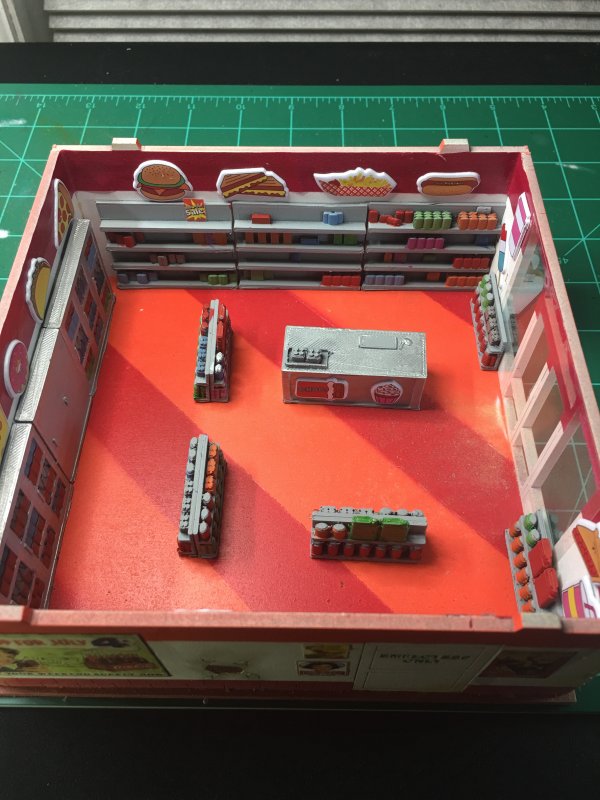
The first building I worked on was the Convenience Store, well really a Mini Mart. I was shooting for a 7-11 color scheme thanks to a batch of spray paint that I picked up when Hobby Town USA was closing up. Honestly, how often am I going to get to use orange? I primed the interior and exterior white, masked off the middle and added some accent stripes of red and orange. It turned out pretty good. I then got cocky and tried putting a red strip along the top of the interior. Either I didn't mask it properly, or the paint just decided to bleed. It did not turn out well. I decided to go work on the second building while mulling over how to turn a messy red line into a happy mistake.
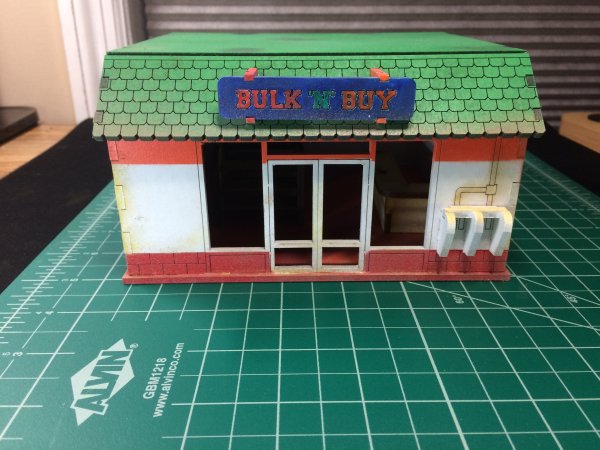
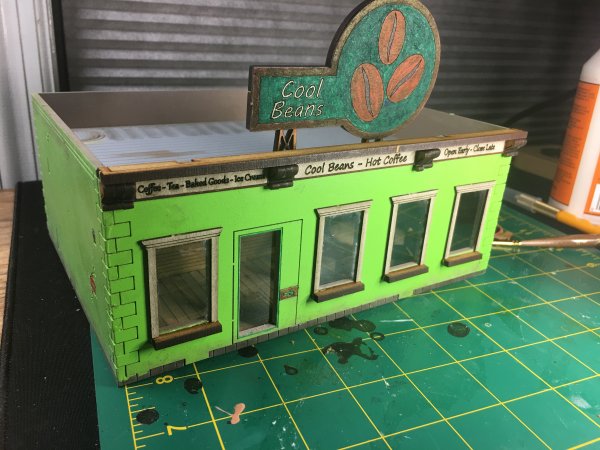
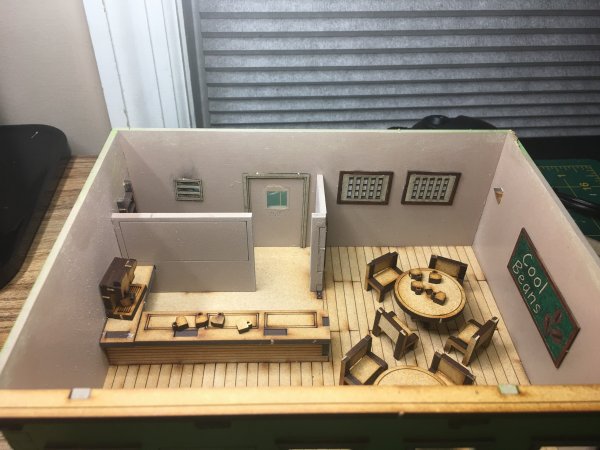
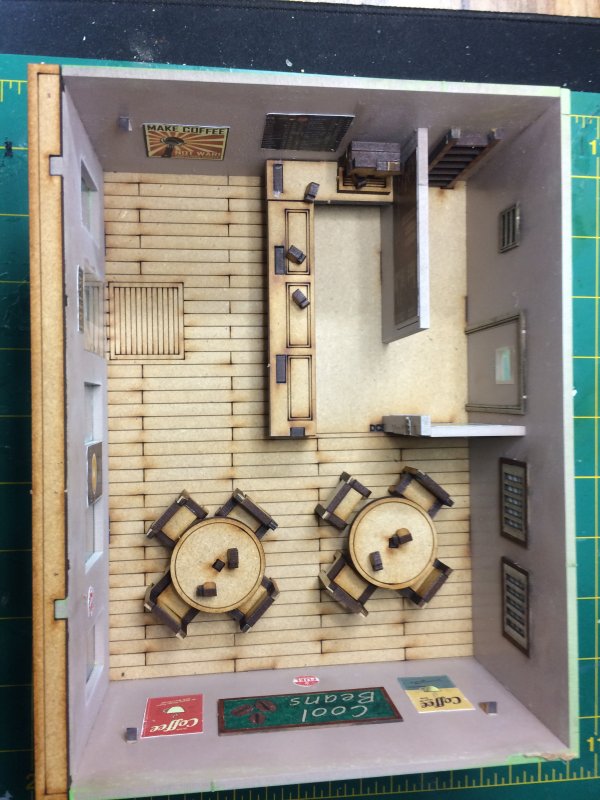
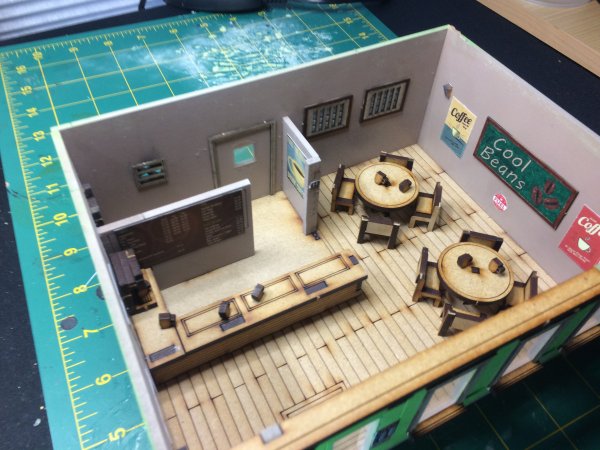
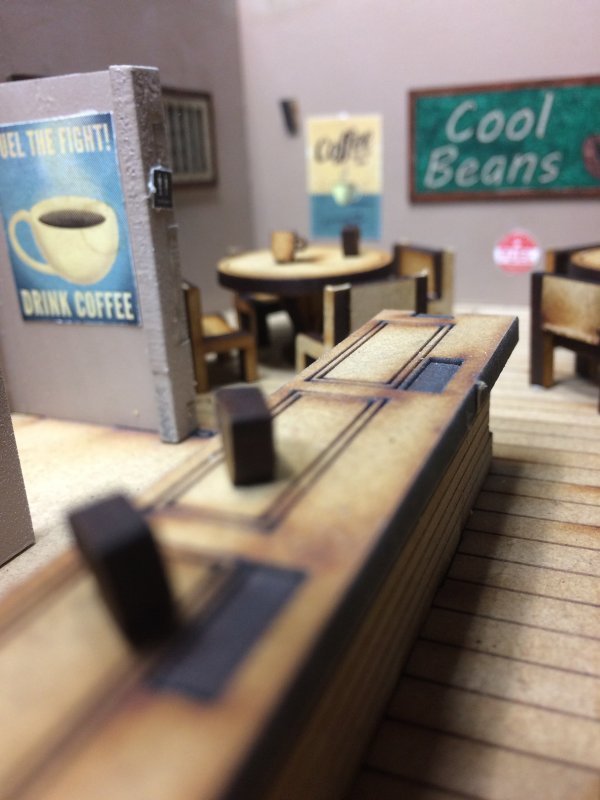
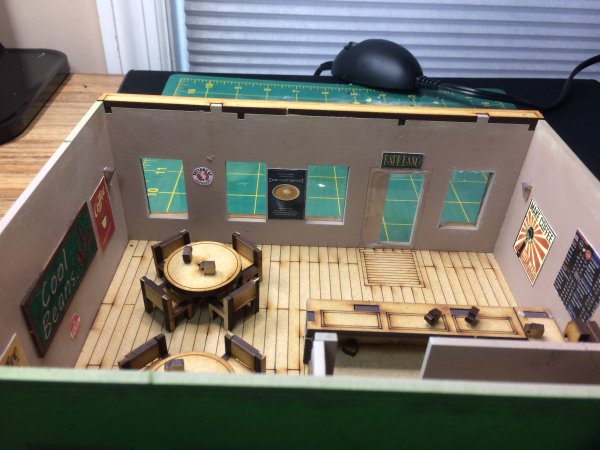
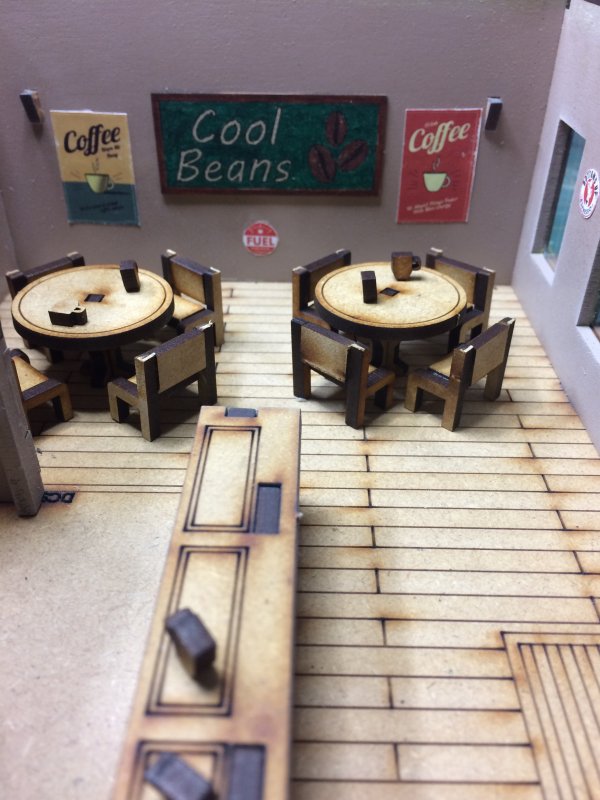
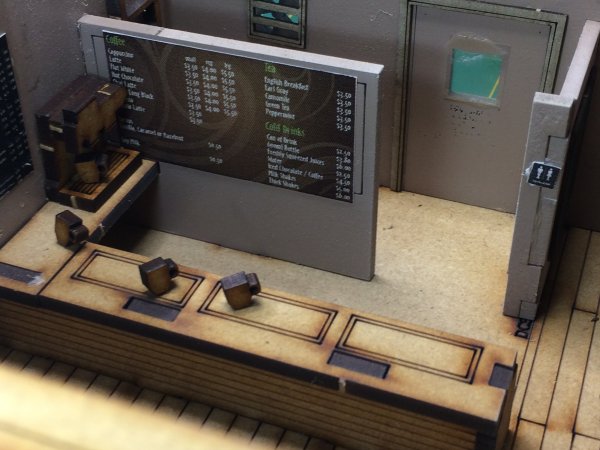
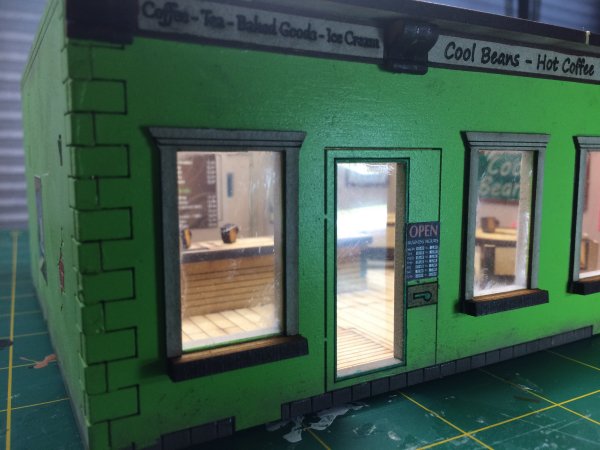
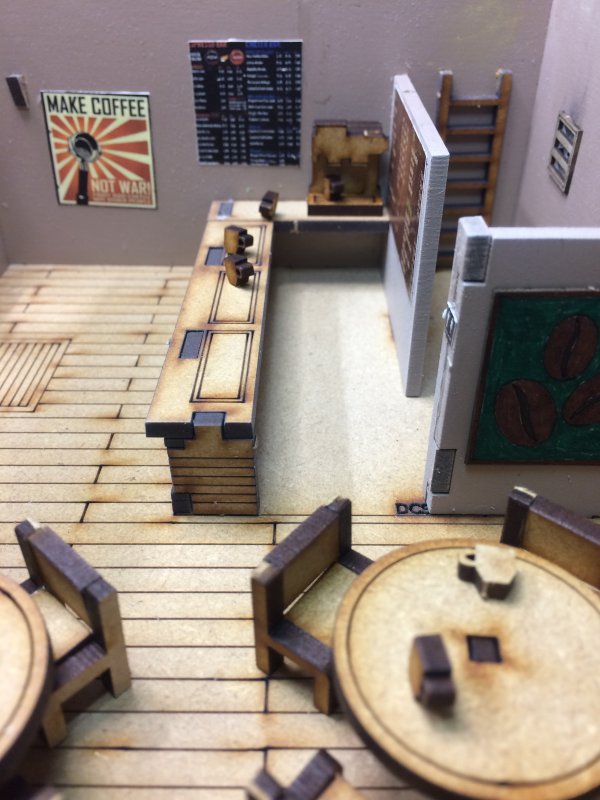
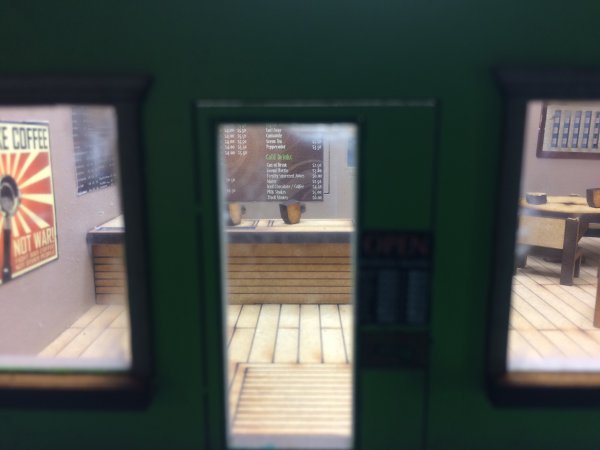
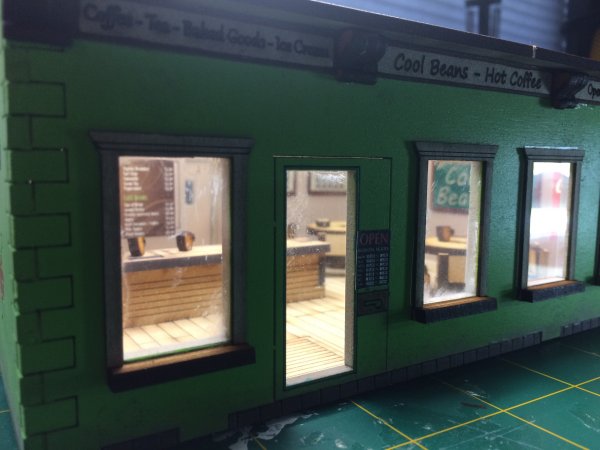
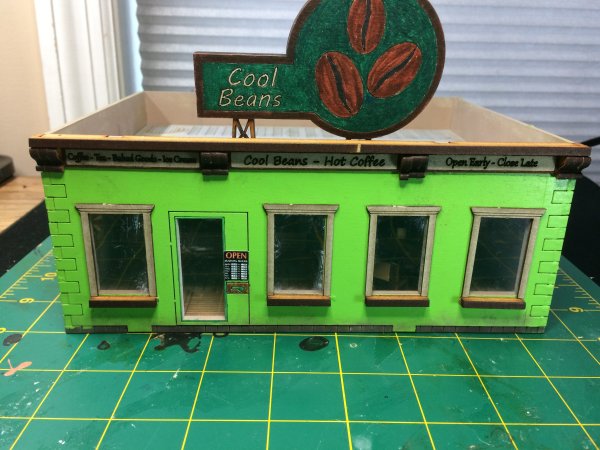
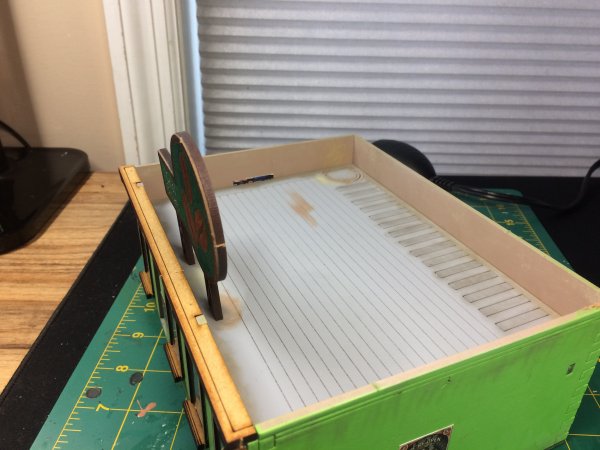
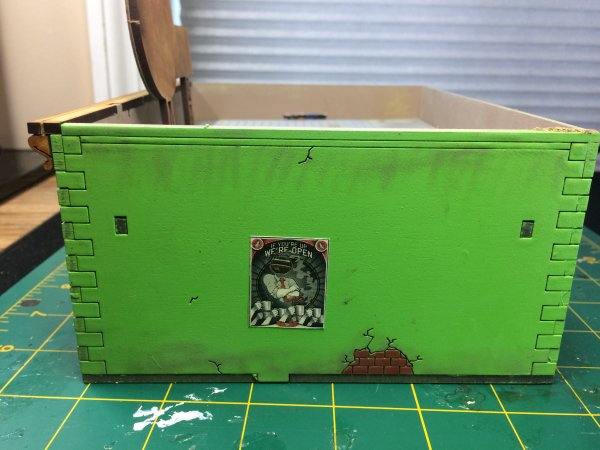
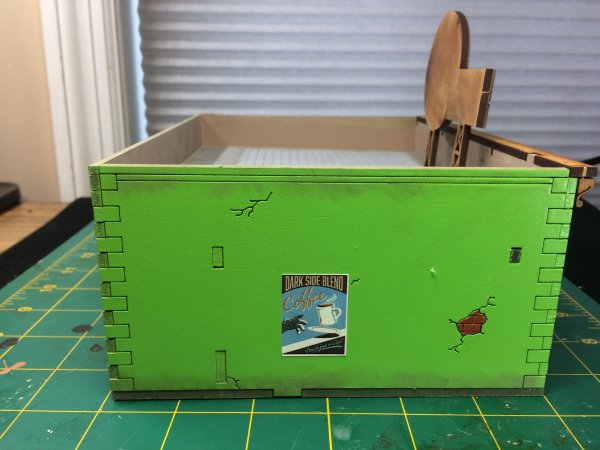
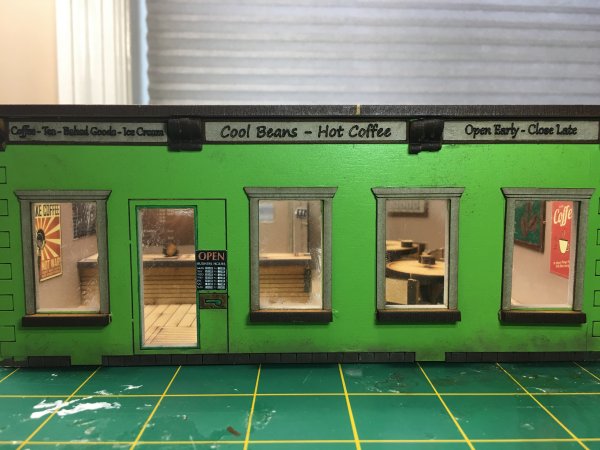
For the Coffee Shop I wanted to go with the overplayed Starbucks color scheme. The problem I would have to avoid is using too similar a green that I used on the Mini Mart roof. I thought I was going with a lighter green with the can of something Dodge Charger Green something something. I was going with a brighter green. Way brighter. but at least it wasn't the same! I stayed away from masking frenzy on the coffee shop. I started having fun adding printed out what not to the walls - a menu, random coffee propaganda. The kit came with a counter, table, and chairs, and it fleshed out the interior really well.
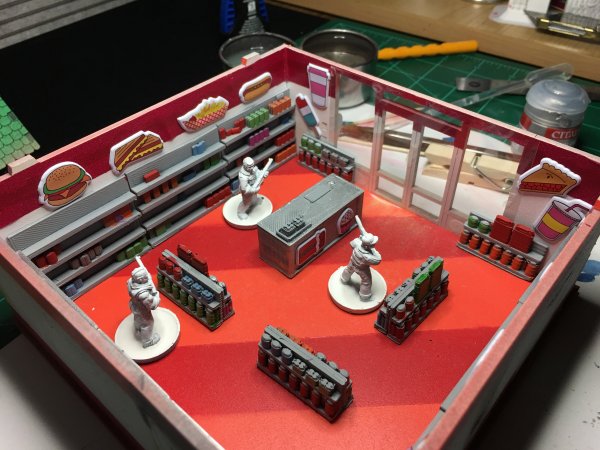
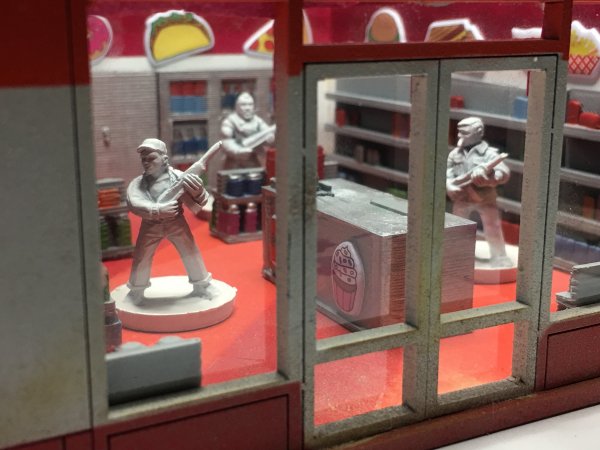
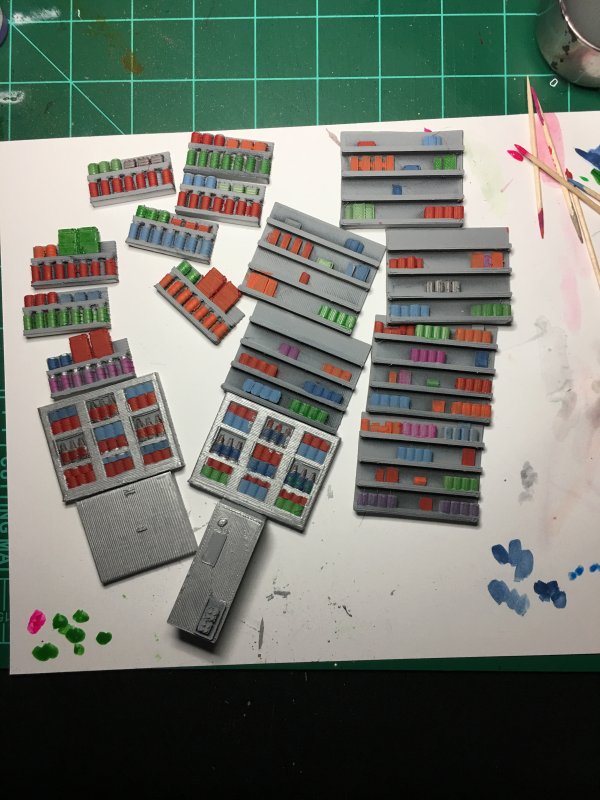
I returned to the Mini Mart after the coffee shop was done, and there may have been a sale at Hobby Lobby. To cover up the bleeding red line, I picked up some clearance duct tape that was lacking most duct qualities. It didn't stick very well. It was a decorative dark red. It was thin. No wonder it was on clearance. But it suited my needs as a replacement stripe to go along the top of the wall. I'd also been 3D printing shelves to go along the walls. I tweaked the settings of the shelves - I'd learned when getting furniture printed for the houses that the default "real" volume makes everything take up too much room. The first thing I did was change the shelves from 15mm depth to 6mm. Yes, that's tiny, but I wanted something with just a little relief on the walls - honestly I'd been thinking of just printing a picture of shelves to glue to the walls until I thought it'd be cool to use that printer I've got! The best part is... it worked! It took a while, as I printed out 15 shelving units that took anywhere from 2 hrs to 8 hrs (I was learning how to tweak things!) to print. Once they were primed, I figured grey was a good shelf color, and the random products painted I used the sticky tac to hold it all against walls or floor, where appropriate. I've got plenty of sticky tac as that's what I use to mount minis on blocks to hold when I go to paint them, yet most people use it to hold up posters. After the walls were lined with shelves, I decorated the otuside with some random sales propaganda. The Mini Mart turned out a lot better than it was looking when the coffee shop started.
I really need to work on some proper map tiles for these 2 stores. Parking with an entrance, and how to deal with the footprint of the buildings. I've been meaning to work on this for a while, but I keep putting it off.


Permalink
3D Printer gaming miniatures hobbies ttcombat
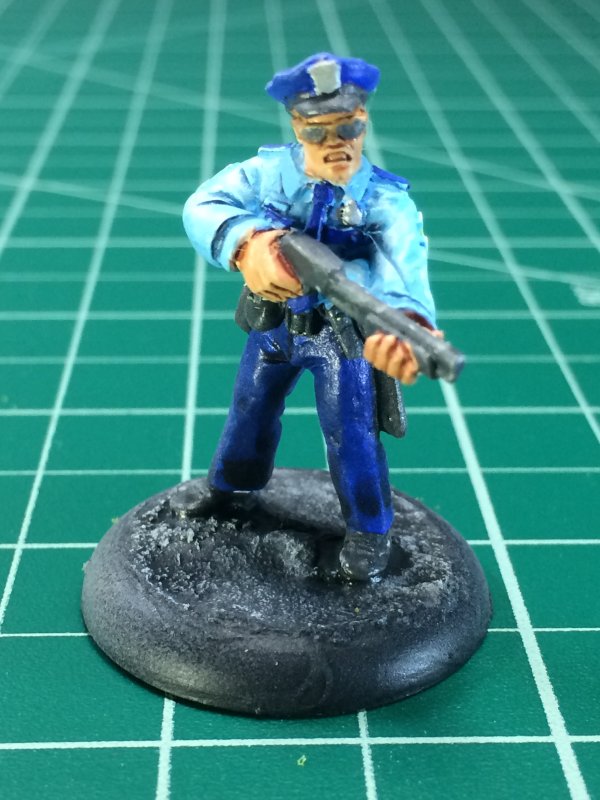
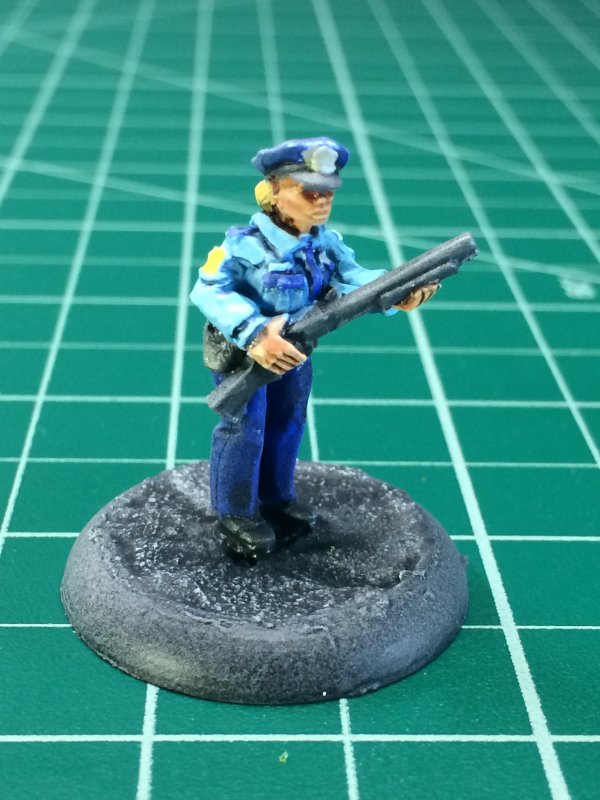
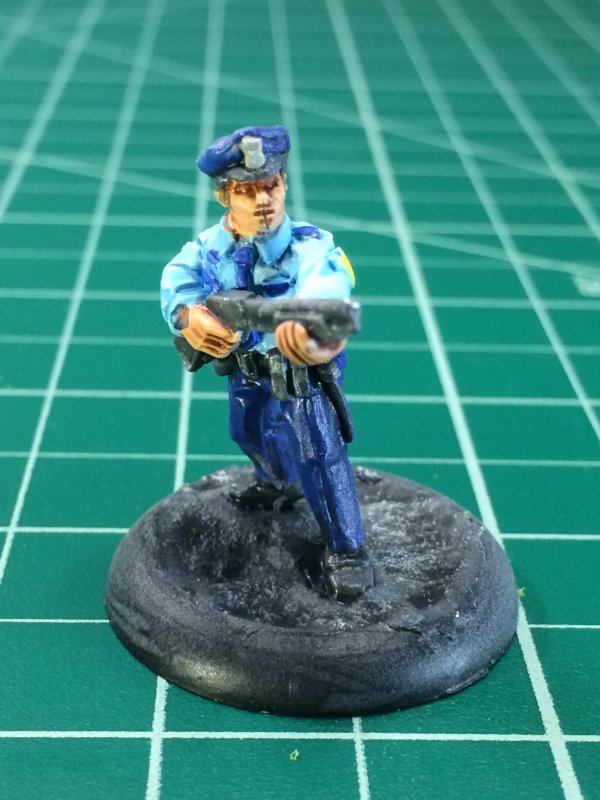
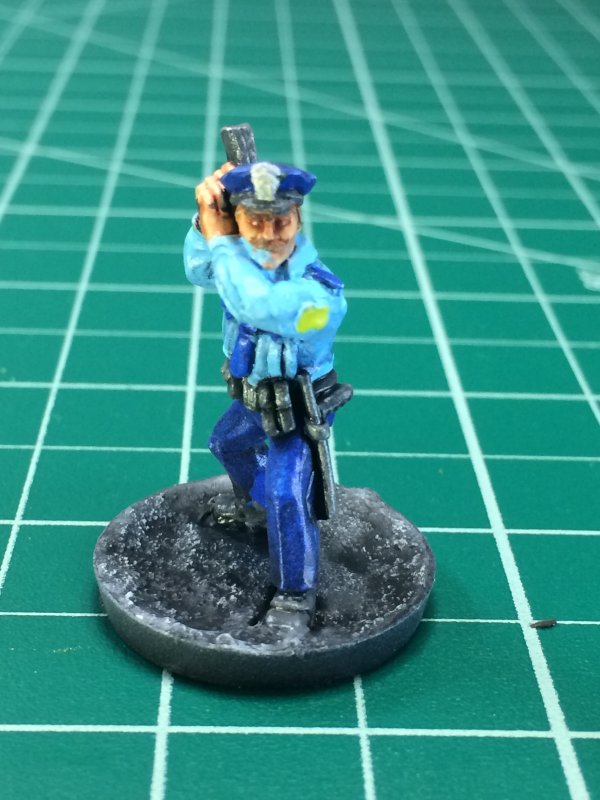
Police Force and Pringles Cans
06.08.2018
Branching out to a new line of molds, the Foundry Wargames police (Shotgun Cops and Street Cops) have been added to keeping the streets of Potham safe during the zombie apocalypse. More important, I finally unboxed the 3D Printer.
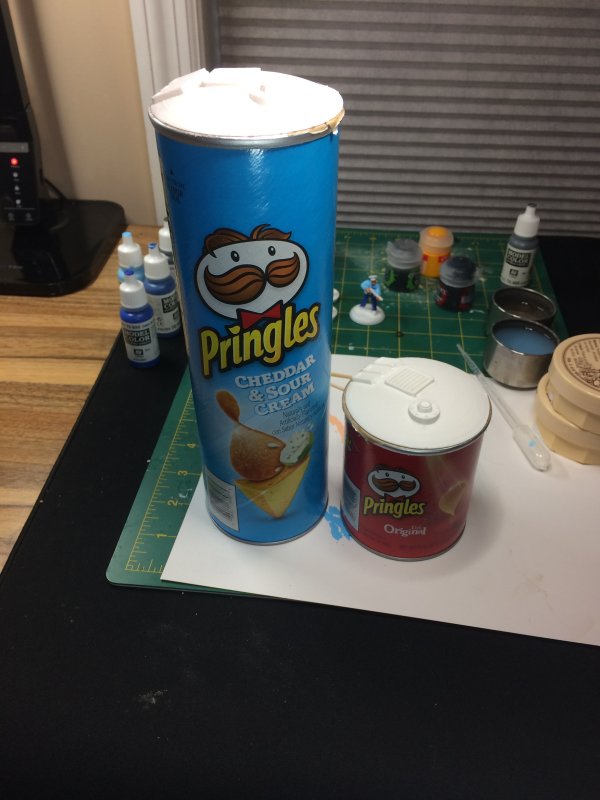
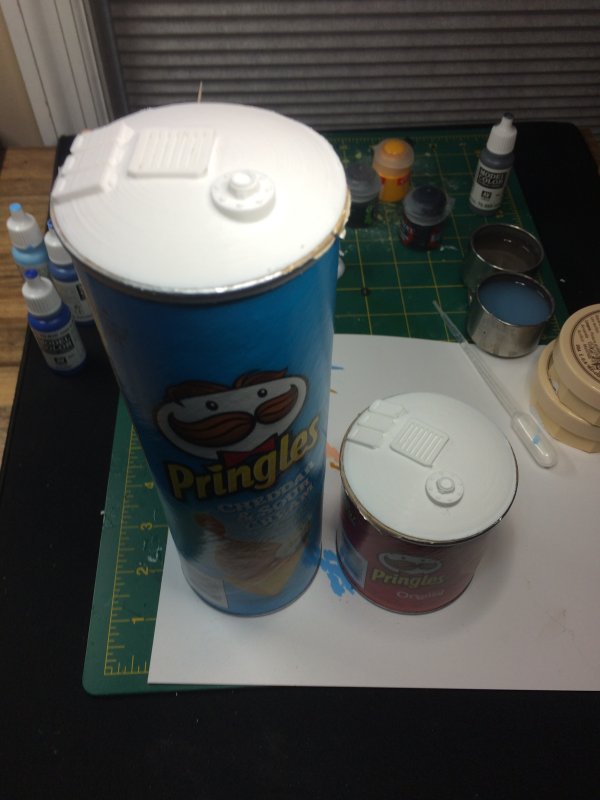
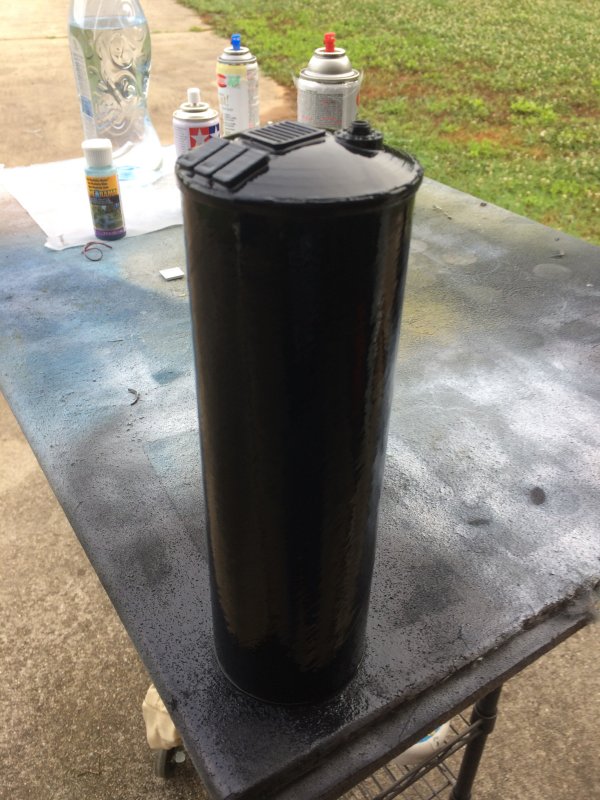
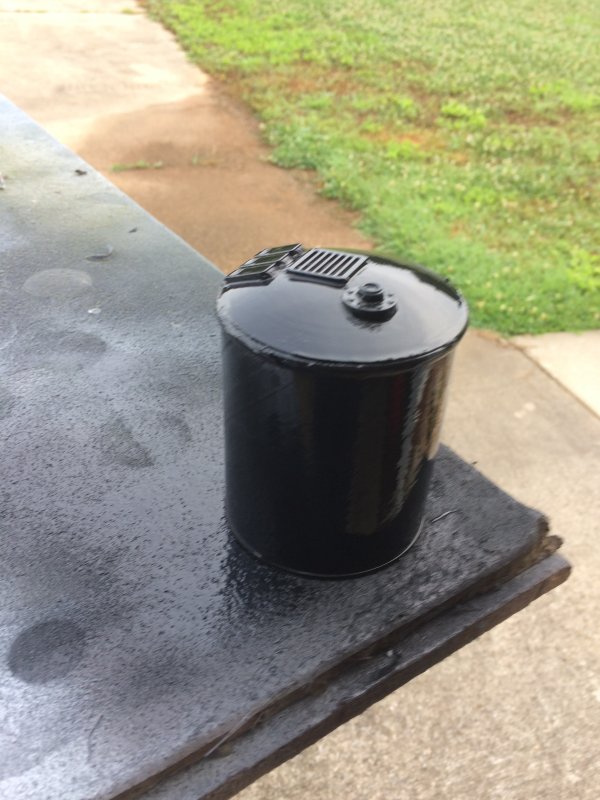
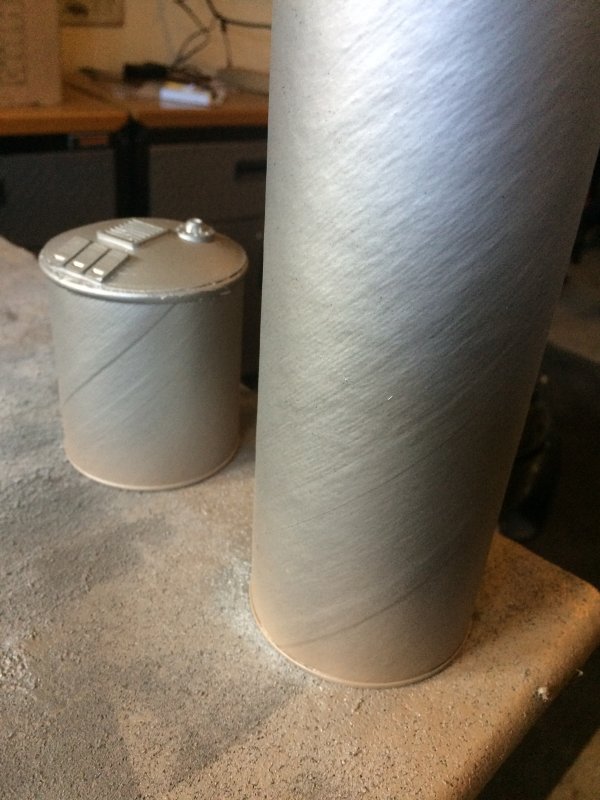
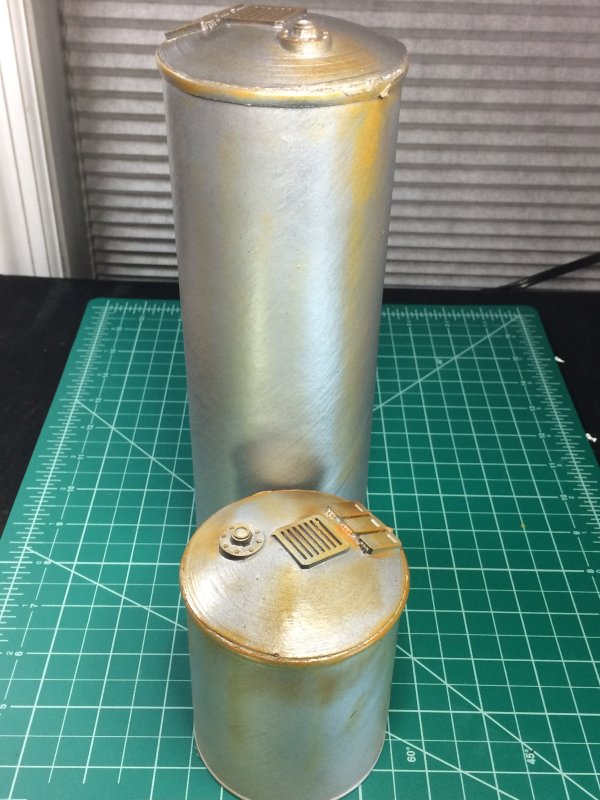
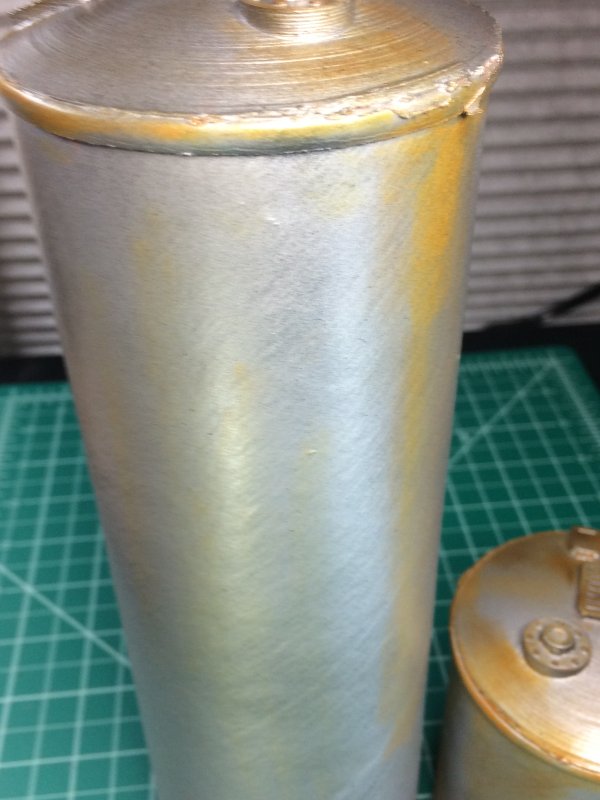
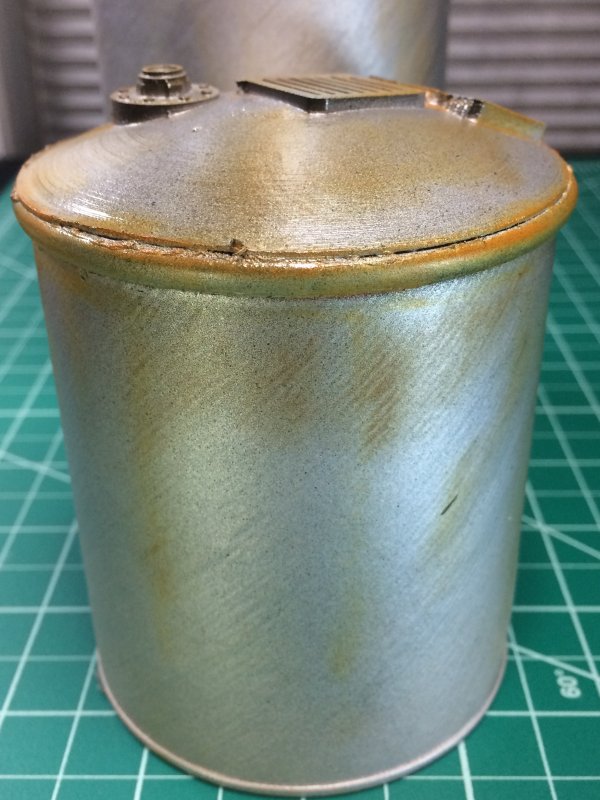
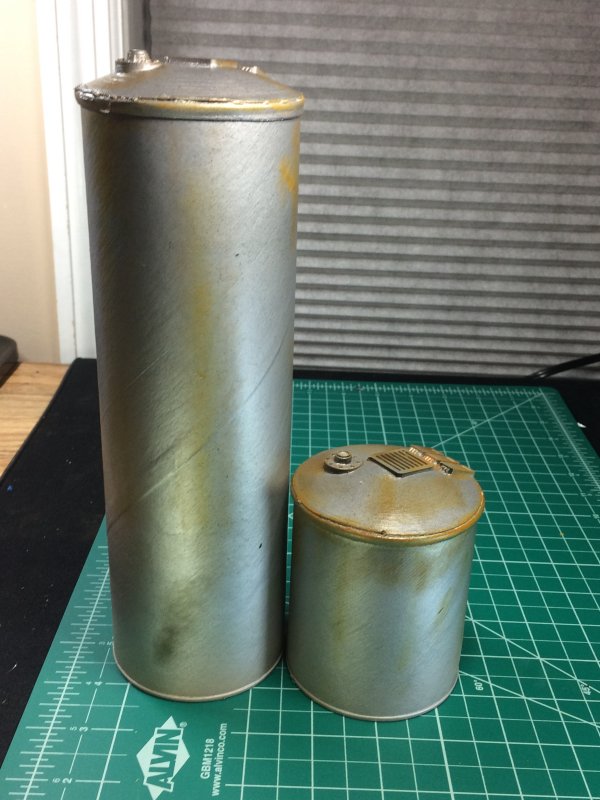
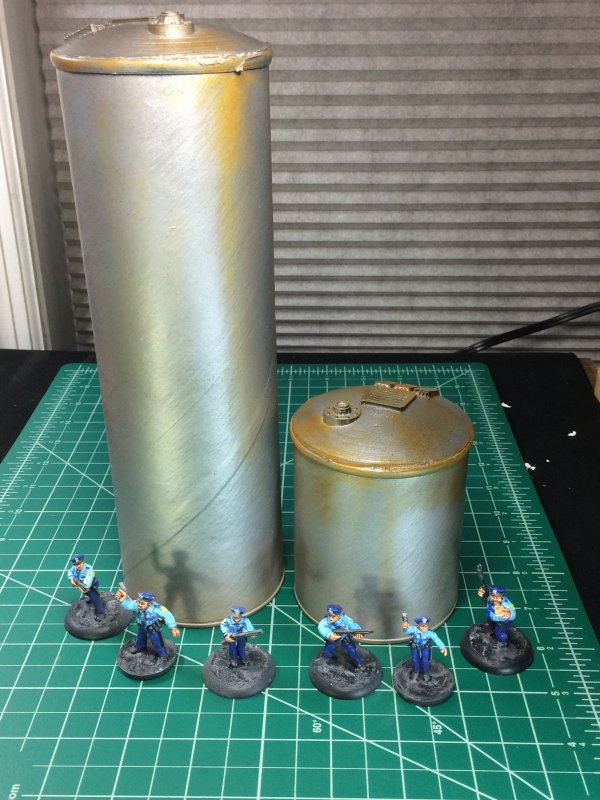
You're supposed to print some type of calibration trinket right after you plug in a 3D printer. I have no idea how to tweak anything a calibration do-hicky would show needed tweaking, so I went straight to printing something useful. At some point I saw add-ons for cans to make them look like tanks (storage, not armour) for wargames. My favorite showed a Pringles can with a lid replaced by a tank door/end. After looking on 3D file sites for "Pringles Can Tank Top" unsuccessfully, I ended up taking part of a model of a tank and just sizing it (80mm) and printing it. The end result turned out A LOT better than I thought for my 1st print. Even better, work has small can of Pringles that I can take when empty. I had 2 Pringles cans begging for printed material. As such, I printed away.
I've never painted a Pringles can before. It felt weird.
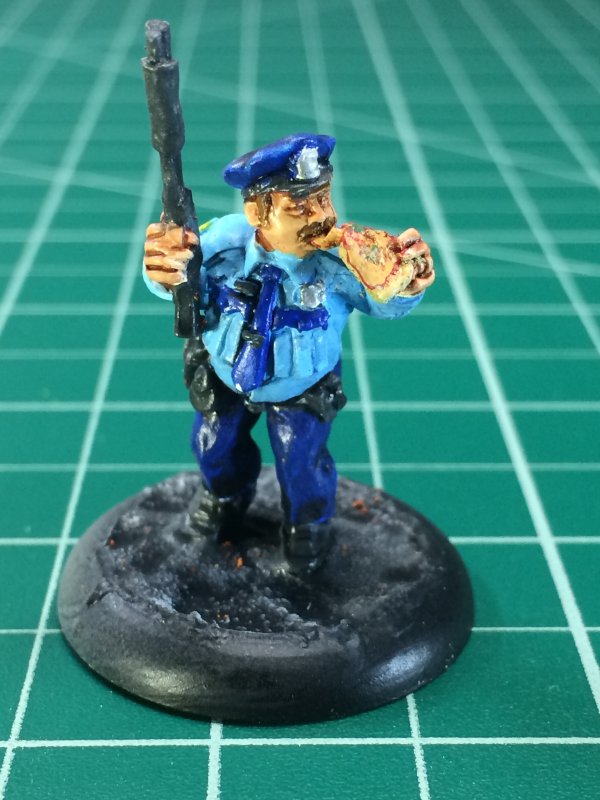
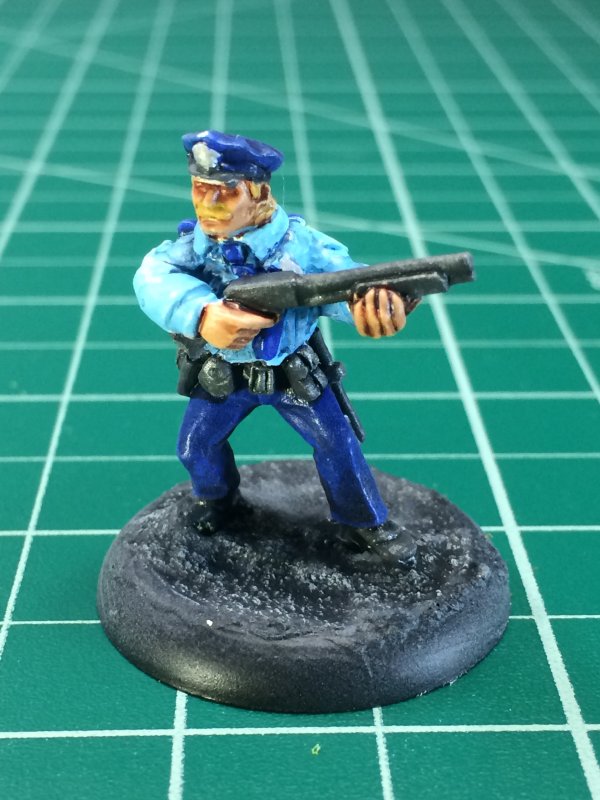
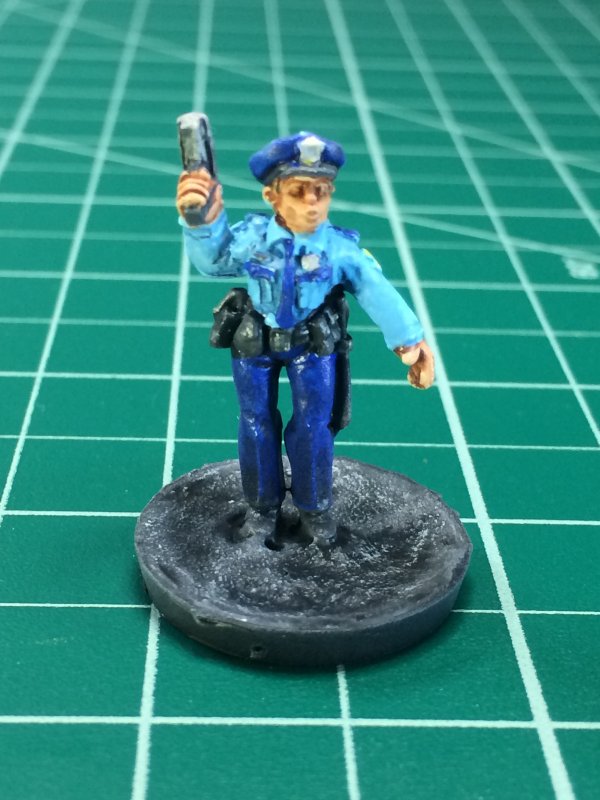

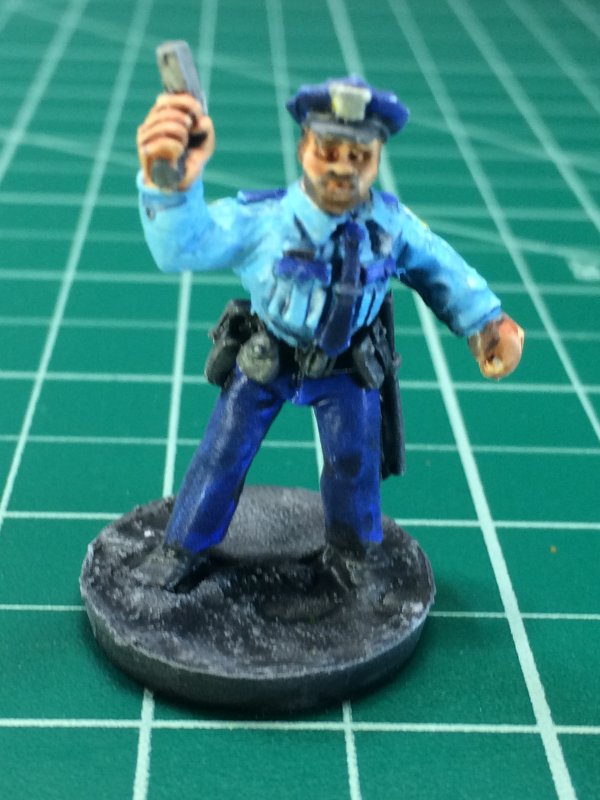

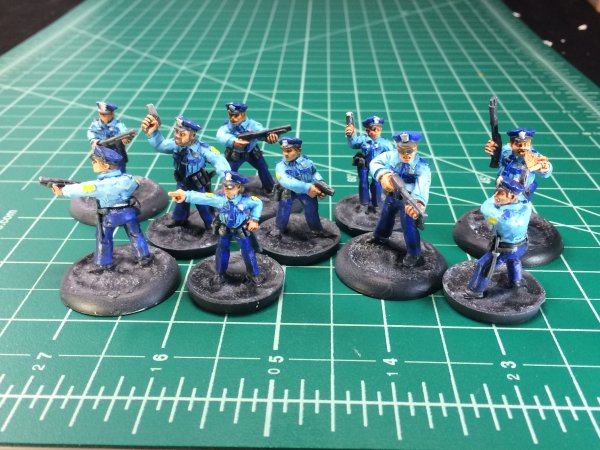
This is the first 10 from the Foundry list to mark off. Still making progress on that list!
Next up are a couple of TTCombat buildings, those same buildings I've been mentioning and putting off. Actually 1 of them is already made, I've just been behind on blog posting. The Convenience Store will a 7-11 motif will pop in to the zombie apocalypse, with the Coffee Shop to hopefully follow soon after. The Foundry version of the A-Team is also primed and ready for paint.
Blog Archive
As always, correct spelling is optional in any blog entry. Keep in mind that any links more than a year old may not be active, especially the ones pointing back to Russellmania (I like to move things around!).
Tags have been added to posts back to 2005. There may be an occasional old blog that gets added to the tag list, but in reality what could be noteworthy from that far back?
Blog Tags
3D Printer (26)
4ground (32)
4ground-mall (40)
action figures/toys (10)
airbrush (7)
Aliens (1)
Amazon (12)
antenocitisworkshop (11)
Atlas O Gauge (2)
Batman Miniature Game (2)
Battletech (1)
belt sander (12)
Blood Bowl (4)
boardgames (77)
books/comics (19)
computers hate me (5)
conveyances (15)
diet (53)
dreams (7)
fallout (1)
Foundry (3)
Gale Force Nine (1)
game dev (22)
gaming miniatures (227)
gaslands (10)
gastric sleeve (34)
Green Stuff World (2)
Hasslefree (9)
Hero Forge (1)
hobbies (101)
Jailbirds Minis (1)
kevin smith (1)
Knight Models (2)
malifaux (2)
Marvel Crisis Protocol (2)
mckays (1)
models (9)
mom (32)
moon light (5)
movies/tv/dvd (60)
ninja division (1)
Pathfinder Deepcuts (1)
pilonidal cyst (5)
plastcraft (2)
programming/interweb (41)
rambling (60)
random (365)
random maintenance (3)
Reaper Bones (3)
reaper chronoscape (32)
renovation/remodelling (24)
road trip (26)
salesforce (1)
sarissa precission (2)
scenery (16)
studio miniatures (3)
ttcombat (12)
video games (51)
walking dead (36)
wargame foundry (3)
work (6)
wrestling (45)
zombicide (1)
Zombicide Invader (19)
zombie mall (23)