Mall: Phase 1 - 7 Stores 95% Complete
03.09.2020
It looks like I'm going to steal "phases" from Christian - at least it'll give me an impetus to move forward!
It's interesting how things to go according to plan, and how quickly that can happen. I built the first store to go in the mall as a baby step to minimize mistakes going forward, following directions, and getting 1 store put completely together. This was actually one of the ground floor expansion stores and not from the mall bundle. The bundle is just 6 of those stores, 2 entrances, and extra roof pieces. My plan was to take my time and put each store together one at a time, maybe throw in one of the entrances or extra roof sections as I got bored or needed a change of pace. As everything in the bundle is available individually, I thought the bundle would just be a box with all of those individual pieces thrown in.
It was not.
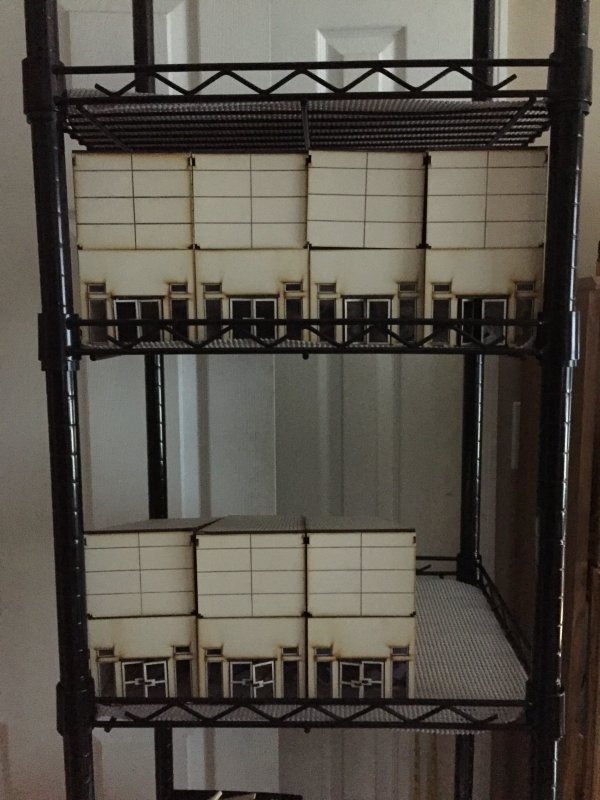
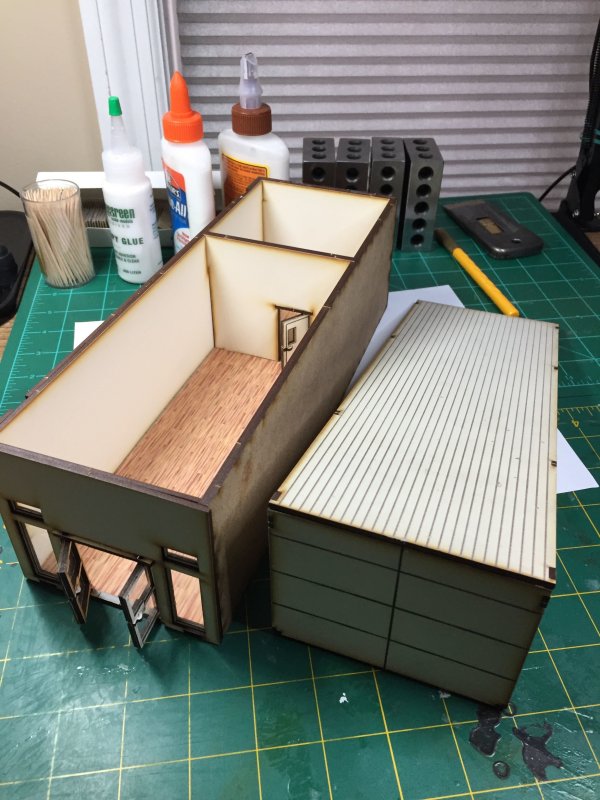
While expecting 6 copies of the store I'd put together, there were 6 stores present but they had been re-cut (re-lasered?) in order to efficiently maximize the use of MDF. Oh, here's a piece of MDF with 6 back walls. Here's another piece with 18 doors.
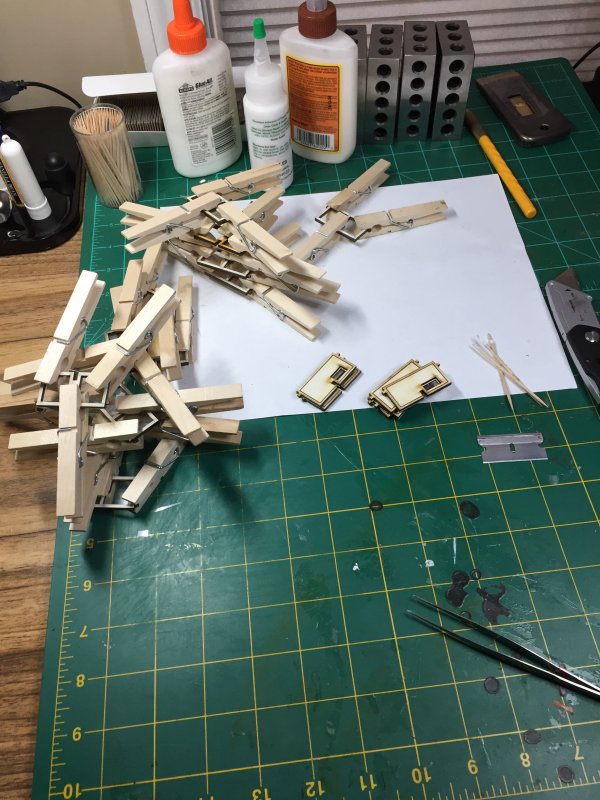
My plan of making 1 store at a time was no longer feasible. Pieces were going to come apart from their indexed locations. Those pieces were going to get misplaced. I know me. This is what happens. Instead of making stores one at a time, I was going to assembly line this mo-fo. Step 1 was taking care of doors. Each door is 2 pieces, with a piece of clear plastic to act as a window sandwiched between. My new toy here was canopy glue. While this has probably been around forever, seeing it on the shelf at Hobby Lobby made me realize that the majority of my acting-windows have a glue-smudged fingerprint or fogging from various types of glue. Would this act any better? A: Mostly. This is a very thin glue which dries mostly clear. A glob will still show as no-clear-enough when dry. No problem with fogging!
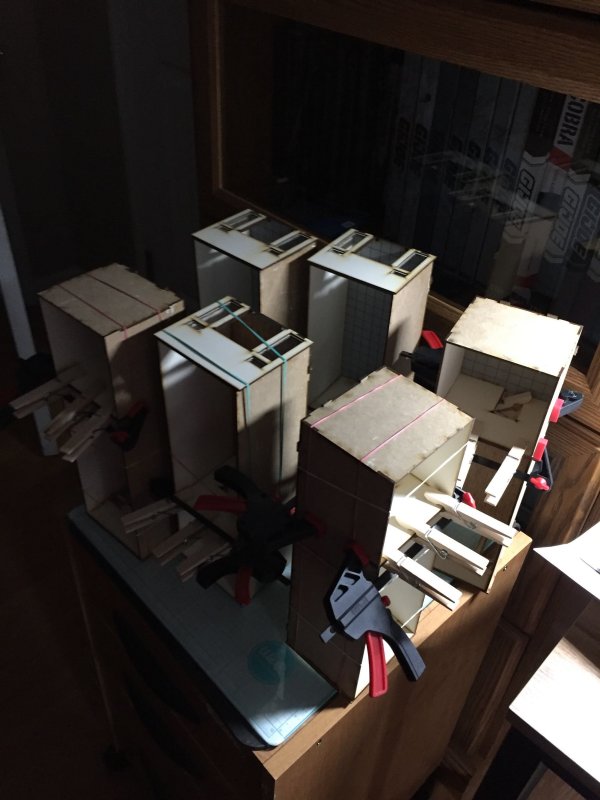
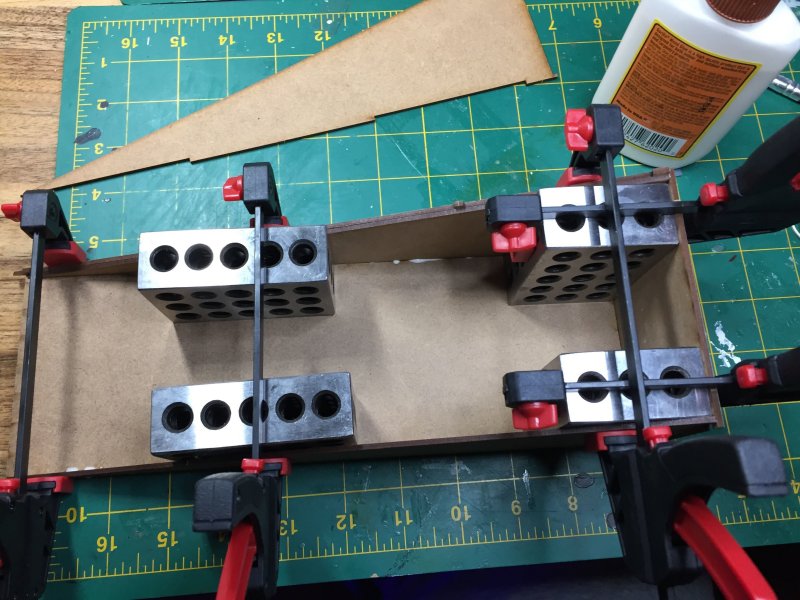
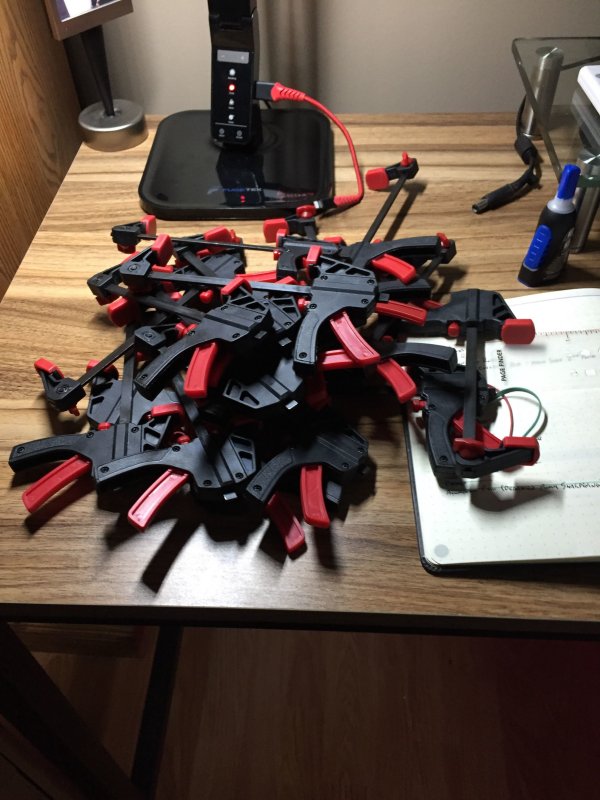
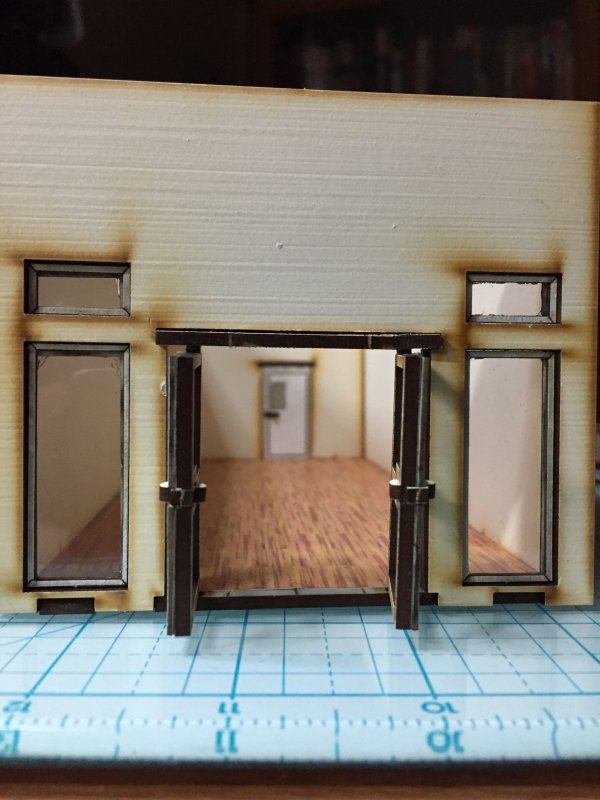
After the doors, I put the stores together - 4 outer walls + 1 inner wall. Front wall and inner wall get doors later. Stores are roughly 10" deep and 4" wide. Time to use now toy #2, which I've had for quite a while. At some point Luke used some 1-2-3 blocks in one of his builds. Straight lines and square angles have long been my bane. Some of these store walls don't have firm fitting notches for other walls, and I really didn't want to try and glue the inner and outer wall sections on at the same time in trying to get everything flush - this has been problematic in the past. The 1-2-3 blocks let me set things up square, plus gave my clamps something to... clamp on to.
Ah, the clamps. Once upon a time while wandering Wal-Mart, I came across cheap 4" trigger clamps and thought "for $2, this might be useful". I quickly got my $2 worth and went back and got more. I still used the prescribed clothes pins and rubber bands for clamping, but these trigger clamps made some things easier. Or at the very least it felt easier. In the last building I made, before mall stores, rubber bands were putting a slow bow into the longer MDF walls. With the trigger clamps, I could localize pressure to where there was support behind and thus limit the bowing. That was my theory, at least.
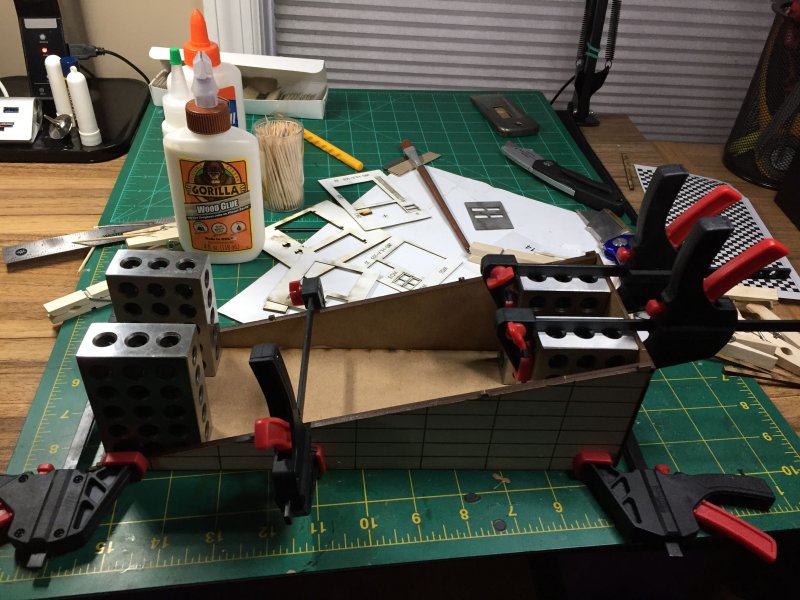
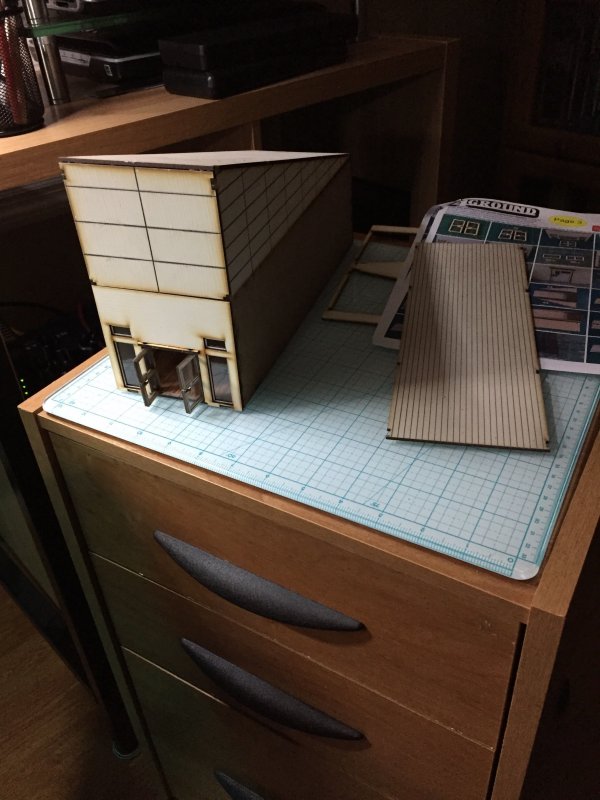
While the inner walls were drying, I made 6 roof sections. This is where the 1-2-3 blocks really came in handy. Without the blocks, there was a lot more give in the triangular side walls and the square back wall. With the way 4Ground has made the mall, 4 pieces of both the roof and stores have an extra external facade on the side. This is were things being square really paid off, and where I would traditionally have made at least 1 "oops". Once store walls and roofs were dry enough, I added in the external facades.

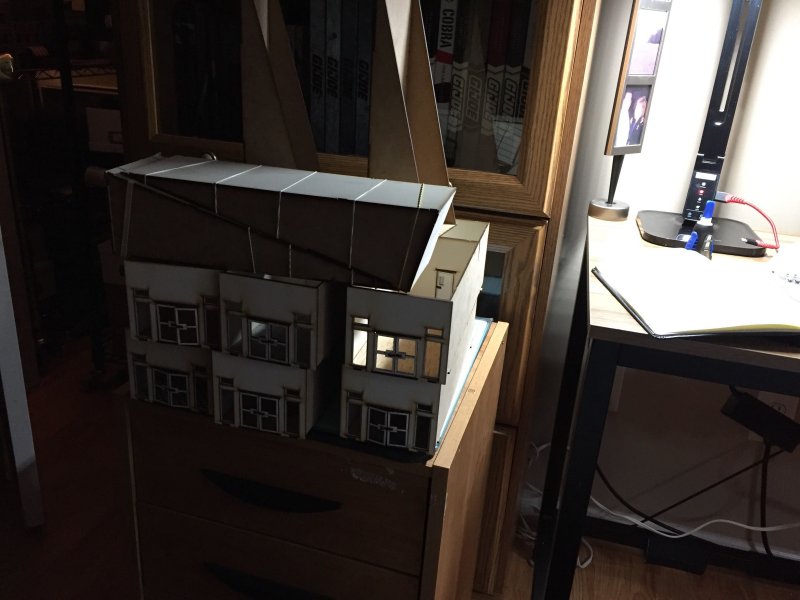
These 7 stores aren't done. They obviously need interior clutter, but I think I'm going to make an empty mall first and then lease out store space :)
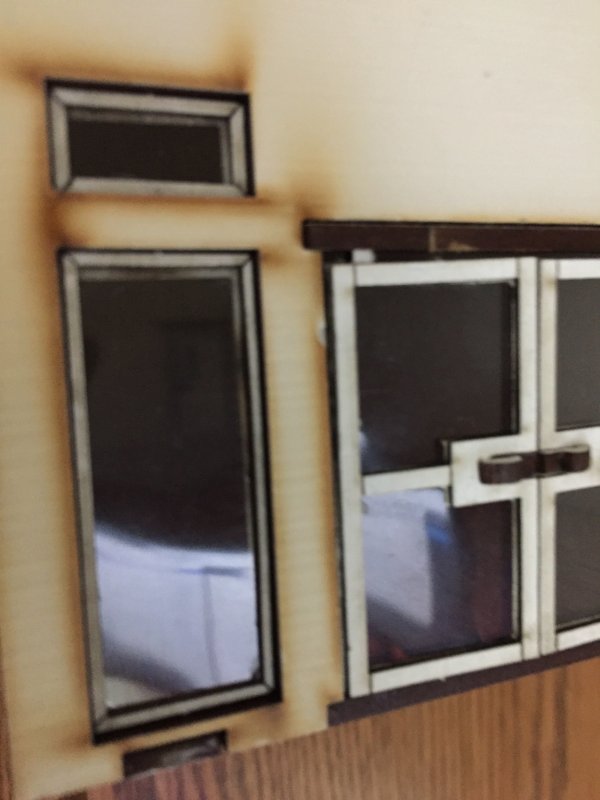
The external facing facades have some detail work left to do. Vents and decorative pieces to cover the lines where things join. I'm waiting a little while to add these, as I'm not completely sure if having an optional 2nd story to the mall will make a difference on how or where any of this is placed. The entrance and roof is a whole other mini-project and counts as at least half of the built on this kit. After spending more of a week then I intended by building only stores, I'm going to take a building break the rest of the week. I've still got plenty of other things to do.
Permalink
4ground-mall scenery
Breaking Ground on the Mall
03.04.2020
This year I've had so little going on I've barely posted once a month. Now I'm at my third post in as many days. A productive spurt!
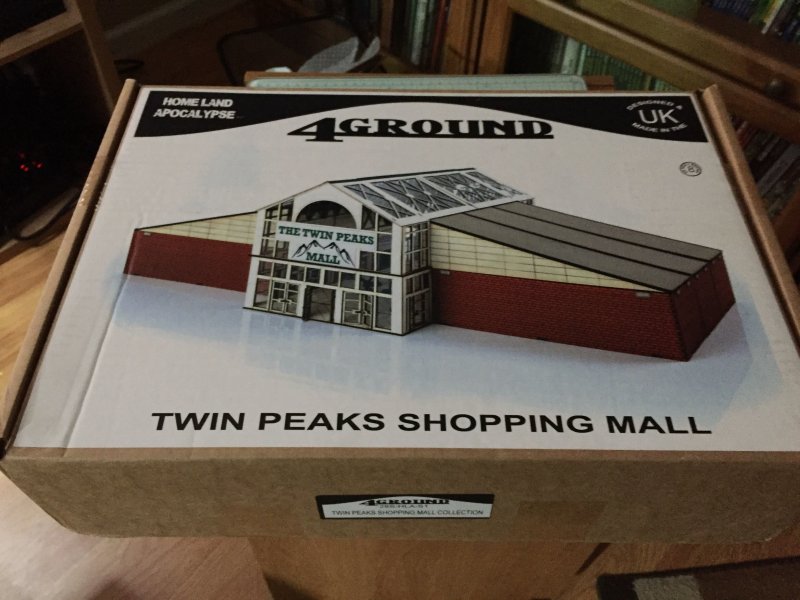
I FINALLY got around to starting on the mall from 4Ground. I picked a generic store and followed the directions, without taking shortcuts or things I thought would be easier for my fat fingers at an earlier time than suggested. Overall, it worked well. There's an alignment problem on the front wall, but that came from not knowing how everything was supposed to fit together and should (hopefully) not happen again.
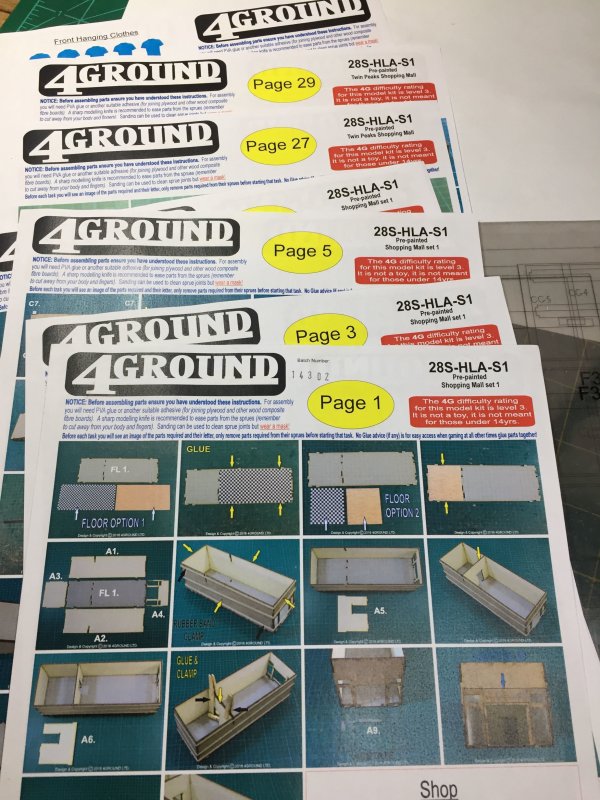
Disregard the order of the pictures, but after finishing the first store faster than I expected (less than a day), I opened up the "starter" bundle. 6 ground floor stores with 2 entrances. There were 29 pages of instructions. That was needlessly daunting, as only the first 8 pages are instructions for the stores, entrances, and roof. The rest is graphics for stores (signs, products for sale) and instructions on how to put it all together (lots and lots of shelves and counters). The way the bundle was cut/burned lends itself to an assembly line style. Instead of 6 ground floor store kits, like the first one I made, the set is optimized so 1 sheet has all 6 front entrance walls, another sheet has all the back walls, etc. Having just made a store, I think the assembly line method will work for me. I just have to remember not to get in a hurry.
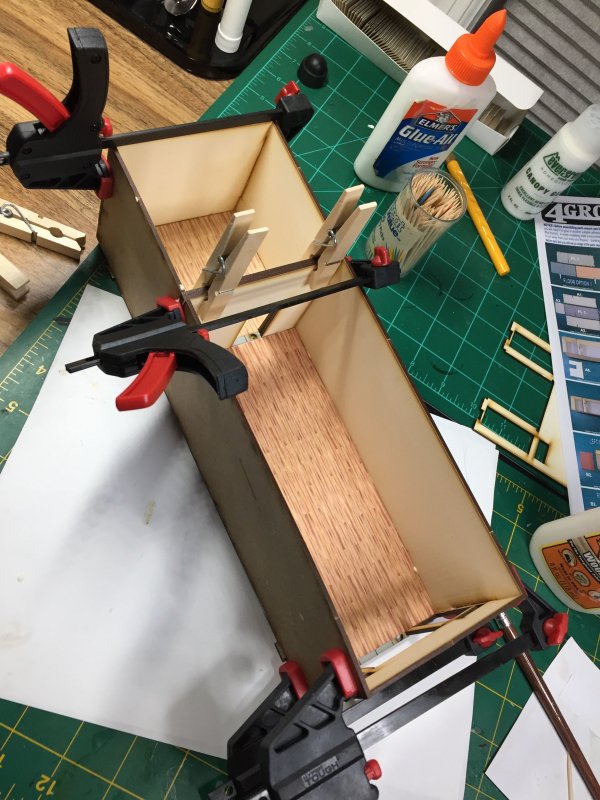
Using the 123-blocks with the clamps helped keep my walls/floors at right angles. That's what those blocks are supposed to do! I also used some canopy glue for the plastic windows. I've had problems with the plastic fogging or showing some glue-induced fingerprints in the past so I thought I would try something new since the bottle jumped out at me at Hobby Lobby. It's a very thin glue, which may be all it really is, but I didn't notice any glue splotches on the windows in the store. I'll keep using it going forward.
Now to see how far I get through building the basic bundle before, honestly, I get bored.
Blog Archive
As always, correct spelling is optional in any blog entry. Keep in mind that any links more than a year old may not be active, especially the ones pointing back to Russellmania (I like to move things around!).
Tags have been added to posts back to 2005. There may be an occasional old blog that gets added to the tag list, but in reality what could be noteworthy from that far back?
Blog Tags
3D Printer (26)
4ground (32)
4ground-mall (40)
action figures/toys (10)
airbrush (7)
Aliens (1)
Amazon (12)
antenocitisworkshop (11)
Atlas O Gauge (2)
Batman Miniature Game (2)
Battletech (1)
belt sander (12)
Blood Bowl (4)
boardgames (77)
books/comics (19)
computers hate me (5)
conveyances (15)
diet (53)
dreams (7)
fallout (1)
Foundry (3)
Gale Force Nine (1)
game dev (22)
gaming miniatures (227)
gaslands (10)
gastric sleeve (34)
Green Stuff World (2)
Hasslefree (9)
Hero Forge (1)
hobbies (101)
Jailbirds Minis (1)
kevin smith (1)
Knight Models (2)
malifaux (2)
Marvel Crisis Protocol (2)
mckays (1)
models (9)
mom (32)
moon light (5)
movies/tv/dvd (60)
ninja division (1)
Pathfinder Deepcuts (1)
pilonidal cyst (5)
plastcraft (2)
programming/interweb (41)
rambling (60)
random (365)
random maintenance (3)
Reaper Bones (3)
reaper chronoscape (32)
renovation/remodelling (24)
road trip (26)
salesforce (1)
sarissa precission (2)
scenery (16)
studio miniatures (3)
ttcombat (12)
video games (51)
walking dead (36)
wargame foundry (3)
work (6)
wrestling (45)
zombicide (1)
Zombicide Invader (19)
zombie mall (23)