I'm Alive Update: Nov 2025
11.12.2025
2 months ago I posted about finishing painting the Heroquest core set. You think in 2 months I'd have something else to post about. Well, it seems I vastly underestimated the scope of the next thing I would work on.
I mentioned Jer getting a Bambu printer and alluding to a printing project for dungeon tiles. Now I have a Bambu printer and will allude to a printing project for dungeon tiles.
I succumbed to peer pressure from Jer and Keith and (re)joined their cult of FDM printing as the Bambu A1 prints really good quality and, most importantly, is easy to setup and print each job. One of the things I've had to get past since my original foray into FDM printing is that it's ok to waste filament. Part of the aforementioned ease of the Bambu is self-cleaning and calibration available before each print job. Add in how easy it is to switch hotends, such as the fine resolution 0.2mm, and printing is easy! Dialing in those fine print details is a little more work, mainly because of how easy it is to set up those print jobs and each little tweak might make a difference I pretend I can see.
The big issue I ran into after paying attention to the first couple of batches of prints was that the corners of my prints were warping upward. Searches told me this could be either too hot (bed) temps, too cold temps, or other stuff I chose to ignore. My fix went the direction of a colder bed, lowering the hotend temp after the first few layers, and adding brims. This seemed to work fine! Until the outdoor/garage temp dipped below 60, them some random prints would either start spaghetti printing at some later point, or not adhere to the plate. This seemed to be an obvious "not hot enough" problem, so I returned to hotter temps and kept the brim. 3 days of this and things are printing ok when the garage temp drops to 47 °
Pics of random printed pieces isn't much too look at. Over the last 2 months I've printed some Sci Fi shuttle parts - about 4 times between scaling issues and refining settings. The dungeon is from Heroboard, using the larger 123% scale (larger than they recommend) and lots and lots of magnets. I've just started printing hallway floor tiles, which at the resolution and rate will take minimum of a week if the printer ran constantly. After that are room tiles (11 days minimum) and walls/doors (don't know). While my 2025 hobby goal was to paint the Heroquest minis, I secretly wanted to have the dungeon printed and together too. That latter ain't going to happen.
I've got another batch of Cyberpunk minis primed. Soon I'll have some pics of those trickling onto the site.
Permalink
3D Printer HeroQuest rambling
HeroQuest - Core Set Good Guys
09.16.2025
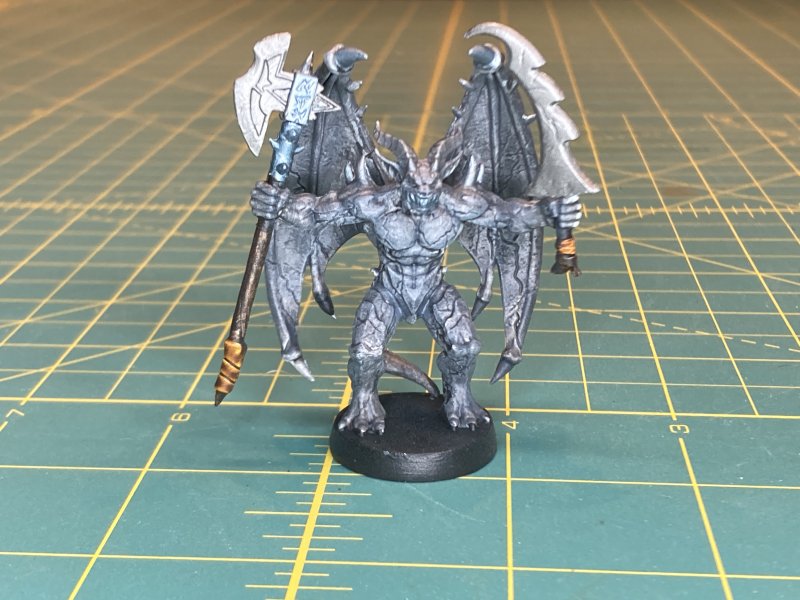
The wrap up to this year's painting goal of finishing the Hero Quest core set can now be checked off. The 4 good guys and evil dungeon master stand-in are now painted. As an extra challenge, I tried to stick close to the card are for each one. I think all of these qualify for a decent tabletop quality paint job. Zoom in a little and you can tell where there's still work that needs to be done better.
With that, the overall Hero Quest project isn't complete. Magnetically linked 3D printed dungeon tiles are still on the to-do list. Will they get to-done by the end of the year? Dunno. I've been playing with some new 3D printing - BambuLab A1 FDM printer, even though I've got 2 resin printers (still in their boxes) that have been sitting around for up to a couple of years. Originally the dungeon tiles were intended to pawn off on Jer and his fresh Bambu printer. Should I join in on the printing there?


Permalink
boardgames gaming miniatures HeroQuest
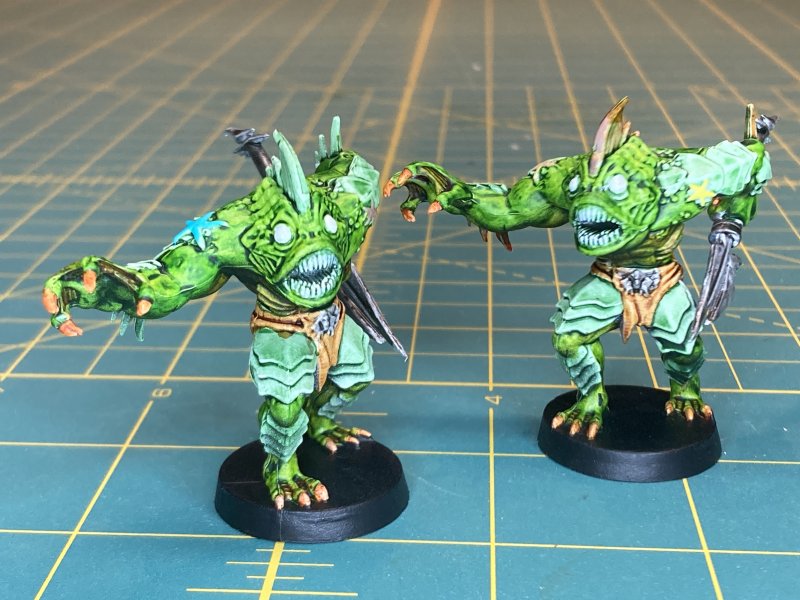
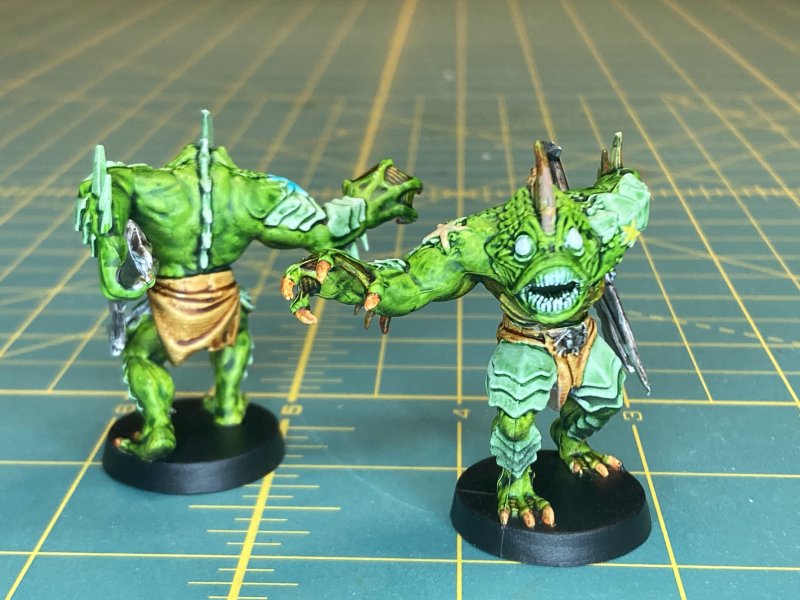
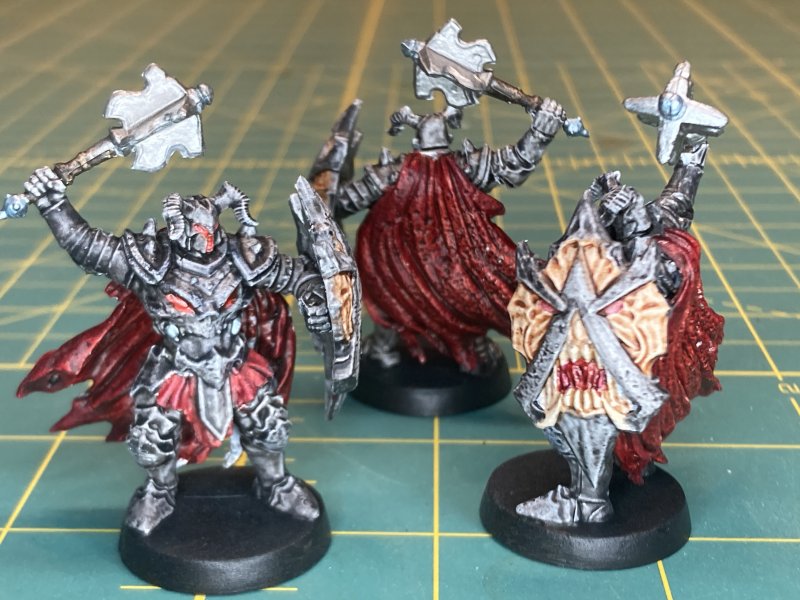
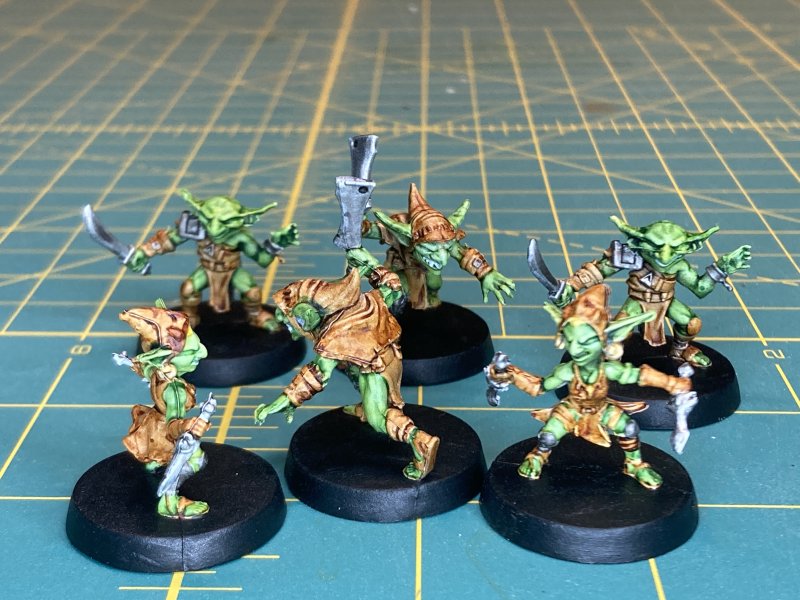
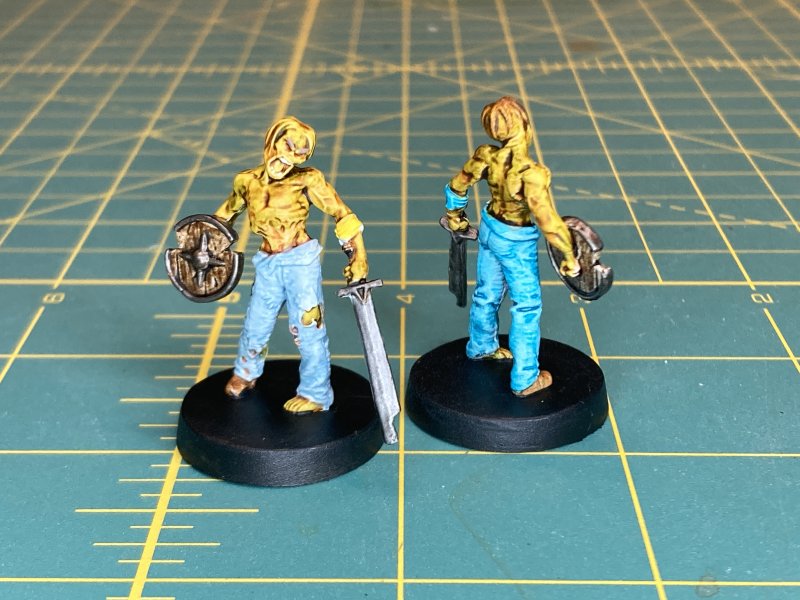
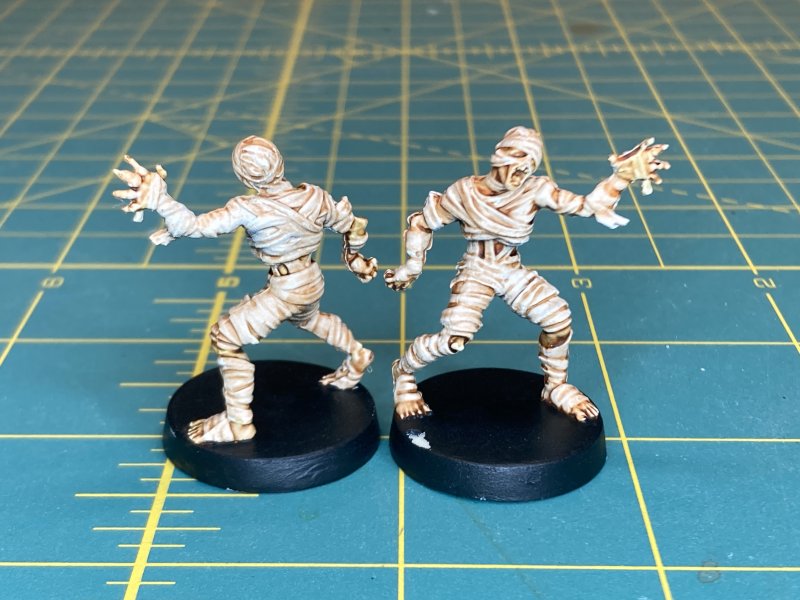
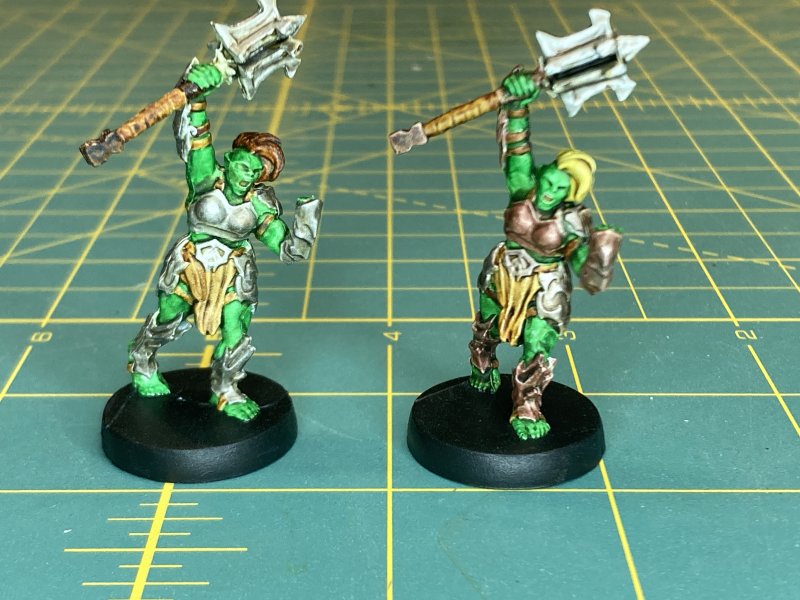
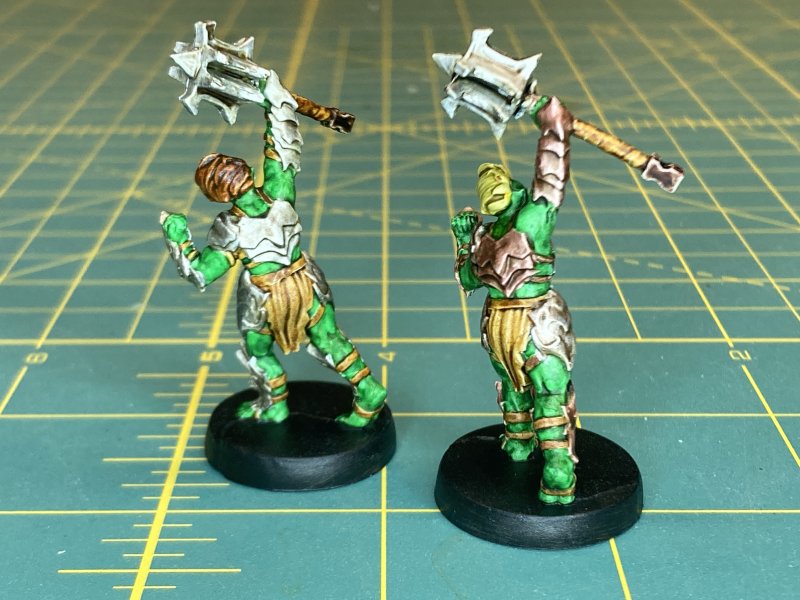
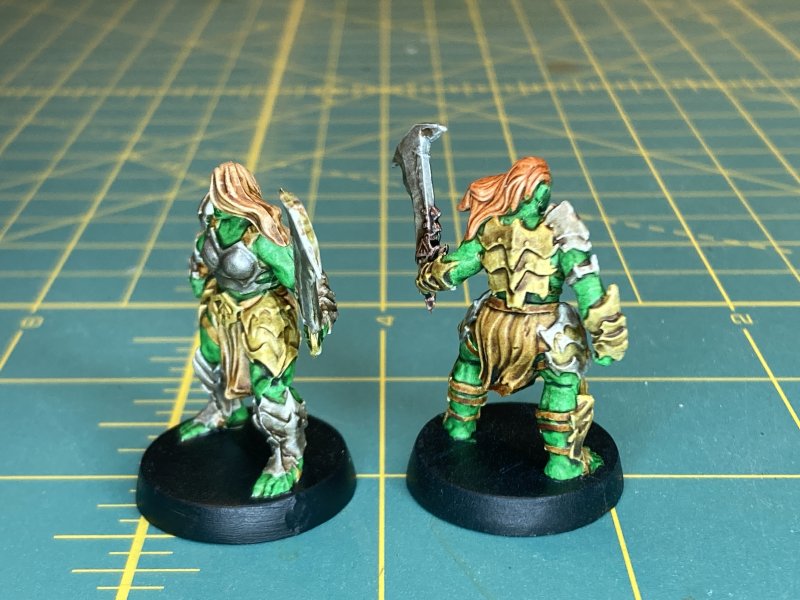
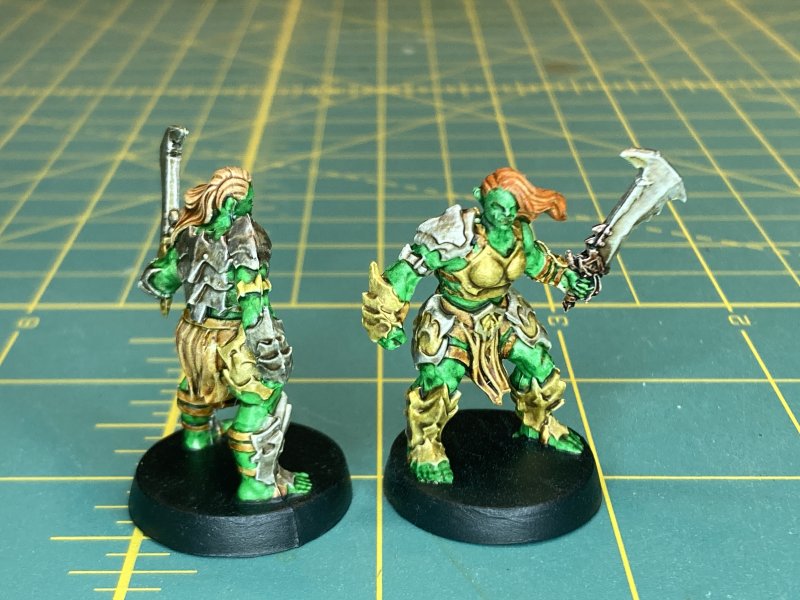
HeroQuest - Core Set Bad Guys
08.24.2025
My project for this year is to paint the HeroQuest core set. Along with that is working with Jerry on 3D printing the board, but that's a bullet for another time. The interesting part of this project is that I have no idea how HeroQuest plays. I just like the idea of a boardgame from the 80s (barely), that I know I would have loved back then, being re-released 30 years later. I like the idea of getting together with Jer and Keith for a good old fashioned game night and having upgraded and pimped out pieces. Maybe it'll happen?
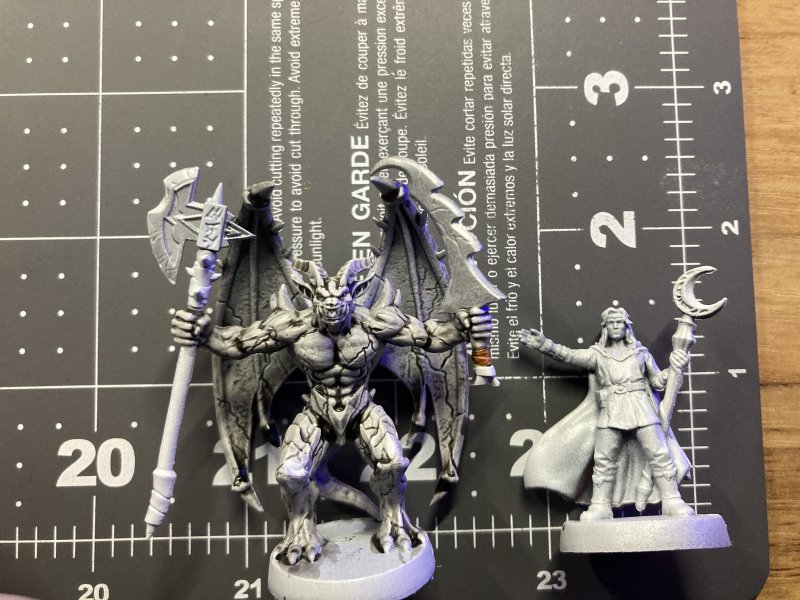
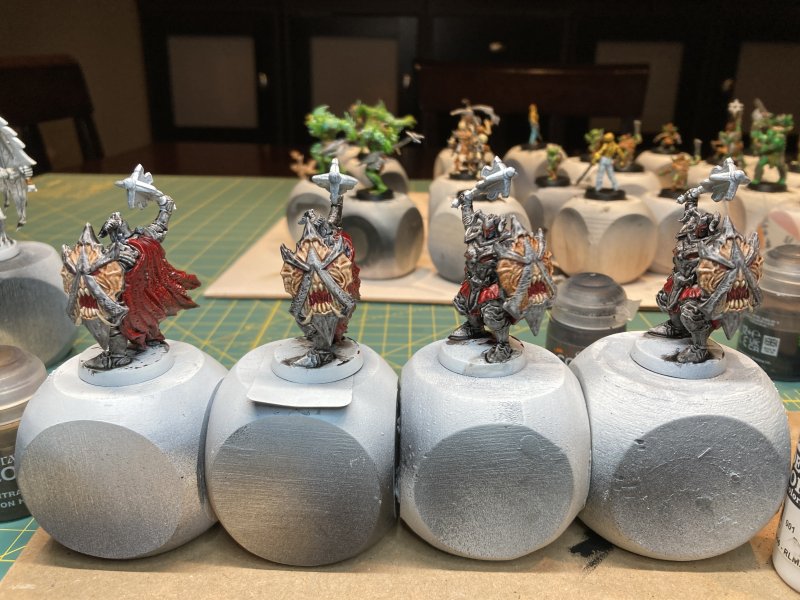
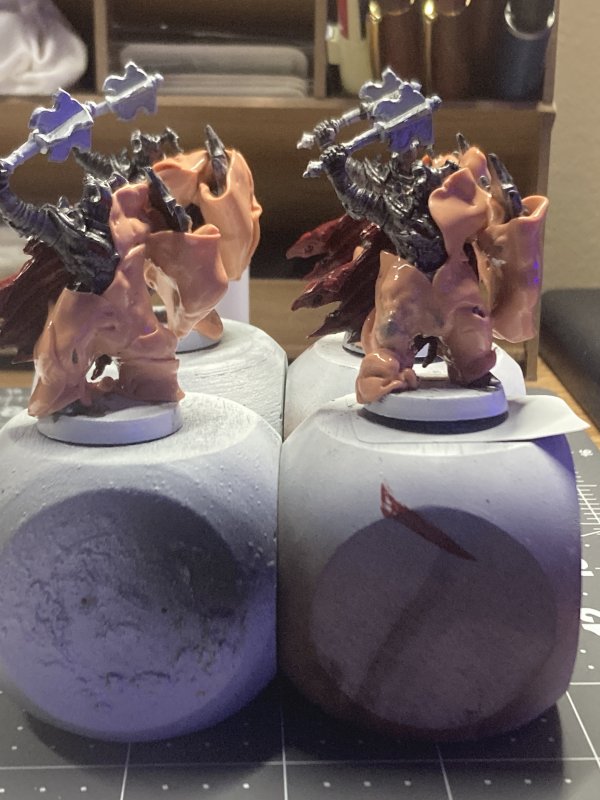
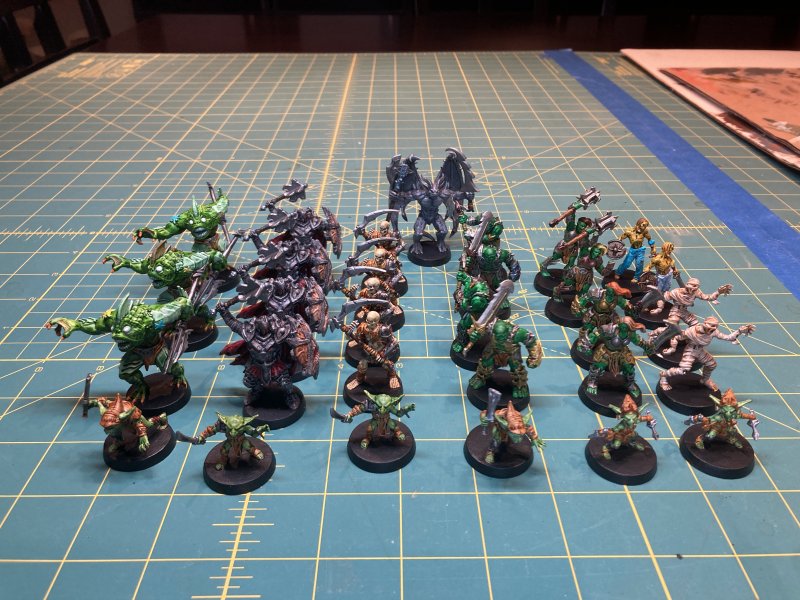
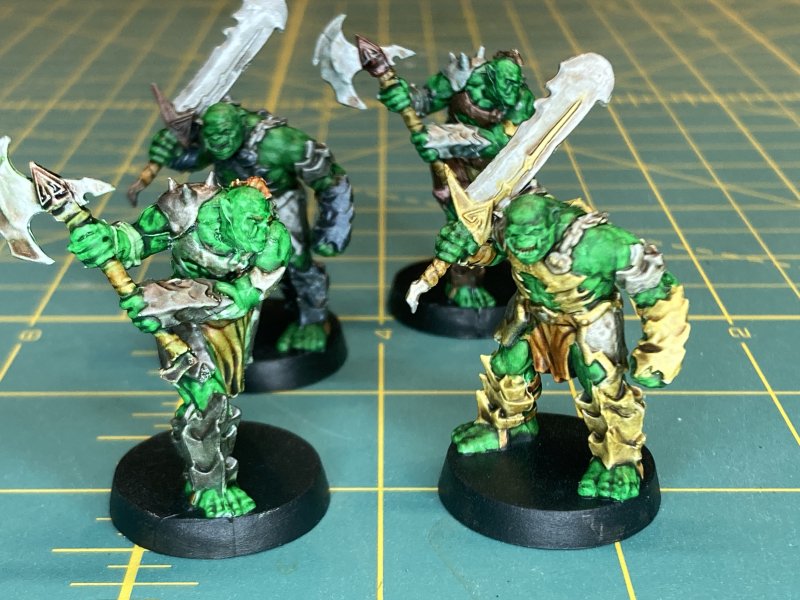
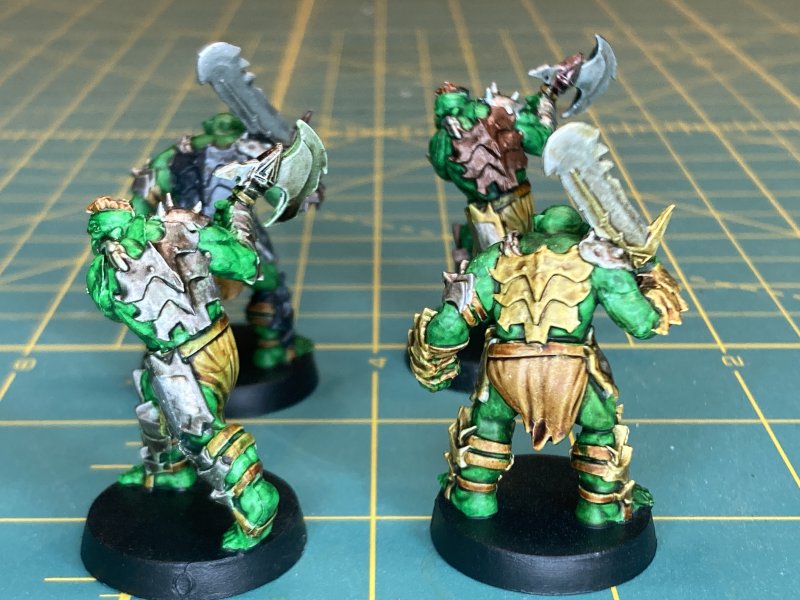
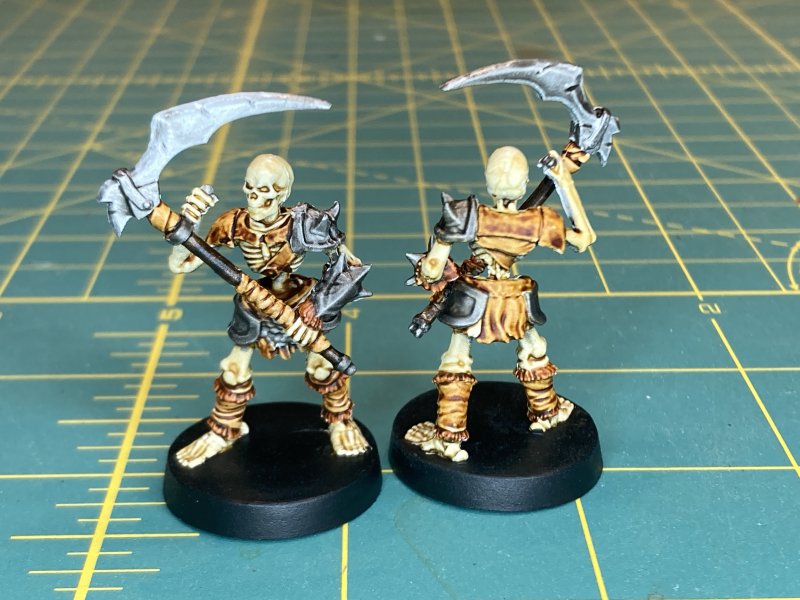
For the last couple of months I've been working on the bad guys from the core set, using the character cards as the template for how to paint the minis. Sometimes I've veered a little far from the card art - see the Orcs, mainly - but I also have to stick to paint approaches that work for me.
After these, there are 5 more mini figures to paint. 4 heroes and what I think is the main bad guy, which I can't find an image/painting reference for. I guess I'll need to Google that later. The core set also has dungeon furniture and whatnot, which is included in my "paint the core set" memo. 3/4 through the year - I should be able to finish this.

Permalink
boardgames gaming miniatures HeroQuest
Not Yet A Moonbus
08.15.2025
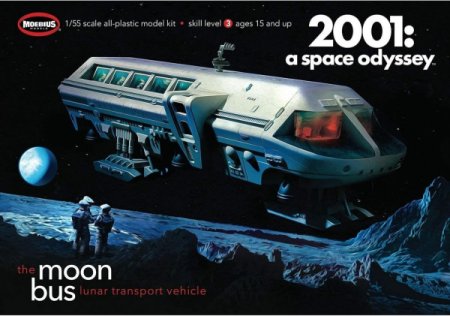
For a while now, I've been working on a Moonbus model from 2001: A Space Odyssey. It's somewhere between 1/50 and 1/55 scale
depending on where you read the details, and that's a close enough match to 28/32mm scale games to work. As my sci-fi base
has had a bit of a retro theme, the 2001 future as seen from a 1968 movie kind of fits in. It was back during my trip to Georgia
and the Hobby Town USA of Kennessaw back in either 2018 or 2023. It is indeed sad that I don't know how long the model has been
sitting on a shelf. I think 2018, because along the way an Amazon sale came along where I purchased 2 more.
The reason I purchased 2 more - after trying to glue together a couple of models, it's somehow much more difficult to get pieces
to line up now vs when I was 12! I'm accepting that the first time I glue together any model I'm going to screw it up. Thus,
I decided Moonbus #1 would be the practice, make mistakes Moonbus. And I was right! I was focused on sub-assemblies and how to optimally
paint some parts before gluing things in place, and then another round of painting with masking, etc. I was focused so much so that
a key interior part(s) were not glued in before the out part that locks them into place was glued in. But this was practice, and
that's ok. I continued on and by the end noticed some gaps that were going to need A LOT of gap filler to correct.
Lessons learned, and on to Moonbus #2 where I remembered that I needed to insert inner walls first, and not leave a big
gap on the other part. The gap was on the main outer walls, and there's no good "clamping" point because of the angles, but
I did my best. To counter this, when I glued on the front cockpit I managed to not set it flush/straight. Those side
outer walls I was so focused on not having a gap - now where the cockpit to join flush I instead and a huge, measurable gap on one
side and an overlap on the other. Between sanding options and actually going forward with using some styrene strips to fill the counter
gap, I gave up and admitted it was beyond my current skills. Well, on to Moonbus #3 that I happened to have.
For #3, I repeated my corrections and tried to do better. There were still some wall gaps, but I can backfill those with putty filler.
Somehow that damn canopy will not go on flush - curves and edges just aren't cooperating. Things are together, but
it still feels hacked together. Maybe I need Moonbus 4. And 5?
As it is, I'm at the "I need to practice painting" stage, and I have plenty to practice on. The truth is, after fighting
this model for over a month, I need to take a break. Now I have the hobby table cleaned off and ready for a weekend of a return
to painting HeroQuest minis. Hopefully I won't get overly frustrated with that...
Mantic Firefight Tunnellers
06.15.2025
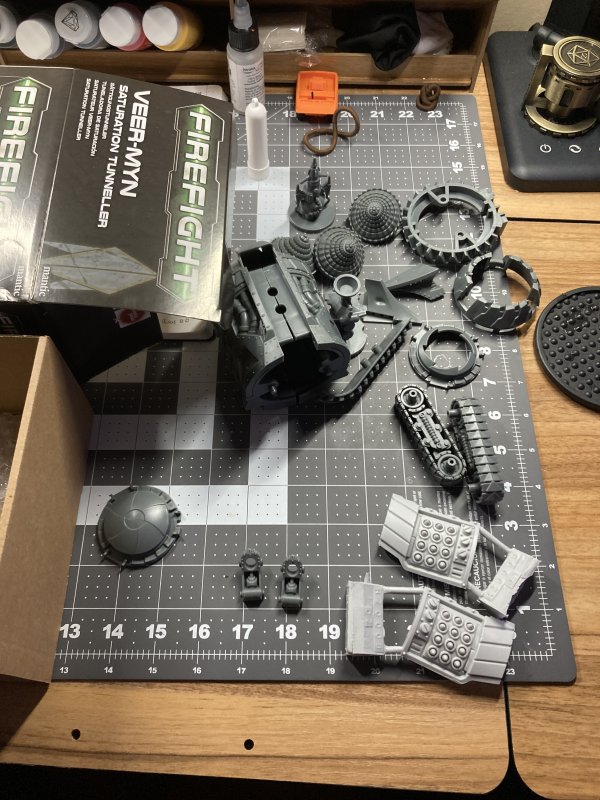
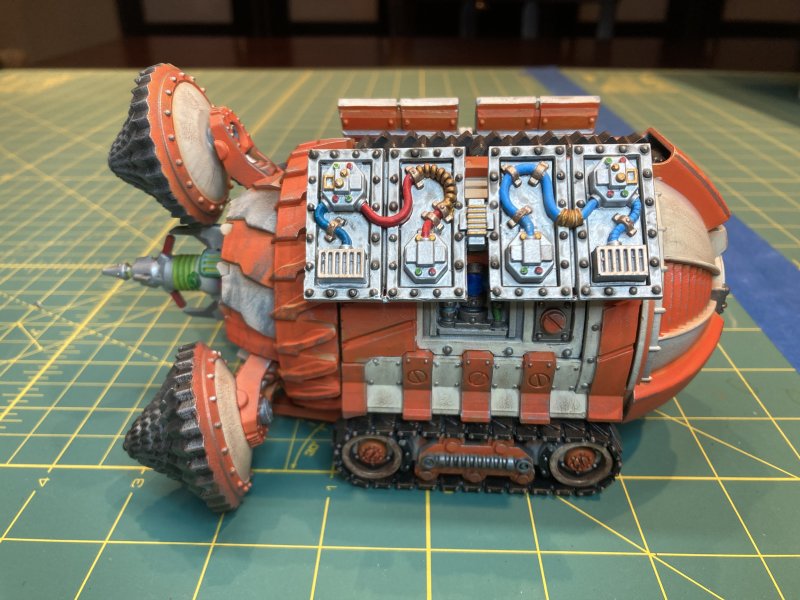
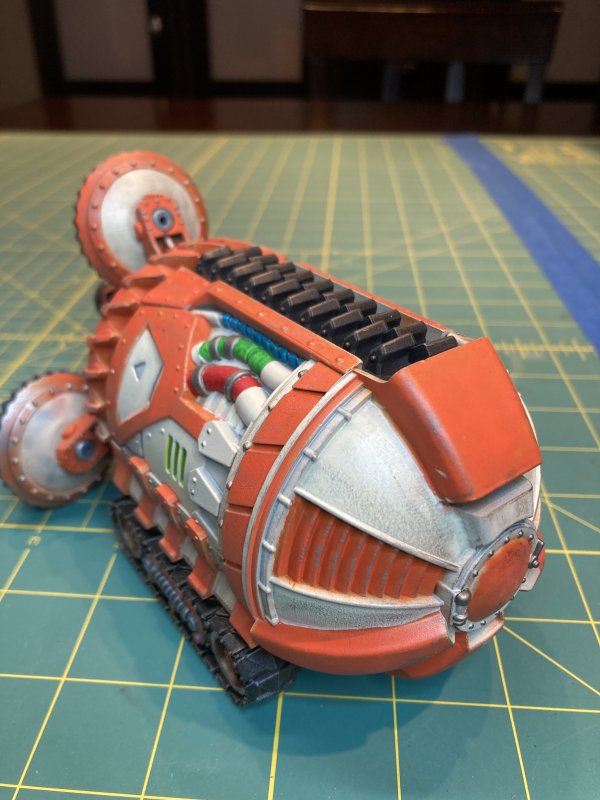
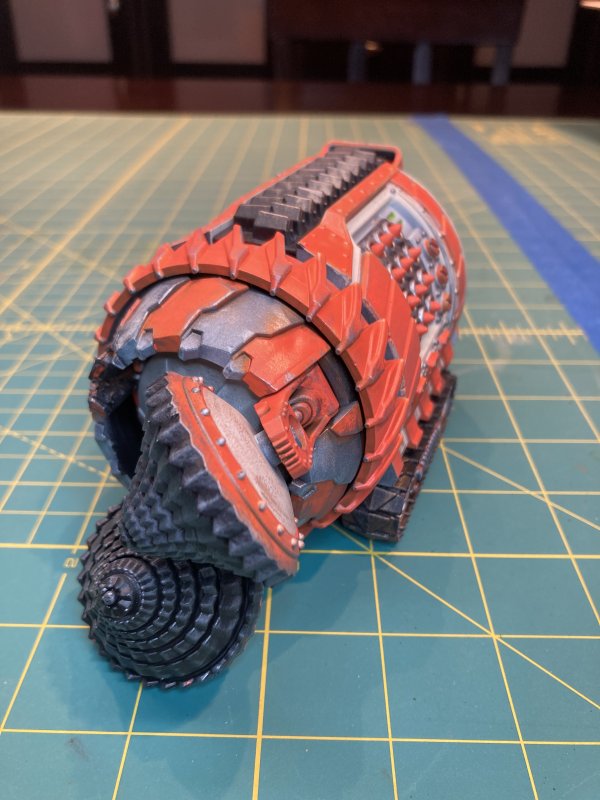
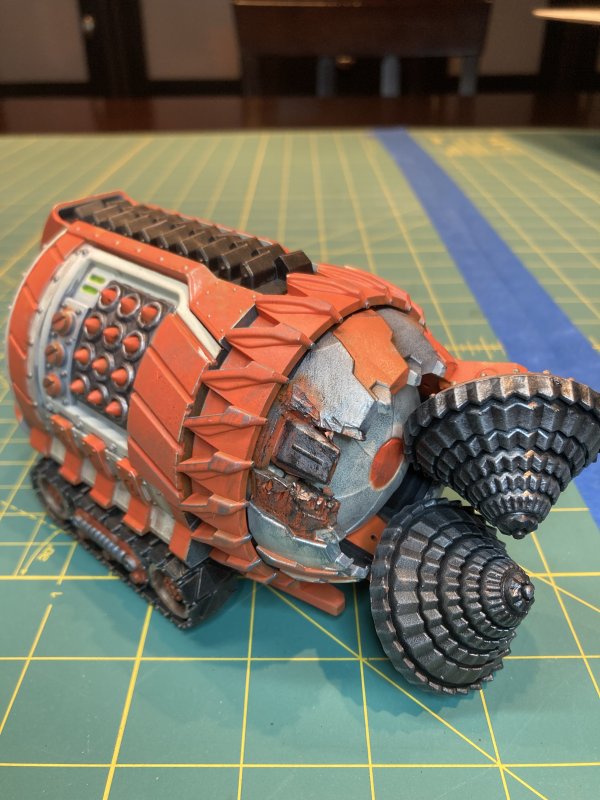
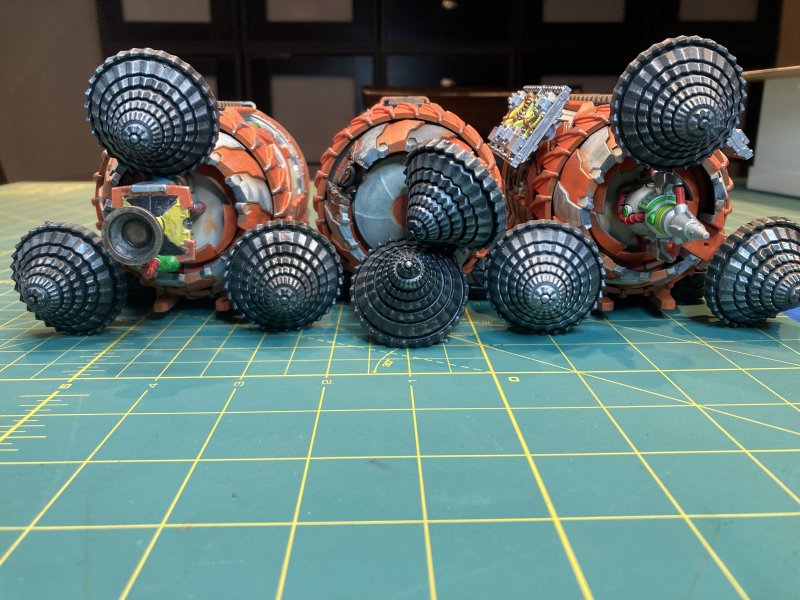
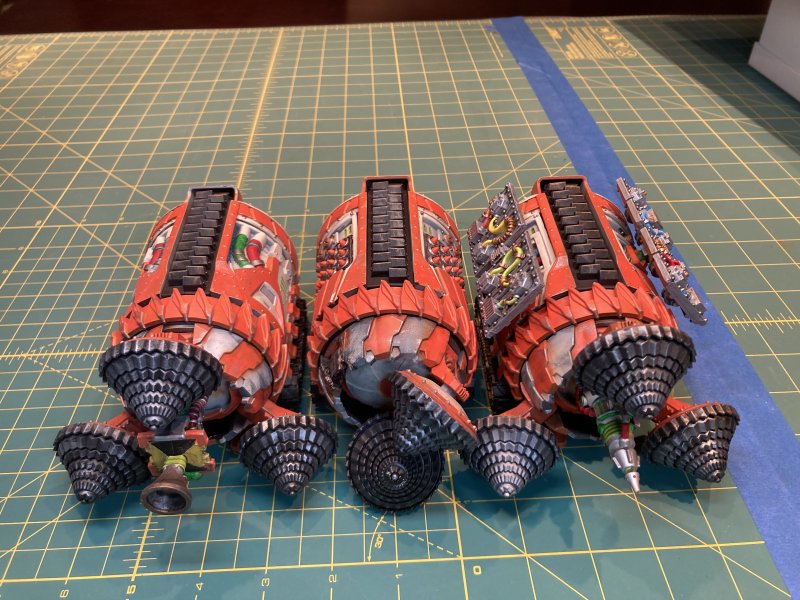
Oct 27, 2024. Miniature Market runs a "Bigger Than Black Friday" sale. One of the many things that caught my eye was a vehicle from Firefight 2E - a Tunneller. For $32, 2 caught my eye, as they have multiple versions with different add-ons I don't understand as I've never played the game, but a Tunneller looks just right for my ever evolving retro sci-fi base. Thus, 2 were ordered. They arrived, and promptly went on a shelf somewhere.
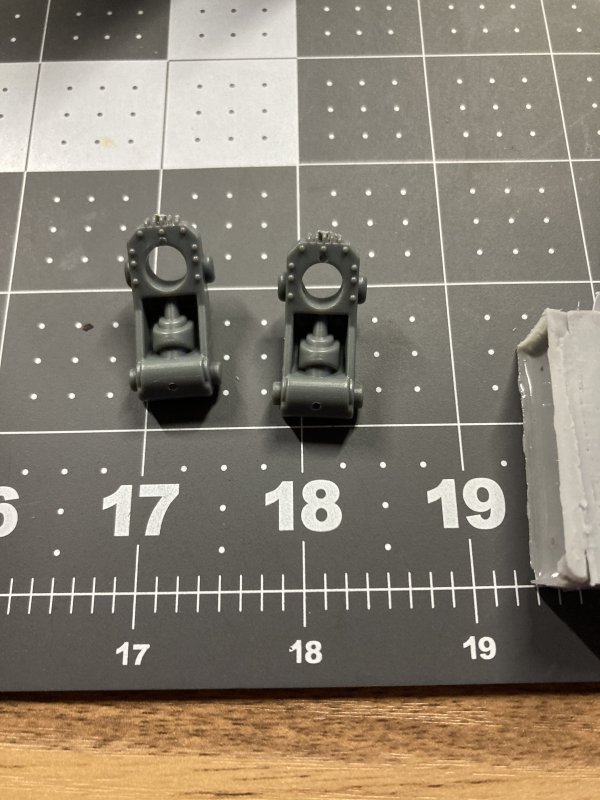
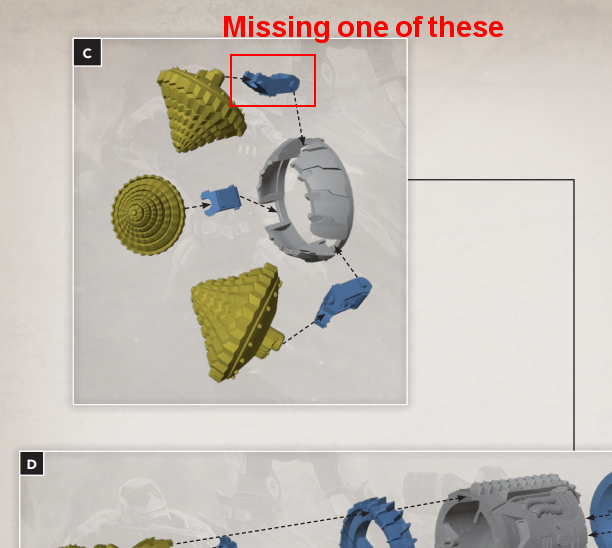
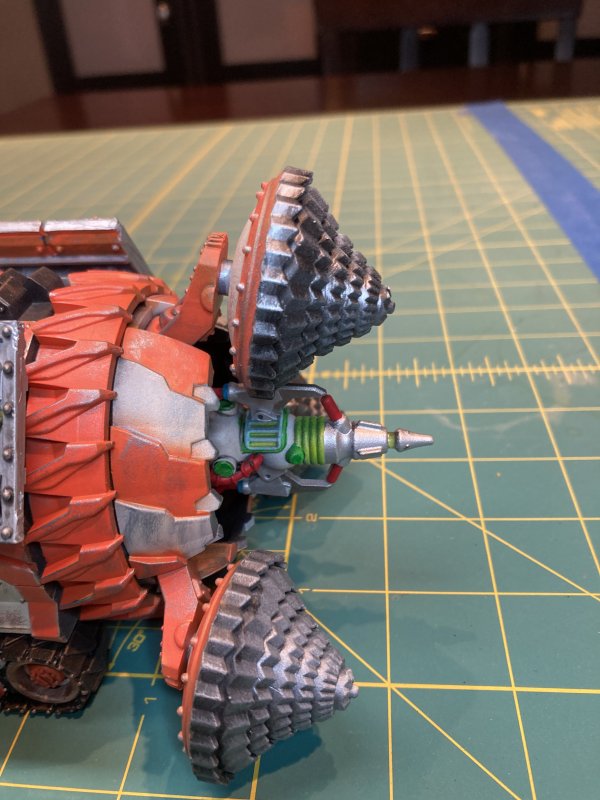
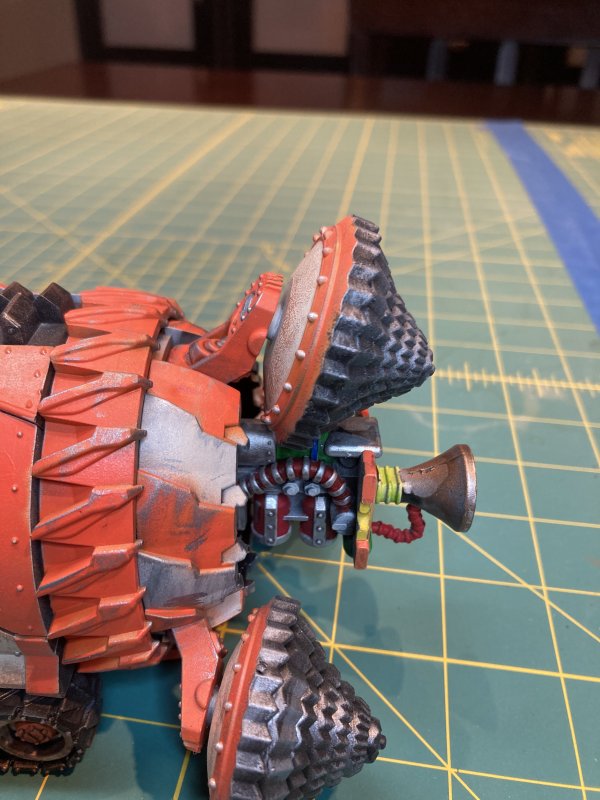
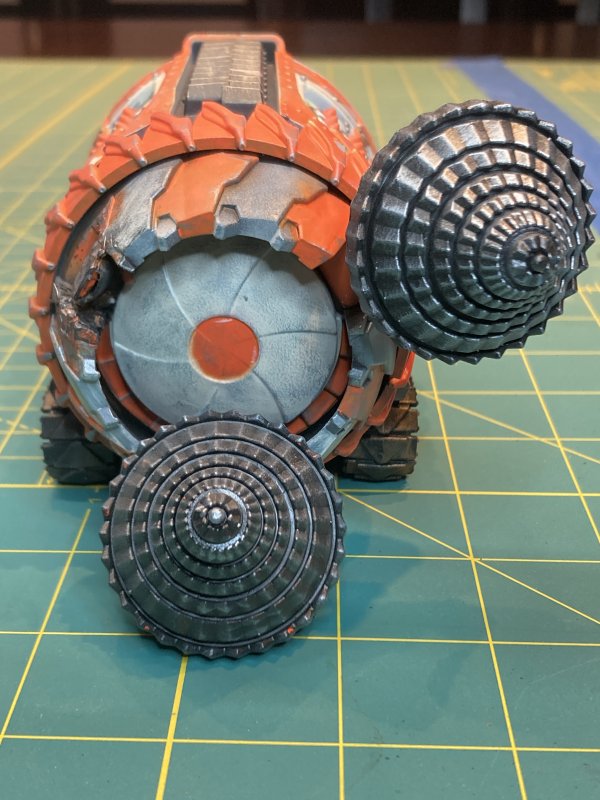
Jan 27, 2025. I get around to finally opening the box(es) of the above. While dry-fitting parts, I find one of the Tunnellers is missing 1 part. The hinged part that holds one of the swirly spinny diggy things.
Firefight is published by Mantic Games. For better or worse, I've got plenty of experience in contacting Mantic with missing/damaged parts - This will be time #3 or #4, which shouldn't sound like a lot, but for all the minis, games, toys, etc I've gotten over the decades, there's very few times I've had to contact anyone once with an issue. Luckily, I know the "I have a problem" routine and could cut out some back and forth steps when contacting Mantic. I took pics of all the parts I received. I took a pic of the directions and highlighted the part missing. (Most importantly) I included a copy of my original order from MM, showing that I legally purchased said kit. I got a reply that the missing part was on it's way.
Mar 7, 2025. Missing part arrives, from the UK. I was expecting 4-6 weeks, so it's not as long as it looks on paper. Plus, it's a piece of plastic. The world's not going to end if I have to wait a little while for a piece of plastic. As I secretly expected, the 1 part I was missing came with most of/the generic base of another Tunneller. It's easier for them to grab a bag that contains the part I need than to rip open a bag and pull out that 1 part - and then what would they do with the left over parts?
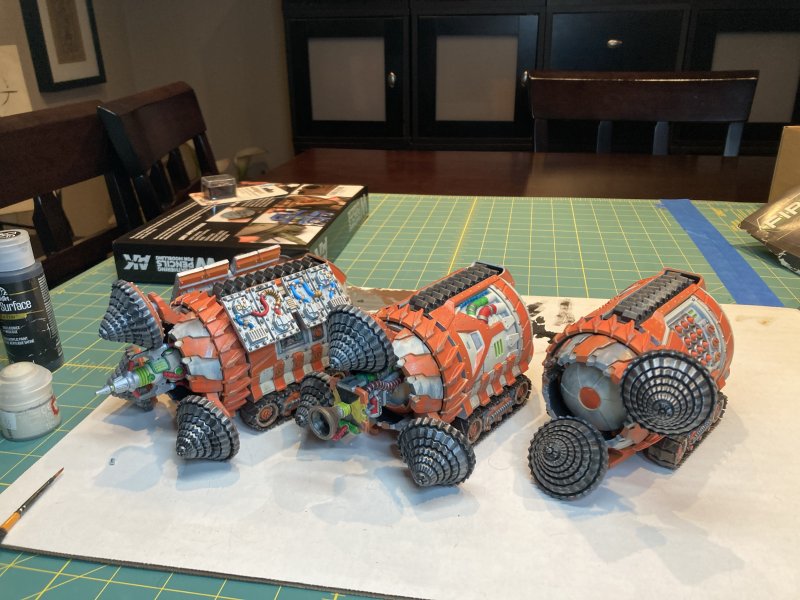
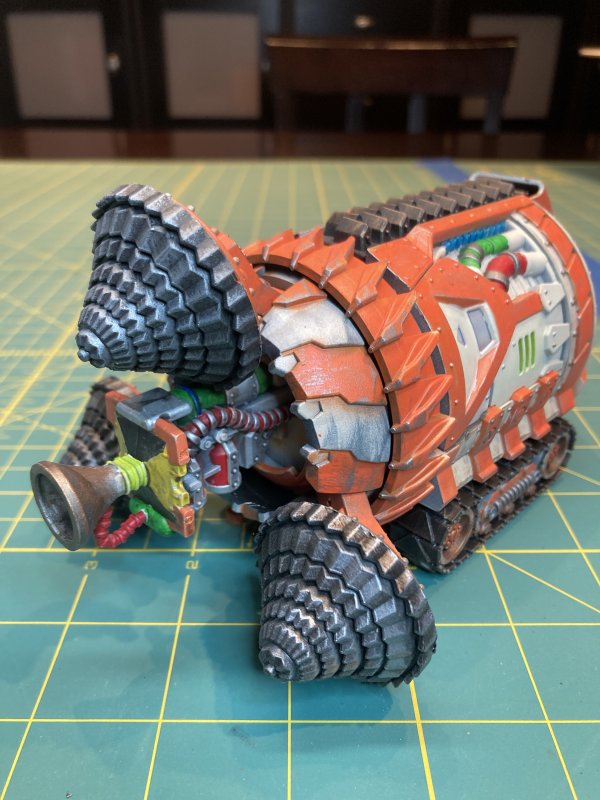
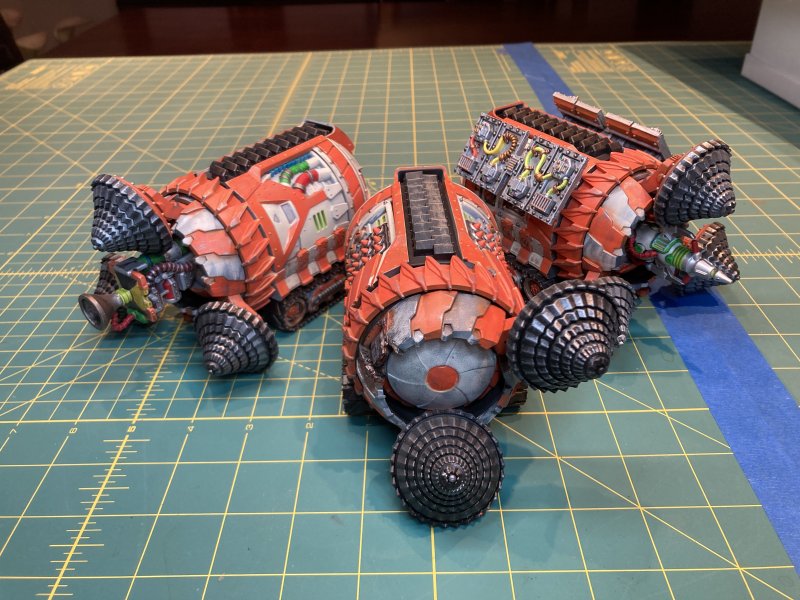
What would I do with the left over parts? Well I would make a battle damaged tunneller is exactly what I would do! And that's what I did.
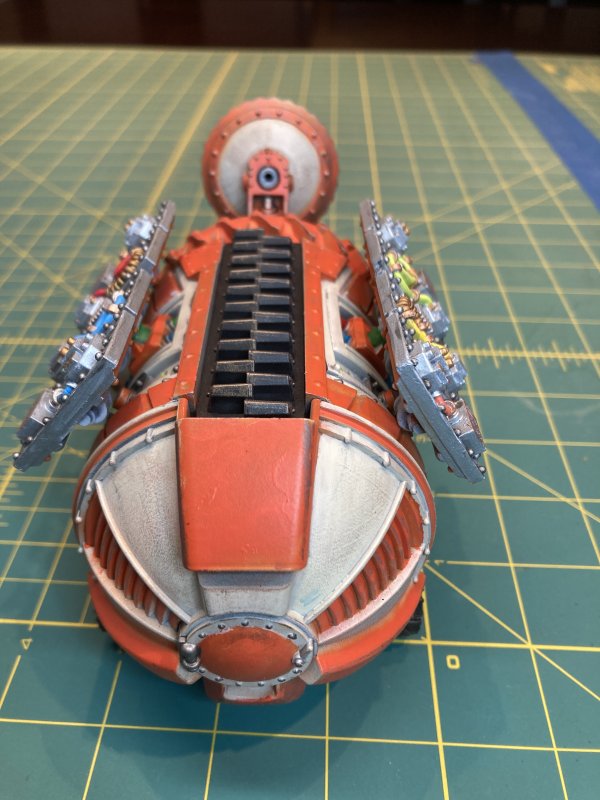
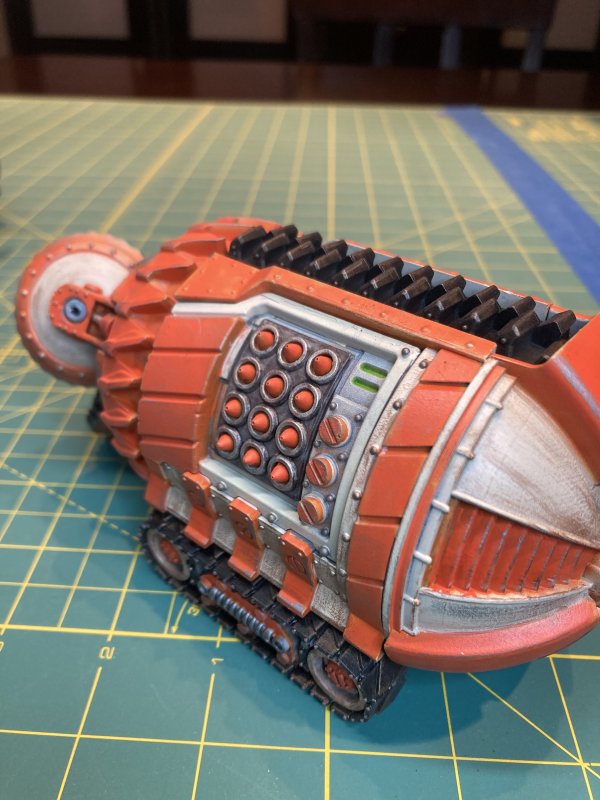
Making tunnellers was going to be (1) me better learning how to build using sub-assemblies, and (2) how to better use my airbrush. The orange that I use for retro sci-fi needs multiple coats to cover + not show brush strokes. After the last airbrush class built my confidence a little more, and finally not being afraid of breaking the airbrush, I wanted to try spraying the orange this time. And that's what I did.
The thing I quickly learned after spraying orange is that I need to find the right eye-distance and angle(s) as I was guessing on where my spray would stop. I was wrong most of the time. With that, I ended up with a lot of orange-brush touch-up. I don't know if it was just as much time if I've just brushed it on to begin with. Maybe. Maybe not.
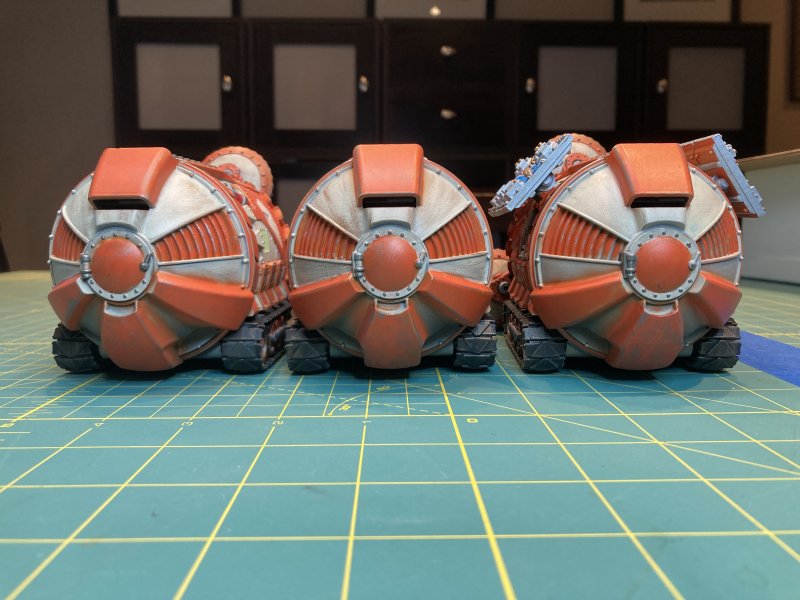
The whole time I was working on these things, I was oscillating on how much to weather things. Most of my retro sci-fi is pretty clean and devoid of real weathering. Then again, a "tunneller" should be going through some stuff and not be squeaky clean. After things were painted white and orange, and start adding a little silver-metallic drybrush, which became a little heavier and more all-over. I also used some AK Interactive paint markers. These worked really well for touching up off-white and orange, plus getting some good metallic highlights in. Speaking of metallics, I brushed on some Vallejo Air metallics - Rust works really well for dirty metal, too.
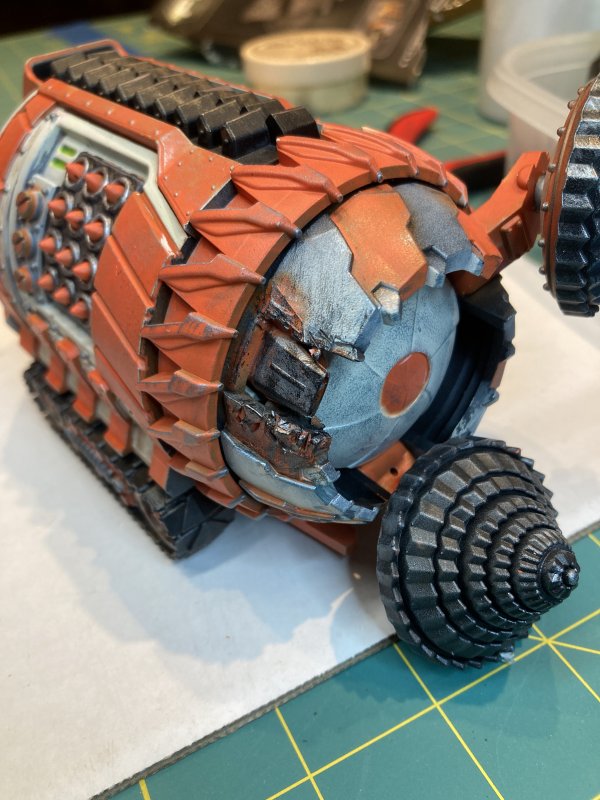
When it came time to work on the "battle damaged" tunneller, I had to think of how to cover up the missing digger hinge. I decided something needed to fill the hole - more like things were coming apart than making a hole. What ended up fitting well was the nose of a very small snap together Star Trek Defiant that didn't snap together very well. It worked out well for me though, as the end result as battle damage detritus turned out mostly how I wanted.
Now retro sci-fi base has 3-ish tunnellers to round out the scene. While next I plan on making a little more progress painting Heroscape minis, I also want to see if the 2001 1/55 Moon Bus model I picked up on a trip to Kennesaw is a close enough scale to fit into retro sci-fi base.

Blog Archive
As always, correct spelling is optional in any blog entry. Keep in mind that any links more than a year old may not be active, especially the ones pointing back to Russellmania (I like to move things around!).
Tags have been added to posts back to 2005. There may be an occasional old blog that gets added to the tag list, but in reality what could be noteworthy from that far back?
Blog Tags
3D Printer (28)
4ground (32)
4ground-mall (40)
5PFH (1)
action figures/toys (10)
airbrush (7)
Aliens (1)
Amazon (12)
antenocitisworkshop (11)
Atlas O Gauge (2)
Batman Miniature Game (2)
Battletech (1)
belt sander (12)
Blood Bowl (4)
boardgames (79)
books/comics (19)
computers hate me (5)
conveyances (15)
Cyberpunk Red Zone (3)
diet (53)
dreams (7)
fallout (1)
feng shui (1)
Firefight (1)
Foundry (3)
Gale Force Nine (1)
game dev (23)
gaming miniatures (239)
gaslands (10)
gastric sleeve (34)
Green Stuff World (2)
Hasslefree (9)
Hero Forge (1)
HeroQuest (3)
hobbies (102)
Jailbirds Minis (2)
kevin smith (1)
Knight Models (2)
malifaux (3)
Marvel Crisis Protocol (2)
mckays (1)
models (12)
mom (32)
moon light (5)
Moonbus (1)
movies/tv/dvd (60)
Necromunda (4)
ninja division (1)
Pathfinder Deepcuts (1)
pilonidal cyst (5)
plastcraft (2)
programming/interweb (41)
rambling (61)
random (367)
random maintenance (3)
Reaper Bones (3)
reaper chronoscape (32)
renovation/remodelling (25)
road trip (27)
salesforce (1)
sarissa precission (2)
scenery (19)
Star Trek (2)
Star Trek Away Missions (3)
Star Wars Legion (1)
studio miniatures (3)
ttcombat (12)
video games (51)
vs Factions(PDFs) (1)
walking dead (36)
wargame foundry (3)
work (6)
wrestling (45)
zombicide (2)
Zombicide Invader (19)
zombie mall (23)