Sabaticalish
05.25.2026

I've been doing a lot of printing, and re-printing, without much to show for other than cardboard boxes full of printed plastic that I'm either going to add magnets and/or paint.
After a little more than 3 months since posting anything, I think it's time to admit I'm taking a blogging break. I've taken them in the past, too. There's nothing going on (hobby progress, work, life in general) that merits posting or remembering later. There's a couple of gaming blogs I follow that have just gone silent over the past couple of years, and I wonder at times if those folks are ok. As such, this serves as "I'm ok" until the next post shows up.
Walking Dead Game App
02.16.2026
This time I have no painting or modeling to talk about. This time I have an app (ugh, I miss calling them "programs") to talk about. Honestly I call it a webpage since there's nothing to install. And technically this is just for me as to make it publicly available likely goes against some copyright and licensing laws. But this is not about trying to hawk a new app onto the public. This is about making myself a tool to make playing a game more likely.
The only game I've played in years is the Walking Dead Miniatures Game. The real reason I play it is an excuse to setup the scenery that I enjoy putting together. With that, I also like the game - it's light, I love a good zombie theme, it's solo friendly. I've always played the same self-made-up mission where I take 1 survivor and a set number of zombies, and said survivor has to get supplies from Point X and make it to the egress point. Survivor has a minimal loadout so I won't worry about things activating the Noise rule. I'm not sure if the survivor has ever made it to the egress point (maybe once). I enjoy playing this for the story of the game, not actually trying to win.
For a while now, I've thought about apps for solo games to make setup/teardown easier. There's a DVG Apache helicopter game that I played once. 45 min for setup with sorting through lots of cardboard counters for the right ones. 30 min game play on the playmat. I lost the game, by the way. Not a surprise for my first time playing. Then another 45 min to put it all away. I'd play it more often were it not for the extra hour and a half of not playing the game involved.
There's a factor of that with the Walking Dead game. I play a minimal version because I don't dig through the right equipment cards to add to a character. I also don't know all the "real" rules, and looking those up when needed during a game slows things down. Cheat sheets, or "Game Aids" as they're called these days, help, but tracking down something the first time always seems to take forever. The third time feels that way too.
This transitions us to our new best friend over the past year, ChatGPT. Thanksgiving 2025 I started playing around with ChatGPT and making some game rules. That went into a rabbit hole, and honestly it went into rabbit holes for the better part of a year as I learned how AI and GPTs and typing prompts works. Jerry jumped onto the AI trend and soon stated making quick, throw away, stupid browser games for fun. Being fun, I jumped in too. I found I was mush better at keeping an AI chat on target with a quick browser game than making new boardgame rules, or even mods to boardgame rules. Most of the times, one of my stupid quick games started as "can CSS do...." and most of the time it could. I didn't care about the underlying code, I found myself (ugh) vibe coding and just tweaking the results.
Which brings us back to the Walking Dead game. If I had an app that could handle all the drudgery of setup and book keeping during a game, would I play more? Would I play better? What could I automate that would help me go that direction? Well that's what I set out to tell ChatGPT.
For my (failed) boardgame attempts, I had a pretty good dice rolling app. It was even geared toward the Walking Dead dice, as I like the combat system of pitting attack dice against defense dice. With a small tweak, this used the Walking Dead rules details for combat resolution. While referencing the rules for this, I learned I've been resolving combat wrong the entire time I've been playing this game. ~10 years. The rule for combat against Walkers is that they always attack, never defend. I interpreted that as Survivor attack roll vs Walker attack roll. Nope, that's not how it works. Survivors attack against a Walker that rolls nothing for defense (free attack). Then the Walker attacks (up to Survivor to decide in the beginning if they're going to defend now). That makes it a very different game to me. I've gotten so used to the Attack vs Attack roll, I kept it in as an option. With that, I can now click a button and have the dice rolled, totals added, and a summary tell me the results with what damage to apply/if there was a headshot or a survivor was bitten. Space for dice rolling and remembering how to add no longer needed!
There are other specialty dice rolls in the game. There's a black die that is really a 50/50 chance die. It's used for a handful of things. Things I normally forget. New section to the dice rolling app - black die roller and a bullet list of common reasons to roll black die along with what game phase those happen in. Another die roll space saved along with Where In The Rules Is This reference no longer needed.
I have that same issue with a white die used at the end of the turn to see if bitten survivors turn into walkers. Add white die to the app and the note of when/why! There's also a yellow panic die with a different icon per side. This is used when the character's nerve is below the panic level. I can never remember what those icons mean. How about adding the panic icons to a die in the app, and when that icon is rolled the description/effect pops up. Add it to the app!
Hmm, now that I mentioned the threat level, there's a threat tracker that would be easy to add. It's just a number from 1-18. While that's easy, how about a range color chart to match what the game references too. Add it to the app!
I'm not sure how long I spent on all of the above, but I had gotten on a roll of seeing the usefulness for this. Table space could be saved. Looking up rules that I would likely forget. Not knocking around cards, dice, trackers, and having it all lose their place. Describing what I wanted to the chat and not worrying about the code behind it all was working out so far. What else would really help me move forward on playing a more fleshed out game?
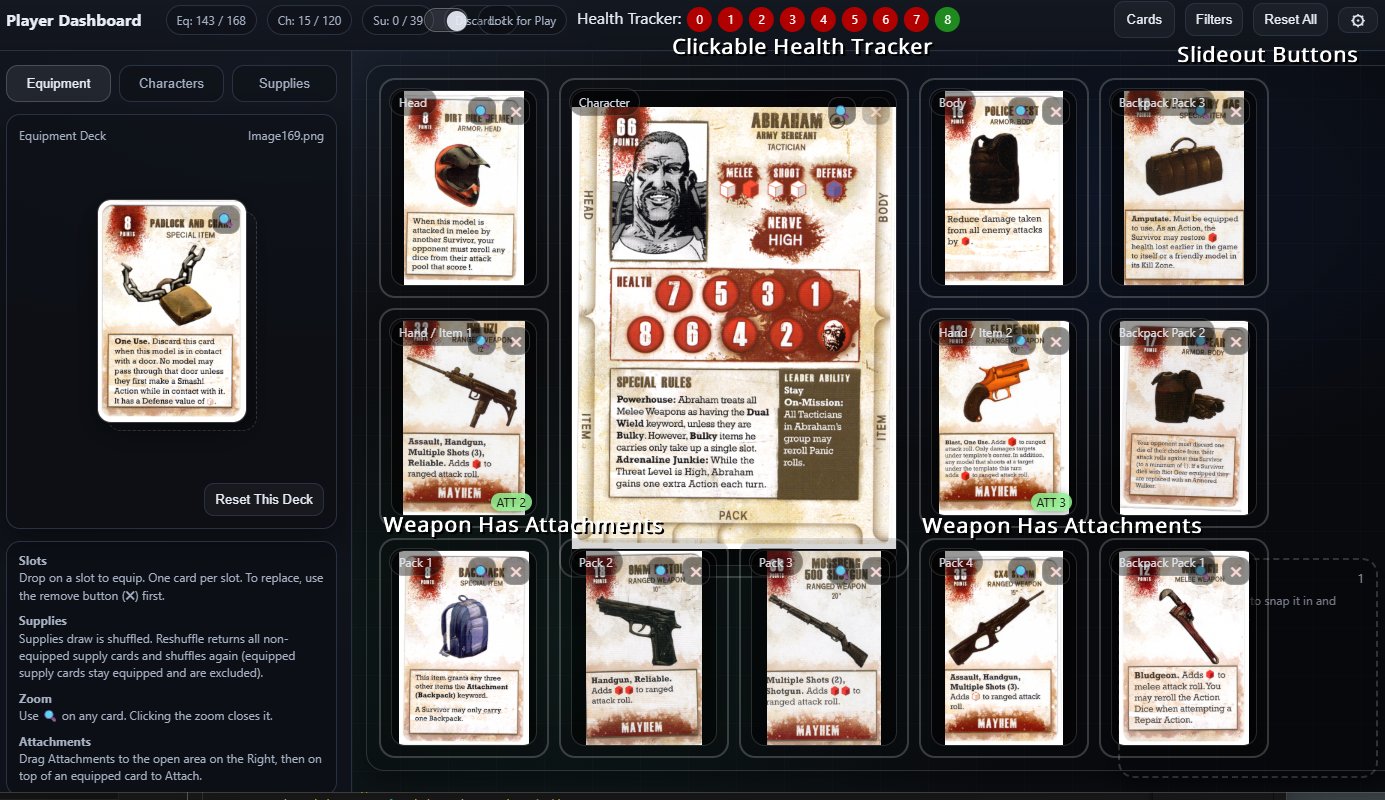
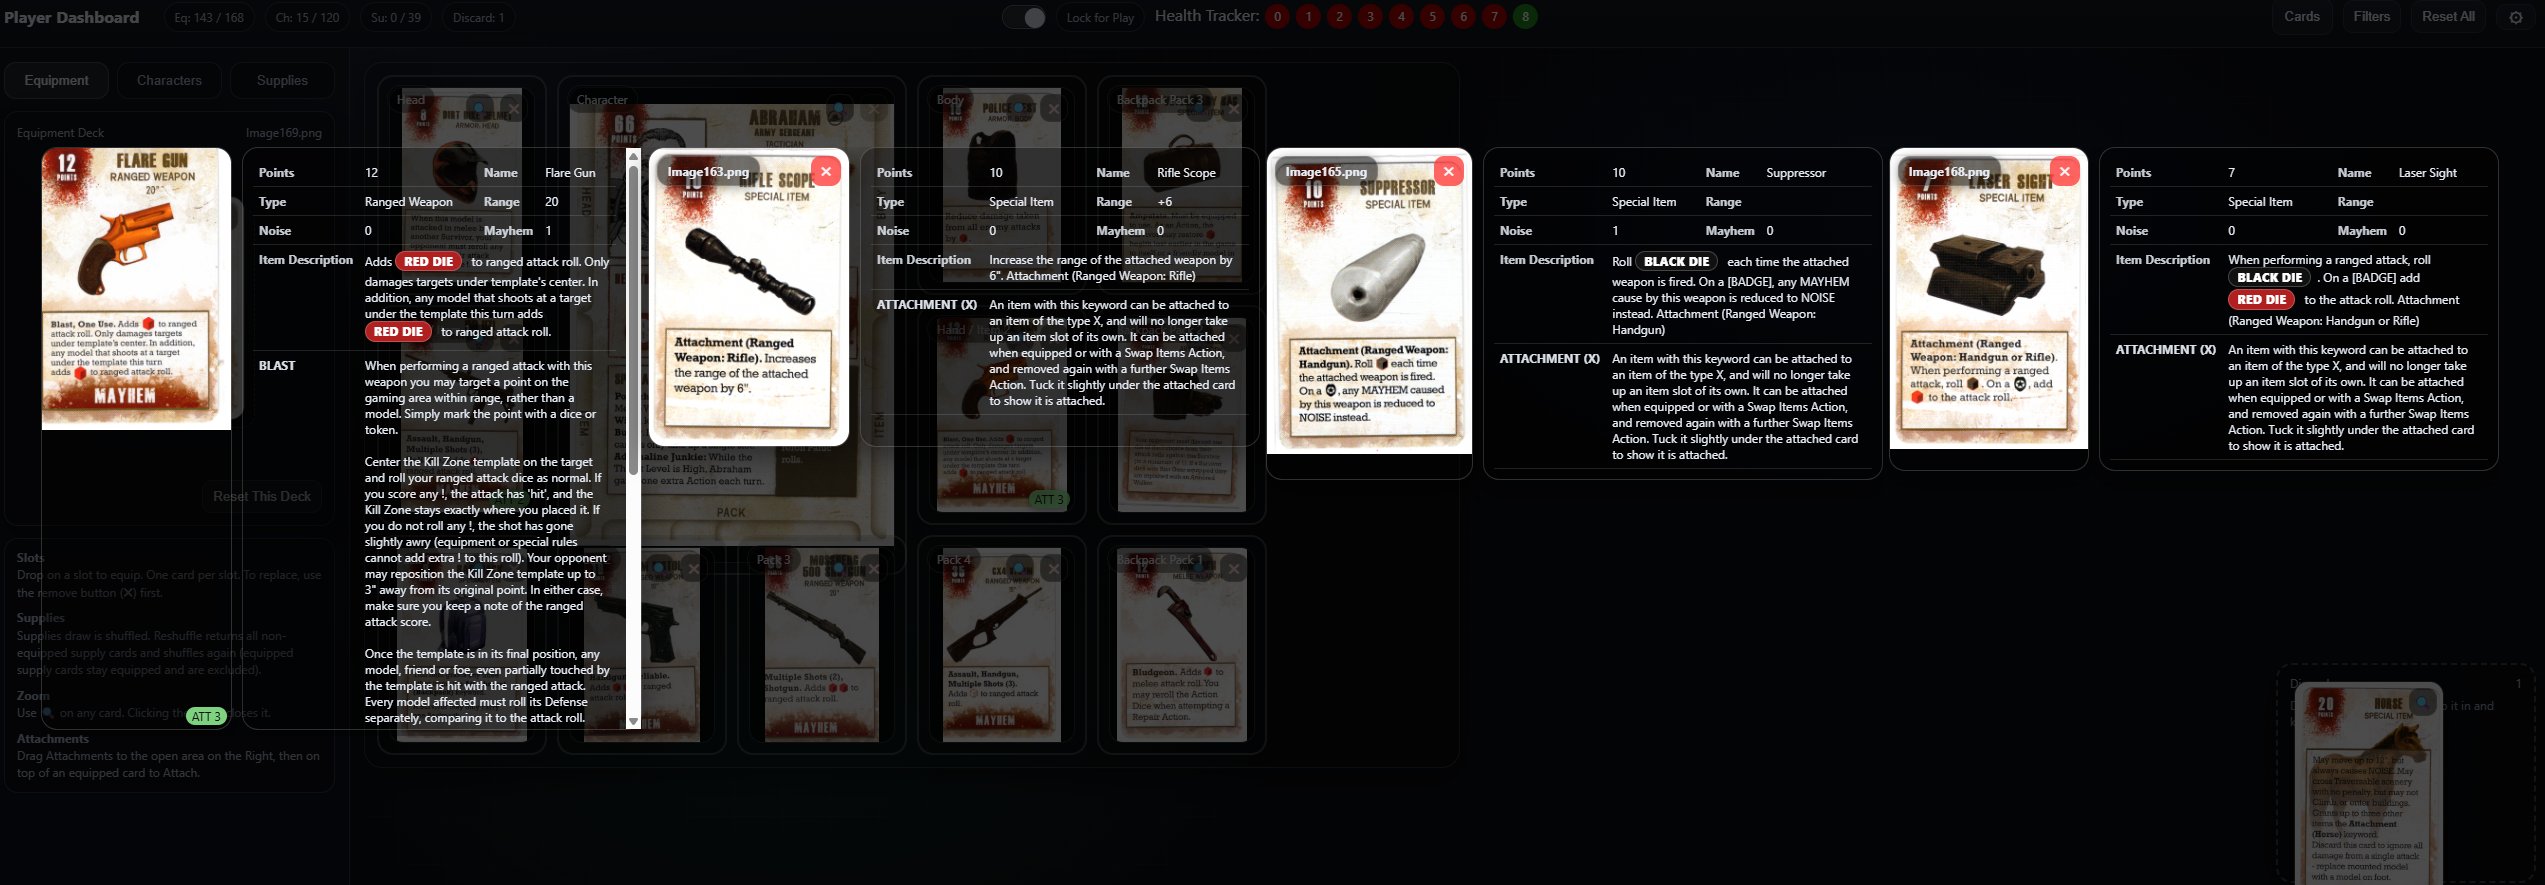
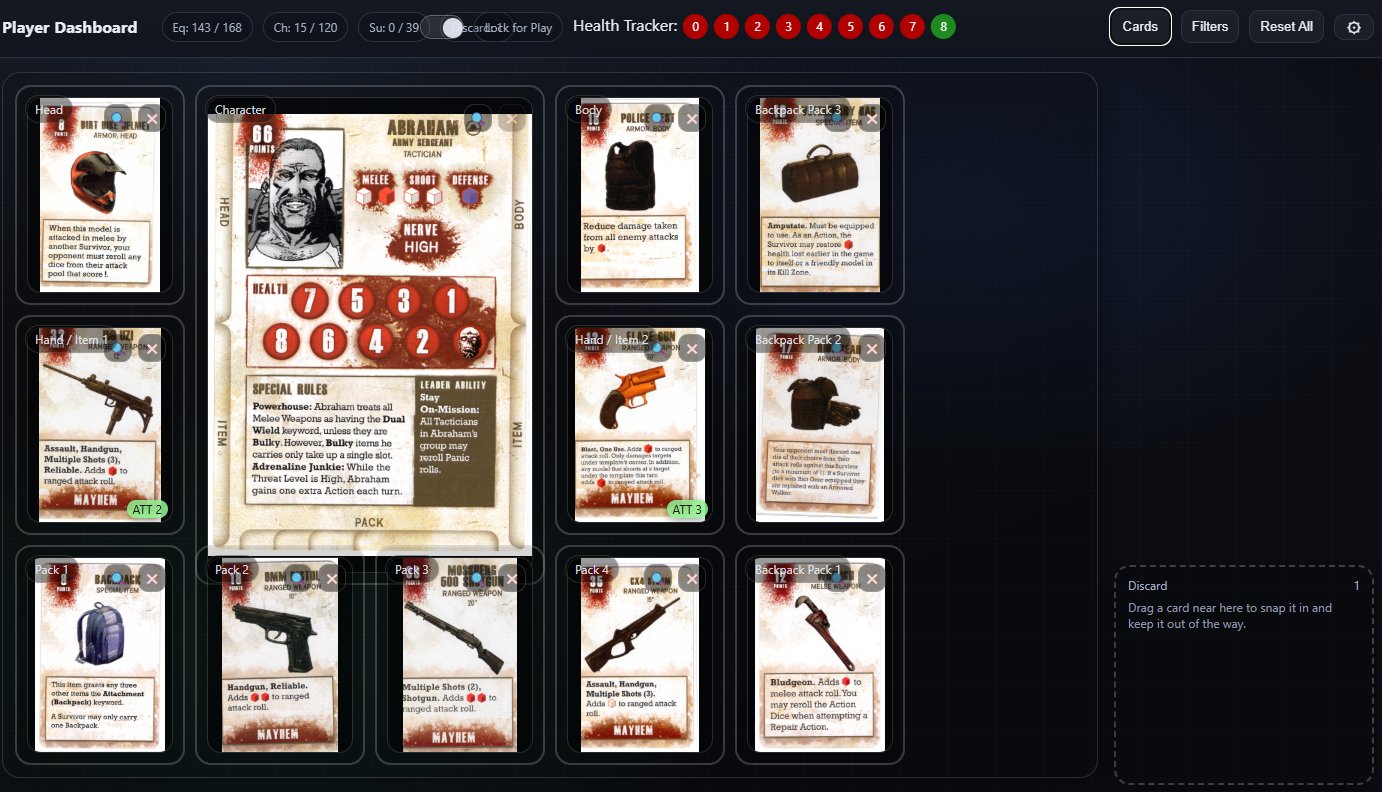
I purchased MDF player dashboards from Etsy a while back. There's a center spot for the survivor card, then spots for equipped cards and backpack cards. An automated/browser version would take up less table space. I'd need to either type in all the info and have it displayed in a way that made sense, or I could just scan in cards and drag them to the right spots on a background. I have a scanner. I have more than 1, really.
For a proof of concept, I scanned a couple of cards and asked ChatGPT if it could pull in the images, make a deck of cards, and let me drag them to spots in the browser. Sure, no problem. Awesome, I'll get to scanning cards! Soon I had a non-Etsy dashboard that I could drag character and equipment cards onto.
It would be nice if I could add in some shortcuts or tooltips for the rules on those cards. I don't know what most of them mean. At this point I learned both AI OCR and Scanner OCR did not like the background of the scanned cards and was doing such a bad job converting to text that it would be just as easy for me to enter the text as to go back and double check everything. At that point, ChatGPT made a tool for me to enter the card info into some new MySql tables. One of those tables was a rules shortcut list, so when a card listed "Bulky", I would be able to lookup and show "Requires 2 Hands".
Now that all the relevant data is in there, we can add a filter to lookup/jump to cards instead of clicking through the deck. Well that's the most handy part so far. Looking through a deck of 100+ cards when I want to add a Shotgun to my survivor can take a while. But if I can type in "shot" and go click-click, survivor has a shotgun... Well that's just pretty damn convenient.
I can take the time to pick a survivor and equip stuff as desired. What else do I need to speed things up? Saving that loadout so I don't have to re-make it when I want to play, and (of course) loading it would be good. JSON save files activated!
Once I saved and loaded a character with their loadout, I cold really see the probability of using multiple survivors in a game and being able to keep up with them. The one, simple tweak that would really help me: add the character name to the browser title. So much easier to find people that way!
During all this, it was the first time I've probably gone through and paid attention to the majority of the rules. I added another browser page for a tab of rules and actions, grouped by the turn phase they're relevant in, as a nice "I haven't played in a while" turn walkthrough-refresher. There's were misinterpretations I had on equipping items, add-ons (like weapon suppressors), and how the character-specific rules should be used.
I'm now at the point I think I've got the app I want in order to play. Each of these will be a browser tab for my next game:
1. Turn phase based rules reference. This has the "what rule is that" and action definitions that I forget after a while of not playing. It's also the rules I never learned correctly to begin with. This should get used less after I play a few times.
2. The Dice Roller actually has 3 parts:
2.1 : Dice rollers for combat, panic, infection check, and the black "chance" die (used for about 4 things, which are listed with the die roll).
2.2 : Threat Tracker - color coded 1-18 range to show the current threat.
2.3 : Event Card Deck - Scanned in cards where I can draw a card (1 per turn). Some cards will change the threat, which is tied into the Threat Tracker to automatically update.
3. Player Dashboard - Survivor with loadout, health tracking. There's also a Supply Card Deck used for searching. This deck can be exported/imported so that each survivor with a tab can keep the deck in sync as it's supposed to be a shared deck for search results. I could have tried to make this sharable between tabs, but I preferred the simplicity of each tab having a copy.
And there's my first big foray into something usable with AI. Mentally running through scenarios and using everything has been my beta testing. I'm planning on playing (a/some) games while I take my annual birthday time off in a couple of weeks. That can be a real test of how useful this is. Laptop, or tablet, space taken vs dice, tray, etsy dashboard(s), threat tracker, and rulebook stashed away.

Permalink
programming/interweb walking dead
Cyberpunk Red Zone Minis
01.18.2026
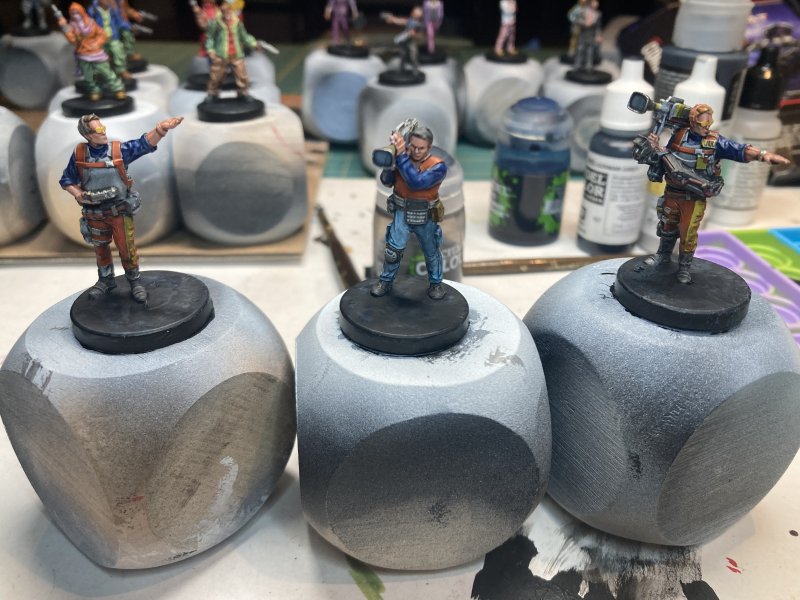
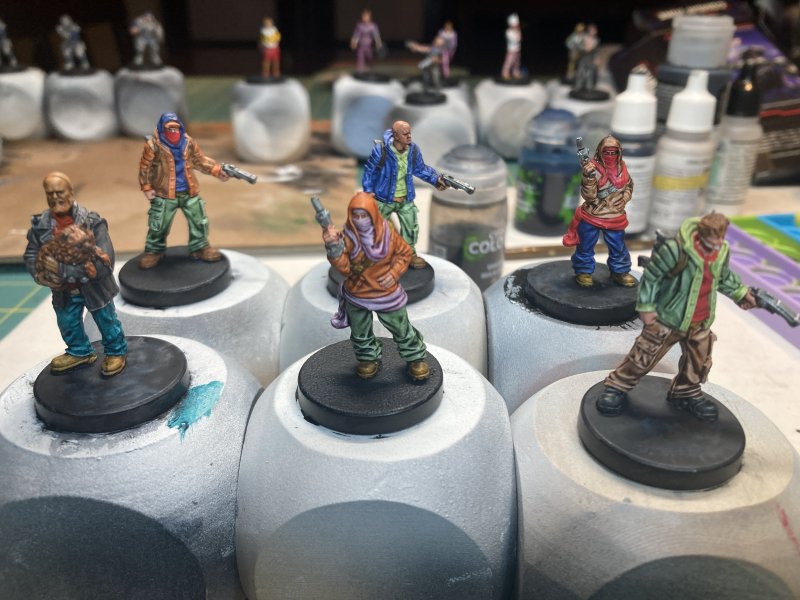
This is one of those painting posts that has taken longer than I thought due to a bunch of things.
I had no gumption to paint through most of December. Not sure why - I just didn't want to. I had a good run of 3D printing for a week during Christmas, but honestly that has nothing to do with painting time other than a notch that I was doing something fun/hobby oriented.
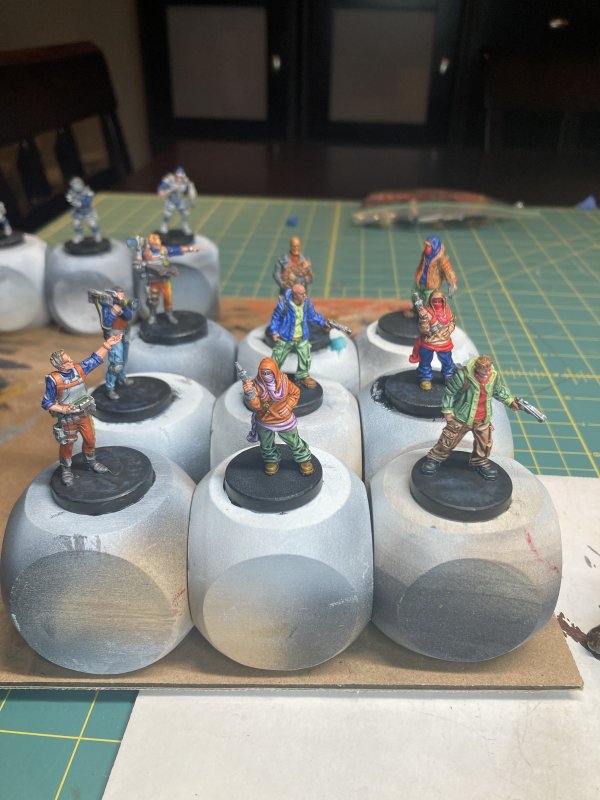
I glued and primed 20-ish of these minis before my last post at the end of November. I have to admit to myself - I don't like assembling these (brand/manufacturer) of minis. There are always gaps. Huge gaps. No matter how I try to trim things, they never fit. And there's something about the way I attach heads - they look too small by the time they're affixed. The trio of police minis really show this - all the hands or arms had to be glued on, and they all look like crap. I also admitted to myself that it's ok to essentially abandon a mini at that point. Gap filling is not a strength of mine, so I can use these to practice on later. Along with the admission that I don't like this line of minis came the cognizant thought to quit buying them. This was important during Black Friday sales. This line fell under "cool looking minis for a game I don't have/plan on getting" so I'm not going to be missing out on anything by no longer buying this stuff.
While prepping minis, I managed to break 3 (although I only remember 2) when I got a little aggressive with an xacto knife. Brittle resin, maybe? It was female characters of a similar mold - maybe that mold/pose just didn't like me and my knife? Normally a mini breaking would bother me, and I might find some battle-damage equivalent to use it. These just got tossed in a box of bits for now - because you can't just toss mini parts.
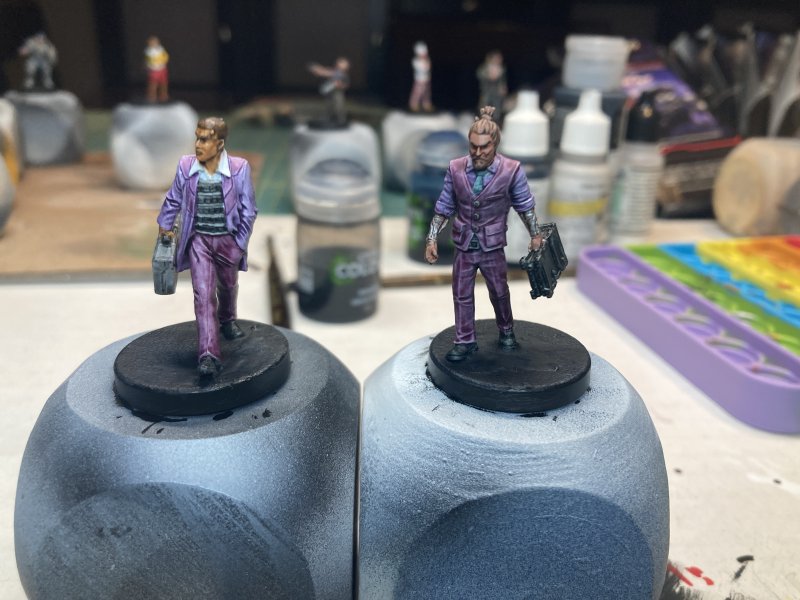
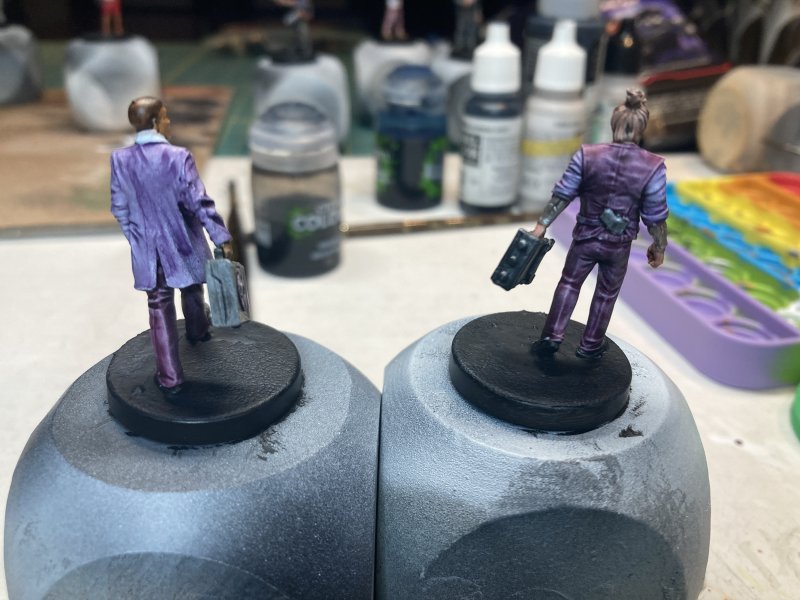
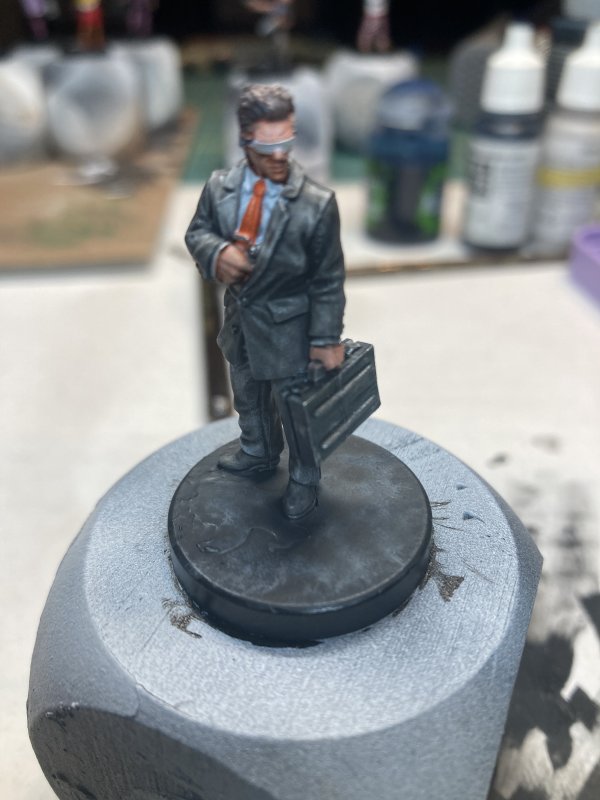
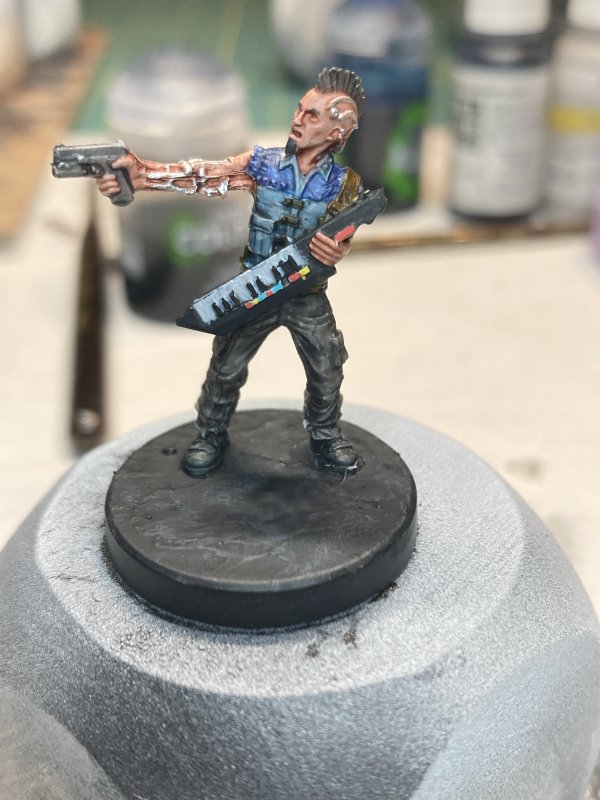
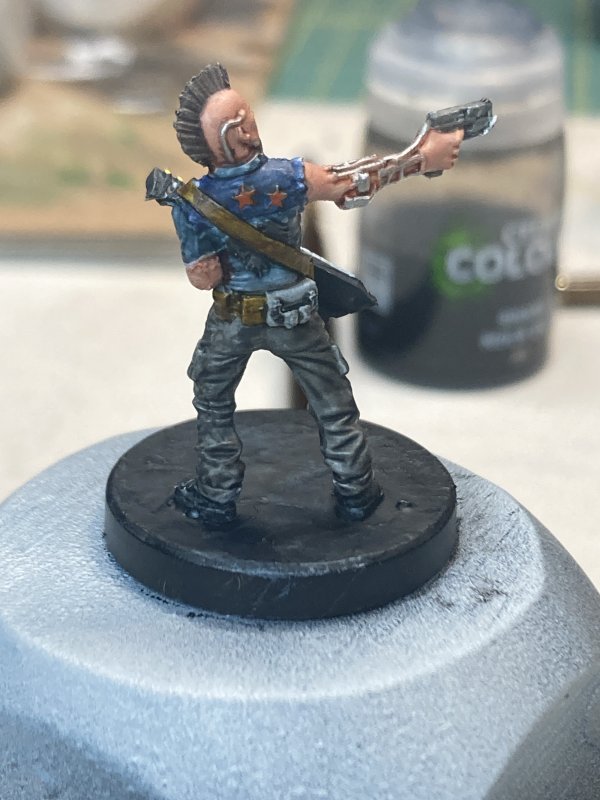
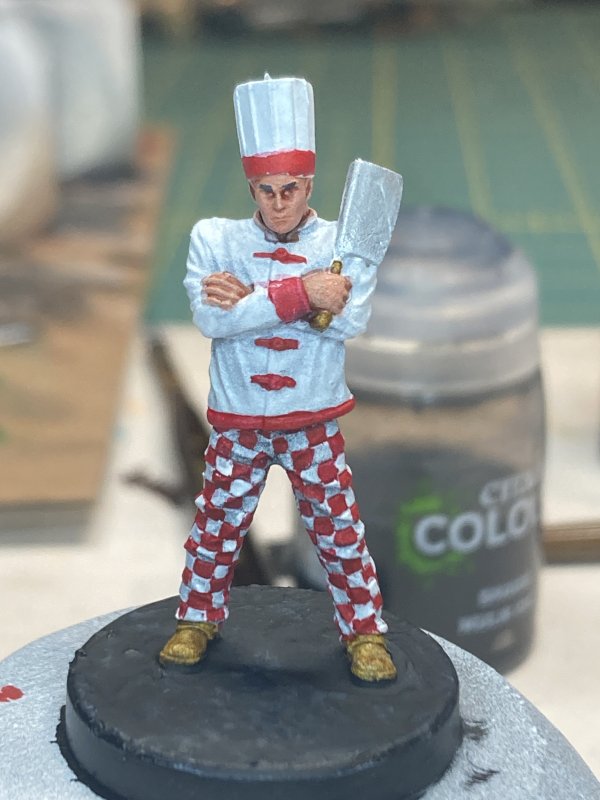
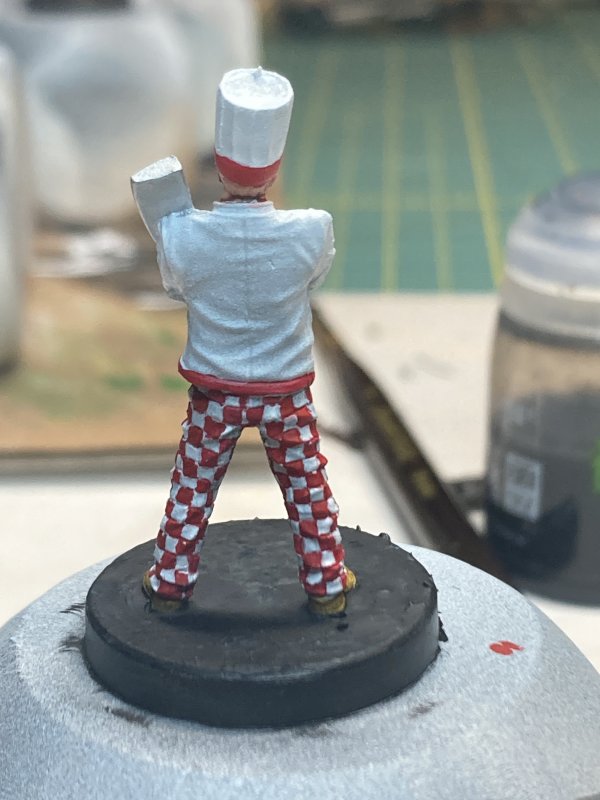
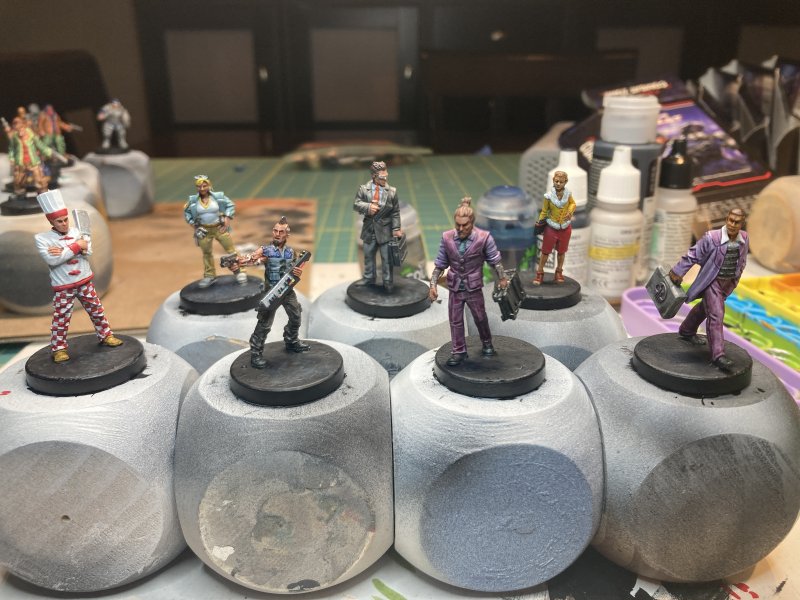
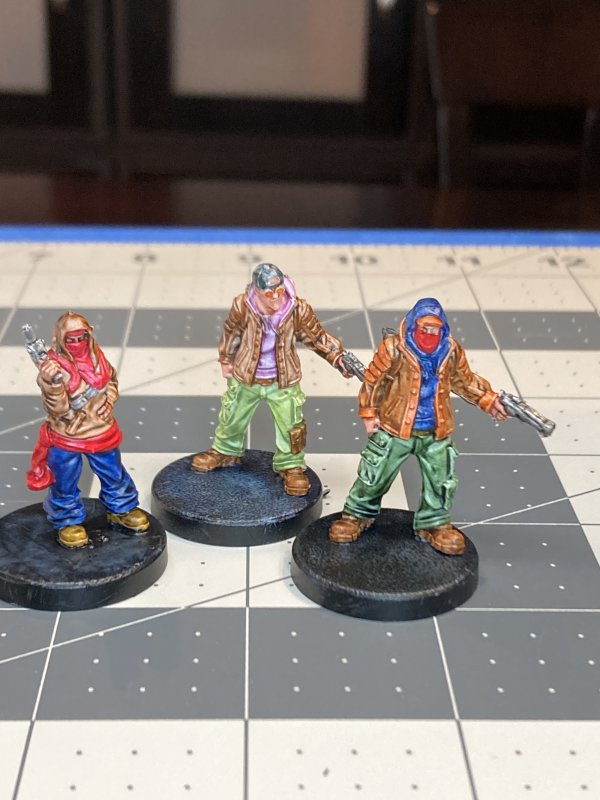
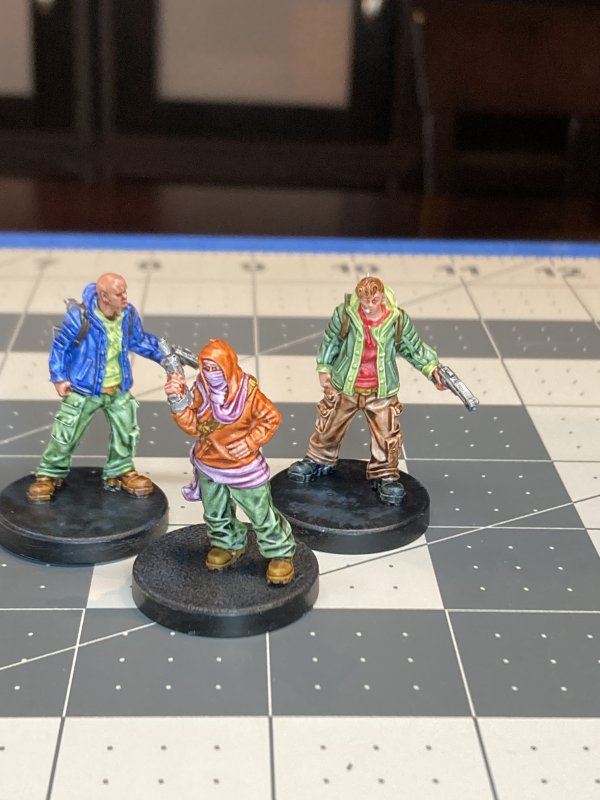
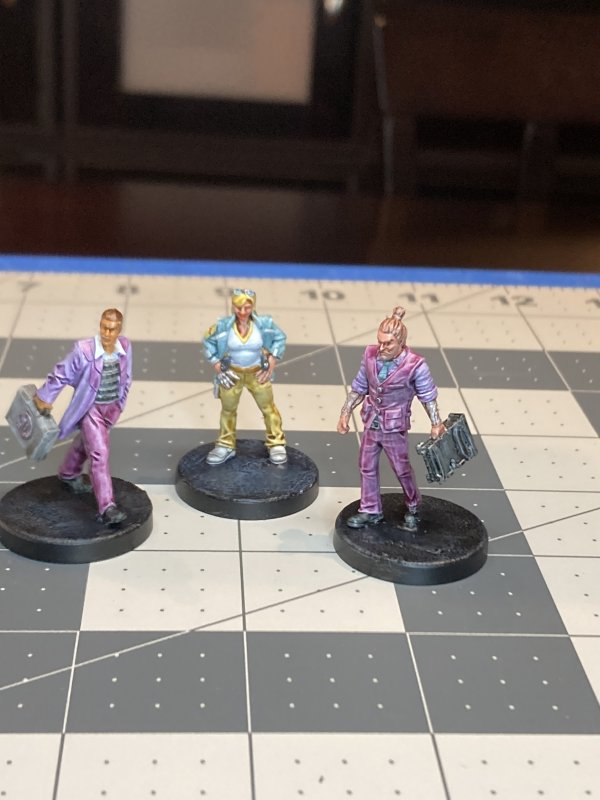
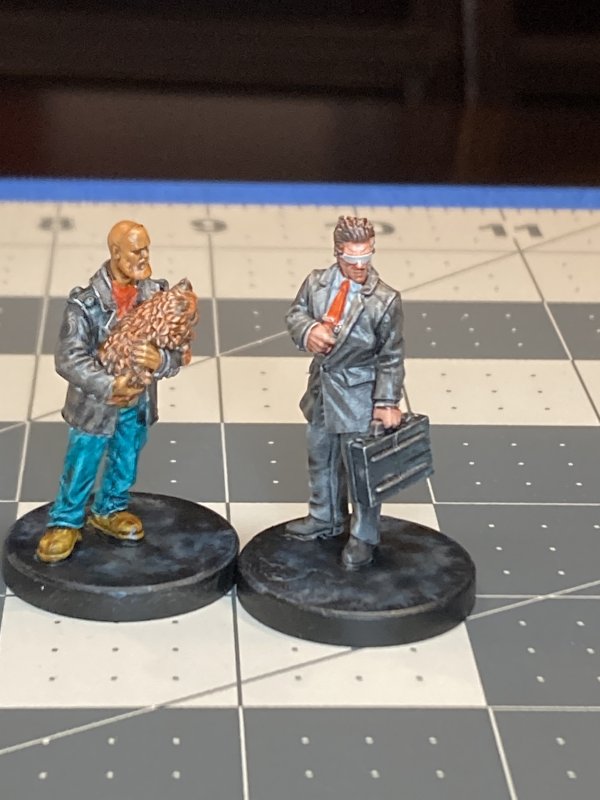
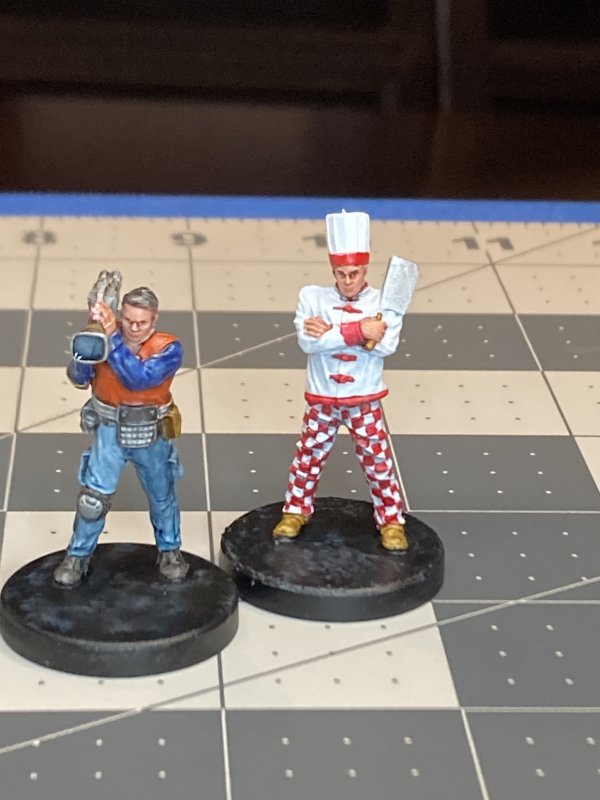
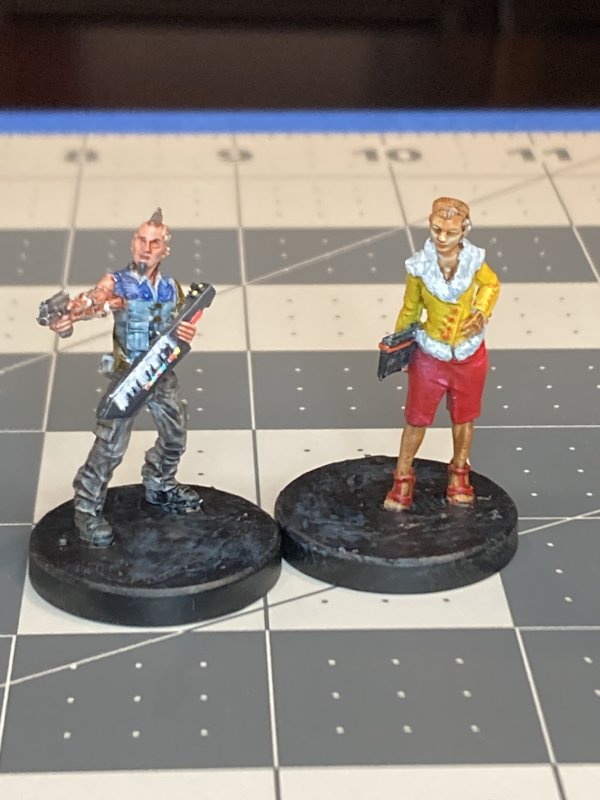
Ok, so those are my excuses for the lull in painting update(s). Beyond my griping, I did have fun with a few of them. The cook with the checkerboard pants was fun. I was rethinking those checkerboard squares at least 3 times when I was painting them. The 2 purple-suited guys I like. They were more practice for an upcoming Prince mini, which I'm feeling more confident about after painting these. The dark suited bodyguard is another I like. Traditionally when I try to go all black/dark on clothes it doesn't turn out well. I went with 2 shades of grey contrast paint this time.
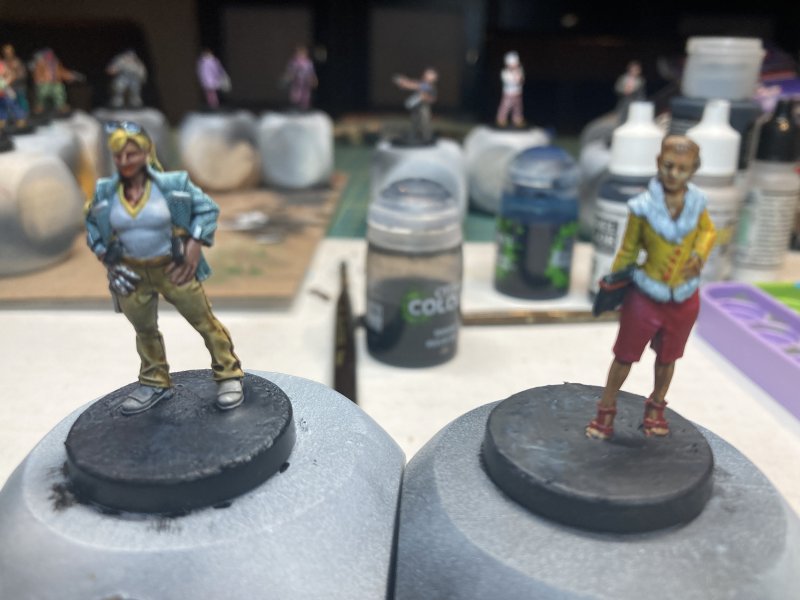
From the Monster Fight Club site, here are the sets I (mostly) put together:
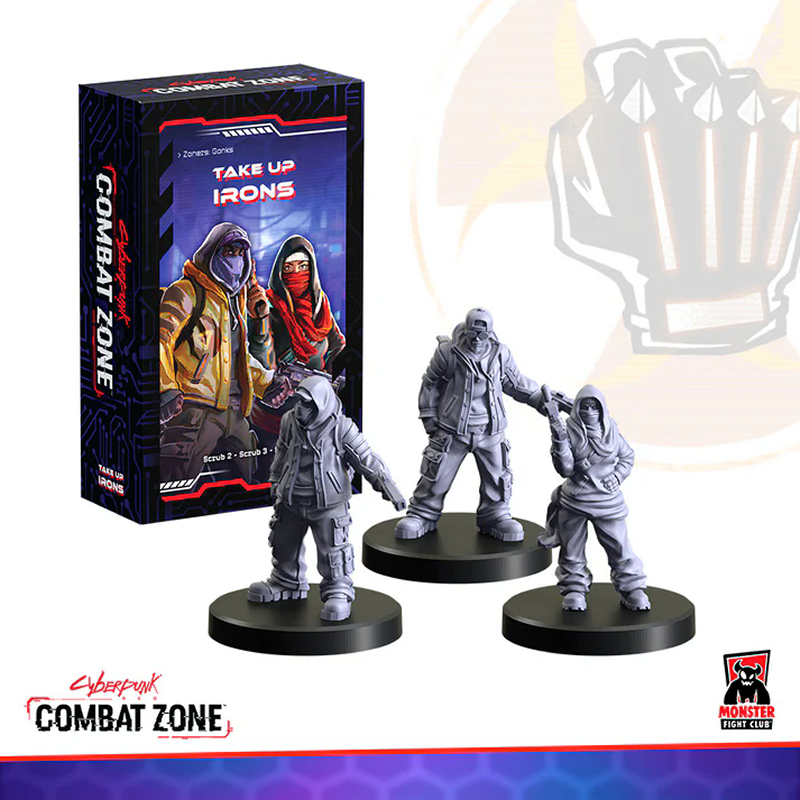


Take Up Irons with Scrubs. 2 sets of these, with mixed up heads.
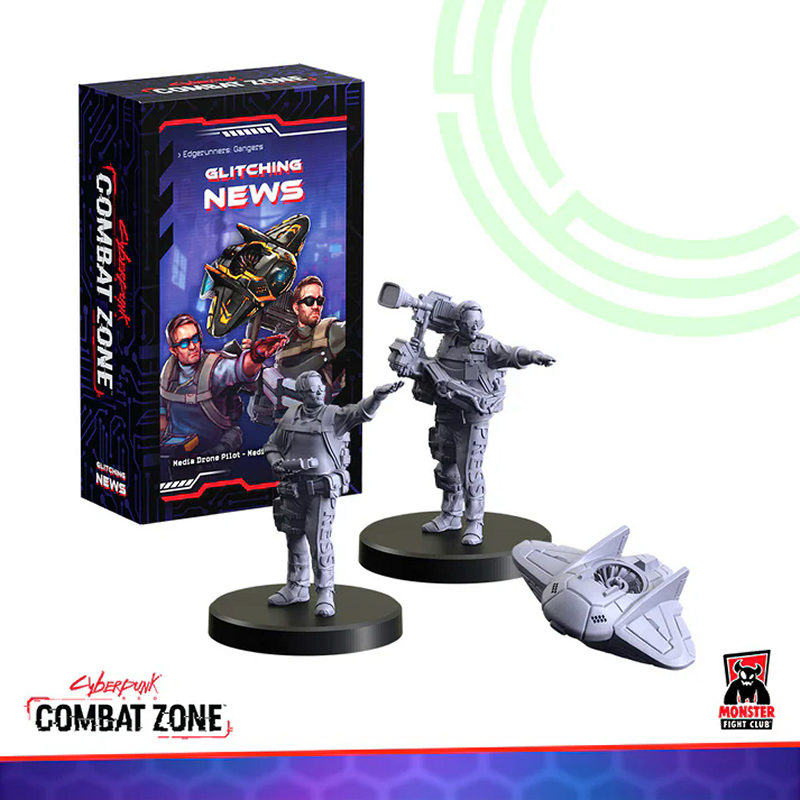
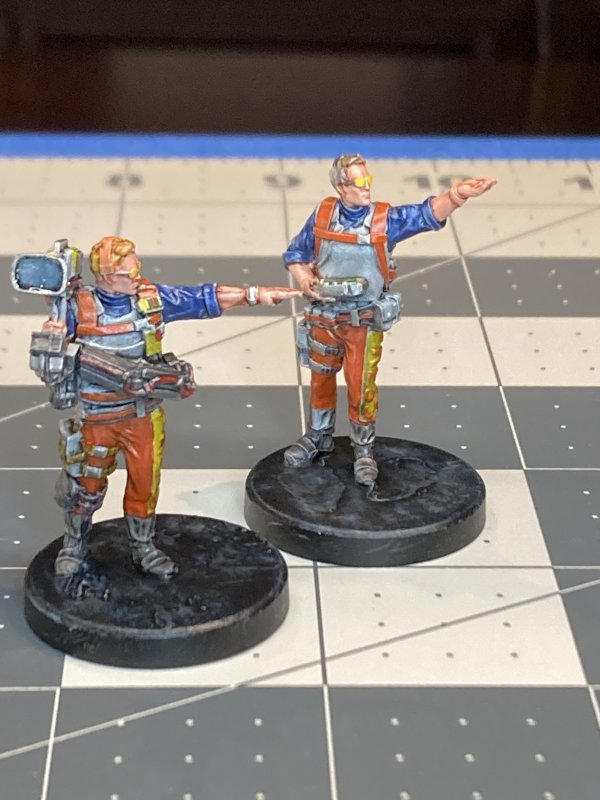
Glitching News with Media Drone Pilot, Media Drone (that I left out), and Hackette.
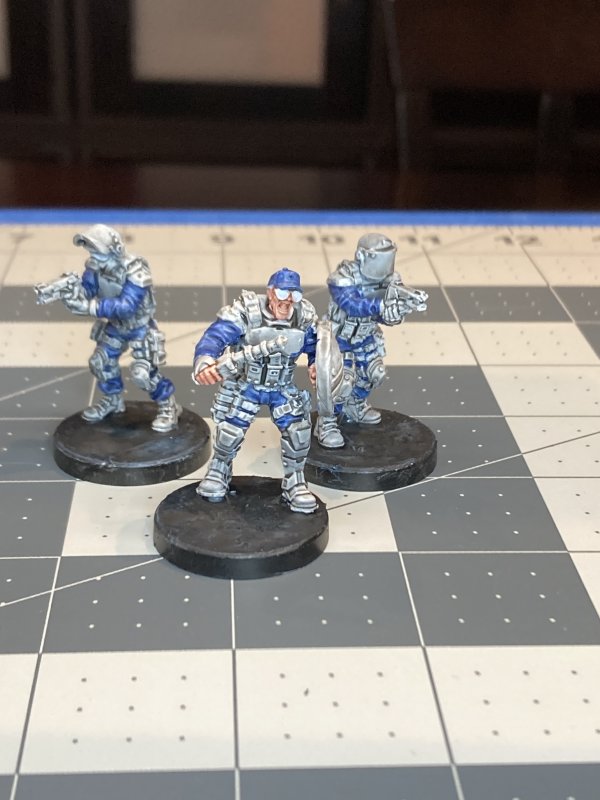
False Flag with Daring Tech (didn't survive an xacto blade), Influential Fixer, and Solo Bodyguard.
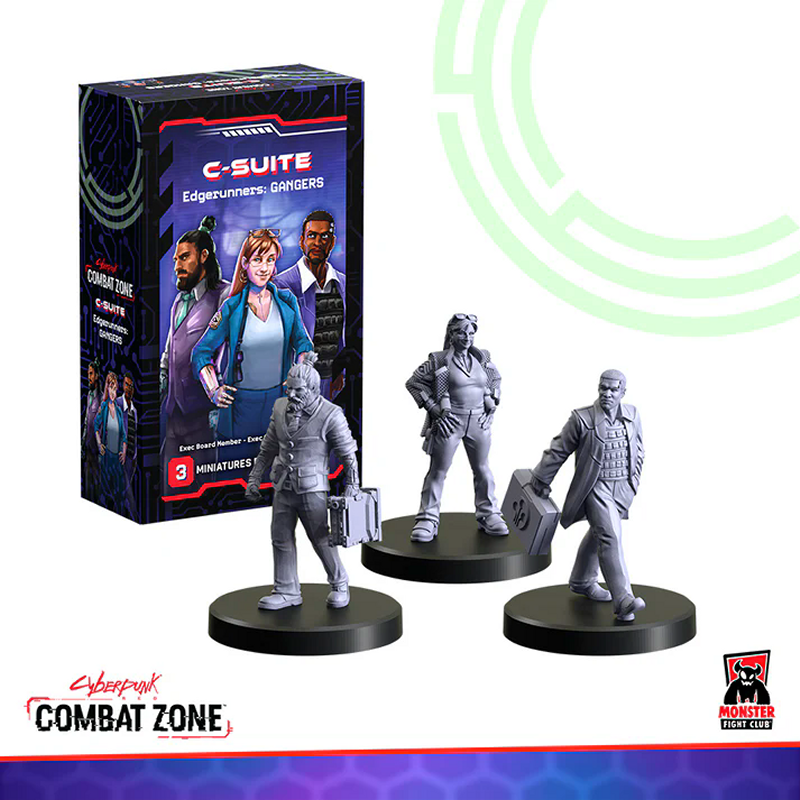
C-Suite with Exec Board Member, Exec CEO, and Exec Director.
The Beat with Rookies and Tactical Response Rookie.
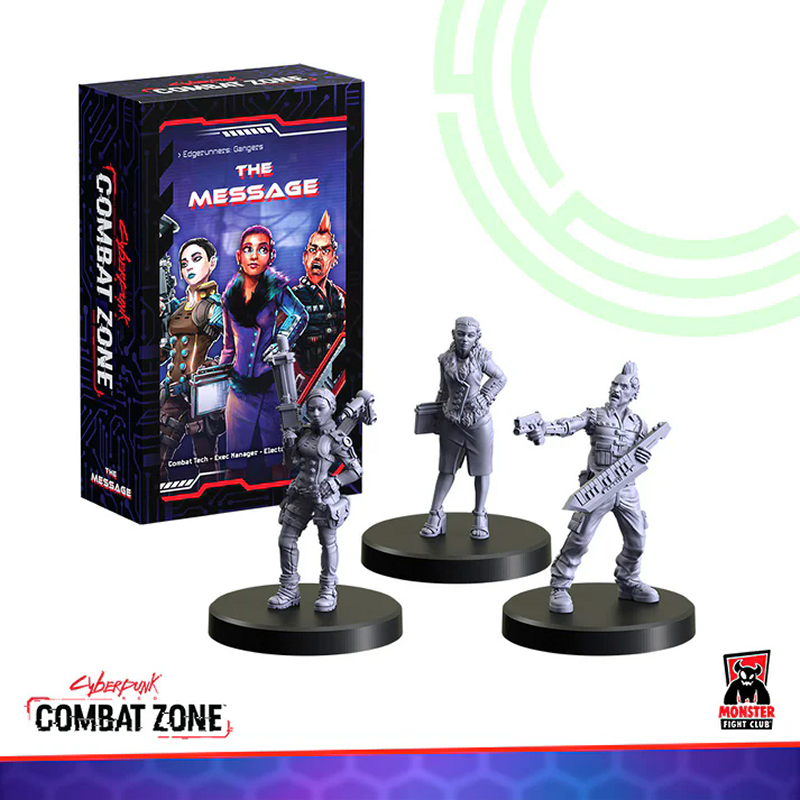
The Message with Combat Tech (also an xacto knife casualty), Exec Manager, and Electronica Rockerboy.
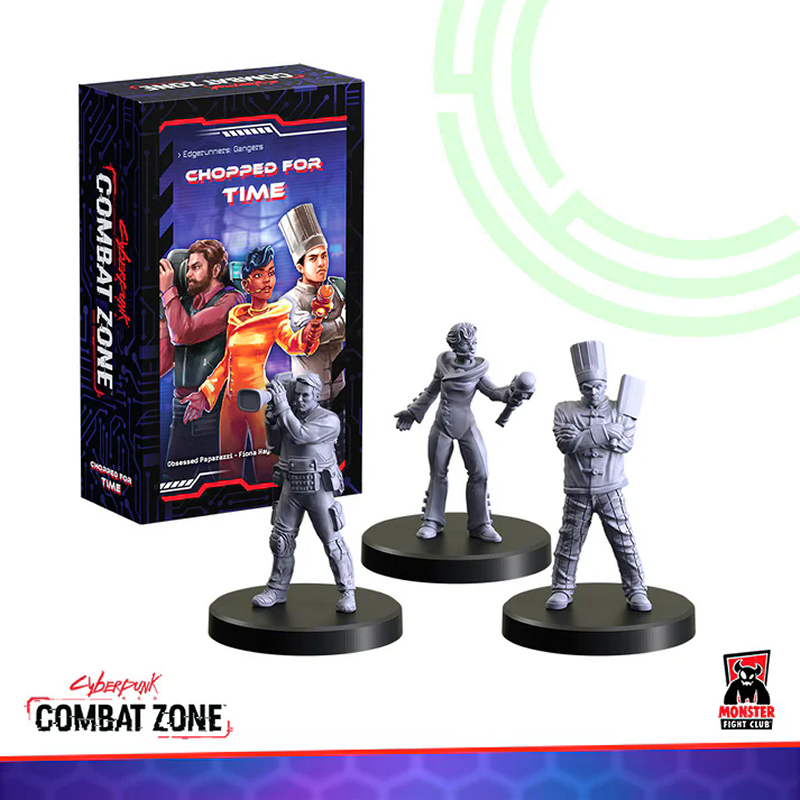
Chopped For Time with Obsessed Paparazzi, Fiona Hayes, and Solo Noodle Chef.

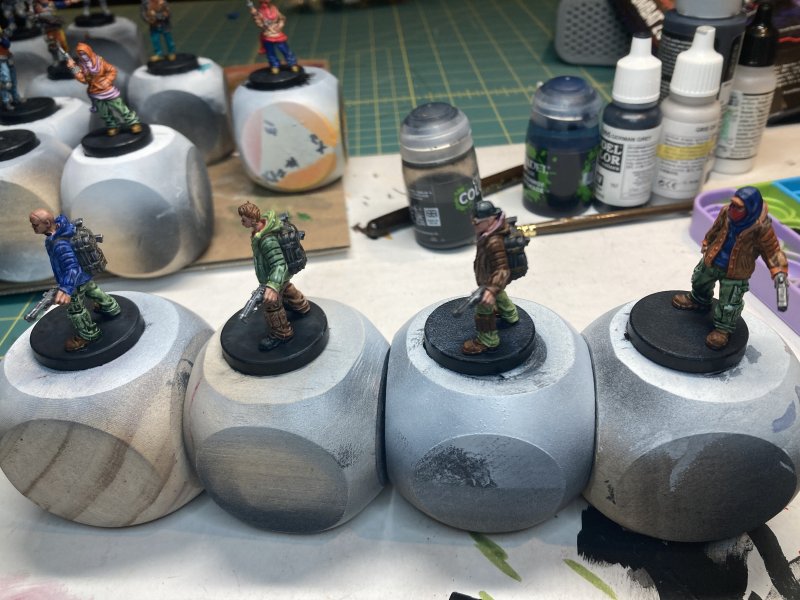
I'm holding off on printing project updates - a pic of a finished print when the garage temperature and humidity cooperate aren't that much fun to look at. Plus I don't see much happening until sometime in March with that. I have some more minis picked out to assemble and paint. This is another line I've never used before, and there's equal chances that these will suck and never see the light of day, or be the coolest Aliens-esque marines ever made. Either way, the odds are good I'll be quiet here for another month or two.
Permalink
Cyberpunk Red Zone gaming miniatures
A Vast Underestimation
11.30.2025

I previously mentioned that I started (3D) printing the Heroboard modular board for Heroquest. It's also been the project to help dial-in the new printer. As such, it's not 100% optimum printing and cranking through everything. Additionally, I don't really know what the minimum I need to print for the game is, as I've yet to actually play it. I do have a "this should cover everything" list to print, which is what I'm working off.
Within that list, I'm working in phases. The first are the under-tiles, the bases that magnetically lock everything together. Effectively, the foundation. After that are the side-walls for those tiles, to cosmetically cover the magnets that aren't being used. Next up is "hallway" floor tiles. These I'm printing as individual floor tiles as the rooms are pre-joined with however many spaces a room takes up. These phases are done! I've got stacks with 502 under-tiles, 103 side-walls to cover the exterior of those under-tiles, and 168 hallway floor tiles. This took the better part of 2 months, to include bad prints as I needed some settings tweak, usually due to garage temperature and/or humidity.
Remaining are 22 room floor tiles, pre-configured based on the original game board. All of this will need walls and doors/doorways, which make up the next two phases. Here is where it makes a difference in not knowing exactly what I'll need, but instead making sure I have a worse-case usage covered. With my current high-quality print settings that use a 0.2mm nozzle, to print the remaining floors, doors, and walls will take just under 94 days if the printer runs 24/7 with no hiccups.
That's a lot of printing. Realistically, that's closer to 6 months than 3. Plus, there's other things I want to print & play around with.
While painting the Heroquest minis was my 2025 project, I thought that was originally going to include printing out the board, too. Now, at the end of November, I think I will claim my 2026 hobby project to be having the board ready for Xmas 2026. There will likely be uninteresting pics along the journey just because pics make these posts more interesting.
Permalink
3D Printer HeroQuest
I'm Alive Update: Nov 2025
11.12.2025
2 months ago I posted about finishing painting the Heroquest core set. You think in 2 months I'd have something else to post about. Well, it seems I vastly underestimated the scope of the next thing I would work on.
I mentioned Jer getting a Bambu printer and alluding to a printing project for dungeon tiles. Now I have a Bambu printer and will allude to a printing project for dungeon tiles.
I succumbed to peer pressure from Jer and Keith and (re)joined their cult of FDM printing as the Bambu A1 prints really good quality and, most importantly, is easy to setup and print each job. One of the things I've had to get past since my original foray into FDM printing is that it's ok to waste filament. Part of the aforementioned ease of the Bambu is self-cleaning and calibration available before each print job. Add in how easy it is to switch hotends, such as the fine resolution 0.2mm, and printing is easy! Dialing in those fine print details is a little more work, mainly because of how easy it is to set up those print jobs and each little tweak might make a difference I pretend I can see.
The big issue I ran into after paying attention to the first couple of batches of prints was that the corners of my prints were warping upward. Searches told me this could be either too hot (bed) temps, too cold temps, or other stuff I chose to ignore. My fix went the direction of a colder bed, lowering the hotend temp after the first few layers, and adding brims. This seemed to work fine! Until the outdoor/garage temp dipped below 60, them some random prints would either start spaghetti printing at some later point, or not adhere to the plate. This seemed to be an obvious "not hot enough" problem, so I returned to hotter temps and kept the brim. 3 days of this and things are printing ok when the garage temp drops to 47 °
Pics of random printed pieces isn't much too look at. Over the last 2 months I've printed some Sci Fi shuttle parts - about 4 times between scaling issues and refining settings. The dungeon is from Heroboard, using the larger 123% scale (larger than they recommend) and lots and lots of magnets. I've just started printing hallway floor tiles, which at the resolution and rate will take minimum of a week if the printer ran constantly. After that are room tiles (11 days minimum) and walls/doors (don't know). While my 2025 hobby goal was to paint the Heroquest minis, I secretly wanted to have the dungeon printed and together too. That latter ain't going to happen.
I've got another batch of Cyberpunk minis primed. Soon I'll have some pics of those trickling onto the site.
Blog Archive
As always, correct spelling is optional in any blog entry. Keep in mind that any links more than a year old may not be active, especially the ones pointing back to Russellmania (I like to move things around!).
Tags have been added to posts back to 2005. There may be an occasional old blog that gets added to the tag list, but in reality what could be noteworthy from that far back?
Blog Tags
3D Printer (29)
4ground (32)
4ground-mall (40)
5PFH (1)
action figures/toys (10)
airbrush (7)
Aliens (1)
Amazon (12)
antenocitisworkshop (11)
Atlas O Gauge (2)
Batman Miniature Game (2)
Battletech (1)
belt sander (12)
Blood Bowl (4)
boardgames (79)
books/comics (19)
computers hate me (5)
conveyances (15)
Cyberpunk Red Zone (4)
diet (53)
dreams (7)
fallout (1)
feng shui (1)
Firefight (1)
Foundry (3)
Gale Force Nine (1)
game dev (23)
gaming miniatures (240)
gaslands (10)
gastric sleeve (34)
Green Stuff World (2)
Hasslefree (9)
Hero Forge (1)
HeroQuest (4)
hobbies (102)
Jailbirds Minis (2)
kevin smith (1)
Knight Models (2)
malifaux (3)
Marvel Crisis Protocol (2)
mckays (1)
models (12)
mom (32)
moon light (5)
Moonbus (1)
movies/tv/dvd (60)
Necromunda (4)
ninja division (1)
Pathfinder Deepcuts (1)
pilonidal cyst (5)
plastcraft (2)
programming/interweb (42)
rambling (62)
random (367)
random maintenance (3)
Reaper Bones (3)
reaper chronoscape (32)
renovation/remodelling (25)
road trip (27)
salesforce (1)
sarissa precission (2)
scenery (19)
Star Trek (2)
Star Trek Away Missions (3)
Star Wars Legion (1)
studio miniatures (3)
ttcombat (12)
video games (51)
vs Factions(PDFs) (1)
walking dead (37)
wargame foundry (3)
work (6)
wrestling (45)
zombicide (2)
Zombicide Invader (19)
zombie mall (23)