Not Yet A Moonbus
08.15.2025
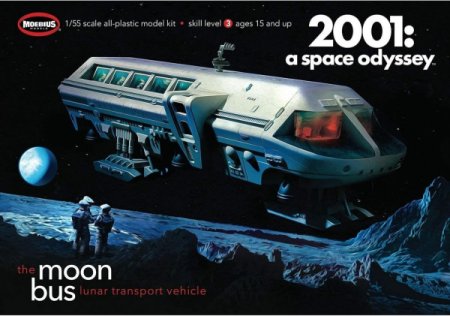
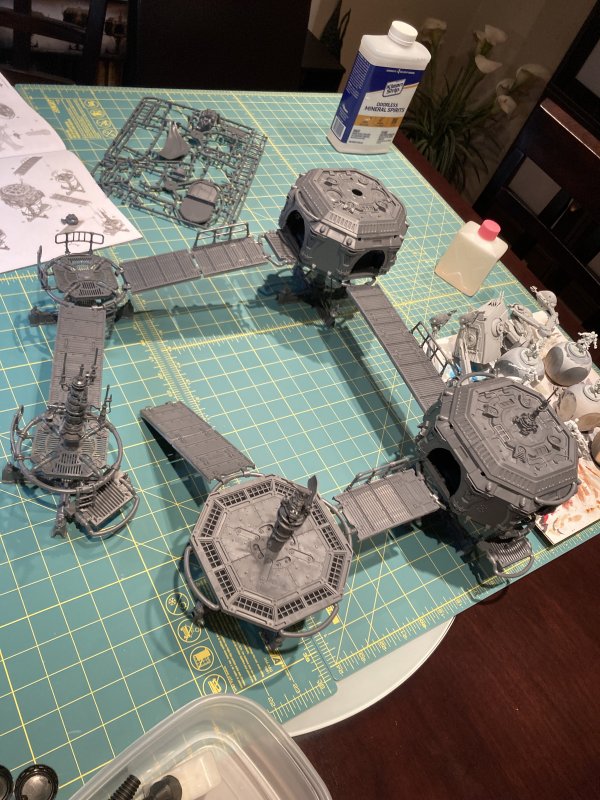
For a while now, I've been working on a Moonbus model from 2001: A Space Odyssey. It's somewhere between 1/50 and 1/55 scale
depending on where you read the details, and that's a close enough match to 28/32mm scale games to work. As my sci-fi base
has had a bit of a retro theme, the 2001 future as seen from a 1968 movie kind of fits in. It was back during my trip to Georgia
and the Hobby Town USA of Kennessaw back in either 2018 or 2023. It is indeed sad that I don't know how long the model has been
sitting on a shelf. I think 2018, because along the way an Amazon sale came along where I purchased 2 more.
The reason I purchased 2 more - after trying to glue together a couple of models, it's somehow much more difficult to get pieces
to line up now vs when I was 12! I'm accepting that the first time I glue together any model I'm going to screw it up. Thus,
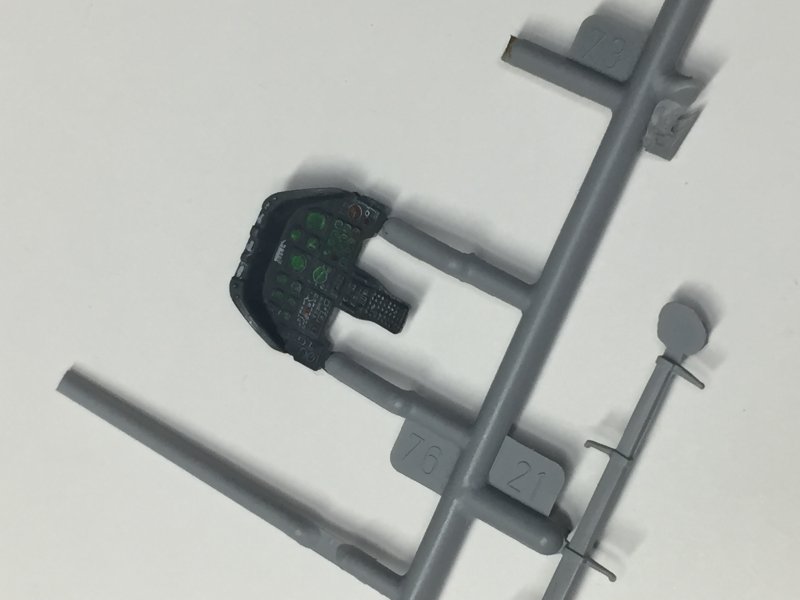
I decided Moonbus #1 would be the practice, make mistakes Moonbus. And I was right! I was focused on sub-assemblies and how to optimally
paint some parts before gluing things in place, and then another round of painting with masking, etc. I was focused so much so that
a key interior part(s) were not glued in before the out part that locks them into place was glued in. But this was practice, and
that's ok. I continued on and by the end noticed some gaps that were going to need A LOT of gap filler to correct.
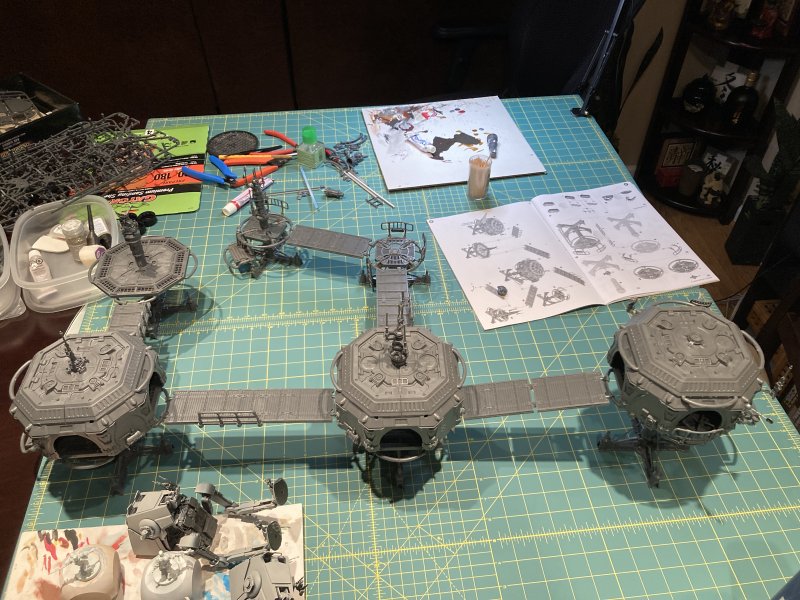
Lessons learned, and on to Moonbus #2 where I remembered that I needed to insert inner walls first, and not leave a big
gap on the other part. The gap was on the main outer walls, and there's no good "clamping" point because of the angles, but
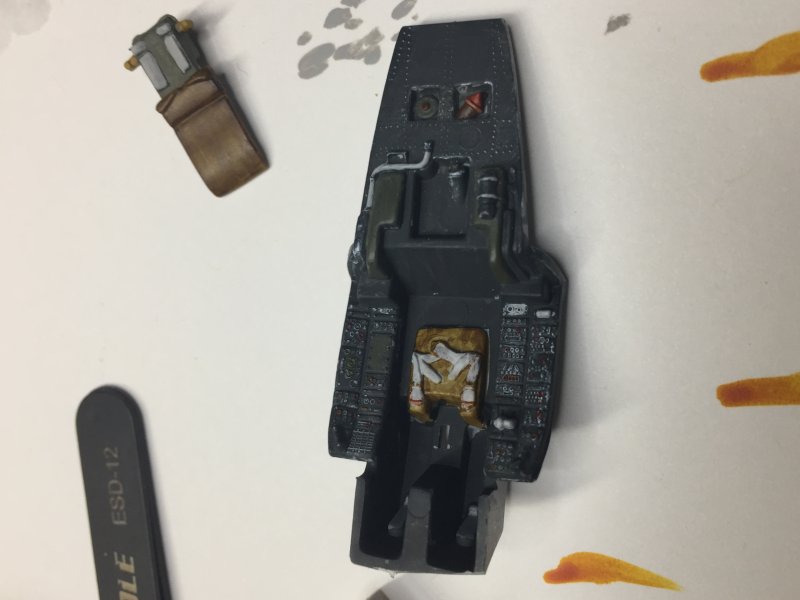
I did my best. To counter this, when I glued on the front cockpit I managed to not set it flush/straight. Those side
outer walls I was so focused on not having a gap - now where the cockpit to join flush I instead and a huge, measurable gap on one
side and an overlap on the other. Between sanding options and actually going forward with using some styrene strips to fill the counter
gap, I gave up and admitted it was beyond my current skills. Well, on to Moonbus #3 that I happened to have.
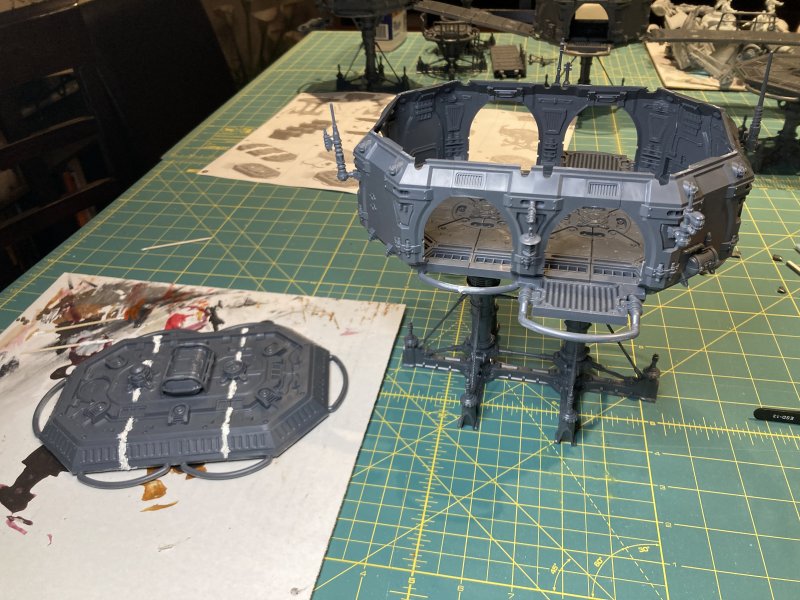
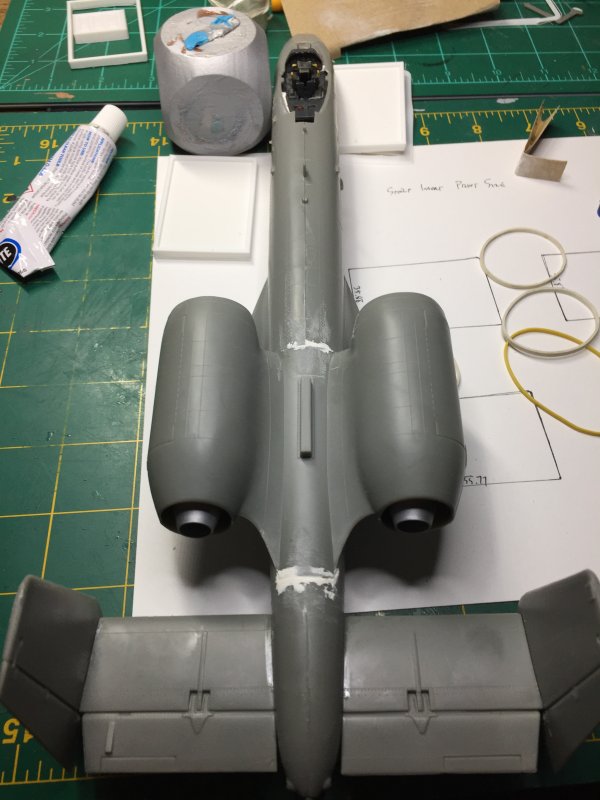
For #3, I repeated my corrections and tried to do better. There were still some wall gaps, but I can backfill those with putty filler.
Somehow that damn canopy will not go on flush - curves and edges just aren't cooperating. Things are together, but
it still feels hacked together. Maybe I need Moonbus 4. And 5?
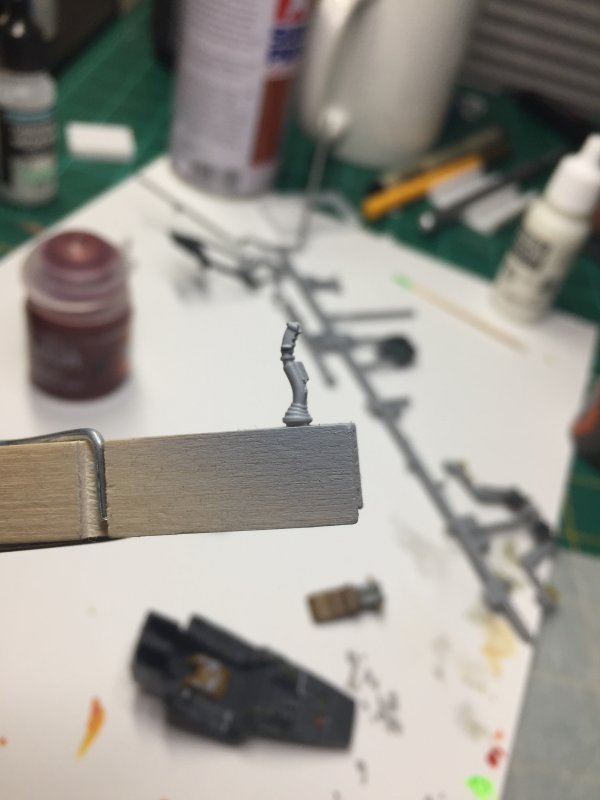
As it is, I'm at the "I need to practice painting" stage, and I have plenty to practice on. The truth is, after fighting
this model for over a month, I need to take a break. Now I have the hobby table cleaned off and ready for a weekend of a return
to painting HeroQuest minis. Hopefully I won't get overly frustrated with that...
2024 Model Show
08.25.2024
Last year I found out about the Huntsville plastic model show the day after it ended, when I was looking at the website of one of the attending vendors. I thought that might have been fun, so I made a Google Calendar note when they announced the next show - Aug 24, 2024. That date was one I actually kept up with and would monitor the sponsoring group's Facebook page to make sure I both had the right date and that the date didn't change.
Saturday of the show came and I was ready to go. I had no idea what to really expect. I've seen videos of various model show/contests online and most have a section of models on display for judging, and then a section of vendor tables that pretty much reminds me of flea markets. My plan was to go and look at the models on display, then check out vendors to see if there was anything special enough that I didn't think I could get locally or online - and there, I wasn't really expecting anything or have a "must buy something before leaving" urge.
The show info had vendors showing up at 8:00 to start setup, model contest entries/admission starting at 9:00, contest judging starting at 1:00. 11:00 seemed like the right time for me to show up. Everyone setting up should be set, and the 1st wave of hardcore people would be done doing whatever people do. It was an oddly pleasant 83° when I arrived shortly after 11:00. I went in and to the left were models on display, to the right 4 rows of 10-12 tables per row of vendors.
The lines winding through the contest models were, for me, a little narrow and not moving in an easily navigable direction, so I opted to go right and browse vendor tables. Along the right-most wall I kind of scanned while walking by - old cars... old military planes.. old cars... old cars ... really old cars... random aircraft. This continued along the length of the wall, where I ran into why I don't go to conventions, shows - basically any large-group thing occupied by people interested in the subject/hobby a lot more than I am.
3 hrs from when people started coming in, 5 minutes after I entered, I walked into a wall that is best described as the odor of old man musk on a hot day plus onions. Once I smelled it, I had a hard time getting away from it. I continued walking the tables and almost speed-browsing as I continued to see car... car... Corsair... Apache... car.. It was here that I ran into a more random, but oft present, reason for not going to special-interest-group centered events.
The random person milling about is oblivious to anyone else, which generally steers them toward coming across as an asshole. I first noticed this when looking (from a couple of feet away) at 3ft high stacks of boxes filled with models atop a table. An old guy in blue shorts is suddenly standing in front of me. Ok, he's not moving. I move to the right to see the next stack. He soon moves to the right and is still right in front me. Even better - I swear he's an onion-smell source. I skip down to the end of the next table, skipping about 4 rows, and there's fewer people so I move in a little closer to the stacks. Maybe a minute later, blue shorts shows up beside me and is trying to wedge in as if I'm in his way. Deciding to go look at other tables, on a return pass I found out blue shorts was working and moving models around/filling empty slots as they were being sold. Had there been any empty spots where I was looking before, I might have given him a pass here.
But in general, people just weren't paying attention to other people moving about. Maybe I'm more cognizant of this as I can inadvertently mow somebody down with my mass if I'm not paying attention, but fully 1/4 of the men there - and let's face it, there's maybe 4 women at this thing - these are dudes close to my size. It was here I thought back to my string of 1-and-done events: Star Trek convention, Wrestlemania, comic/gaming things I can't remember any details of right now. It looked like "model show" was going to enter that list.
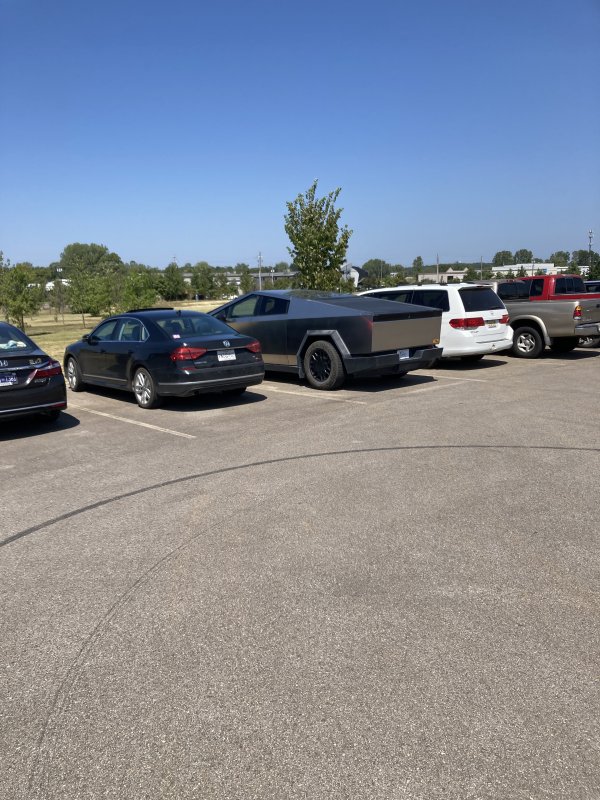
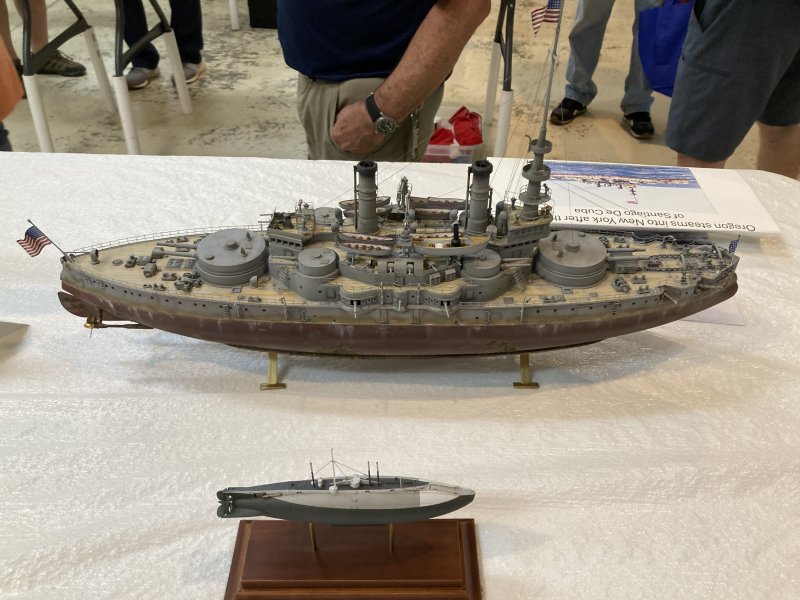
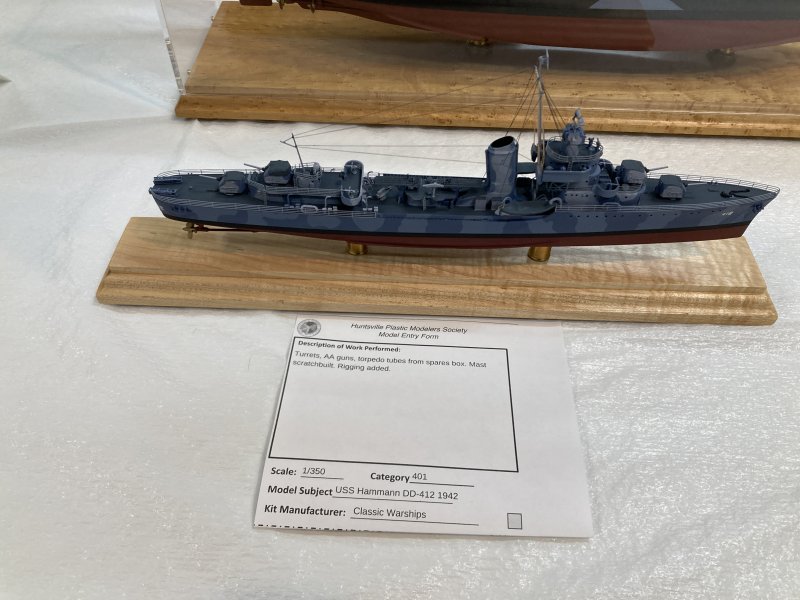
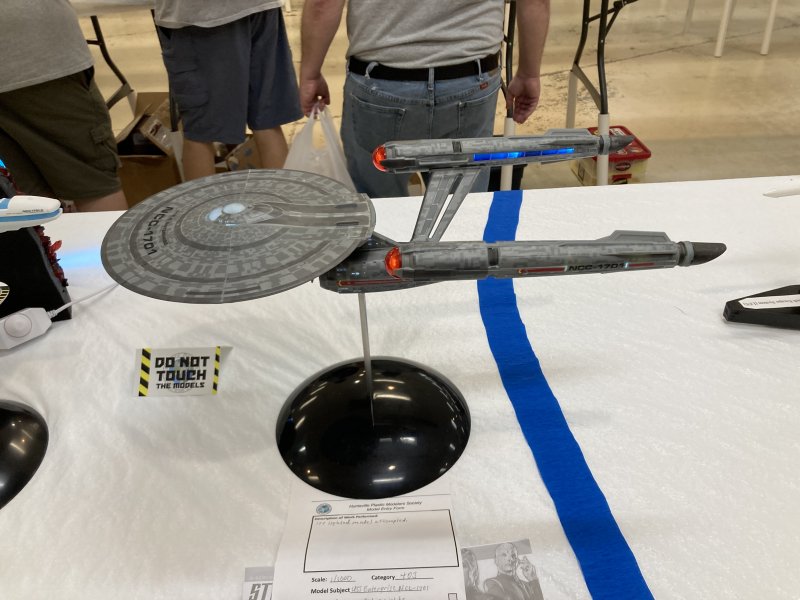
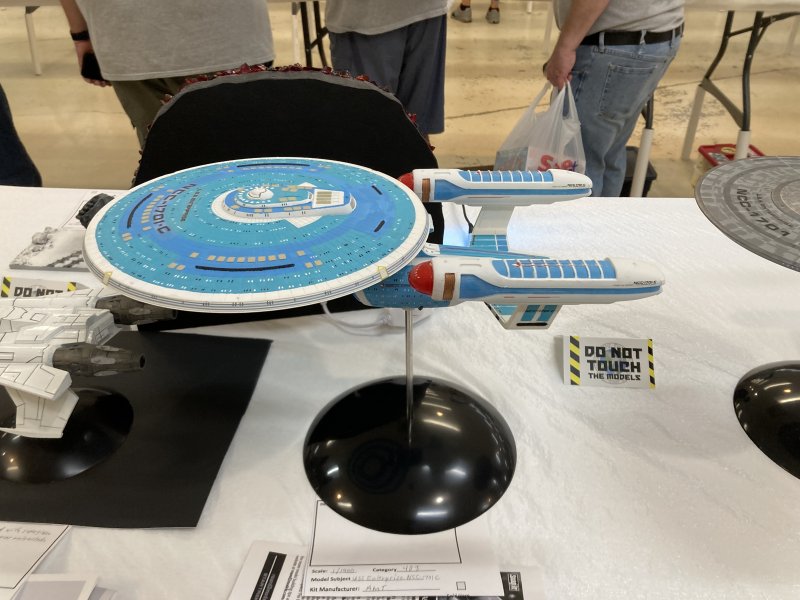
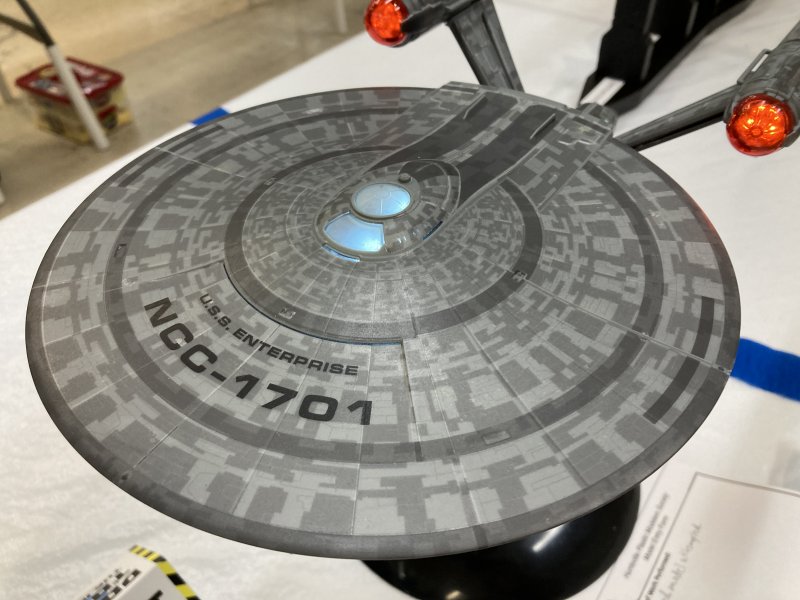
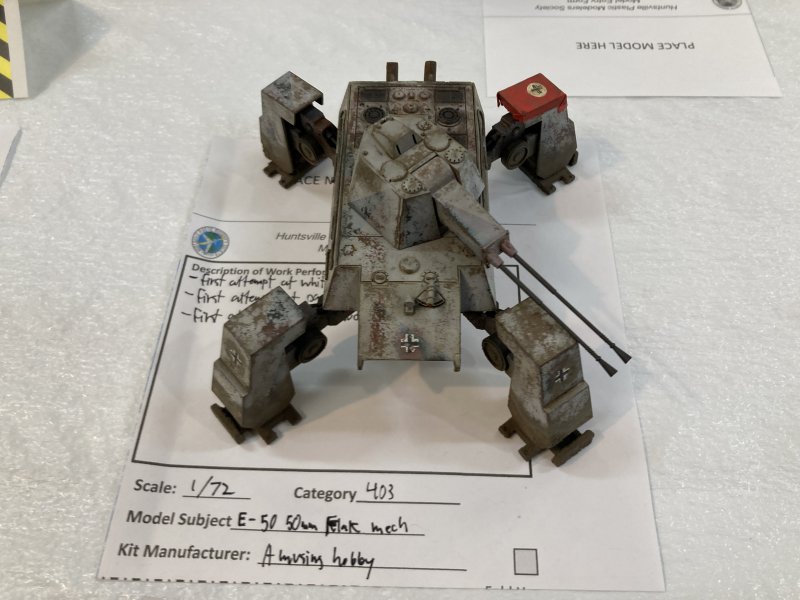
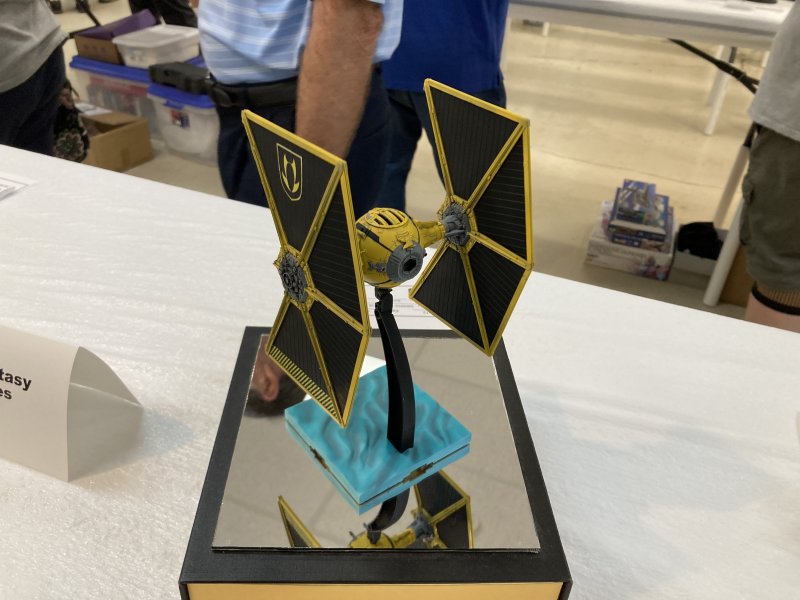
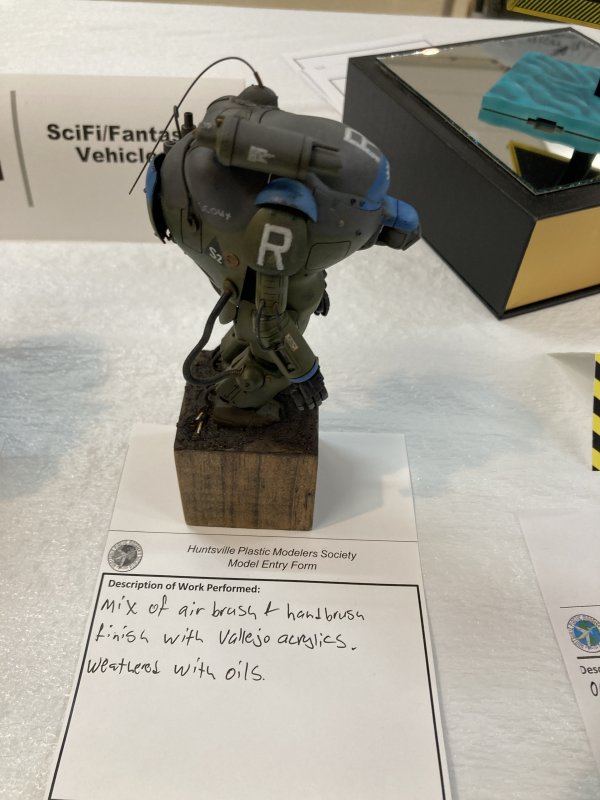
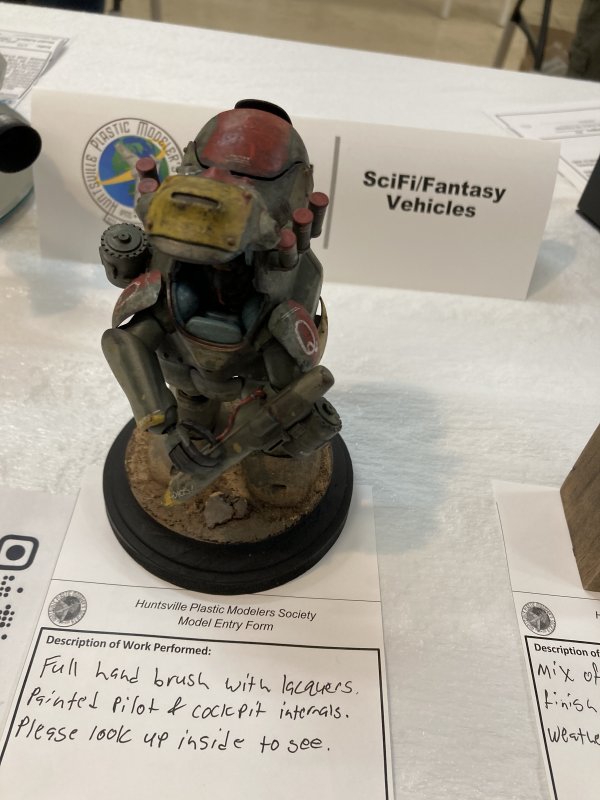
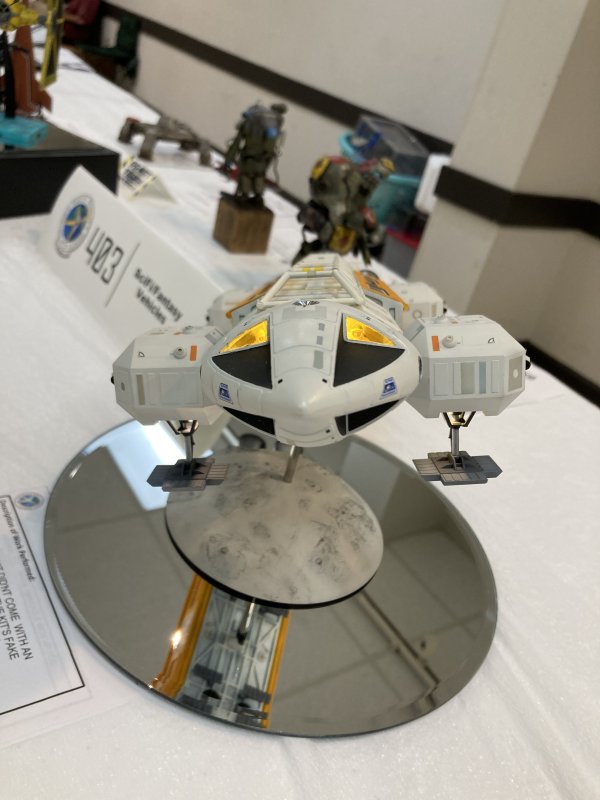
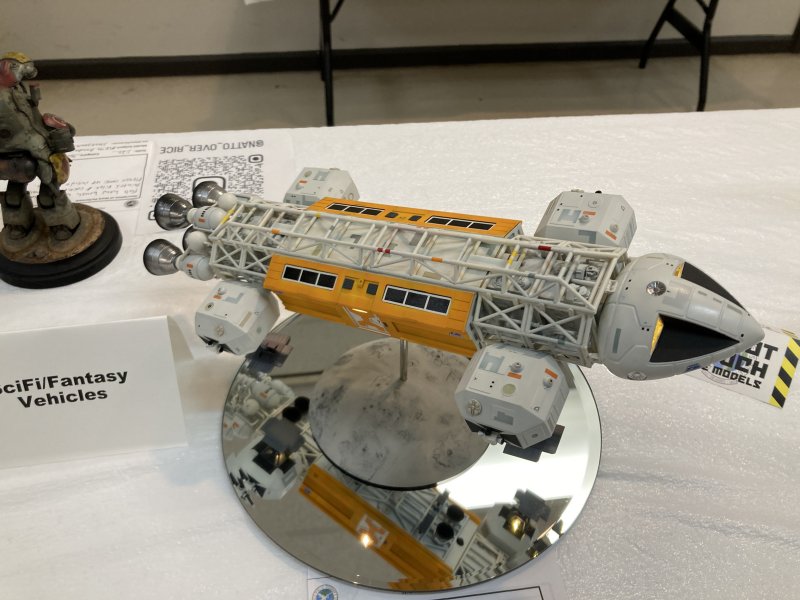
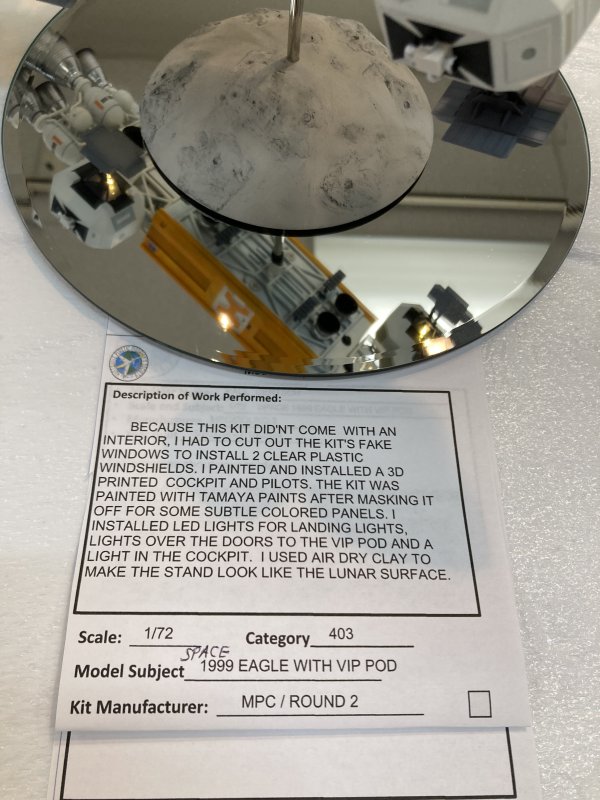
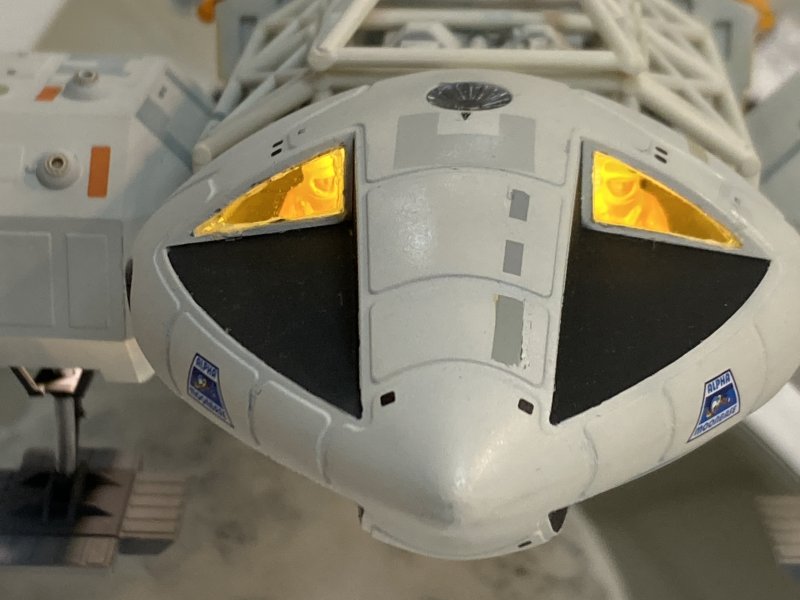
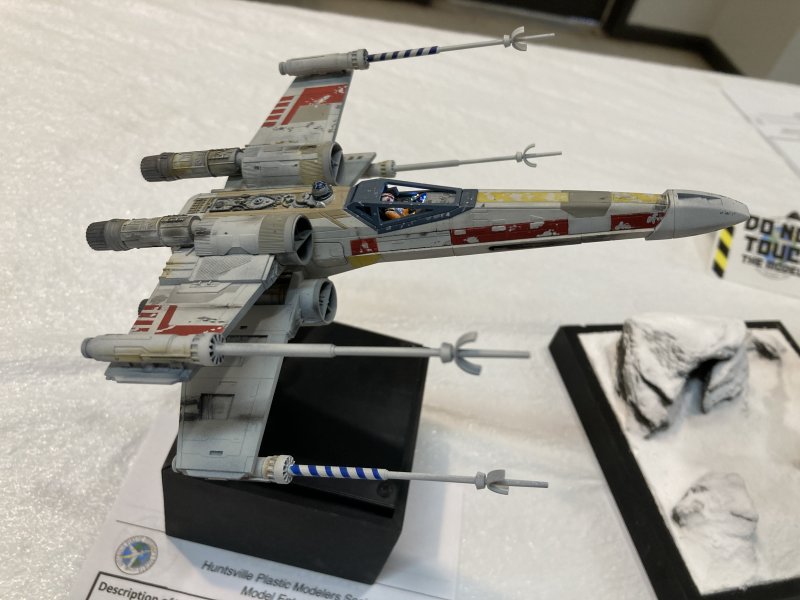
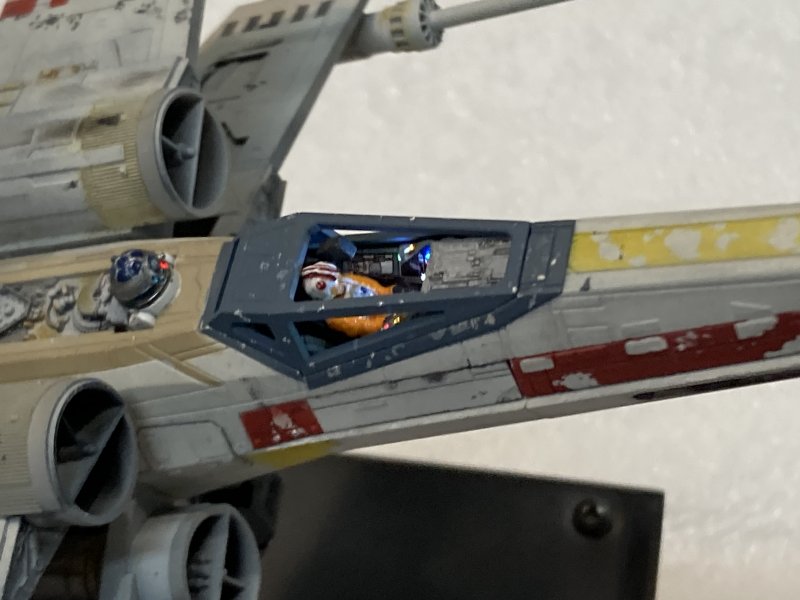
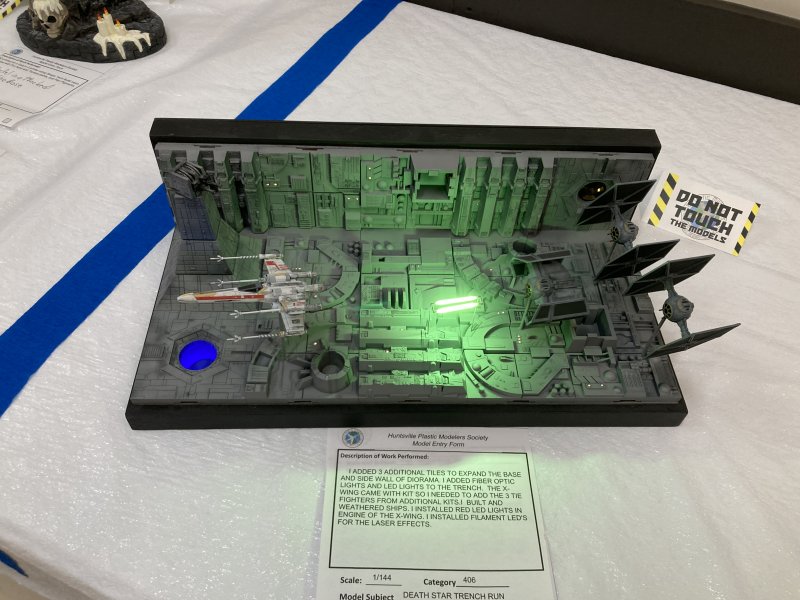
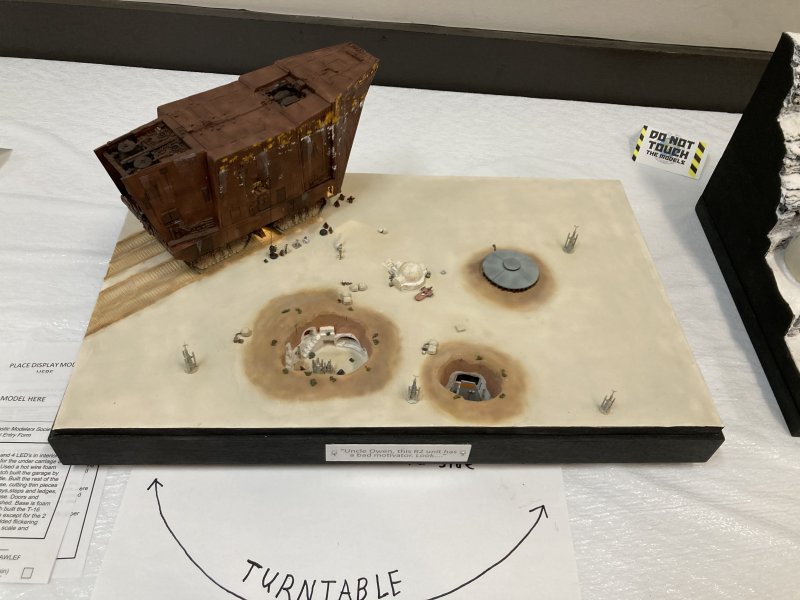
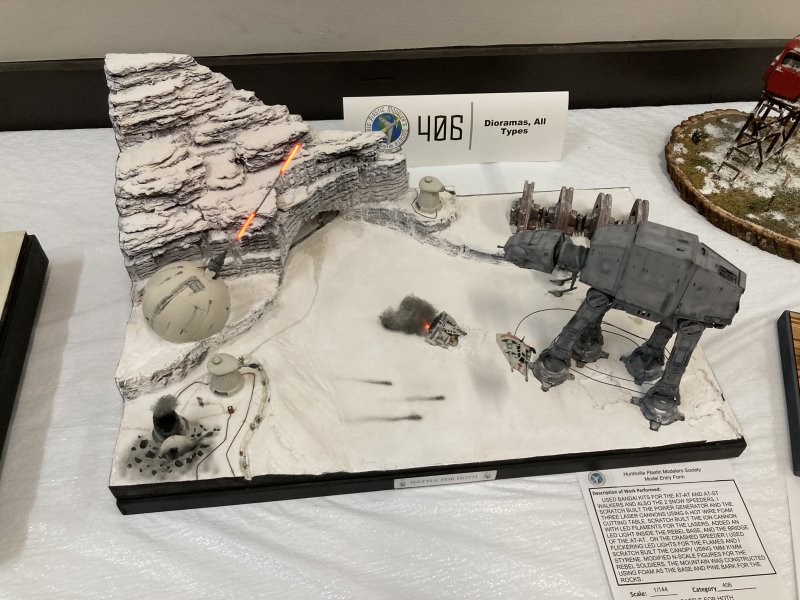
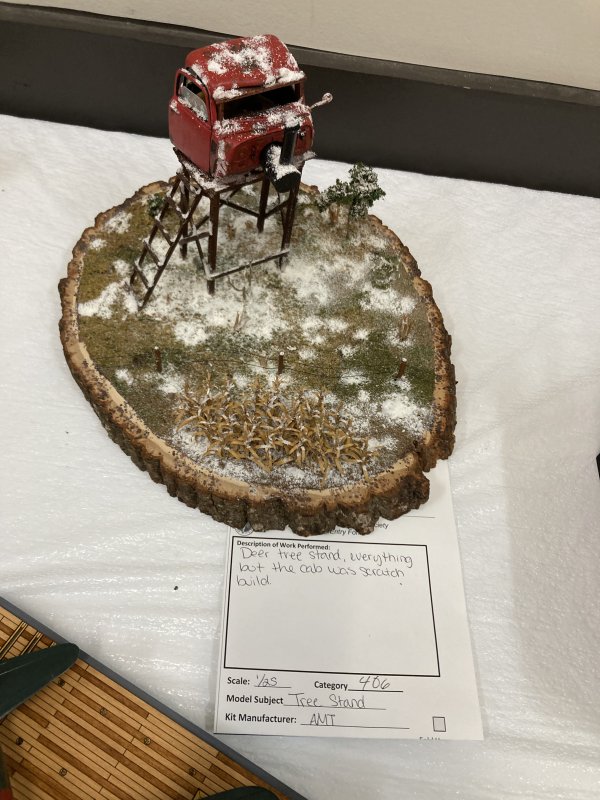
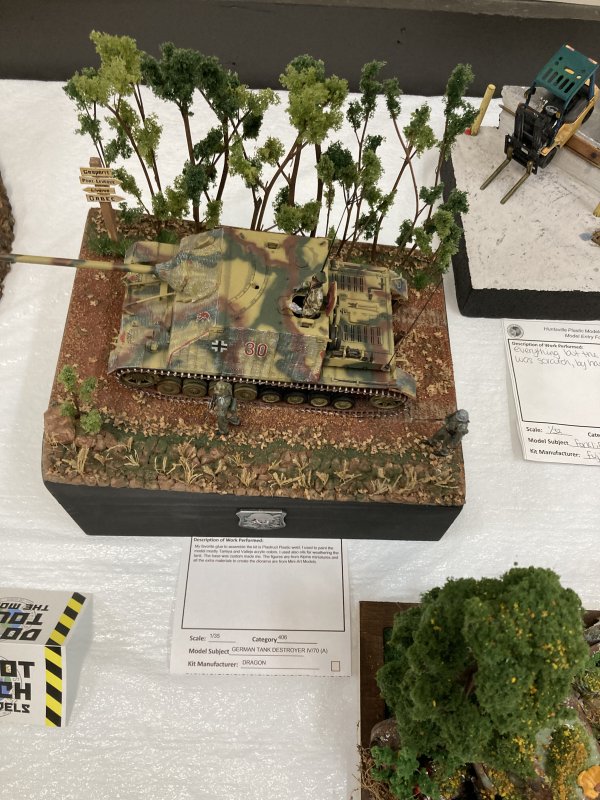
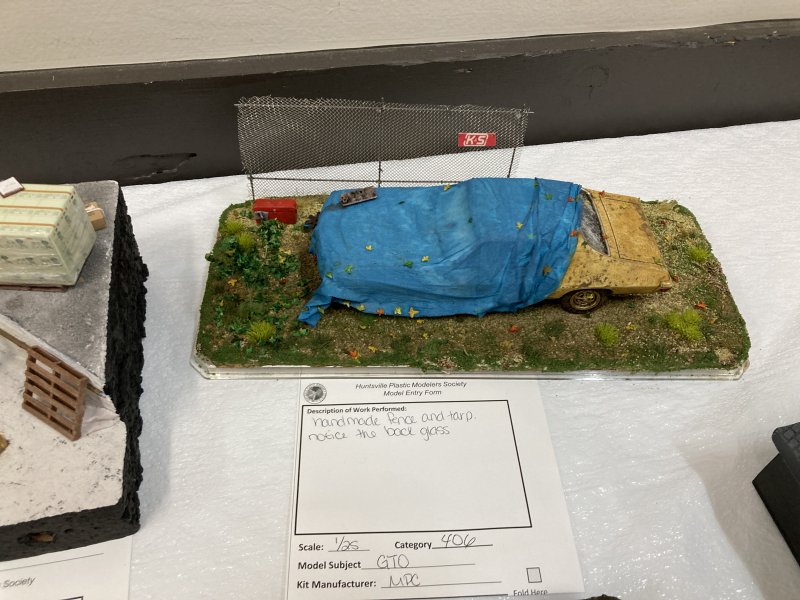
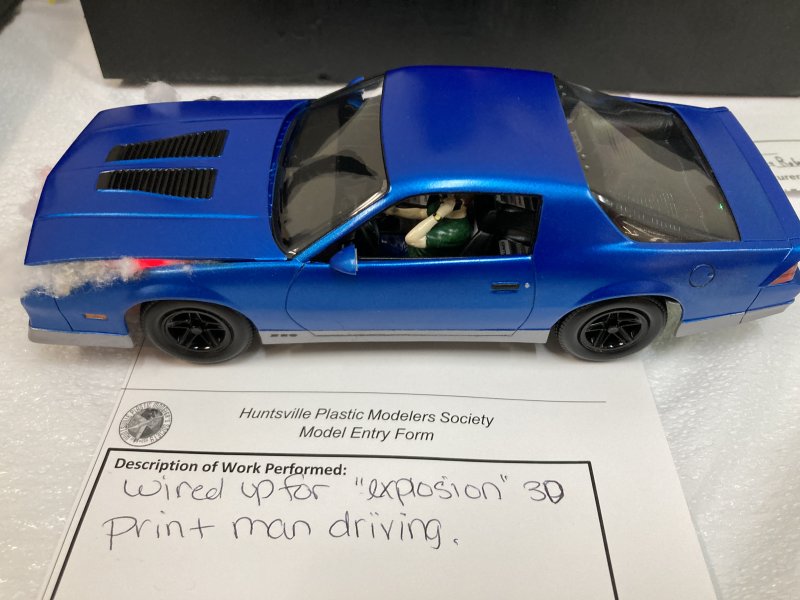
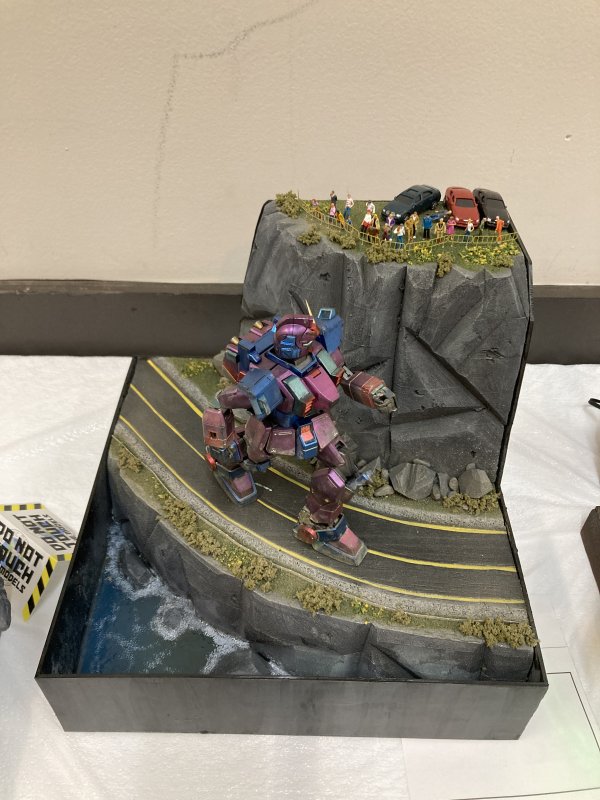
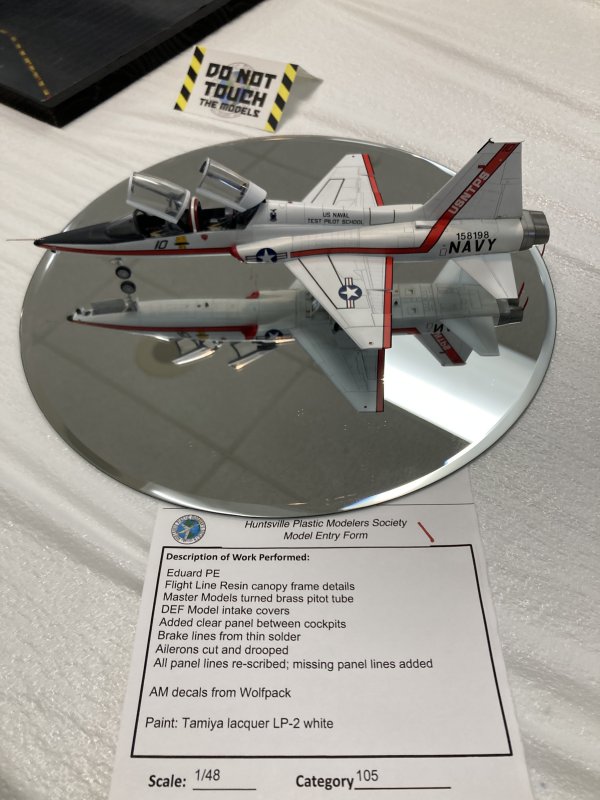
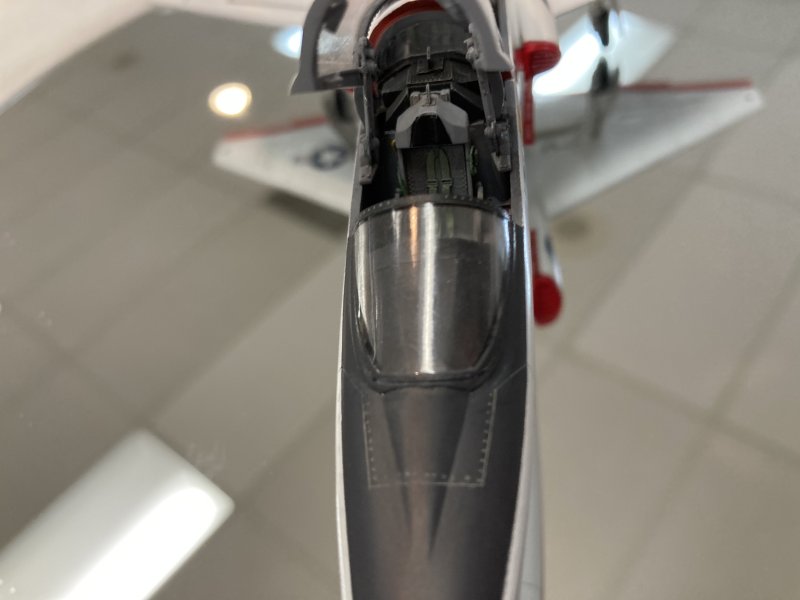
I went and looked at some of the model contest entries. I started on the side that had naval ships and sci fi - the combo of which took up 1 row of tables. The other 5 or 6 rows were cars and aircraft/military, and still seem to have the awkward path to view. Along the back wall were some dioramas, which was a category I specifically wanted to see as that's a little more geared toward my game-painting mindset. I managed to look at some of the aircraft as I looped my way out, and all were good but they just seemed kind of generic-good. I say that as someone who hasn't been able to finish the last 4 model kits I started because I get frustrated with how badly things seem to fit together.
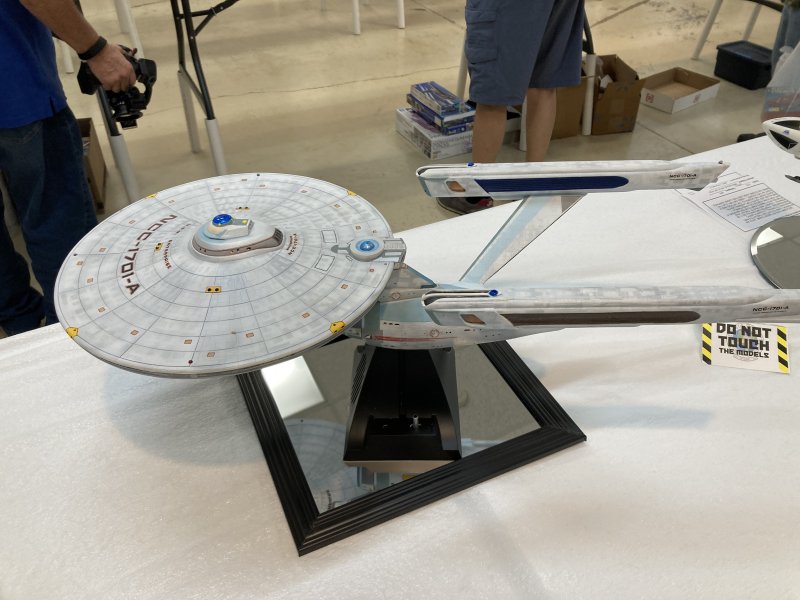
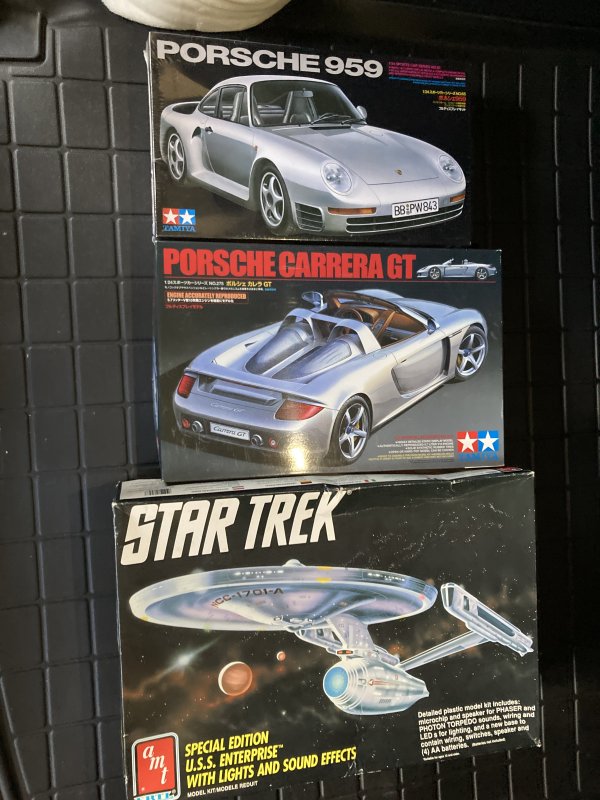
I had reached the point I wanted - browsed vendor wares, looked at some models. The odor had lessened so I went for another quick browse of vendor tables. One had a couple of Tamiya Porsche models that had caught my eye on the initial go around, which unfortunately was where the old man + onion had kicked in. While looking along tables as I walked by, it really was 90% cars/military that I've always seen. I reached the spot with the Tamiya models I'd seen from a distance and looked closer. One was still in the shrinkwrap. Another was open, so I checked to make sure it had everything since that's something you're supposed to do. Then I noticed sitting below the table was a Trek Enterprise with the Light & Sounds kit. I opened up the box to see what was inside, as the honestly friendly guy on the other side of the table said in his best faux-car-salesman voice "what's it going to take to take that home with you today" as he mentioned something about the rarity. There were no instructions for the kit, and it was marked at $50. Even missing instructions, that sounded like a good price for a kit that came out in 1991. We chatted and I added the 2 Porsche models to the Enterprise and managed a 10% discount.
With that, I was out the door and continued on to have lunch with my good close personal friend Charles G. Part of lunch was showing him the pics below. Most of the story time details while viewing pics were about the smell. I started out with no real expectations and a very low bar. I think that's where I left this adventure out. Would I go again? Not unless the vendor who's website I originally learned of this event attend again - as they tend to stock more than cars and military models. Of course, all of those are available for purchase online. If I modelled well enough to enter the contest, that might be interesting. Based on how my re-entry to model making has gone over the past couple of years, I don't think my skills will reach a level I'm comfortable being judge in public for quite some time.


Necromunda Assembled
05.11.2024
2024 has not been shown to be a busy year for me in the usual post-topic work of gaming miniatures and related items and the painting thereof. Barely 1 update per month, and even then there's not much to show for it. While my excuse - do I need an excuse - has been that I'm trying to improve on my technique and not rush through painting minis, a side-truth is that I needed something a little different.
A few years ago I went to a HobbyTown in Georgia and stocked up on some models that looked fun to build. I built one that never saw the light of a camera or blog post, because it absolutely sucked. When I was 10 years old I would crank out a model in 3 hrs that I was perfectly happy with. 45 years later I spend 3 weeks on a model car and nothing lines up, gaps are everywhere, and extra nubs from the plastic sprue are everywhere. I've read a big problem with modern model kits like the car I can never prove I made, are that the kits are cast from molds that are the same as 10 year me used. Or even worse, recasts of those molds, potentially many times over.
Disgruntled old man me decided that it's time to re-learn how to make a plastic model. Model car #2 was a little better, but still crap. Those old molds are not conducive to modern-me learning. So I pivoted to known modern-molded plastic. In this case, some Games Workshop Necromunda (plastic) scenery.
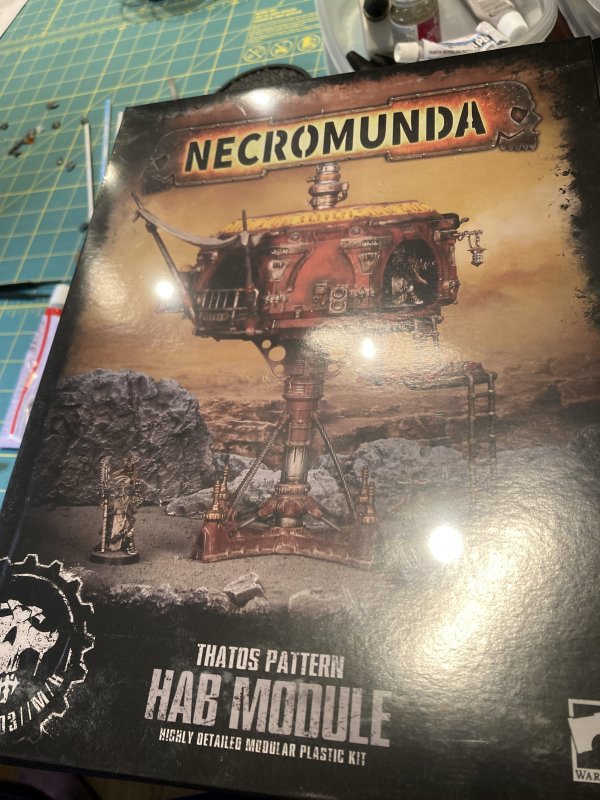
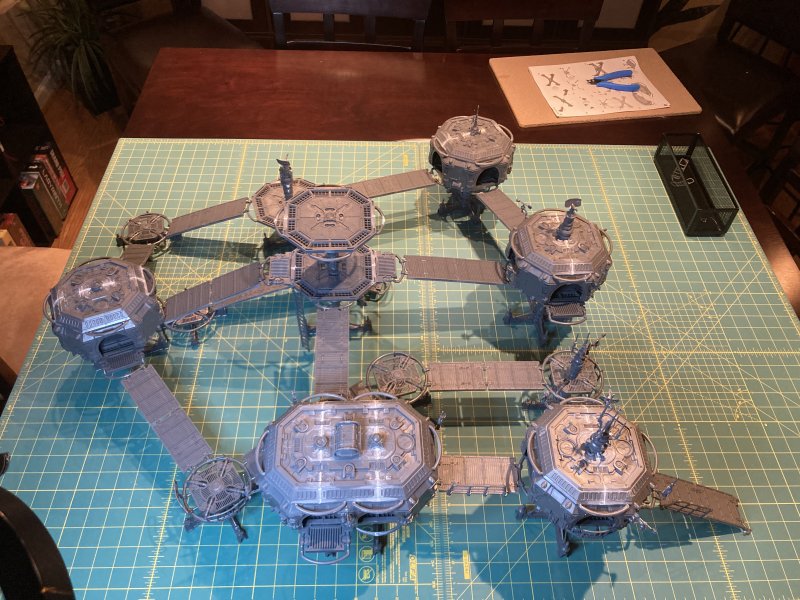
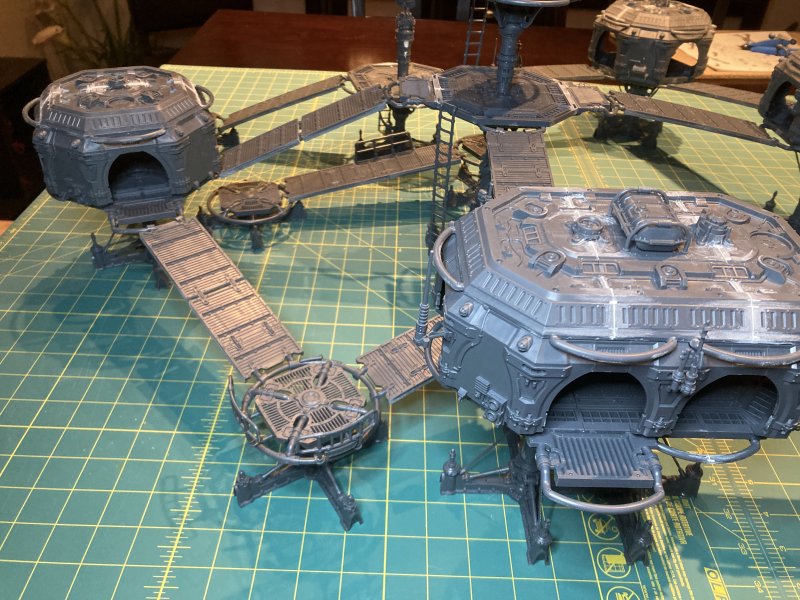
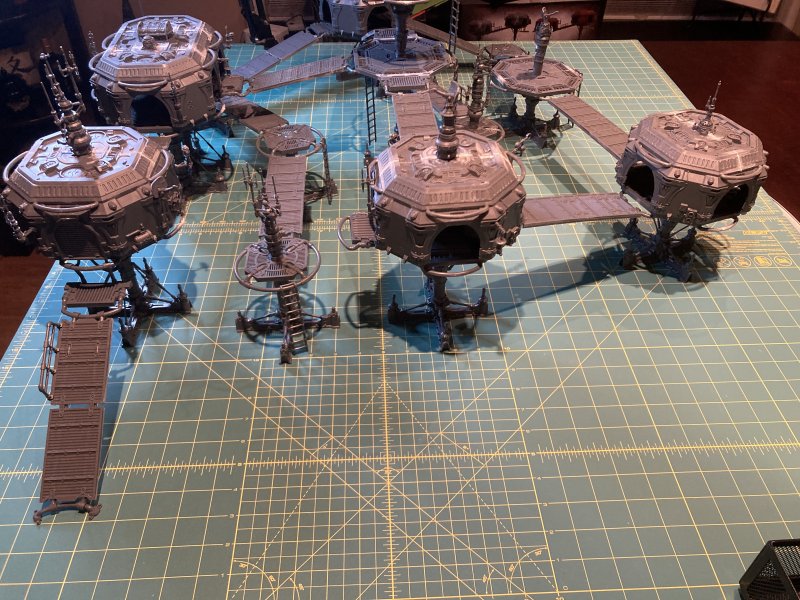
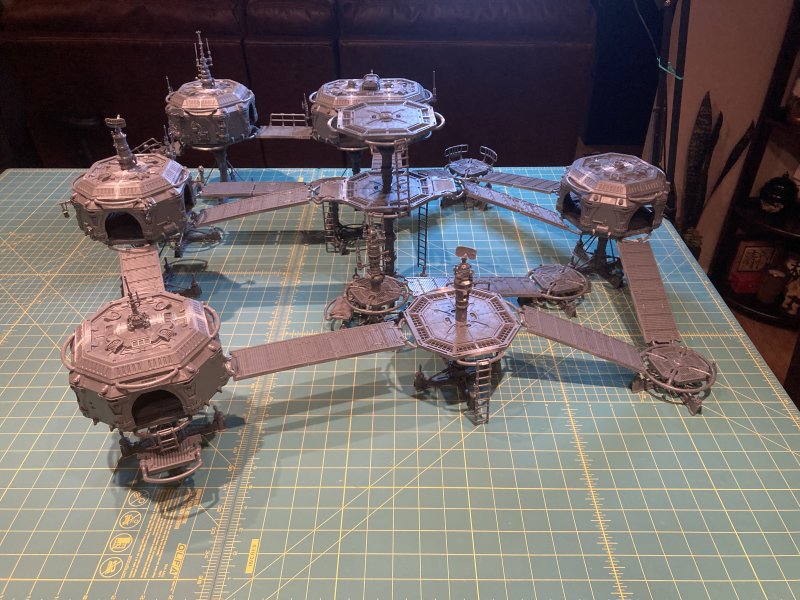
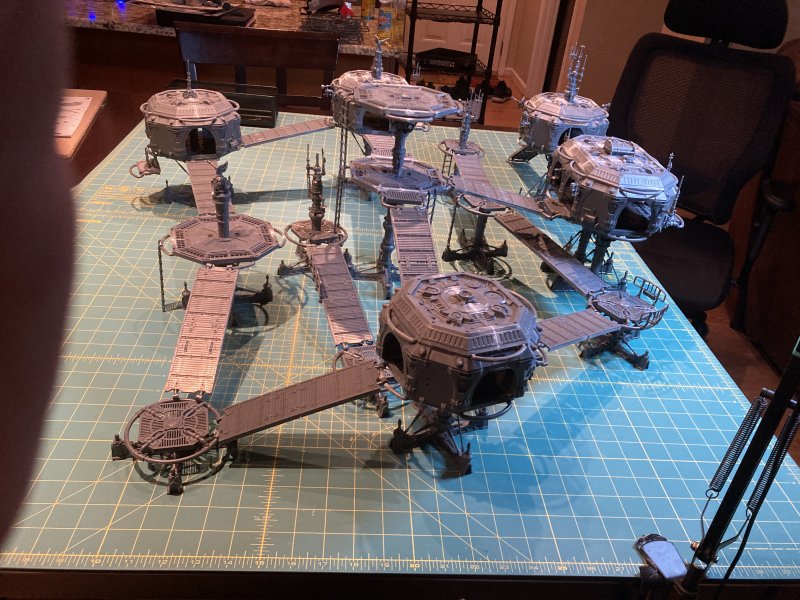
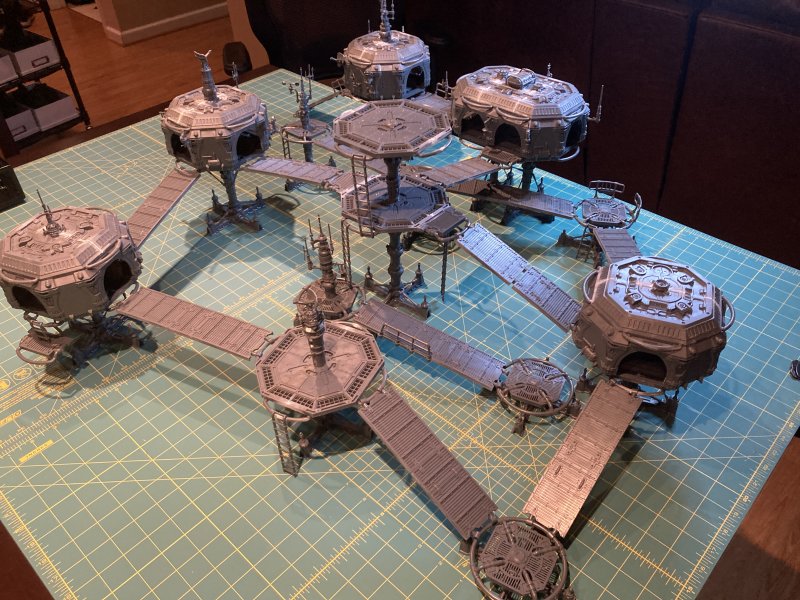
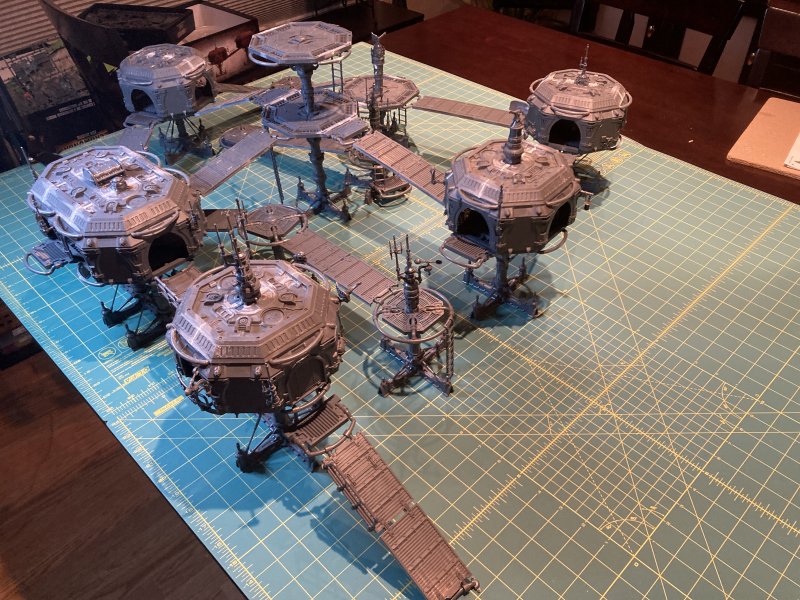
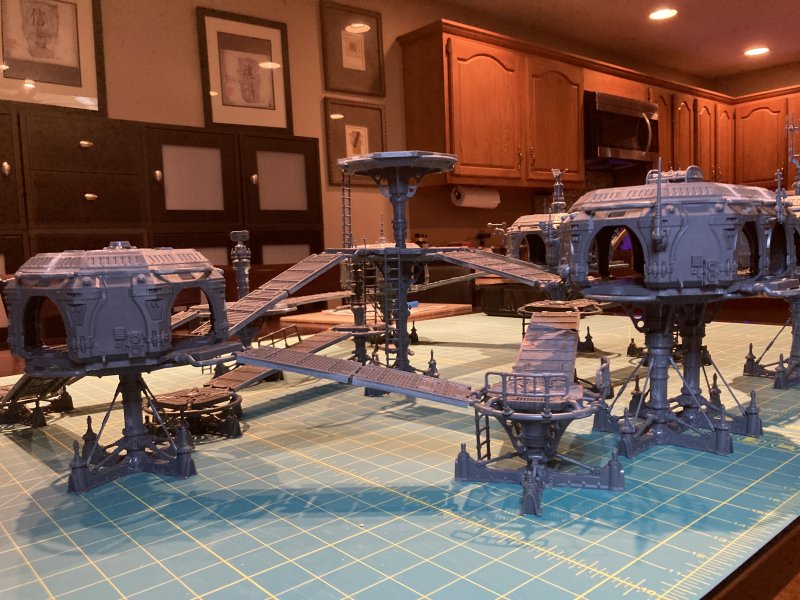
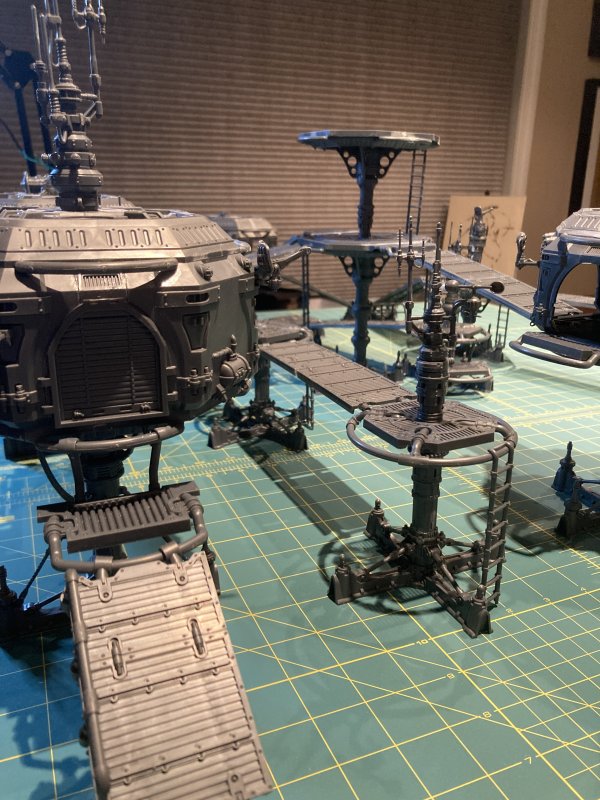
A while back, as I never buy something and immediately crack open a box, I started getting Necromunda Thatos Pattern buildings - Hab Modules and walkways, with Ash Wastes being the set that came with more stuff/rules than I will use, but the price was cheaper than the individual scenery pieces.
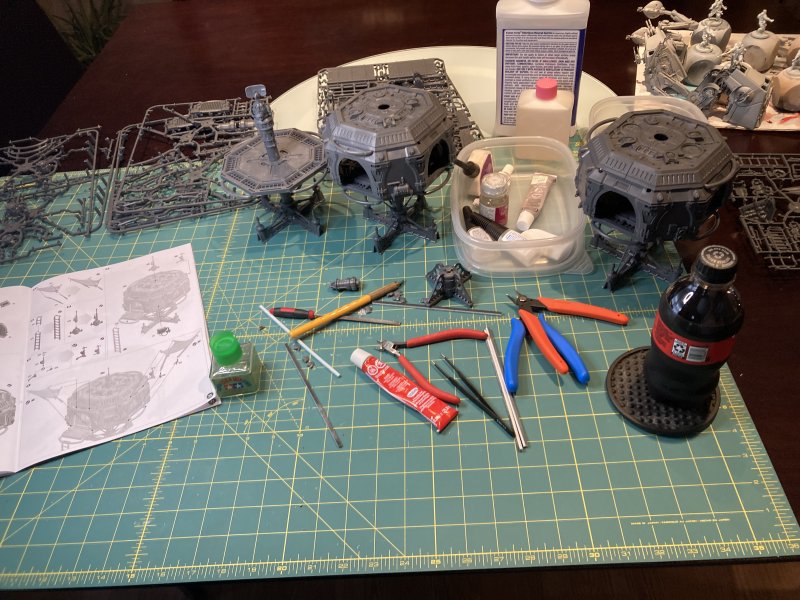
I had a fairly simple color scheme picked out (more on that in a later post) which will work better trying to paint everything at once. Which leads to making everything at once. I did say I wanted to practice on plastic models. Two months ago, I started putting together the first Hab Module kit, and then kept on gluing, snipping, and sanding until everything was built.
I had no idea I had gotten so much of this stuff.
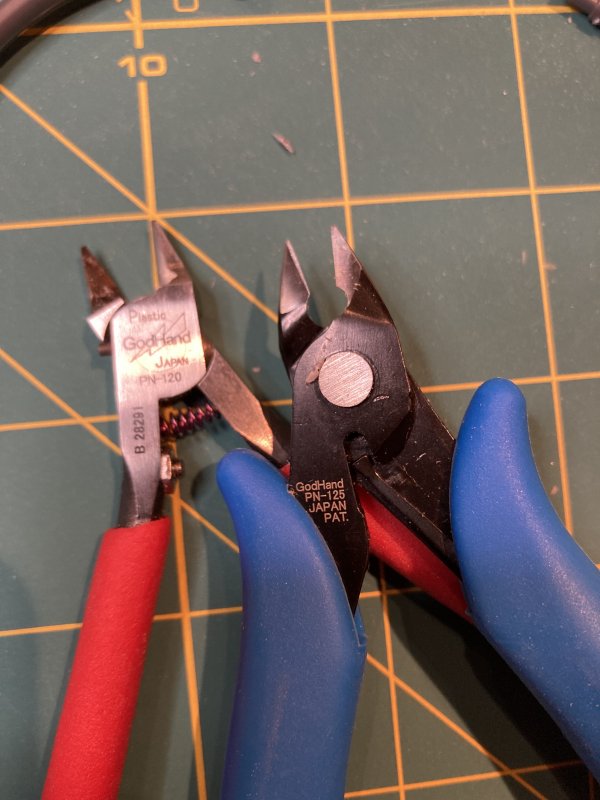
Along the way, most things lined up, or at least lined up better than the model cars I've been trying to make. Old man me uses nippers to cut the parts off the sprue, instead of twisting them off like 10 year old me would do. A long time ago, it was twist part off and then glue together. Now, there is snip, and then a long and involved sanding process. I've got a variety of sanding strips to try and clear the mar on the plastic left from separating from the sprue - this was the big new-to-me thing learned from the model car kits. After lots of sanding is good old glue/plastic cement. There's then potential for more sanding, as that's when I look for places that need some gaps filled, and post-filled sanding.
That's where we are now. Glued, sanded, ready for primer. Once the humidity is down to being spray-paint friendly. Plus, I'm not in a rush. I may need a zombie painting fix next.


Permalink
gaming miniatures models Necromunda
Iron Man and WIP Friends
12.29.2023
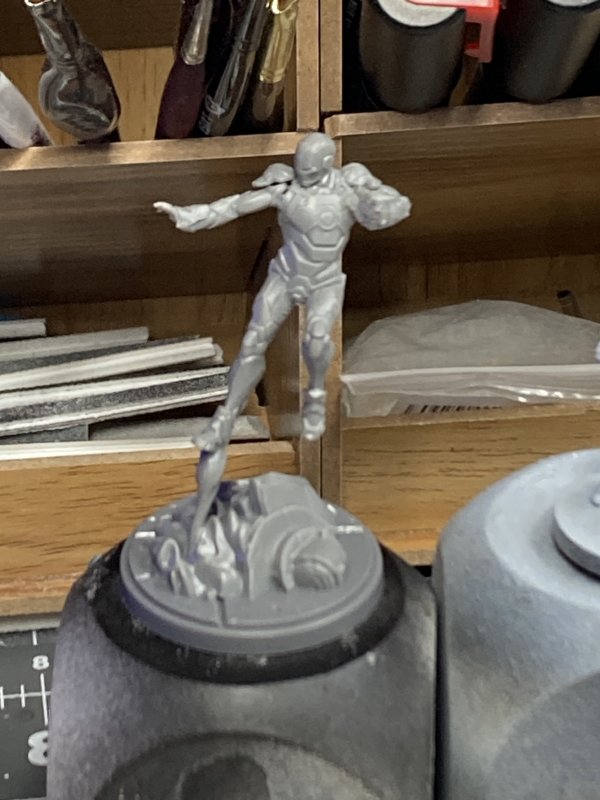
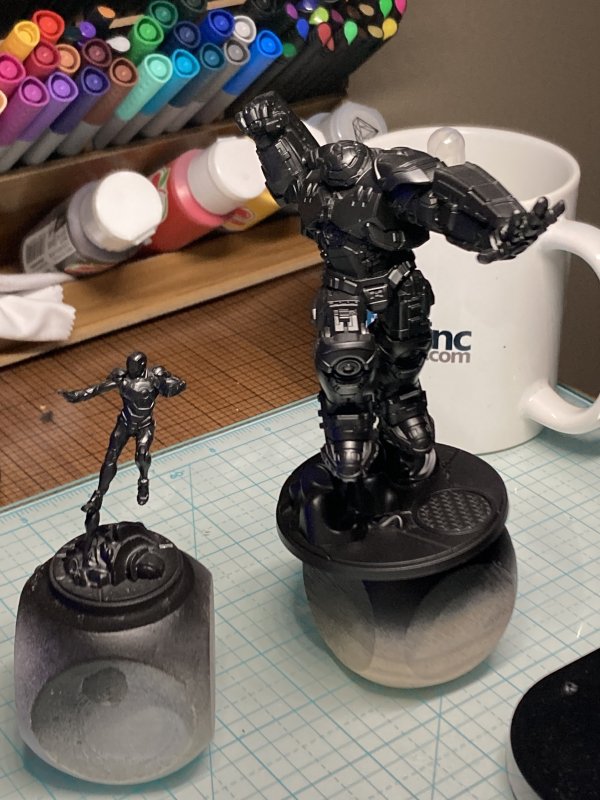
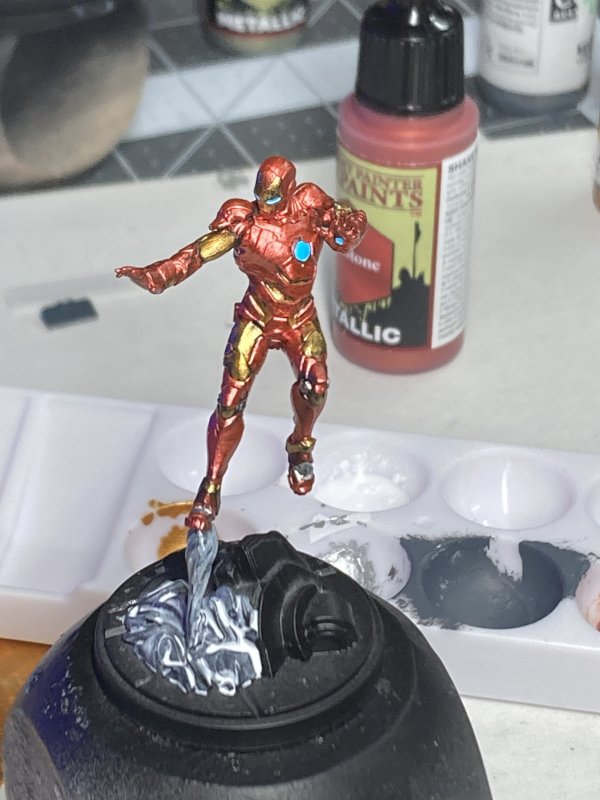
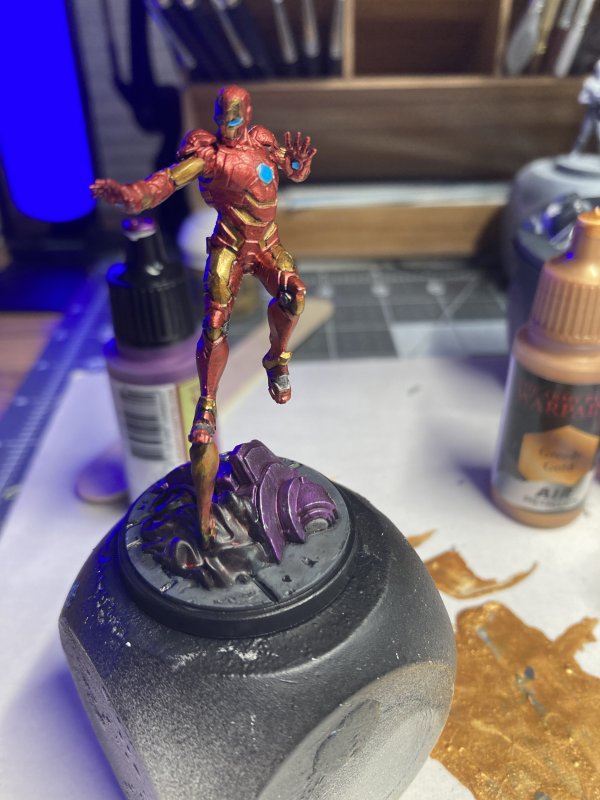
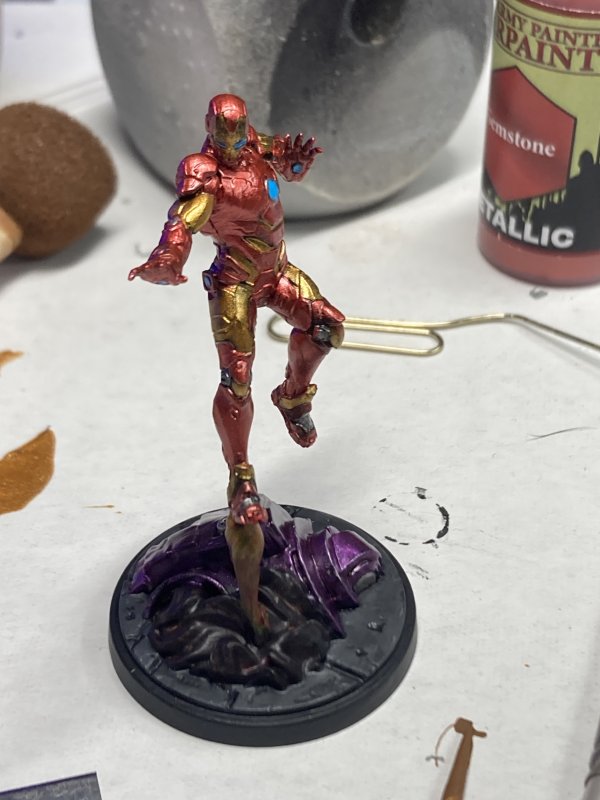
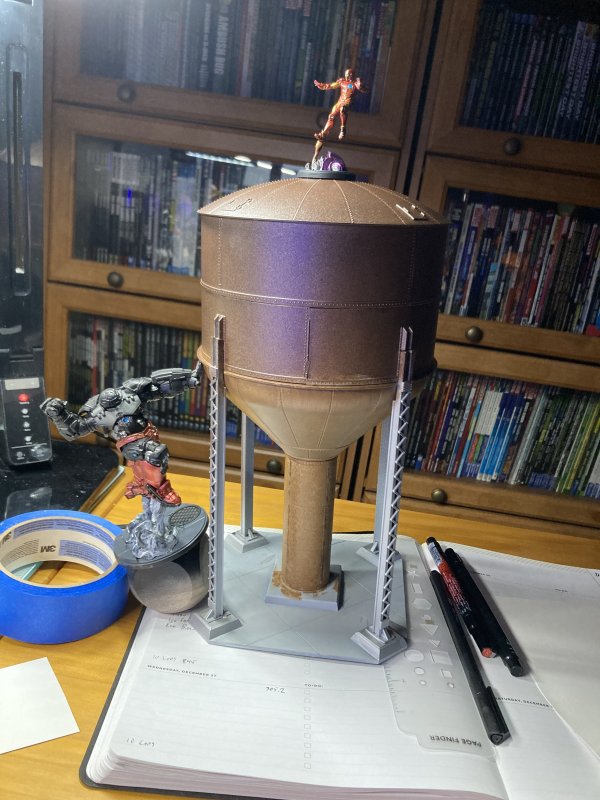
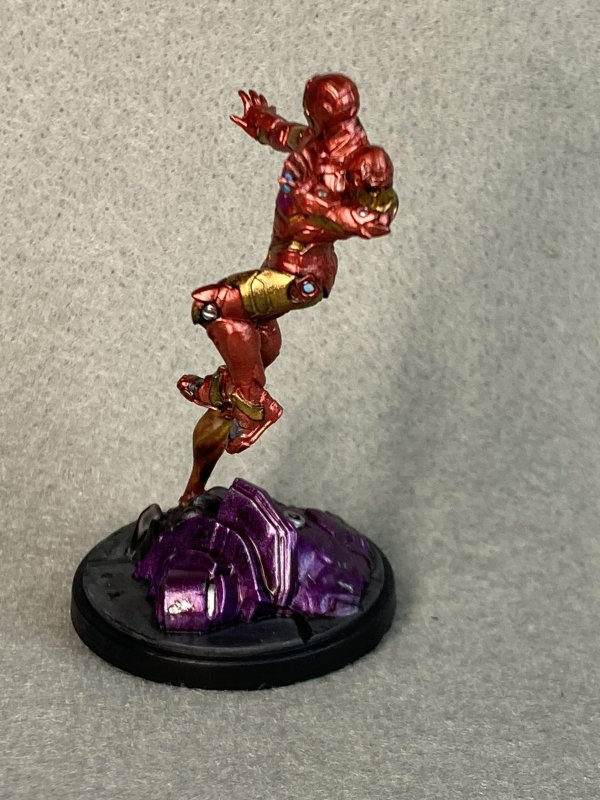
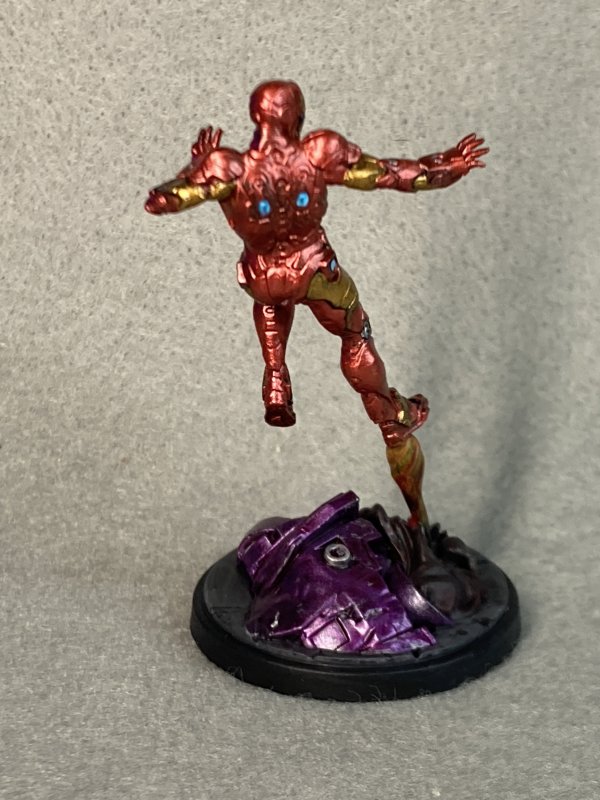
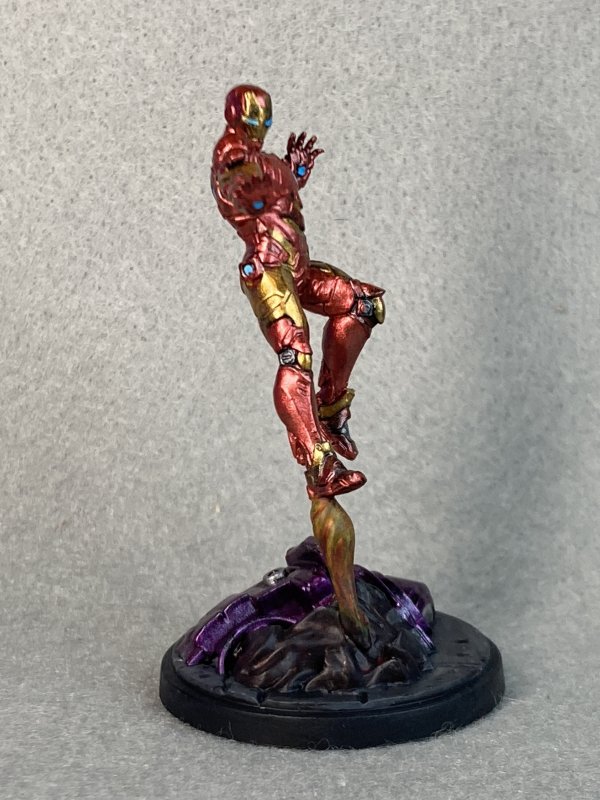
To wrap up the year I finally got around to opening one of the packs from Marvel Crisis Protocol that's been sitting on the shelf for a year. Or maybe three. The Hulkbuster pack has always been at the top of my list to open up and paint, but horror stories about various kits and microscopic parts to glue together has always given me pause. Un-pause, and I've finally moved forward!
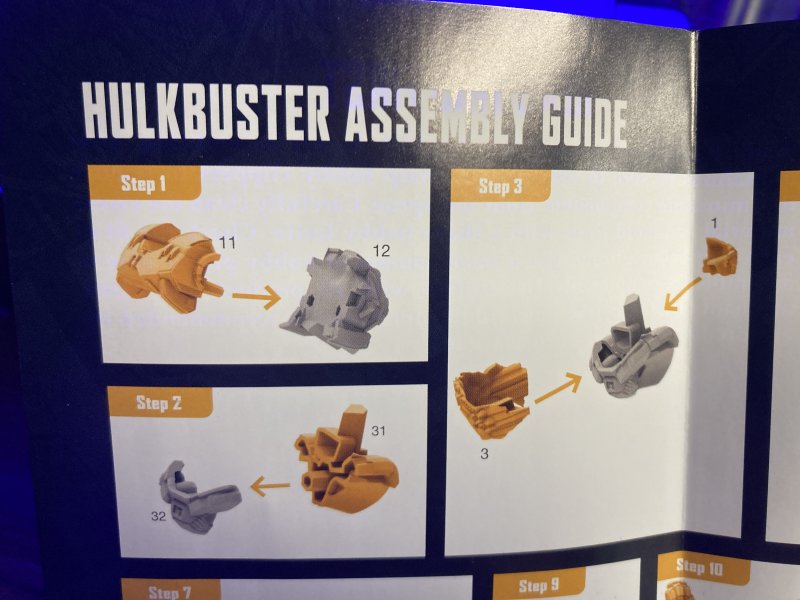
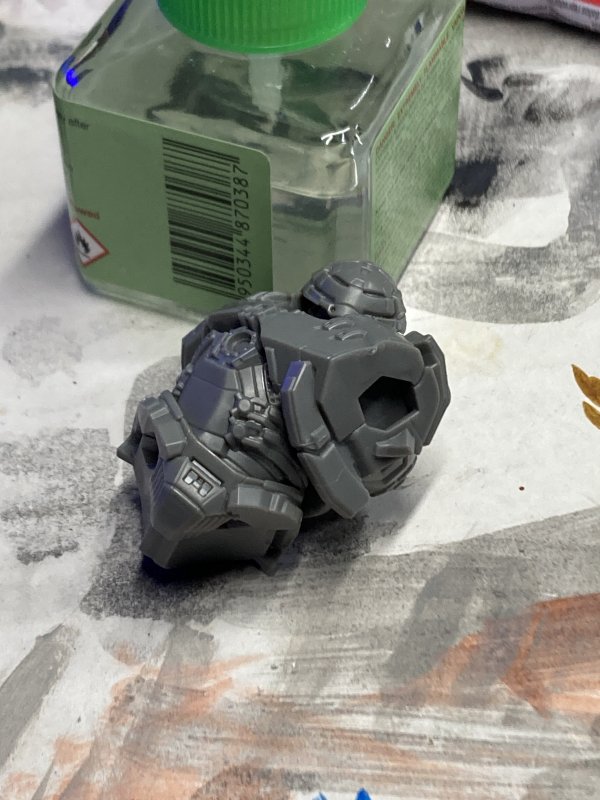
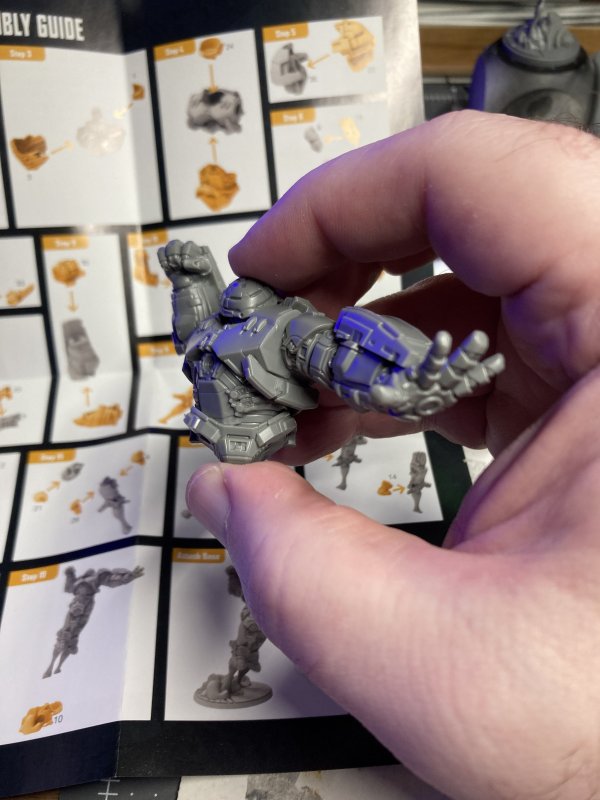
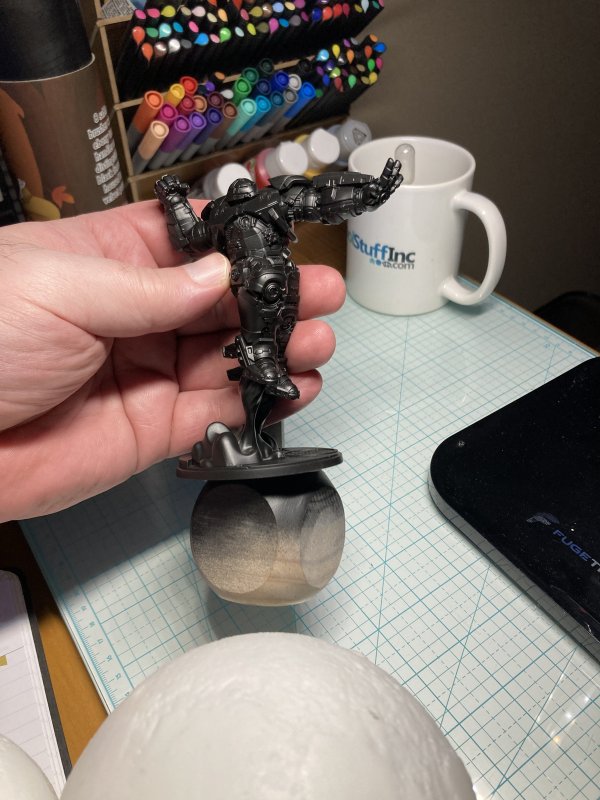
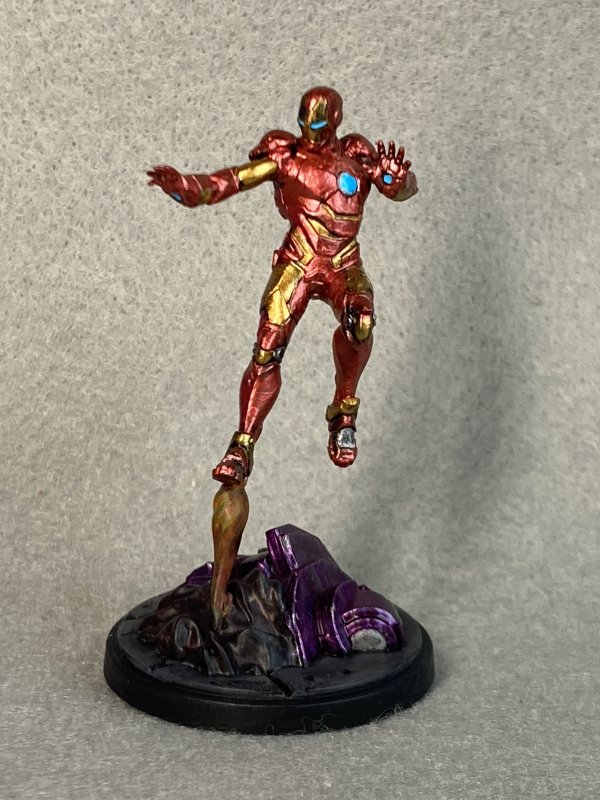
There's an Iron Man and Hulkbuster in the box. Iron Man was pretty straight forward. Hulkbuster was... confusing. I had to consult YouTube for help as the instructions weren't clear on the orientation of some parts. Even the videos I watched weren't clear on the orientation for those torso-parts where I was really confused. The action-angle of stomach/chest/shoulder where things are twisted and bent, without a slot A for tab B to definitely fit in, this is where I knew I would glue things in backwards, upside down, inside out. Luckily, the videos helped and everything ended up glued where it should be.
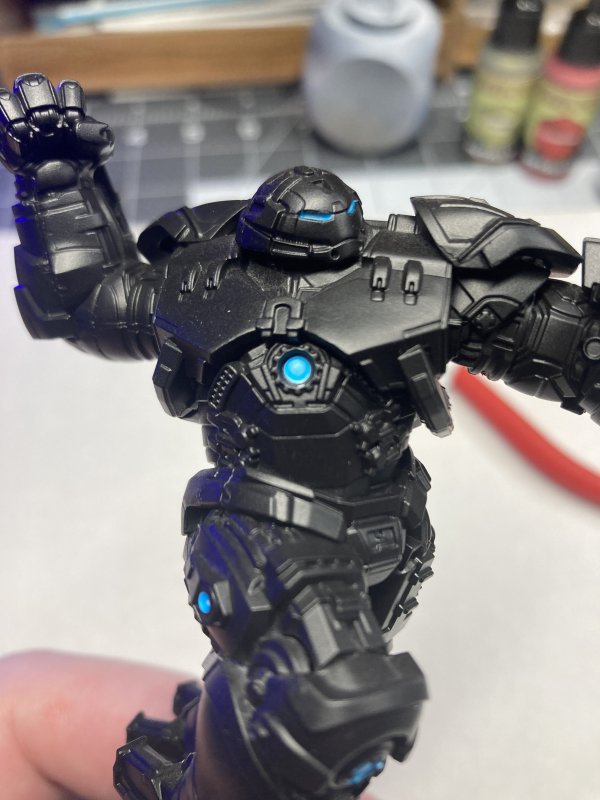
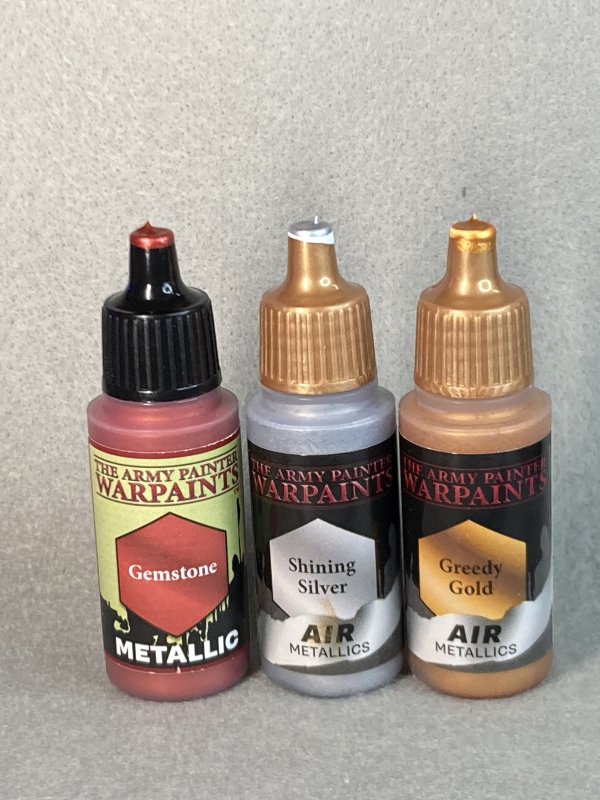
Once it was time to paint, I used YouTube for Hulkbuster, using Army Painter metallics. Although the video is just painting Hulkbuster, regular Iron Man was going through the same treatment. I deviated from the videos by not using a coat of speed paint on top of the metallics. Evidently I like my armor extra shiny. Additionally, I used a different YouTube for the Arc reactor glows to go with a blue-glow more than green-glow.
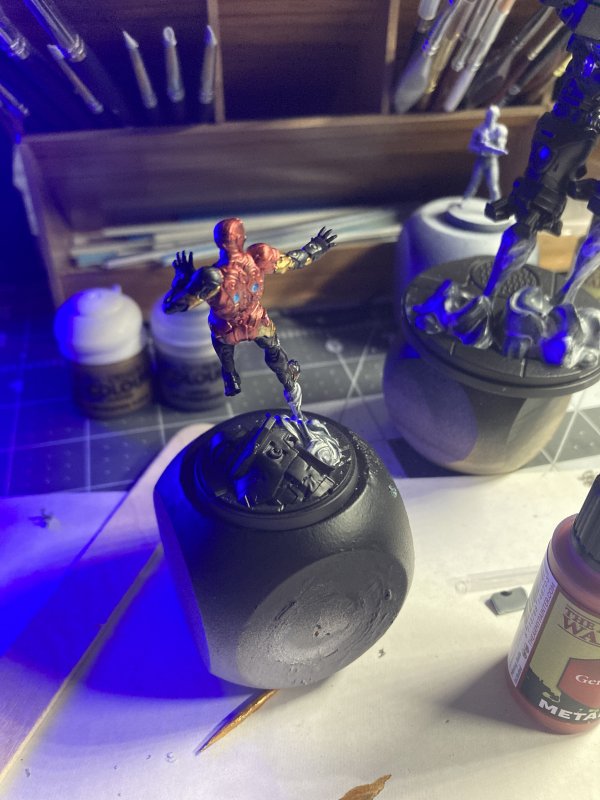
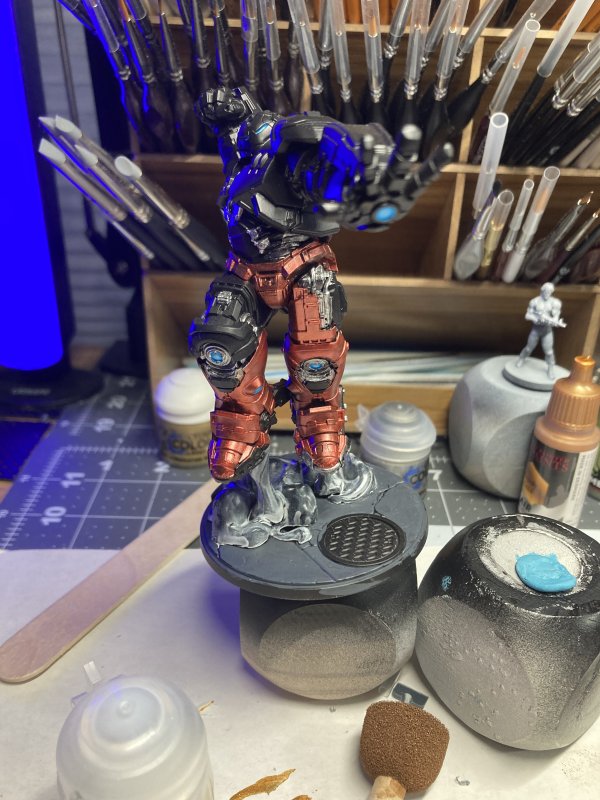
While I started with priming Iron Man and Hulkbuster at the same time, I quickly turned to mainly painting the very much smaller Iron Man more, and finishing him up. The metallic Army Painter paint requires a couple of coats to get proper coverage and smooth things out - this stuff has the consistency of nail policy. Granted, this is my first time to use this paint and I'm obviously still learning here. With Iron Man finished, I decided to work on Hulkbuster from the bottom-up so as to focus more on getting details and coverage instead of the eventual hurry-up-to-get-done that usually comes with using 1 color at a time. Hulkbuster boots took about 6 passes to get the coverage I was happy with. Well, happy enough.
What was I saying about hurrying up to get done?
Hulkbuster is still in progress. Most of the legs are done - maybe 70%. This is one I'm definitely going to have to take my time and not rush. Not rush to the point I may throw in painting other things to completion while working on this one here and there.
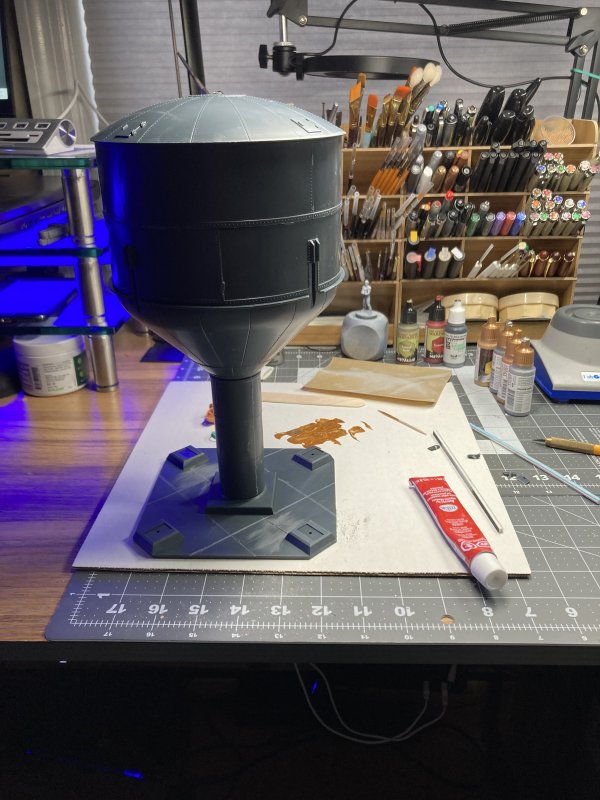
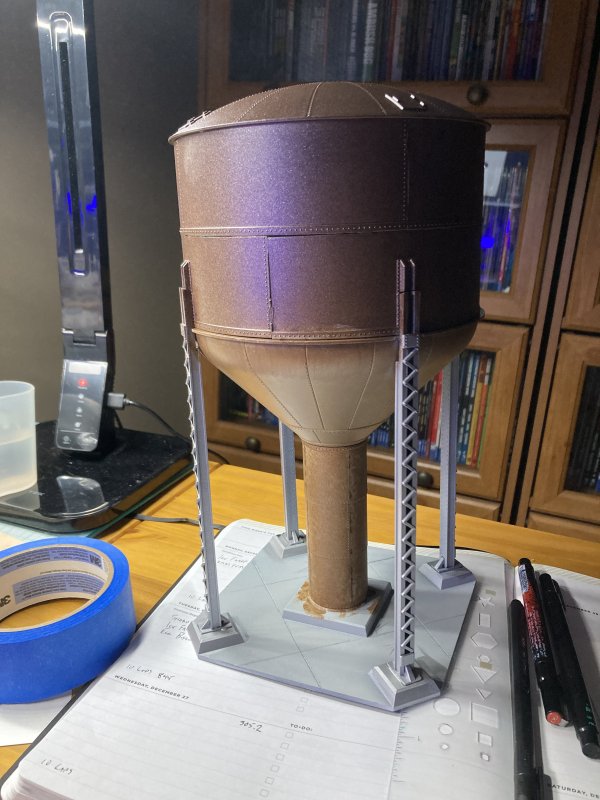
Speaking of other things, one of the semi-impulse purchases I made during Christmas sales was an O Gauge Water Tower for train layouts. O is the comparable scale that fits with 28-32mm gaming minis, and for some reason I've always wanted a non-homemade water tower, probably because my homemade water tower isn't very good. But now, a legit water tower can populate my zombie infested town ship! This is another currently in-progress kit. Getting circular parts to line up on multiple levels was the challenge here, and I knew going in that any gaps or problems with alignment would turn into rust damage. As progress went on, this rusted tower kept sticking in my head and I decided to overdo the rust. This is the step I'm currently on, which boils down to "how much was too much, and how do I backpedal?" This kit is probably about half done now, and still needs a lot of detail work added.
Permalink
Atlas O Gauge gaming miniatures Marvel Crisis Protocol models
This counts as the August update
09.07.2020
The past month has not seen me be productive from a hobby standpoint. If I tried to pick a reason for the lack of anything content-worthy over the past month, it would be "lack of artistic gumption". There were some things I started, but decided not to continue/finish. Things I worked on took way too long for the end result. But hobbies are for fun, so I shouldn't be worried that I don't have much to show for August.
I thought I would make a good, old fashioned model - an A-10 Warthog that I picked up no telling how long ago at Hobby Lobby. The last model I made was a tank last year. For the A-10 I started with paint details in the cockpit, and then started to put the body of the plane together. At that point I both wasn't sure what to do next (prime what I had, add more parts, what about painting more details?) AND I just kind of lost interest. I don't remember getting to the point of a hobby project and just saying "eh, I don't really want to do any more." Again, since hobbies are supposed to be for fun, I didn't force it and just decided to put aside what I'd done.
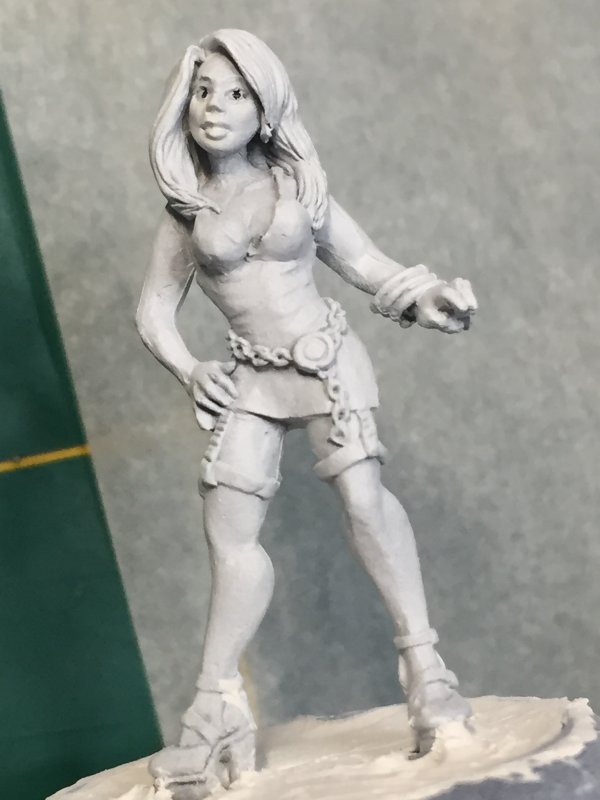
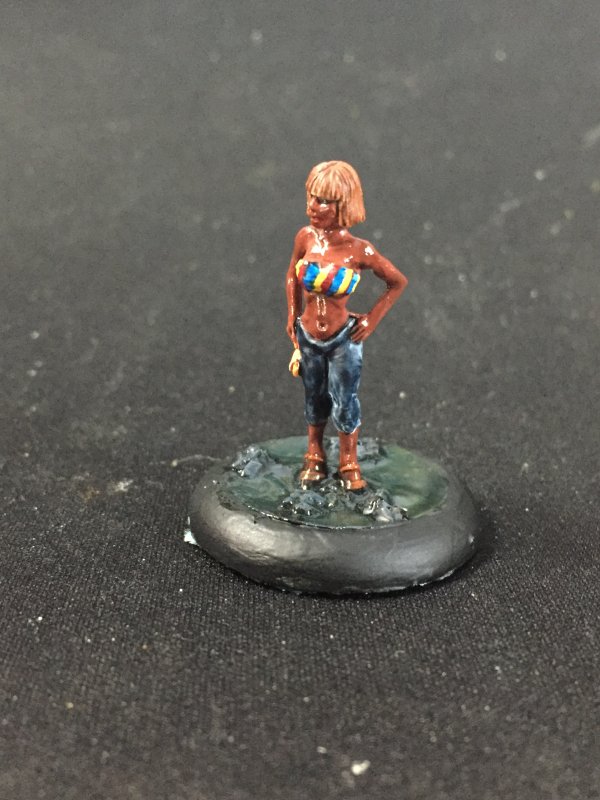
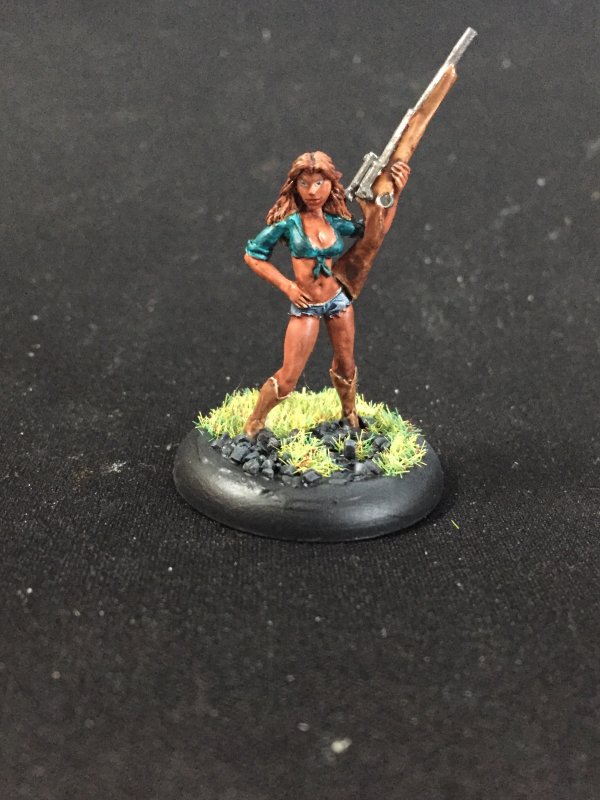
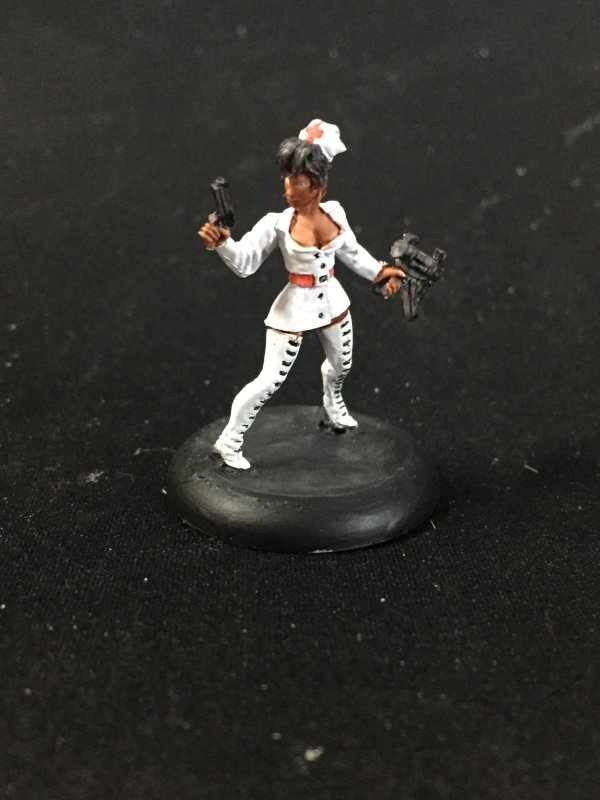
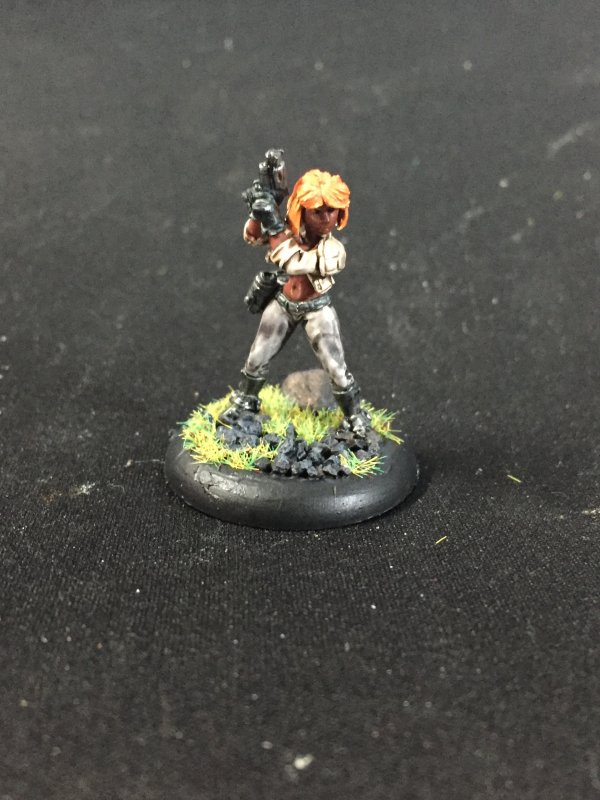
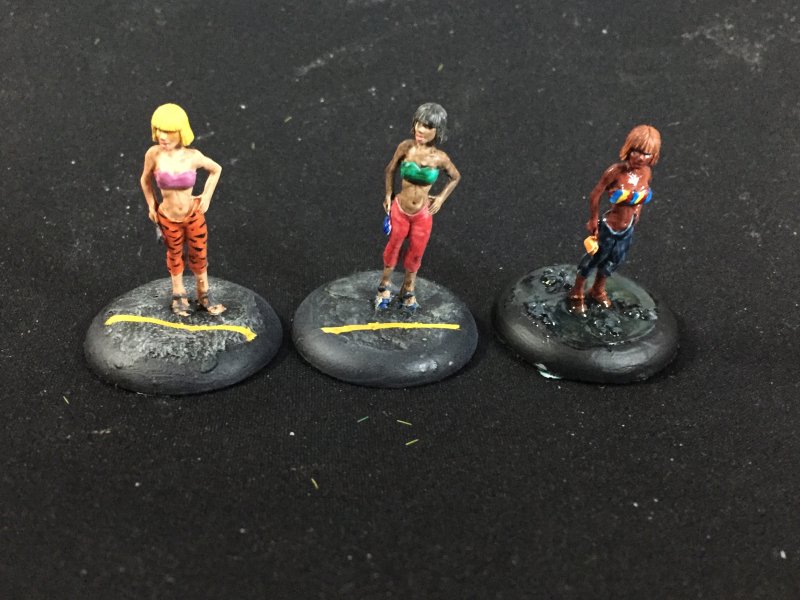
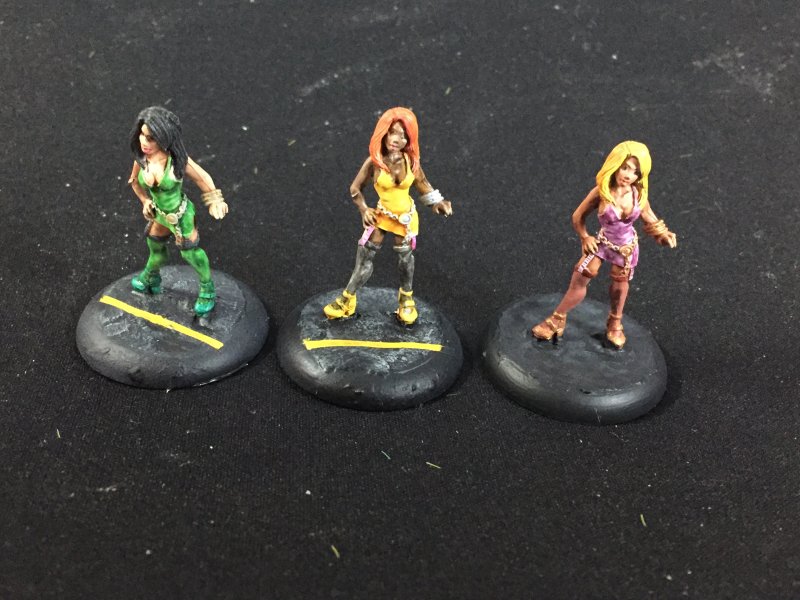
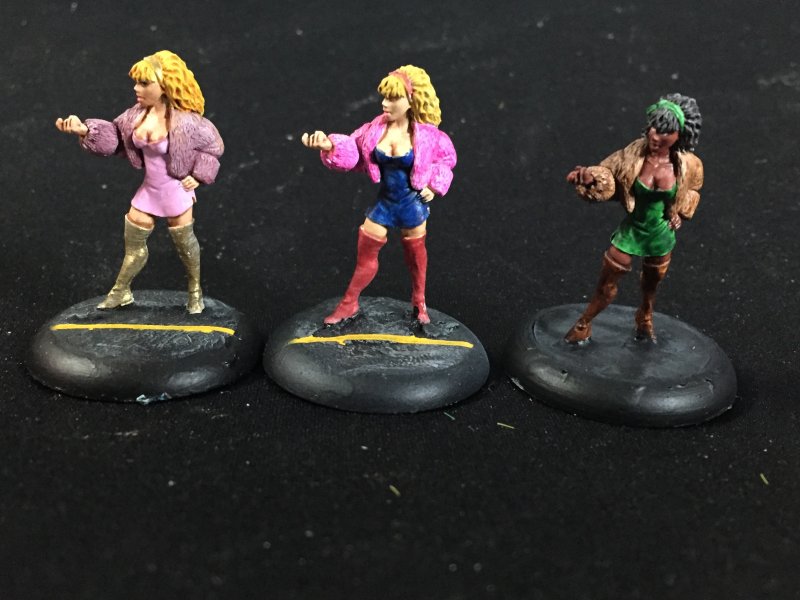
From there I went to the old stand-by of I Can Paint Some Minis. As the Reaper Chronoscope batch was getting ever smaller, I pulled out a couple of blisters to prime. Of the 6 ladies I saw I was going to paint, I'd painted 4 of them before.
- Jessica Blaze, Smuggler - sci-fi gun toter with an unarmored belly button.
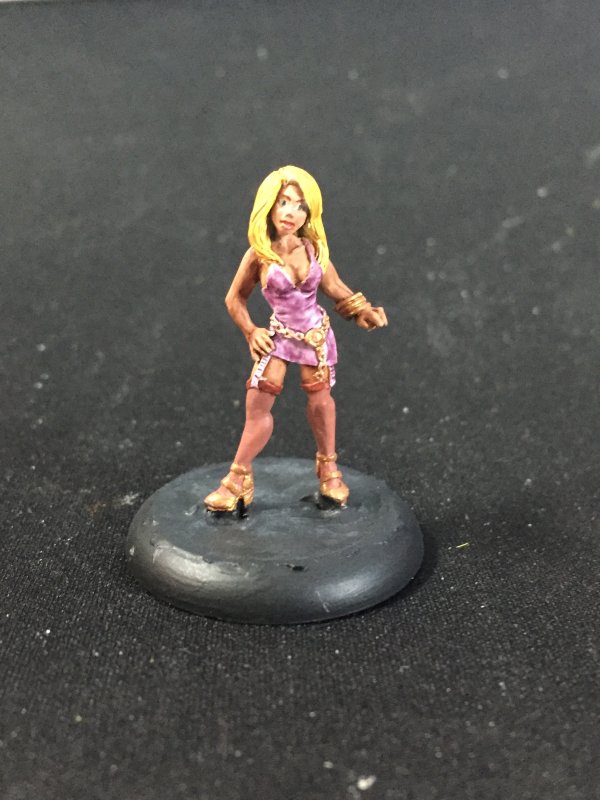
- Bobby Jo, Redneck Princess - copy #2 that I've painted/
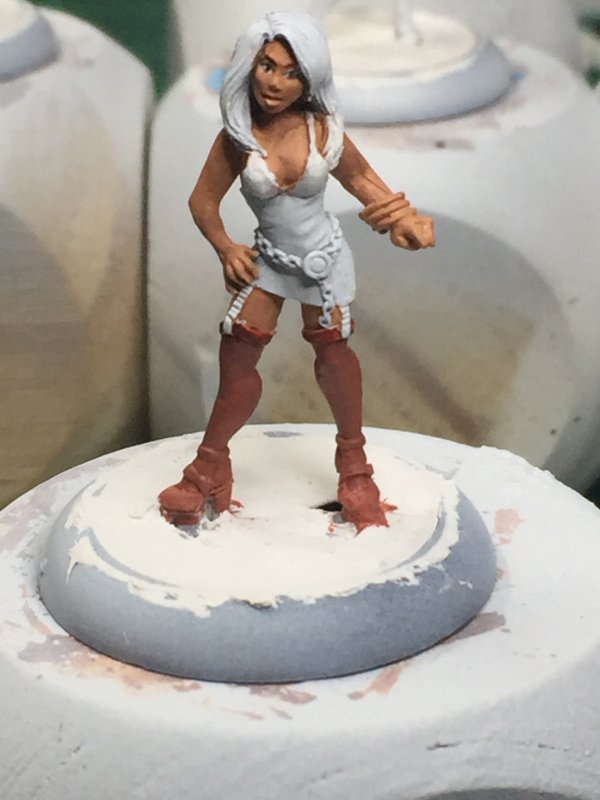
- Karla, Anime Heroine - a nurse, which I didn't notice until priming.
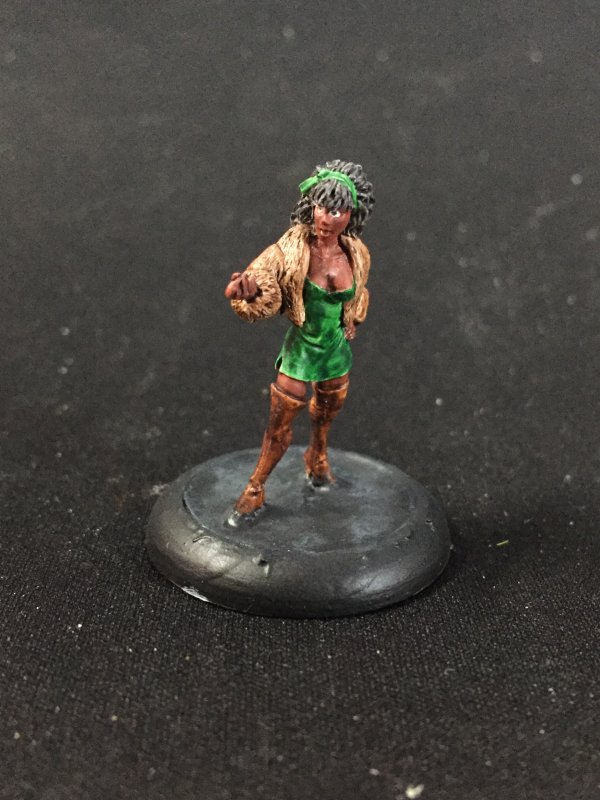
- Townsfolk: Ladies of the Night - third set of this trio of ladyfolk one might find along a darkened street corner. Evidently I think my miniscape has certain needs.
The painting was uneventful beyond trying out some new skin tones. I faltered when it came to working on the bases - this is when the lack of inspiration really hit me. Usually I enjoy bases the most, but at this point I was just ready to be done with it all. I tried giving one of the bases a rain/wet/puddle look, but I don't think it works unless you know what it's supposed to be.
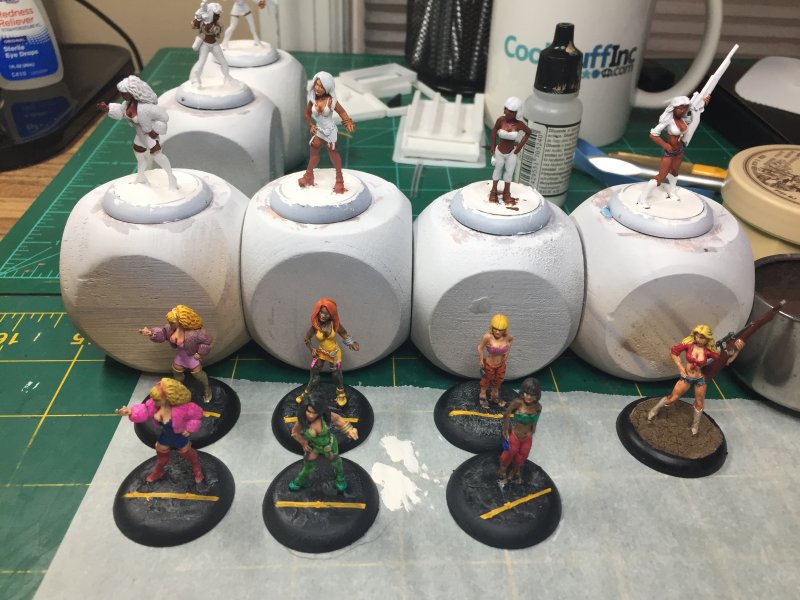
6 more minis down on the Completed column. On the Chronoscope side, I think the ones I have left to paint are all duplicates.

On the "what next" front... I don't know. Over the next 6 weeks I'm taking a bootcamp course for Salesforce Developer certification which
should eat up a lot of free time. This is one of those things I've been putting off since April so I really need to bare down and study. There's
plenty of hobby stuff for me to do, but for the next few weeks I need to find things I can spin up and then put away (when needed) quickly. With that
in mind, there's a couple of computer/graphic centered things I can put on the list, but I don't know how well my hobby mood will align with sitting
in front of the computer.
I've also been enjoying GTA with Jer. We play a couple of times per week. Sometimes we grind away at missions, other times we do goofy stuff. It's been
a good way to get my mind off, well, everything.
Permalink
gaming miniatures hobbies models reaper chronoscape
Blog Archive
As always, correct spelling is optional in any blog entry. Keep in mind that any links more than a year old may not be active, especially the ones pointing back to Russellmania (I like to move things around!).
Tags have been added to posts back to 2005. There may be an occasional old blog that gets added to the tag list, but in reality what could be noteworthy from that far back?
Blog Tags
3D Printer (30)
4ground (32)
4ground-mall (40)
5PFH (1)
action figures/toys (10)
airbrush (7)
Aliens (1)
Amazon (12)
antenocitisworkshop (11)
Atlas O Gauge (2)
Batman Miniature Game (2)
Battletech (1)
belt sander (12)
Blood Bowl (4)
boardgames (79)
books/comics (19)
computers hate me (5)
conveyances (15)
Cyberpunk Red Zone (4)
diet (53)
dreams (7)
fallout (1)
feng shui (1)
Firefight (1)
Foundry (3)
Gale Force Nine (1)
game dev (23)
gaming miniatures (240)
gaslands (10)
gastric sleeve (34)
Green Stuff World (2)
Hasslefree (9)
Hero Forge (1)
HeroQuest (4)
hobbies (102)
Jailbirds Minis (2)
kevin smith (1)
Knight Models (2)
malifaux (3)
Marvel Crisis Protocol (2)
mckays (1)
models (12)
mom (32)
moon light (5)
Moonbus (1)
movies/tv/dvd (60)
Necromunda (4)
ninja division (1)
Pathfinder Deepcuts (1)
pilonidal cyst (5)
plastcraft (2)
programming/interweb (42)
rambling (62)
random (367)
random maintenance (3)
Reaper Bones (3)
reaper chronoscape (32)
renovation/remodelling (25)
road trip (27)
salesforce (1)
sarissa precission (2)
scenery (19)
Star Trek (2)
Star Trek Away Missions (3)
Star Wars Legion (1)
studio miniatures (3)
ttcombat (12)
video games (51)
vs Factions(PDFs) (1)
walking dead (37)
wargame foundry (3)
work (6)
wrestling (45)
zombicide (2)
Zombicide Invader (19)
zombie mall (23)