A Vast Underestimation
11.30.2025

I previously mentioned that I started (3D) printing the Heroboard modular board for Heroquest. It's also been the project to help dial-in the new printer. As such, it's not 100% optimum printing and cranking through everything. Additionally, I don't really know what the minimum I need to print for the game is, as I've yet to actually play it. I do have a "this should cover everything" list to print, which is what I'm working off.
Within that list, I'm working in phases. The first are the under-tiles, the bases that magnetically lock everything together. Effectively, the foundation. After that are the side-walls for those tiles, to cosmetically cover the magnets that aren't being used. Next up is "hallway" floor tiles. These I'm printing as individual floor tiles as the rooms are pre-joined with however many spaces a room takes up. These phases are done! I've got stacks with 502 under-tiles, 103 side-walls to cover the exterior of those under-tiles, and 168 hallway floor tiles. This took the better part of 2 months, to include bad prints as I needed some settings tweak, usually due to garage temperature and/or humidity.
Remaining are 22 room floor tiles, pre-configured based on the original game board. All of this will need walls and doors/doorways, which make up the next two phases. Here is where it makes a difference in not knowing exactly what I'll need, but instead making sure I have a worse-case usage covered. With my current high-quality print settings that use a 0.2mm nozzle, to print the remaining floors, doors, and walls will take just under 94 days if the printer runs 24/7 with no hiccups.
That's a lot of printing. Realistically, that's closer to 6 months than 3. Plus, there's other things I want to print & play around with.
While painting the Heroquest minis was my 2025 project, I thought that was originally going to include printing out the board, too. Now, at the end of November, I think I will claim my 2026 hobby project to be having the board ready for Xmas 2026. There will likely be uninteresting pics along the journey just because pics make these posts more interesting.
Permalink
3D Printer HeroQuest
I'm Alive Update: Nov 2025
11.12.2025
2 months ago I posted about finishing painting the Heroquest core set. You think in 2 months I'd have something else to post about. Well, it seems I vastly underestimated the scope of the next thing I would work on.
I mentioned Jer getting a Bambu printer and alluding to a printing project for dungeon tiles. Now I have a Bambu printer and will allude to a printing project for dungeon tiles.
I succumbed to peer pressure from Jer and Keith and (re)joined their cult of FDM printing as the Bambu A1 prints really good quality and, most importantly, is easy to setup and print each job. One of the things I've had to get past since my original foray into FDM printing is that it's ok to waste filament. Part of the aforementioned ease of the Bambu is self-cleaning and calibration available before each print job. Add in how easy it is to switch hotends, such as the fine resolution 0.2mm, and printing is easy! Dialing in those fine print details is a little more work, mainly because of how easy it is to set up those print jobs and each little tweak might make a difference I pretend I can see.
The big issue I ran into after paying attention to the first couple of batches of prints was that the corners of my prints were warping upward. Searches told me this could be either too hot (bed) temps, too cold temps, or other stuff I chose to ignore. My fix went the direction of a colder bed, lowering the hotend temp after the first few layers, and adding brims. This seemed to work fine! Until the outdoor/garage temp dipped below 60, them some random prints would either start spaghetti printing at some later point, or not adhere to the plate. This seemed to be an obvious "not hot enough" problem, so I returned to hotter temps and kept the brim. 3 days of this and things are printing ok when the garage temp drops to 47 °
Pics of random printed pieces isn't much too look at. Over the last 2 months I've printed some Sci Fi shuttle parts - about 4 times between scaling issues and refining settings. The dungeon is from Heroboard, using the larger 123% scale (larger than they recommend) and lots and lots of magnets. I've just started printing hallway floor tiles, which at the resolution and rate will take minimum of a week if the printer ran constantly. After that are room tiles (11 days minimum) and walls/doors (don't know). While my 2025 hobby goal was to paint the Heroquest minis, I secretly wanted to have the dungeon printed and together too. That latter ain't going to happen.
I've got another batch of Cyberpunk minis primed. Soon I'll have some pics of those trickling onto the site.
Permalink
3D Printer HeroQuest rambling
Star Wars Bunker and Printed Landing Pad
12.29.2024
My focused project for the year has been the Necromunda Hab-buildings for the basis of whatever sci-fi setting I'm going with moving forward. Back in May I made my first post showing some progress, not realizing at the time that there would be but 2 more related posts over the next 4 months. Though to be honest, I've not posted a lot this year. Why? It seems that making slow progress on a large batch of buildings where one looks a whole lot like another does not lend itself to things interesting enough to post. Hence, this latest thing I've been working on for a little over a month is suddenly just shown here out of the blue.
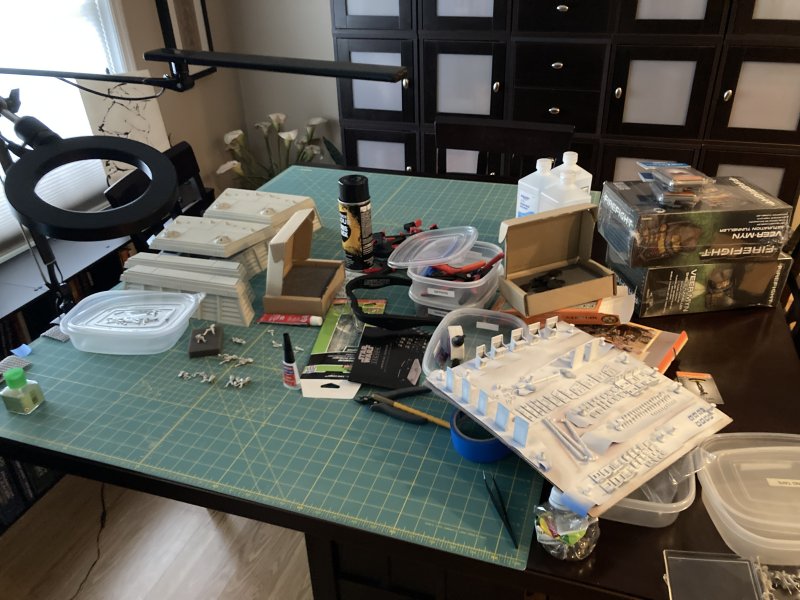
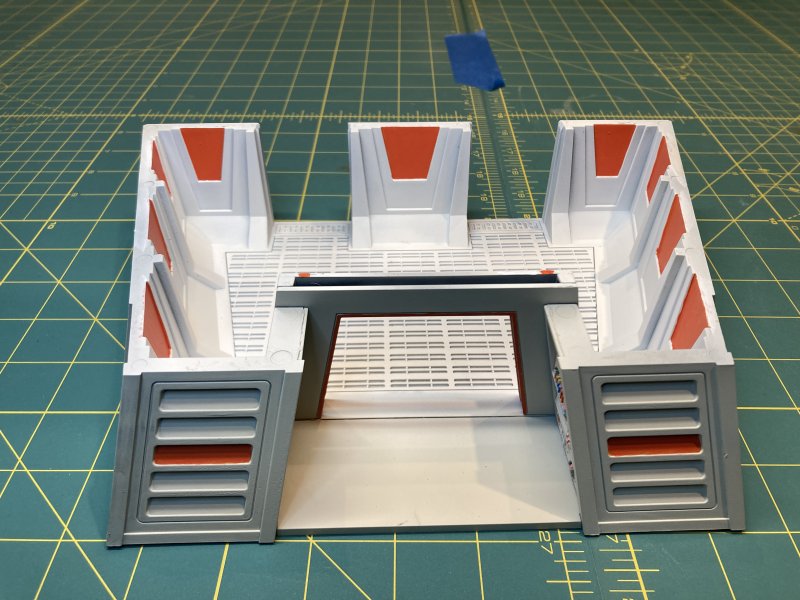
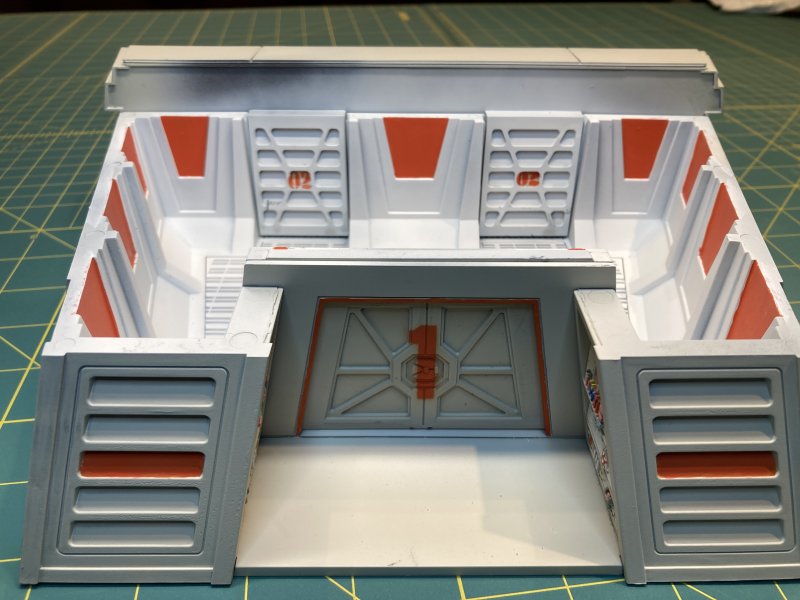
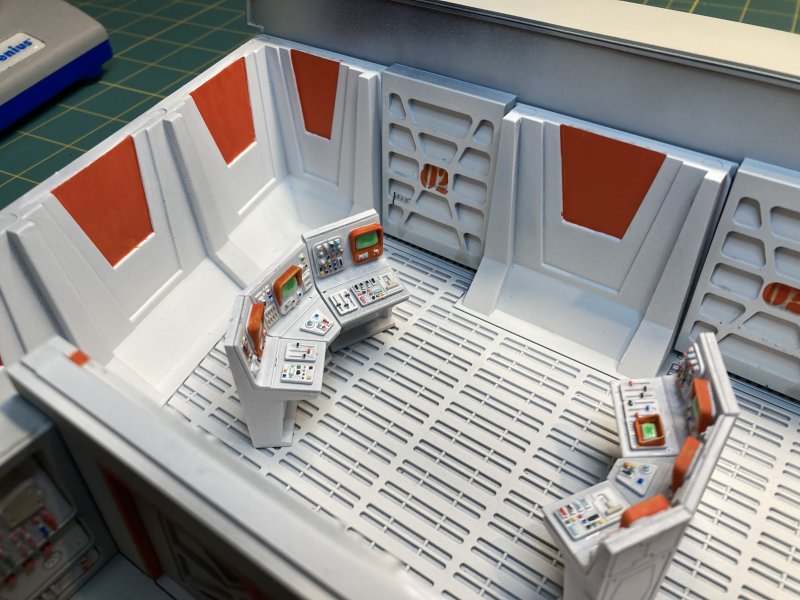
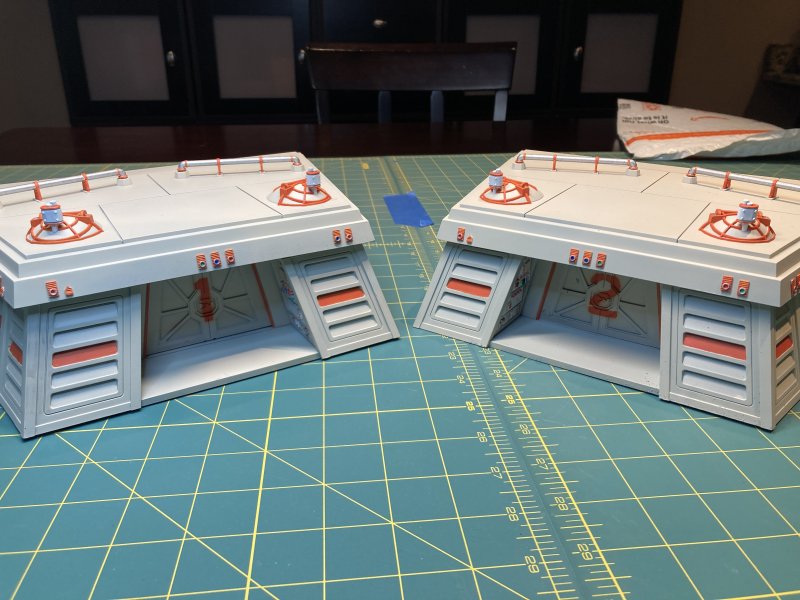
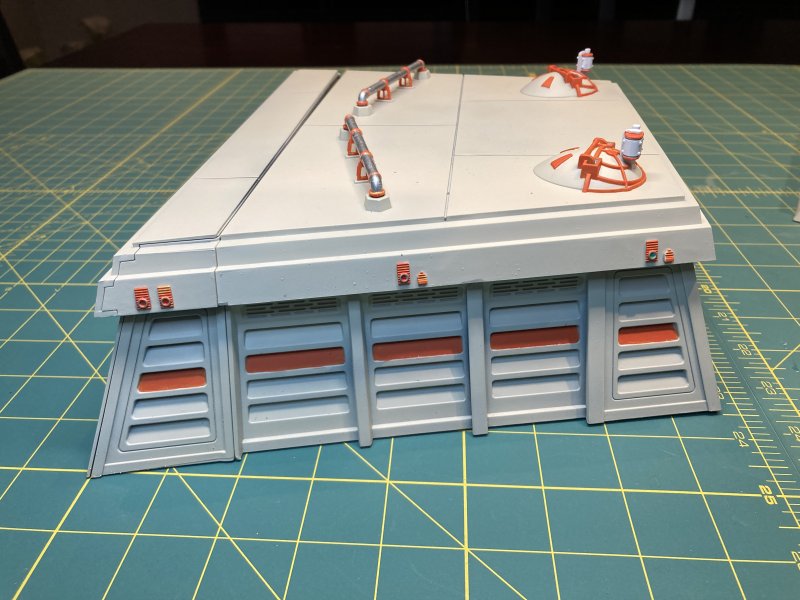
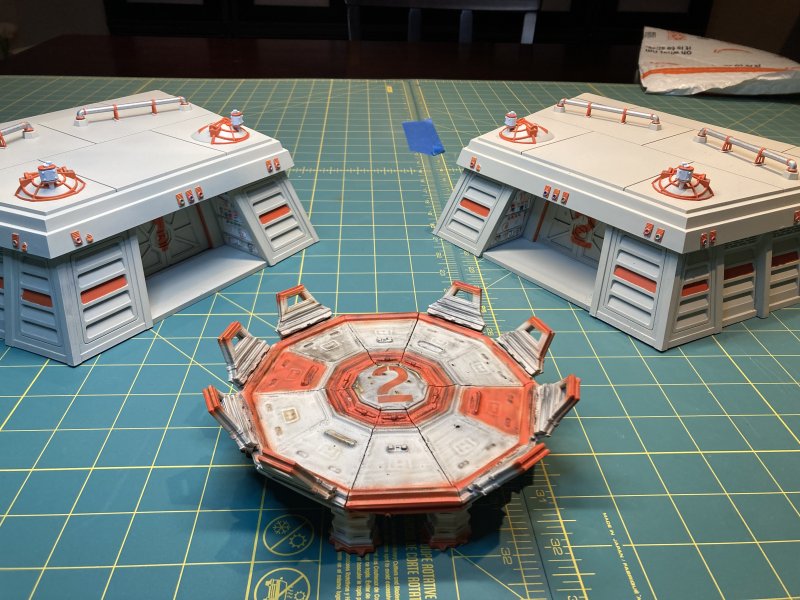
Thanks to a sale at a local shop who decided to get out of the Star Wars Legions business, I got a lot of stuff at half price. In one case, that meant I picked up 2 Imperial Bunkers. The real reason I picked up 2 was that a video I saw at some point from the publisher showed 2 bunkers can fit back-to-back and look really cool. While I don't really envision myself making a board with lush forest scenery and a bunker being defended (or is it attacked?), I quickly saw my white/orange paint scheme used on the Necromunda buildings working on the bunkers and allowing them to fit in with my existing sci-fi scenery. Thus, I had a plan.
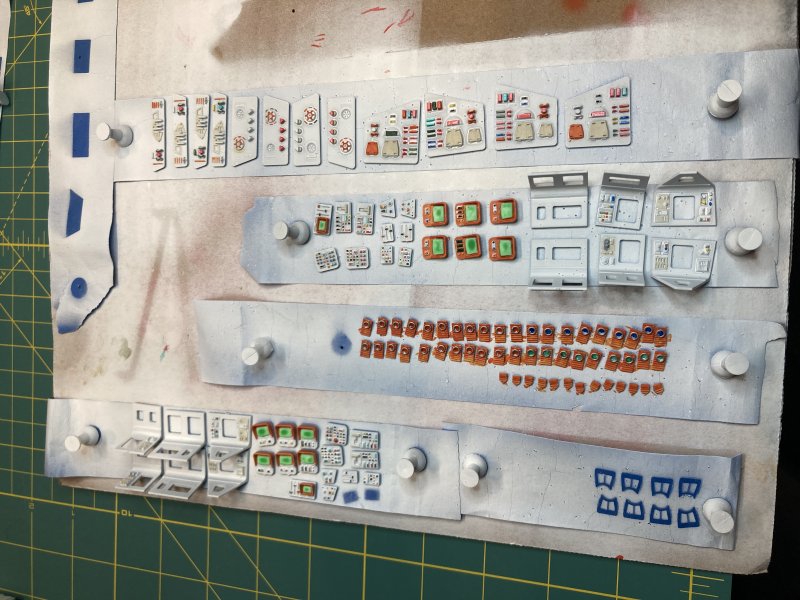
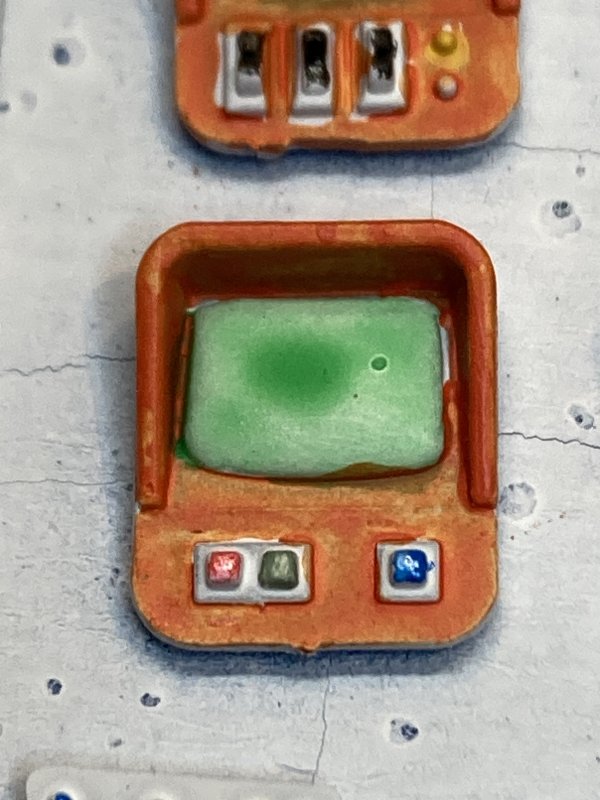
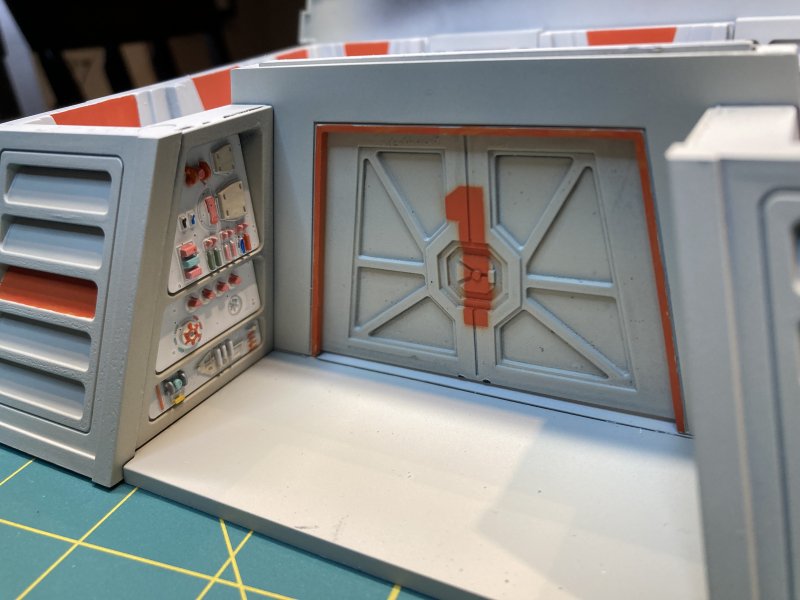
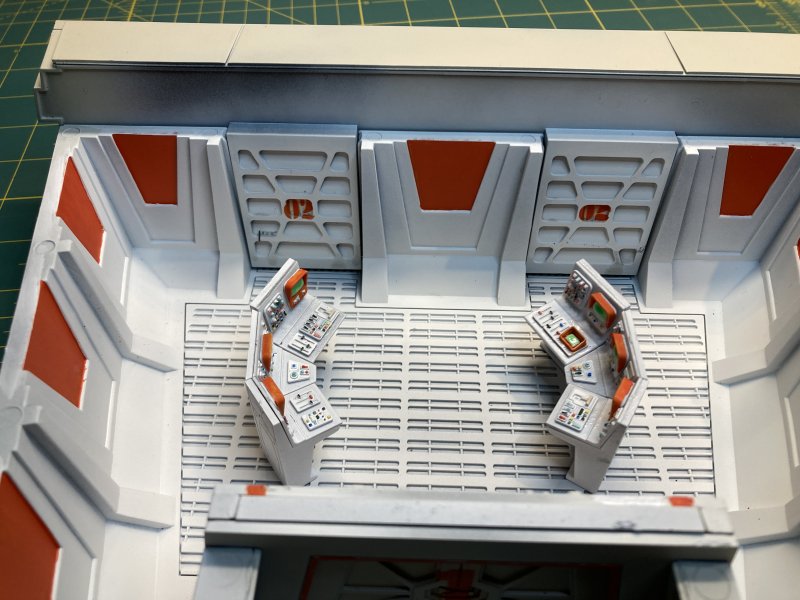
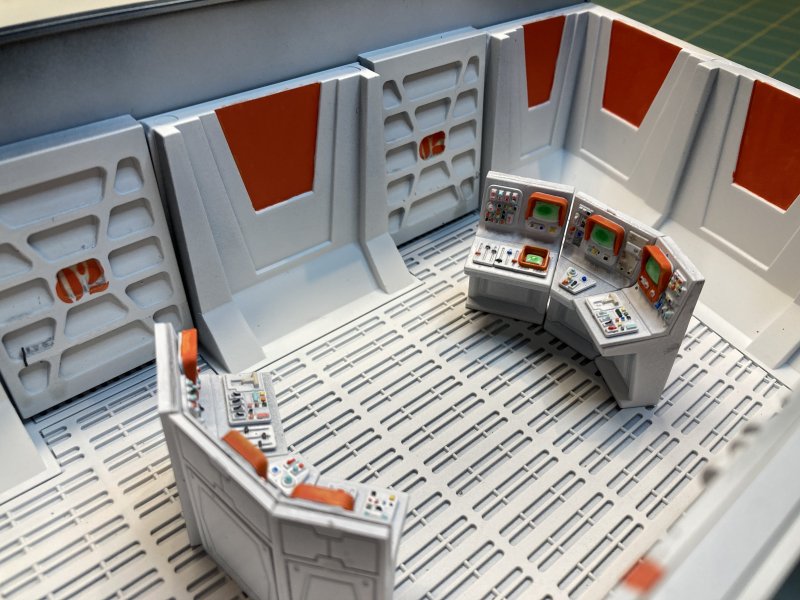
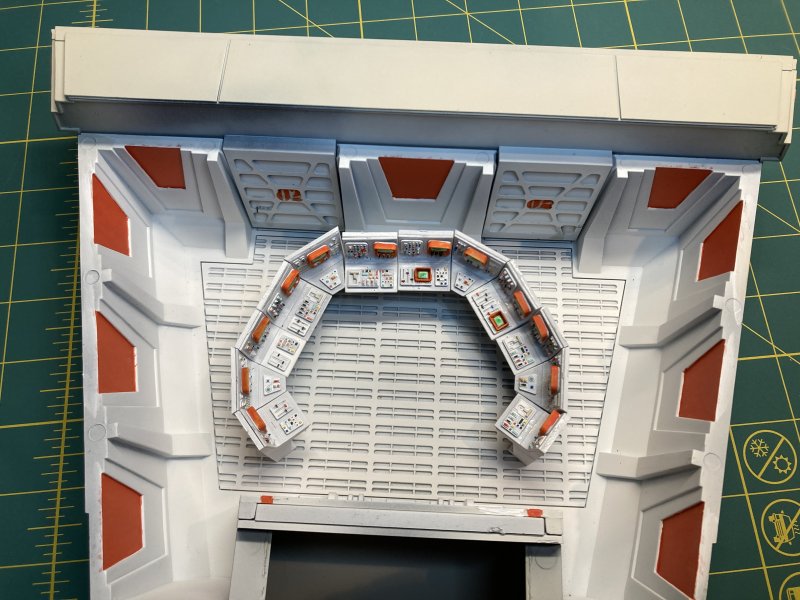
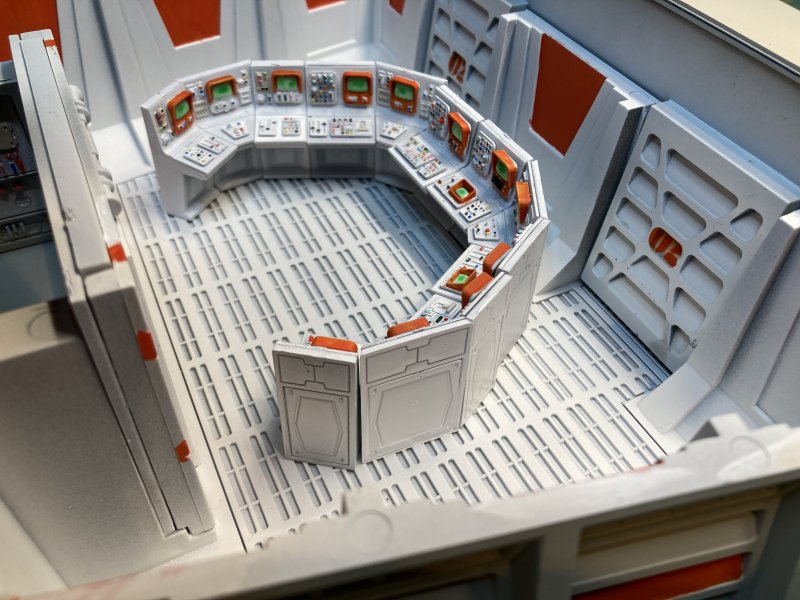
It was a good plan, too. Minimal gluing was involved, and most of the work was in picking out details in control boards and screens. This was definitely one of those times that painting before gluing was the route to go, just to help getting to those details easier. The best new experiment: for the computer monitors, I just added some green contrast paint on top of the white primer, then a dollop of gloss on top of that. I thought it was pretty close to a retro-green glow of a monitor.
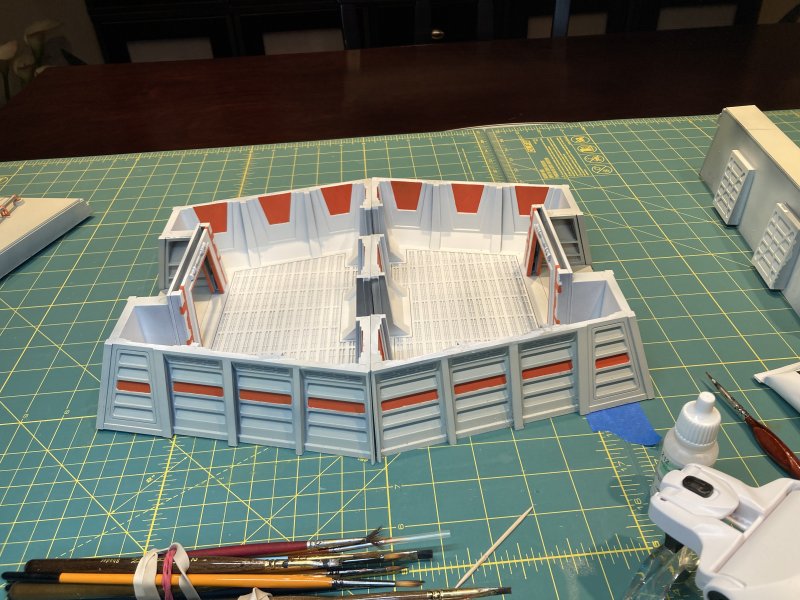
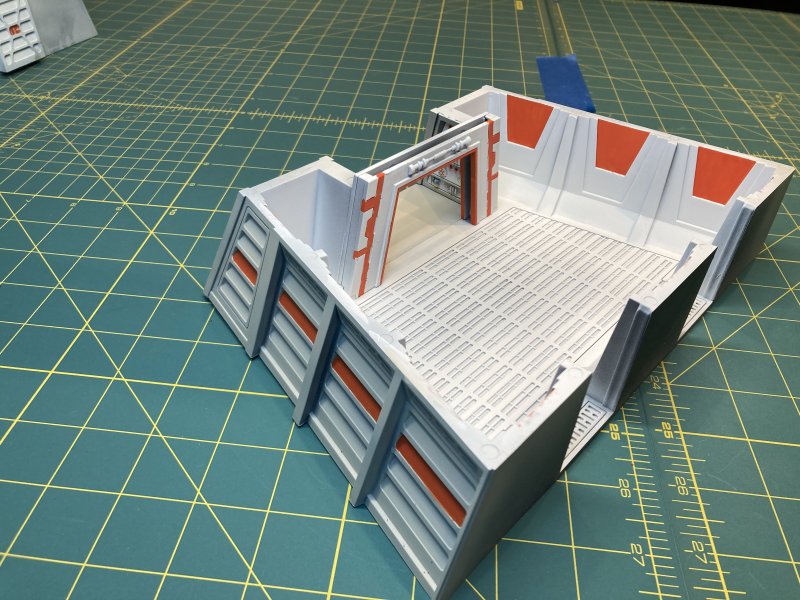
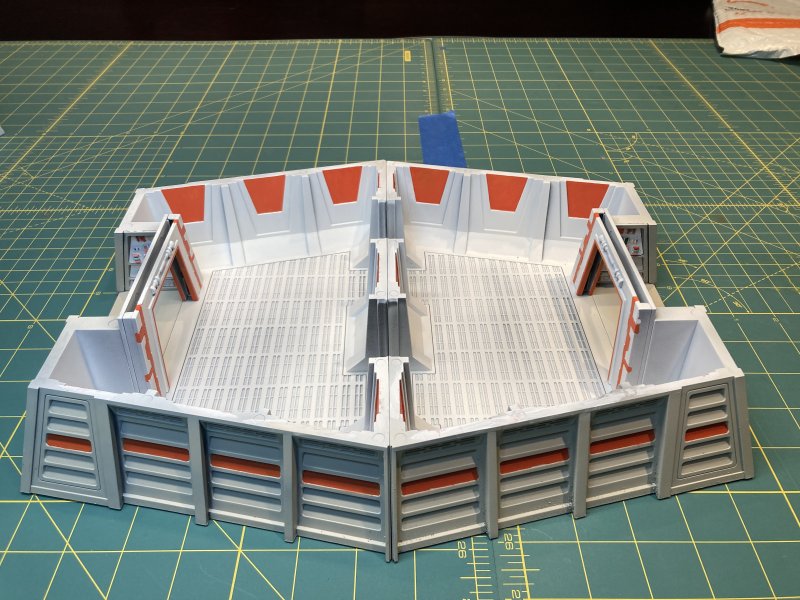
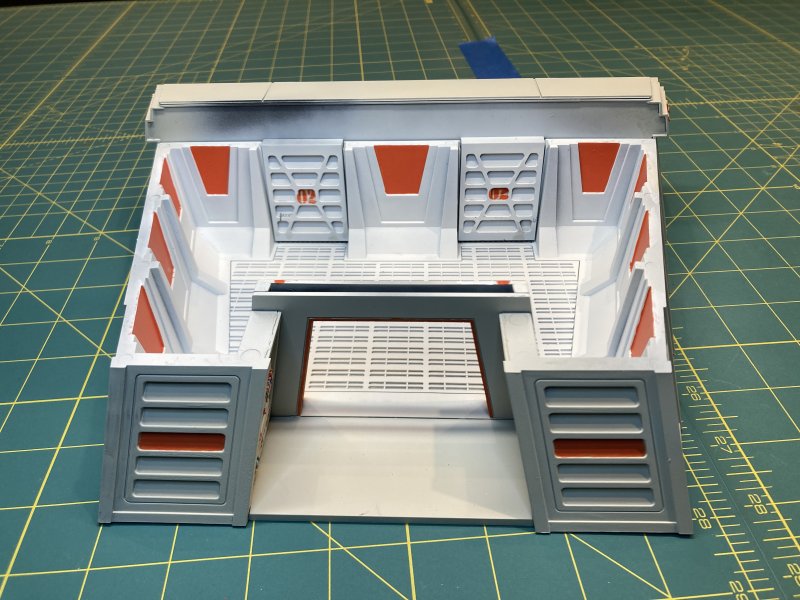
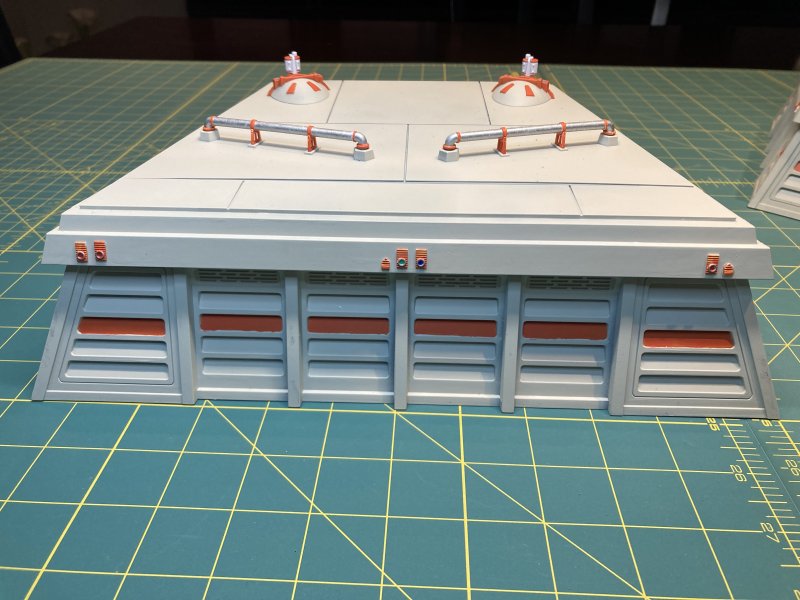
Everything else was finding the right places to add orange to add a little interest. The outside of the bunker is still Wraith Bone white, but the inside is plain primer white. This also helps to break things up a little, since the inside and outside aren't exactly the same colors. Keeping with my Necromunda building stenciled letters, the blast doors for the bunkers got some stenciled numbers added on. One drawback to those blast doors - thanks to a couple of layers of paint + sealant, I'm not sure I can lift those doors up into the open position now that they're down.
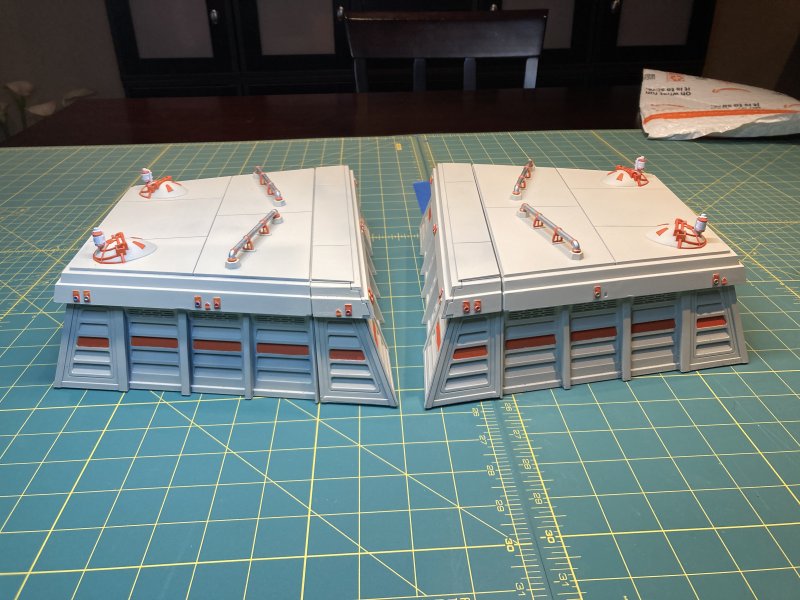
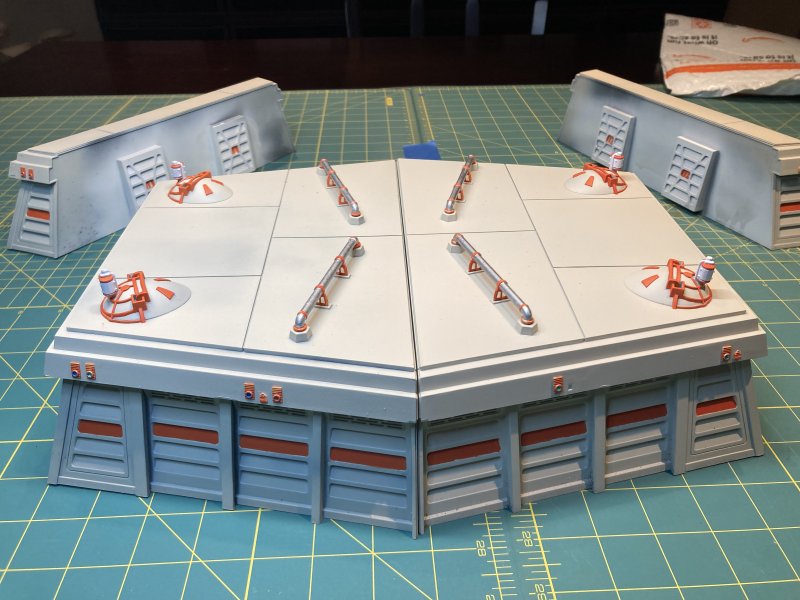
I played around with placing the bunkers together VS apart, and both work well. I can always add a homemade section to join the bunkers, as this also seems a popular video topic.
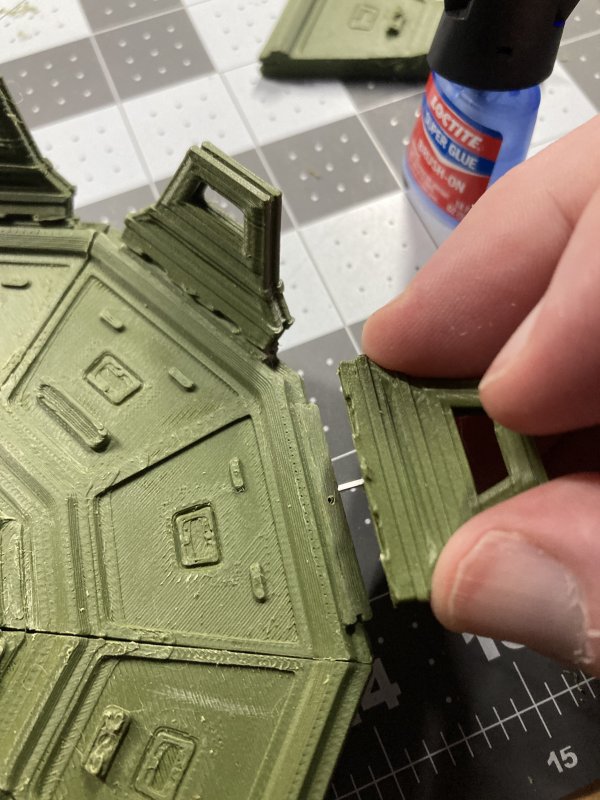
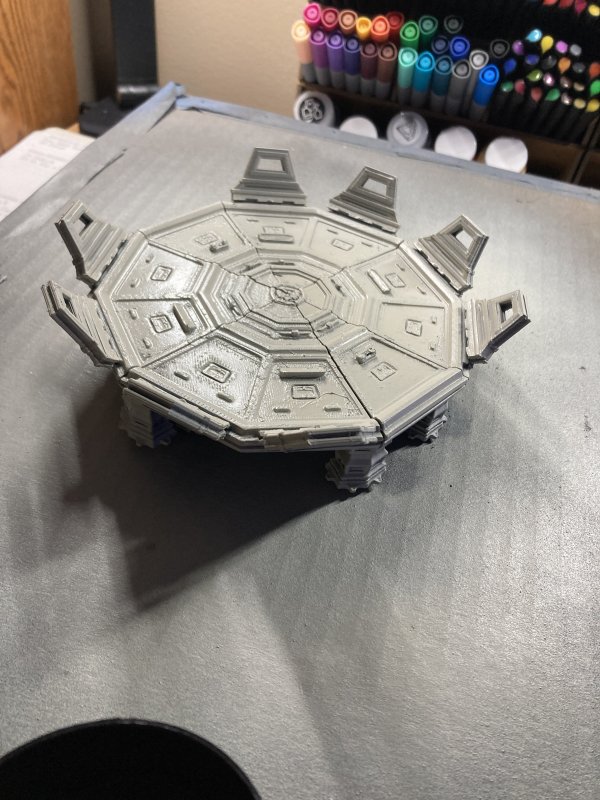
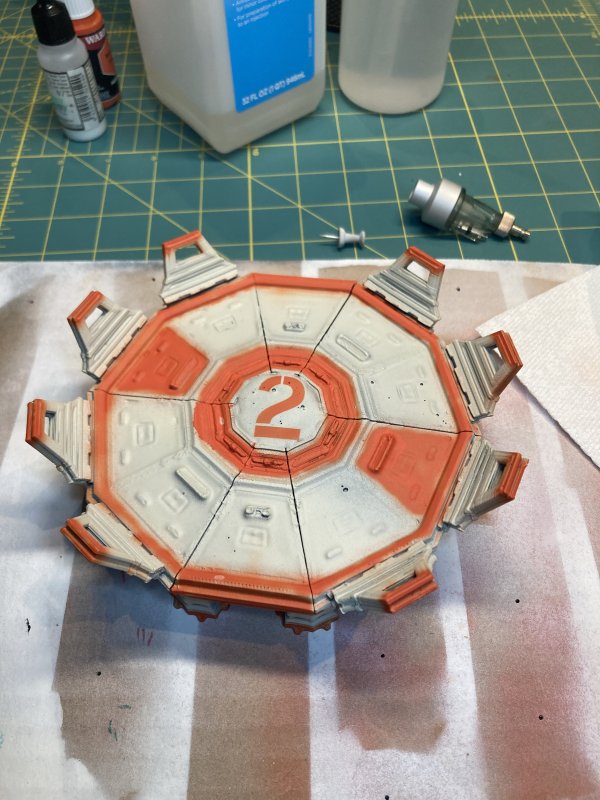
Thanks to Jerry's new FDM Printer, he printed a landing pad for me. This was meant as a printer test and to add something different to the sci-fi layout VS trying to think of what would be landing on it. As such, I asked Jer to scale it down to about a 5" footprint. He got it printed out with minimal trouble (I think), annd after a little sanding and pinning some parts to help fortify the super glue bond, I was ready to try painting this thing.
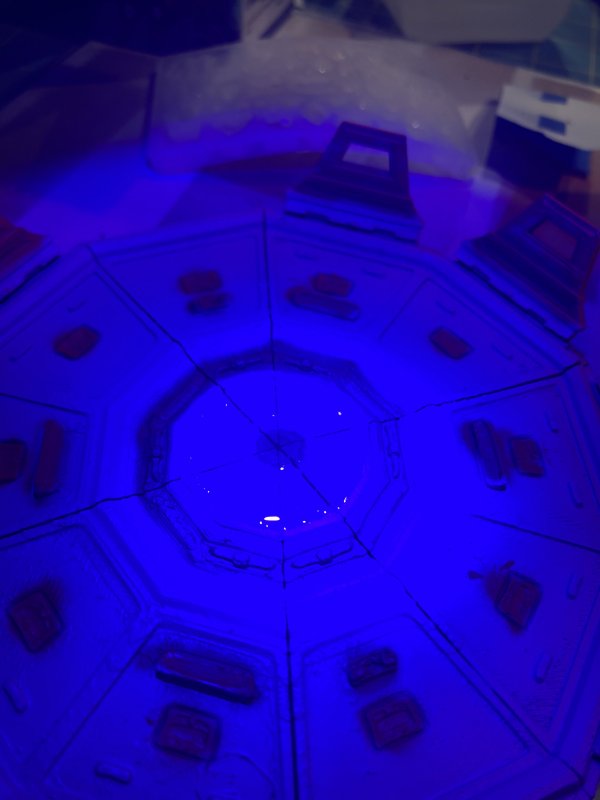
Some of the surface was a little rough, and I used that as an excuse to use some UV Resin I bought a while back to see how it would work. I added some resin to the center, used my UV flashlight on it for 4 min, and had a solid covering in the center. I go out and add a layer of black primer, then spray on some Wraith Bone with a slight zenithal approach - basically from all the "above" angles, down to about 90° It was here I noticed my UV Resin test wasn't as smooth as I'd hoped. Some bubbles looked to have popped on the surface, and the edges weren't as uniform as I thought. I grabbed my seldom used airbrush and decided to freehand orange highlights for stripes, etc.
And to be honest, it didn't turn out very good. It took me until the next day to admit that. The airbrush wasn't flowing smoothly when I first started, and instead of trying to fix it I just muddled through. Additionally, I was still spraying paint like I was afraid of the airbrush. Why? I need to get over that!
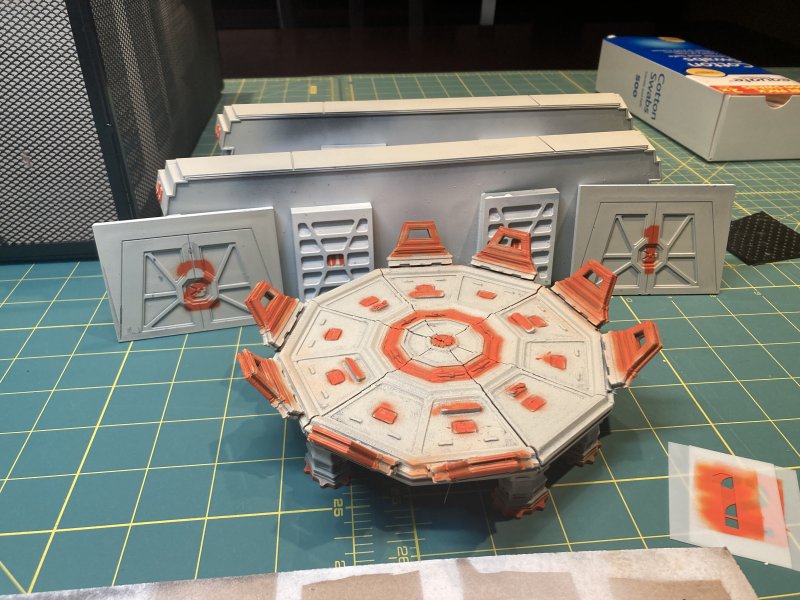
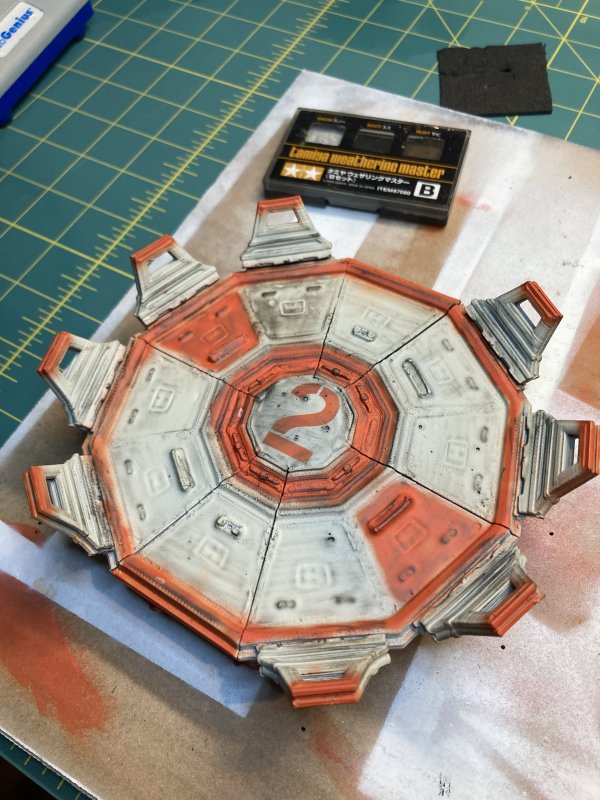
To help with getting over that, I made a 2nd pass. First, I added some Mod Podge Dimensional Magic (poor man's resin) to more of those "rough" spots, which would help smooth things out a little more. After that had dried, I grabbed the black primer and started over on the landing pad. Black, then Wraith Bone. And after a thorough cleaning of the airbrush followed by tracking down where I had last put the bottle of Flow Improver, I started to airbrush landing bad 2.0.
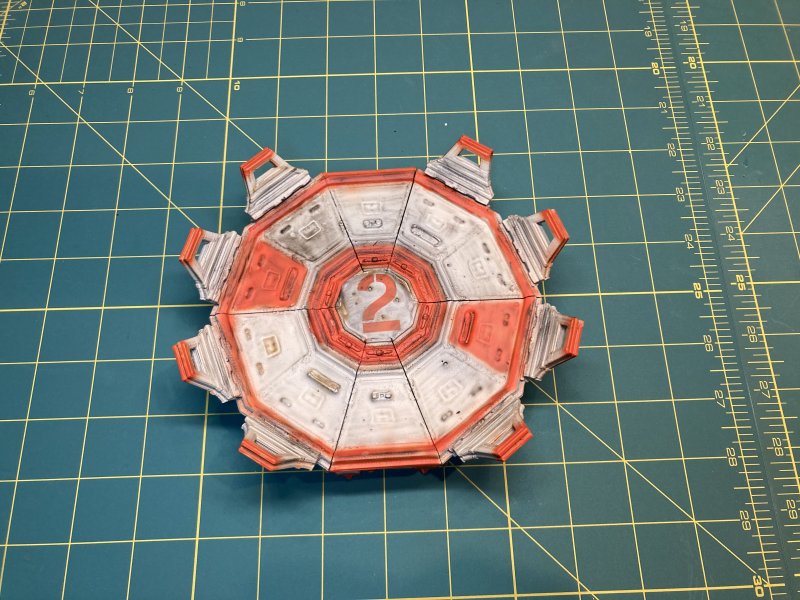
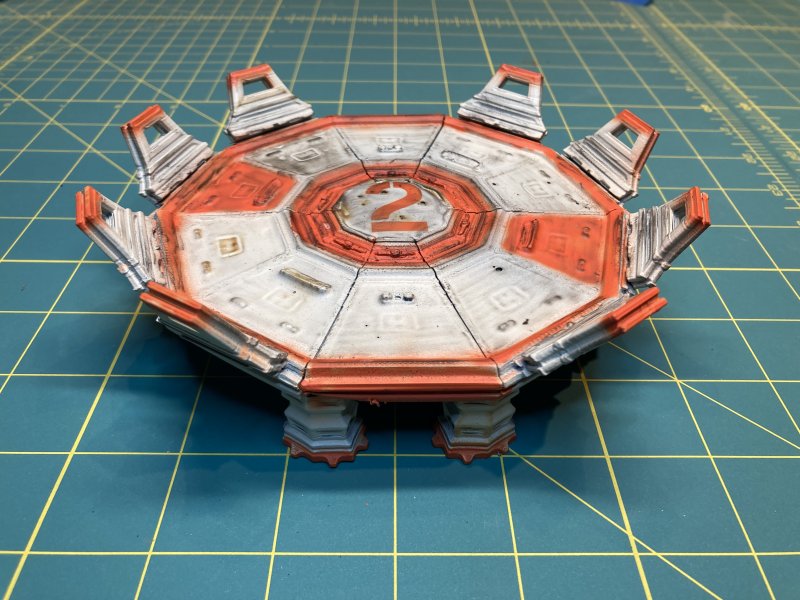
The second pass went a lot better with the airbrush. I picked out some different details, and decided to add a stenciled number to the center. As this was a landing pad, weathering with some heat-focused soot and fallout would fit in well. I've been avoiding most weathering on my sci-fi stuff, as I don't know what shade the ground will usually be. Here the weathering was intended to be man-made from above and not local flora dependent, so I effectively ignored the parts I normally focus on when weathering. It was weird, but in the end the landing pad turned out pretty good.
Now I have a nice collection of buildings, and landing pad, to call on as the basis for my sci-fi setting. Much like the 4Grounds Mall, maybe I'll get around to using it in a game someday. But that's not the true purpose of this stuff - I just like making scenery.


Permalink
3D Printer Necromunda scenery Star Wars Legion
Last of the Cowfolk
07.15.2020
Here are the last remnants of cowfolk, which is really just 1 since not everyone that wears a hat is from the Ancient West.
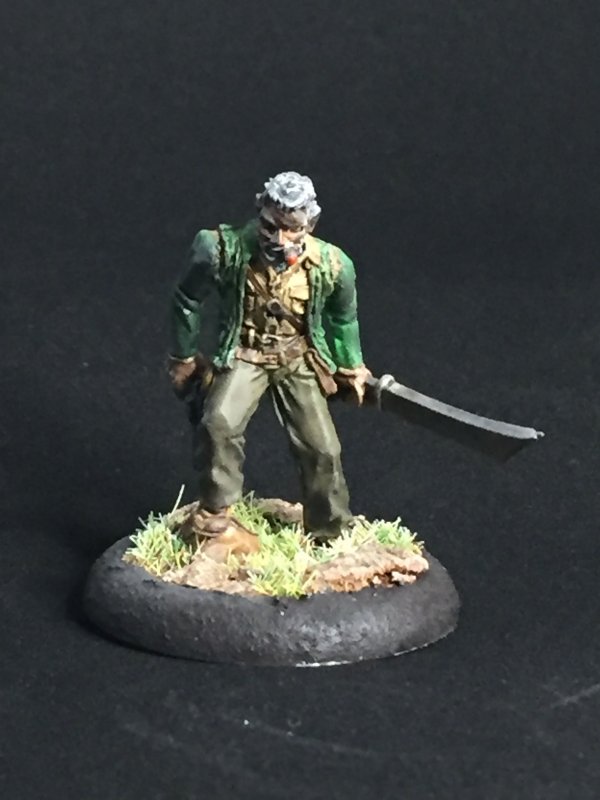
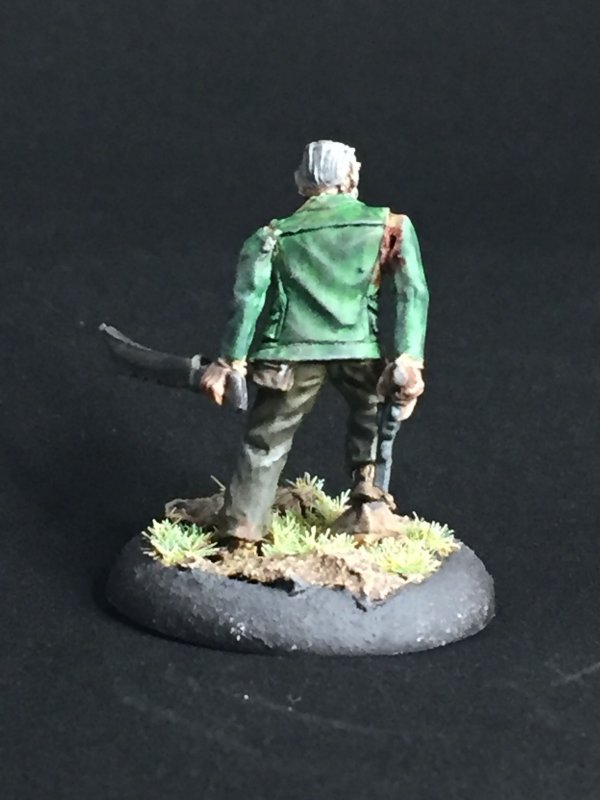
First up is Jack Harrison, Adventuring Hero. I didn't realize this was Indiana Jones. Even when the assortment of left arms included a whip. Jack here was my first foray into using Citadel's Liquid Green Stuff. I should have watched the linked video first, because my green stuff wasn't liquidy. For whatever reason, it was half-solidified. I did my best to fill in the gaps when attaching the arms, but it didn't work out too well. In the end, I tried to compensate by painting toward a "ripped sleeves" look. I'm not sure how well that works without me pointing it out, but I've always got to try something new to cover up mistakes. There was a gaping hole in the back of his right armpit, which was begging to become a wound.
I also went with a more dirty, grungy, mayhap "trudging through the wild" look. I went back and forth trying to give the sword/machete/big knife a rusted look. In the end I just quit going back and forth and left it in whichever state it was in.
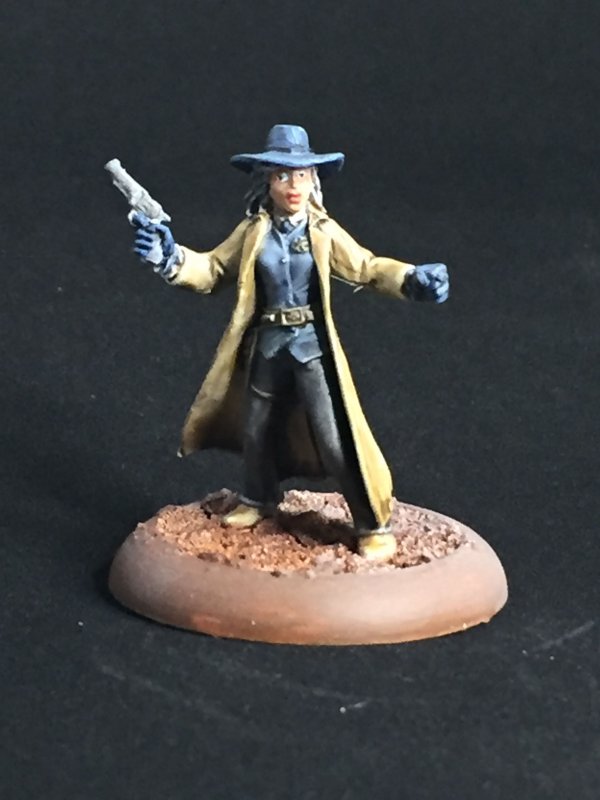
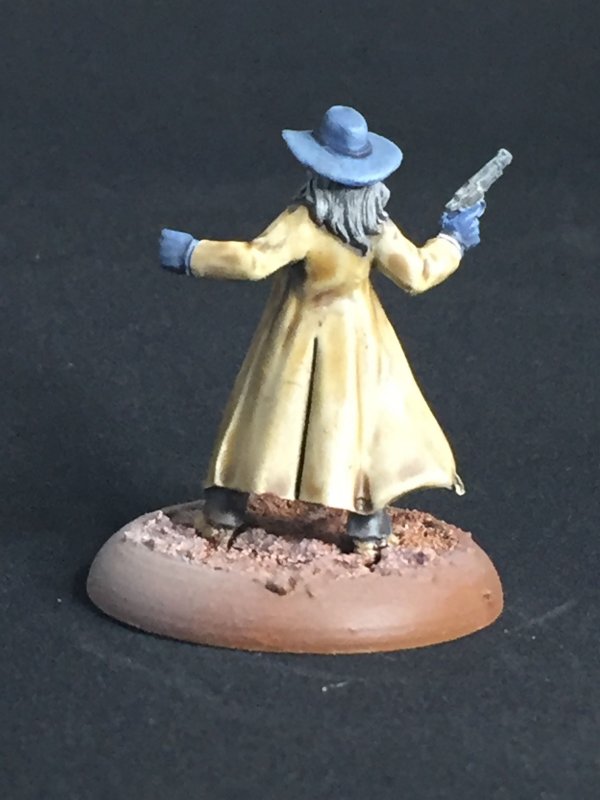
Number 2 was the true last of the western minis, Texas Ranger Female. Experimentation here was to play around with mixing my own colors, and using a Glaze Medium instead of Thinner. From what I've read, this is basically what Citadel's contrast paints are, and I like those contrast paints. Overall, this one turned out pretty good.
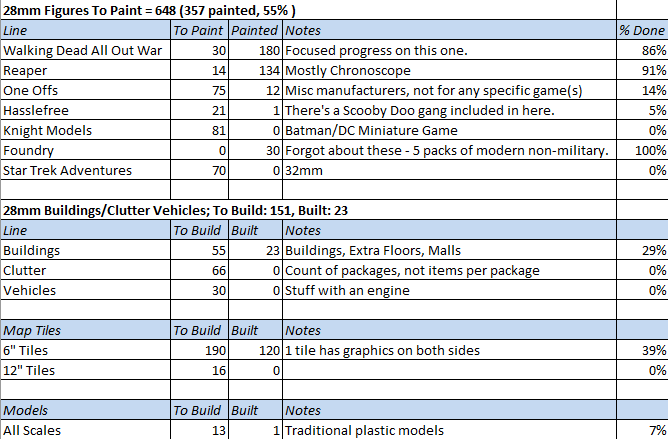
Painting progress chart gets to slide 2 to the Painted column of Reaper minis. And, I didn't get anything new to add to the list so overall progress accomplished! Sure, it's only been a week since the last update, but not accruing more stuff to paint in any time frame can be looked at as a fiscal win.
Another 6 Chronoscope minis have already been primed for when the painting mood strikes. These are all duplicates of previously painted minis. Not sure if I'll have the confidence to compare these against my original paintings to see which direction my skills have gone.
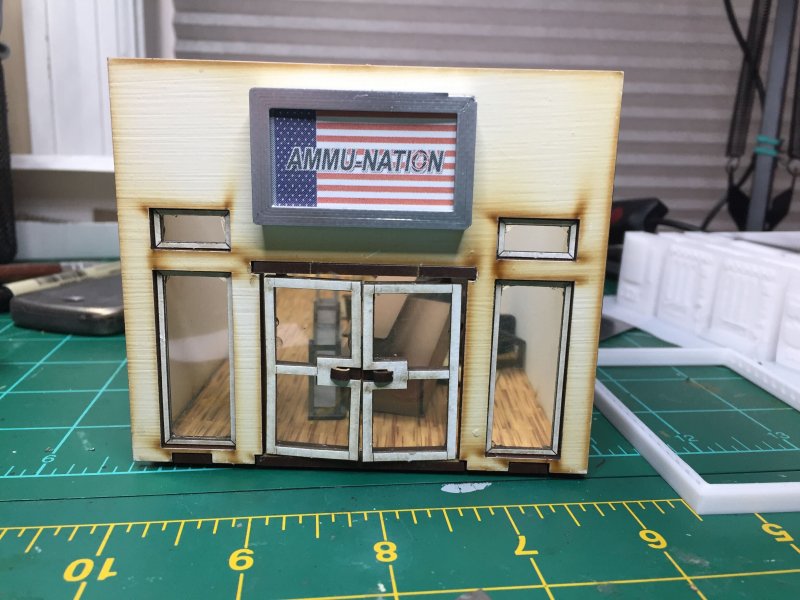
The 3D printer has been running the past few days making improved store front signs for the 4Ground mall. I've gotten the sweet spot on the print bed dialed in - how a glass bed bows up ever so slightly I'm afraid to know. Temperature and humidity are mostly cooperating, although 90° and 85% humidity is cutting it close. I went through the boxes of mall stores that I acquired from last years Oct and Black Friday sales - 25 stores in need of signage. I never go overboard, right?
The end of this week will see an announcement from Mantic Games regarding their next Terrain Crate. Preview pics show hospital furniture, store furniture, and some camping stuff. I'm going to look into the store furniture options. Did I mention 25 mall stores?
Permalink
3D Printer reaper chronoscape zombie mall
Mall Signs V1
05.12.2020
Over the past month I've been working on the furniture included with the 4Ground mall. There's furniture for a coffee shop, gun store, pharmacy, clothing store, sporting goods store, and a hardware store. All of this furniture is on thick, laser cut cardboard.
I don't like it.
It's finicky, and the pieces don't quite fit together like I want. Things don't seem straight enough. Or flush enough. I'm not sure which. After a month, I've got most of the coffee shop and gun store furniture together. There's also some generic shelves that (can) go in all 6 stores. There's some other shelves that may go inthe clothing store, I'm not sure.
One of my nit-picks is the pieces aren't grouped per store, but in a way to maximize used space when the laser cuts. That's fine, I understand the economics in that. My nit-pick is how pieces fall off/out over time as I shuffle pieces laser cut sheets around trying to find part AE4 when it's not with AE1-3, and all the miscellaneous parts that fall away from their identifiers that I'll have to try and match up later.
Waiting for glue to try between pieces on a 14 piece sales counter takes some waiting time, too.
While making seemingly random furniture, I've moved forward on my test for store signs. My goal was to have non-permanent signs so that I could switch out store names based on my whimsy of the moment. To work well, plus add to the cool factor, I decided to model and 3D print some kind of frame I could stick the store sign in. My first endeavor into printable 3d modelling! In preparation, I'd picked up a few modelling lessons on Udemy during a good sale and had worked my way through about half of them when I had an idea of what to put together in Fusion360. It took a handful of false starts, but I finally had a 2-piece model that should work for what I needed. I then went about fiddling with the damn printer bed leveling off and on for 2 weeks. Interesting thing I learned about my 3d printer in the garage - don't print if it's under 60 degrees. Things don't turn out well. My glass bed is ever so slightly warped up in the middle. I'm not sure if heating the bed makes this better or worse over the time of a multi-hour print, or if it makes any difference at all. As it is, I try to keep most of the printable area as close to the middle as I can, and so far that's been working.
After I printed my sign frame, I went into Paint Shop Pro and made some testing signs for size and resolution. It seems that no matter what resolution I set my images (300DPI) or printer (600DPI) I always get pixelation. Maybe it's the graphics program from 2004? Anyway, I printed/cut/glued and saw that the sign looked about right on the store front.
This was a test sign, so it was ok to mess around with - I didn't bother cleaning up the edges, as part of the test was "will just using chrome spray paint without priming work?" (yes!) One of the things I wanted to try out was to use Mod Podge Dimensional Magic to give the feeling of a glass insert on the sign. This stuff was mentioned in a Facebook post for a gaming group where they were putting this on their cardboard tokens. It helped protect the top (images get scratched sometimes) plus gave some depth to the flat cardboard.

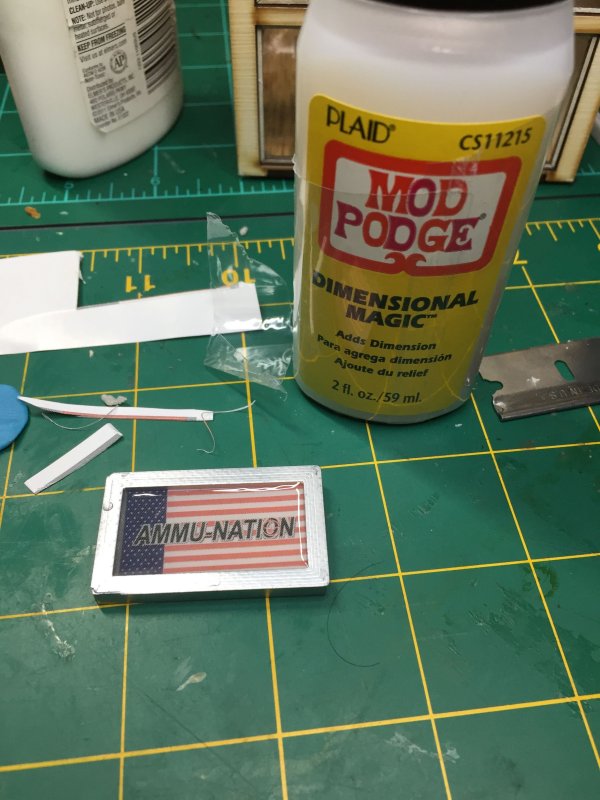
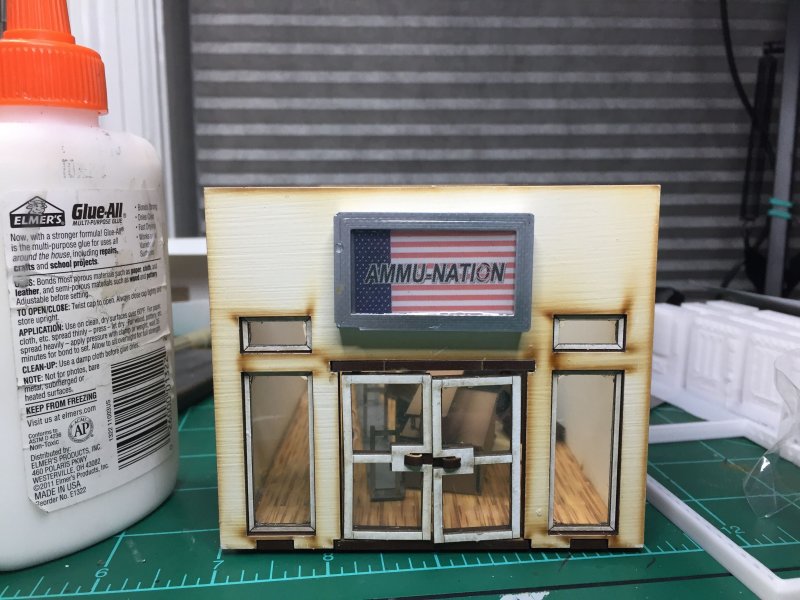
Turns out it worked pretty good. The Mod Podge makes for a decent glass substitute, plus it helps cover up some of the pixelation on the print. The other bonus I was hoping for is that it doesn't look as much like a piece of paper stuck behind some plastic.
Next will be properly trimming up the plastic - it was printed with a skirt to help with bed adhesion, but they don't snap off as clean as one would hope. Soon I'll have signs for all the stores.
And then they'll just need some freakin' furniture.
Blog Archive
As always, correct spelling is optional in any blog entry. Keep in mind that any links more than a year old may not be active, especially the ones pointing back to Russellmania (I like to move things around!).
Tags have been added to posts back to 2005. There may be an occasional old blog that gets added to the tag list, but in reality what could be noteworthy from that far back?
Blog Tags
3D Printer (29)
4ground (32)
4ground-mall (40)
5PFH (1)
action figures/toys (10)
airbrush (7)
Aliens (1)
Amazon (12)
antenocitisworkshop (11)
Atlas O Gauge (2)
Batman Miniature Game (2)
Battletech (1)
belt sander (12)
Blood Bowl (4)
boardgames (79)
books/comics (19)
computers hate me (5)
conveyances (15)
Cyberpunk Red Zone (4)
diet (53)
dreams (7)
fallout (1)
feng shui (1)
Firefight (1)
Foundry (3)
Gale Force Nine (1)
game dev (23)
gaming miniatures (240)
gaslands (10)
gastric sleeve (34)
Green Stuff World (2)
Hasslefree (9)
Hero Forge (1)
HeroQuest (4)
hobbies (102)
Jailbirds Minis (2)
kevin smith (1)
Knight Models (2)
malifaux (3)
Marvel Crisis Protocol (2)
mckays (1)
models (12)
mom (32)
moon light (5)
Moonbus (1)
movies/tv/dvd (60)
Necromunda (4)
ninja division (1)
Pathfinder Deepcuts (1)
pilonidal cyst (5)
plastcraft (2)
programming/interweb (42)
rambling (61)
random (367)
random maintenance (3)
Reaper Bones (3)
reaper chronoscape (32)
renovation/remodelling (25)
road trip (27)
salesforce (1)
sarissa precission (2)
scenery (19)
Star Trek (2)
Star Trek Away Missions (3)
Star Wars Legion (1)
studio miniatures (3)
ttcombat (12)
video games (51)
vs Factions(PDFs) (1)
walking dead (37)
wargame foundry (3)
work (6)
wrestling (45)
zombicide (2)
Zombicide Invader (19)
zombie mall (23)