Glossy Alien Zombies
05.11.2022
Let's speed paint the whole Zombicide alien game, I said. It'll go quick, I said. It's all basically the same.
3 months later....
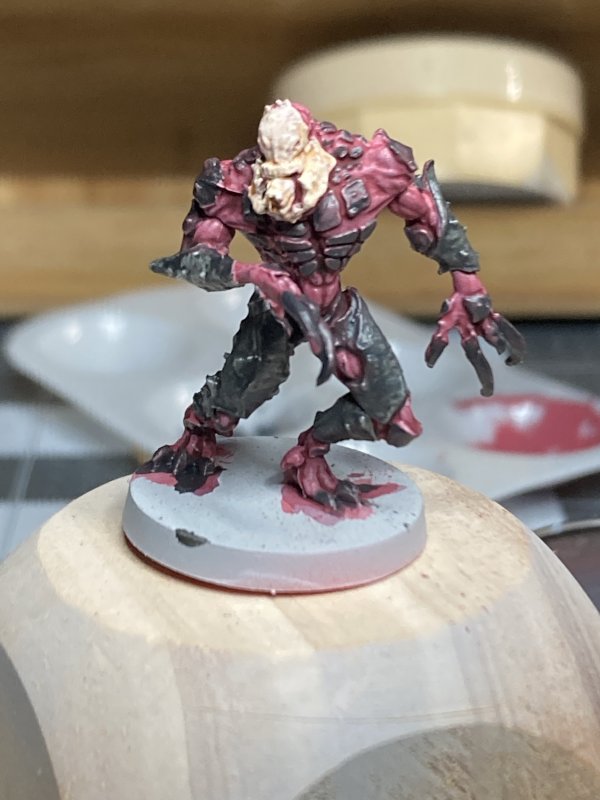
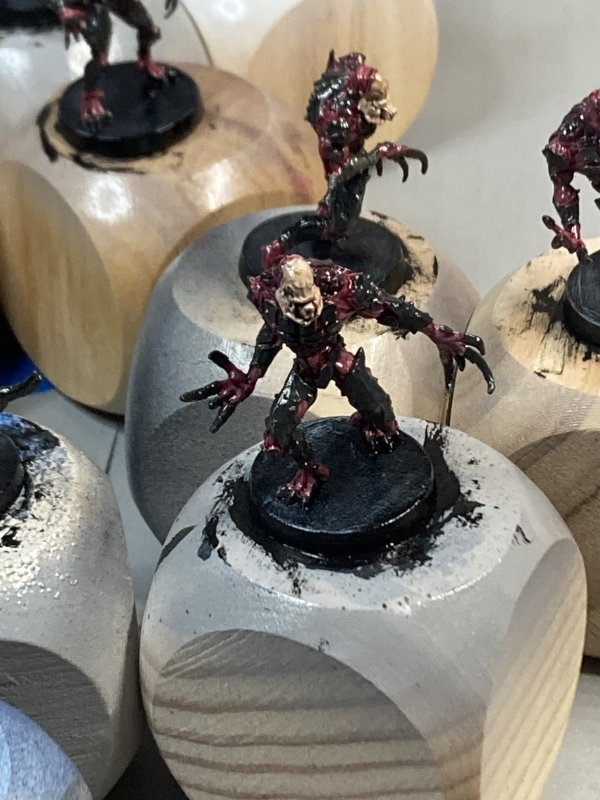
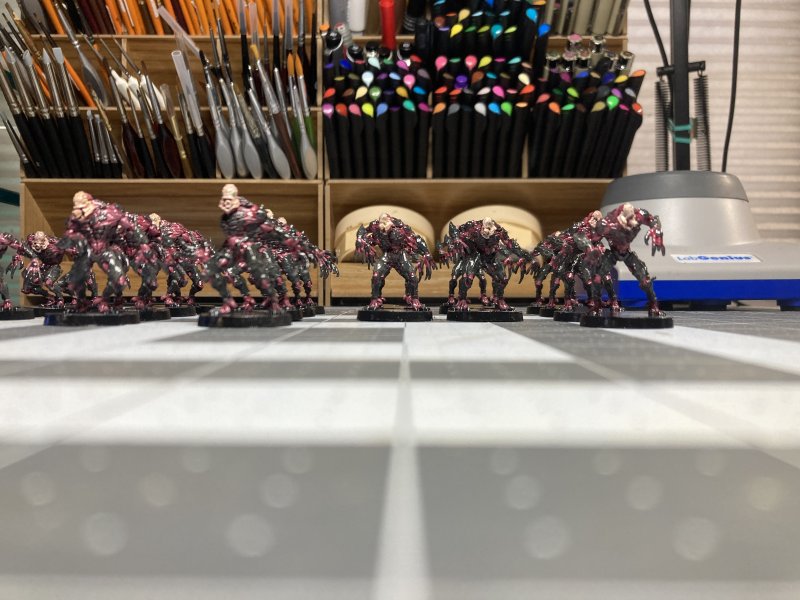
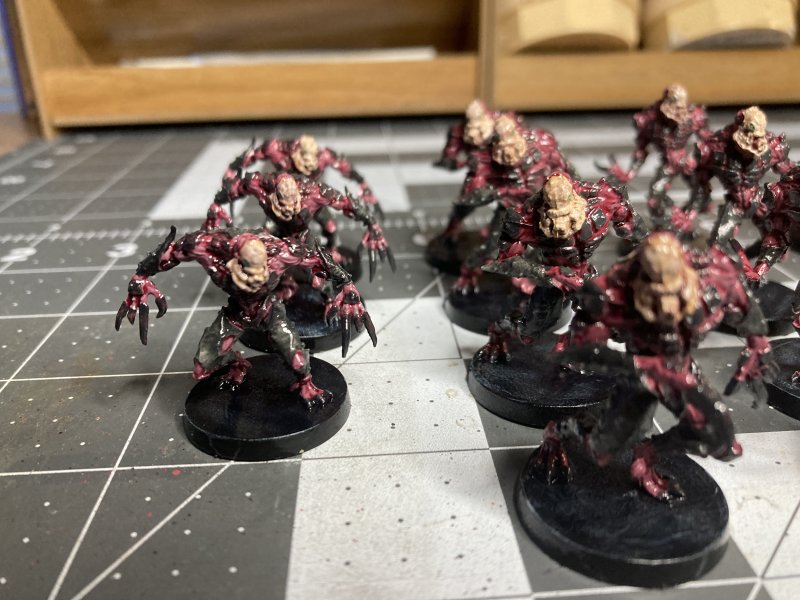
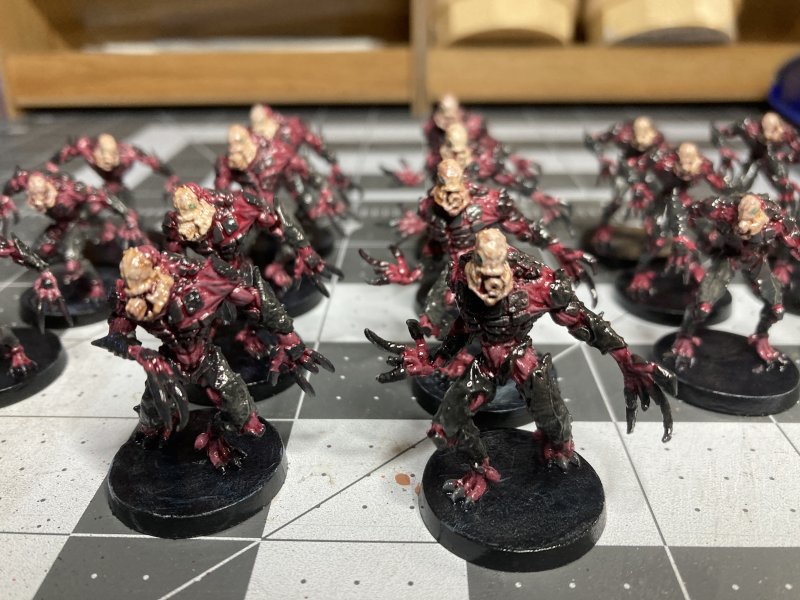
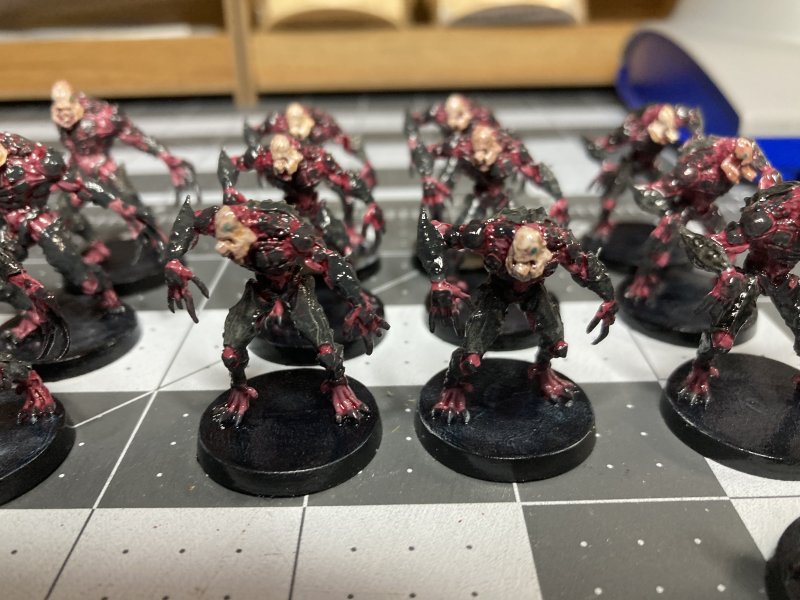
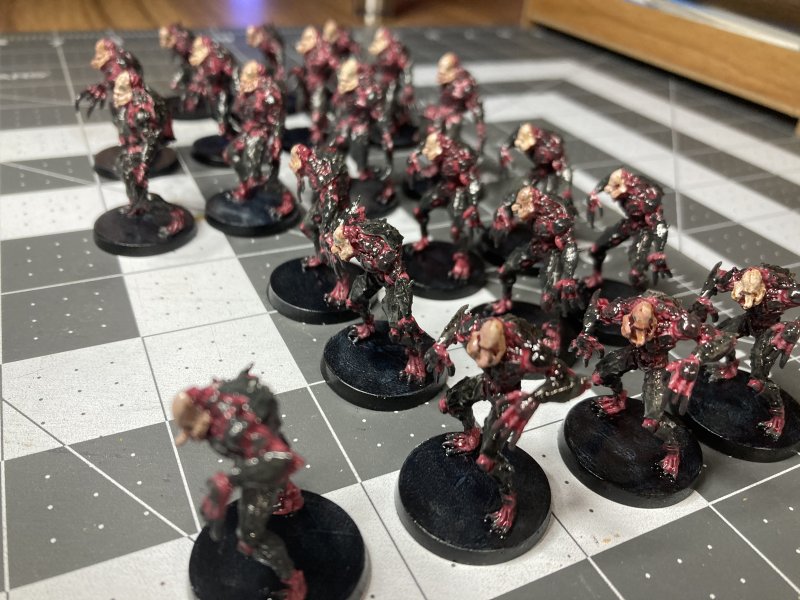
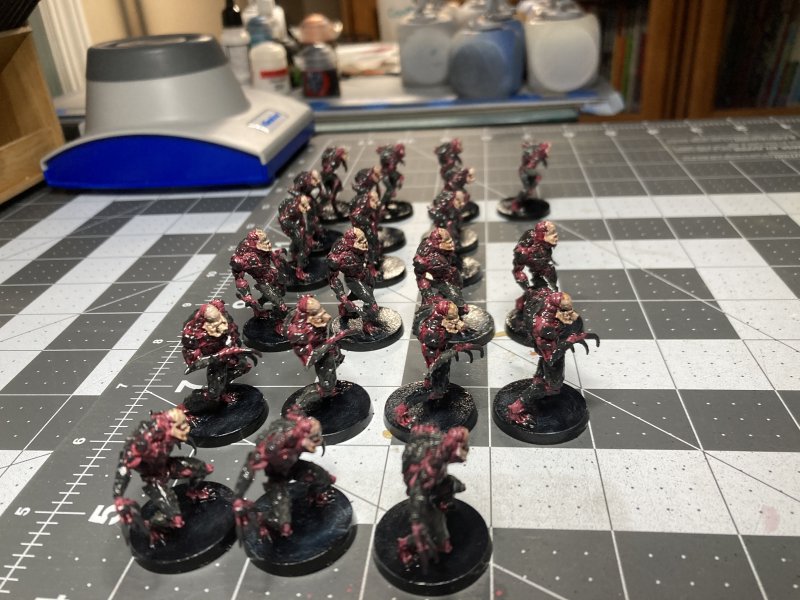
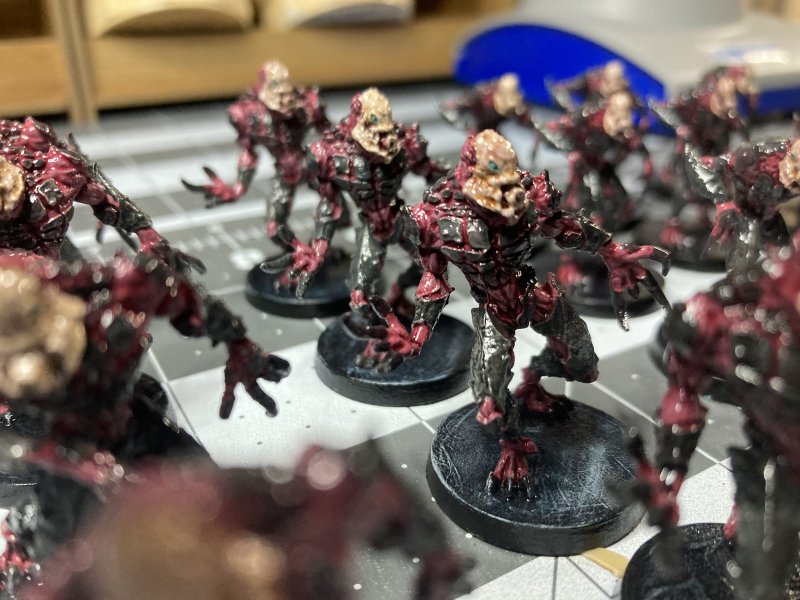
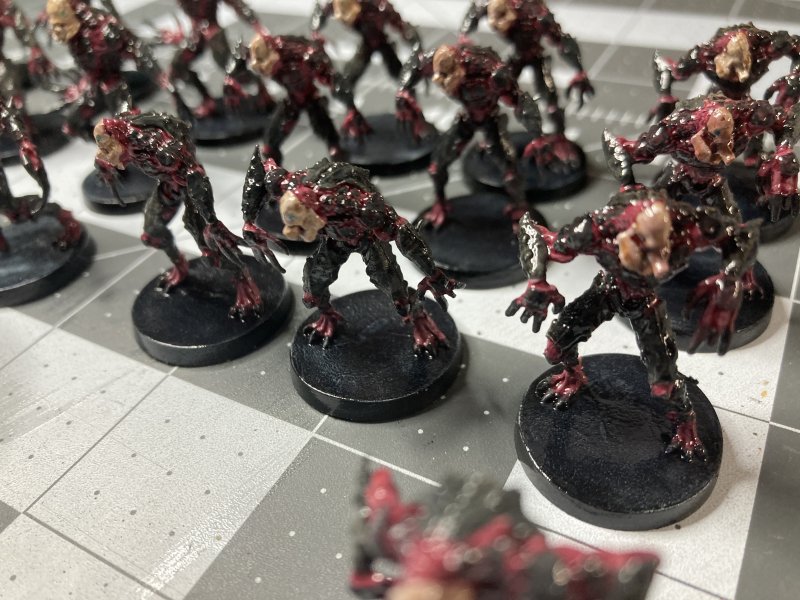
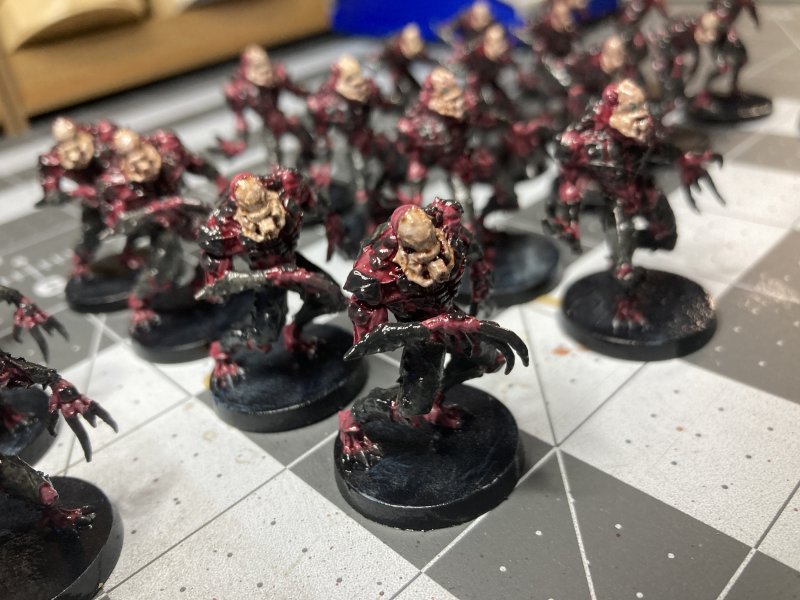
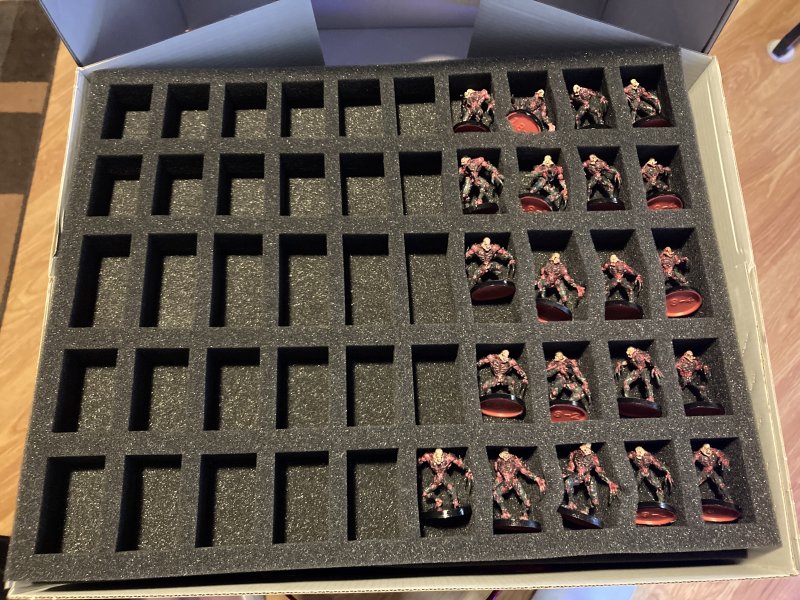
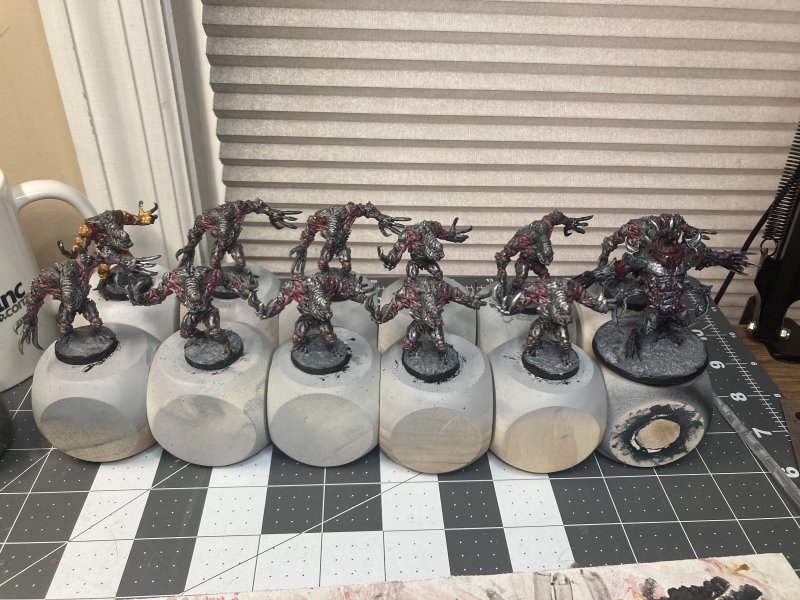
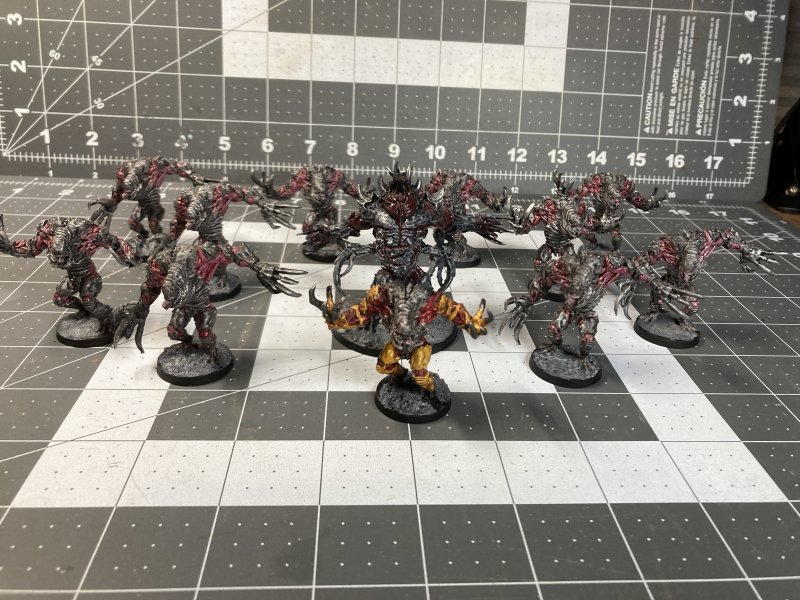
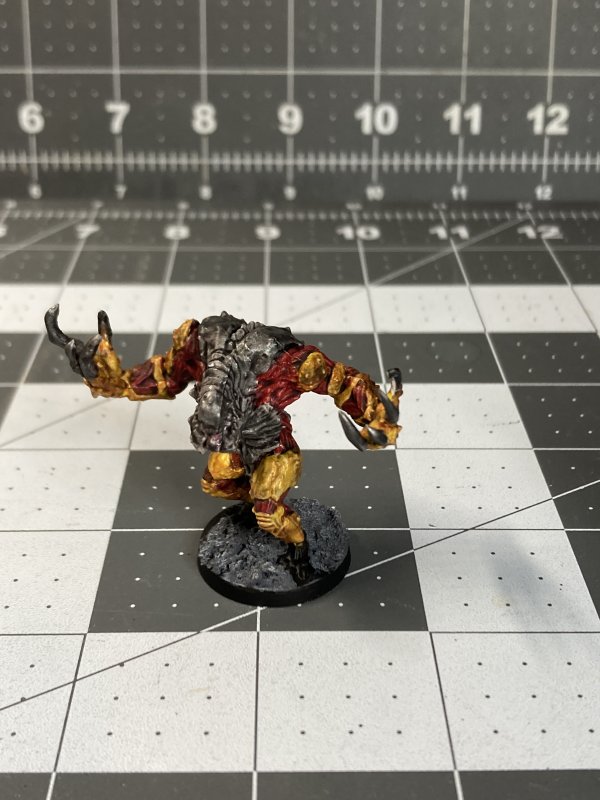
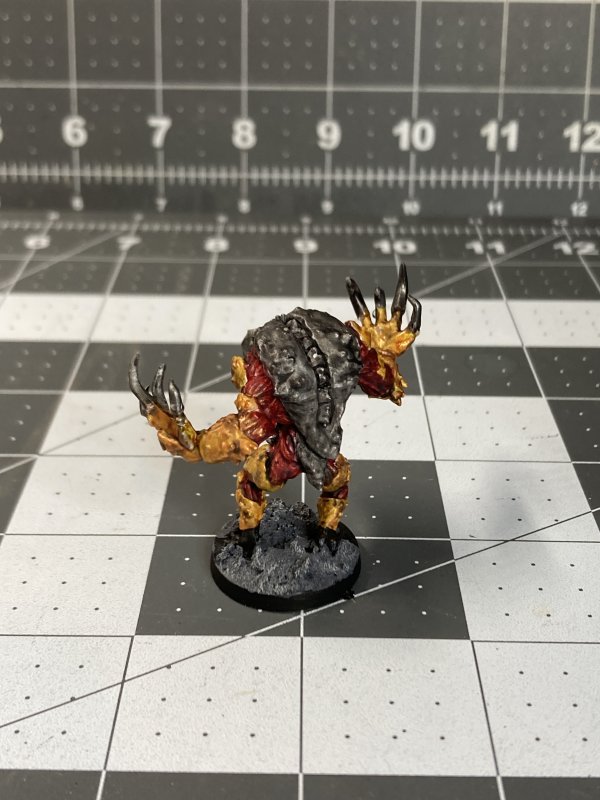
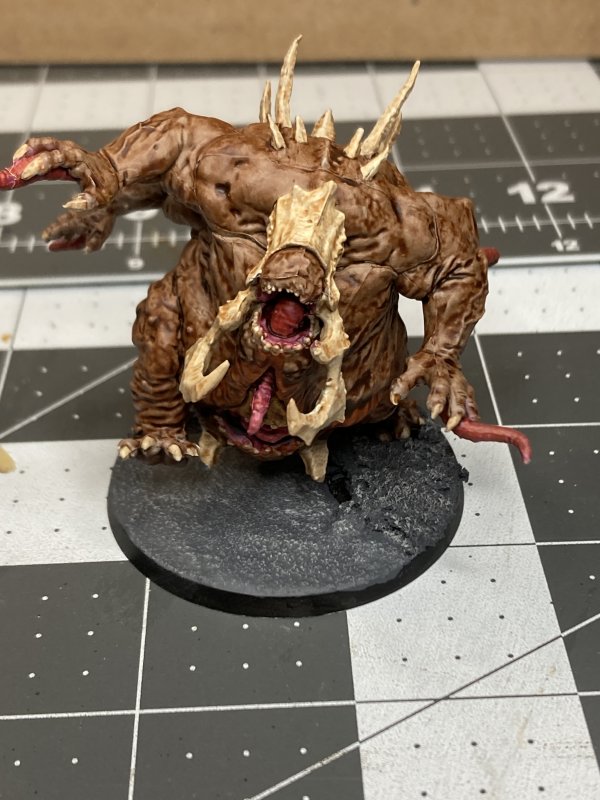
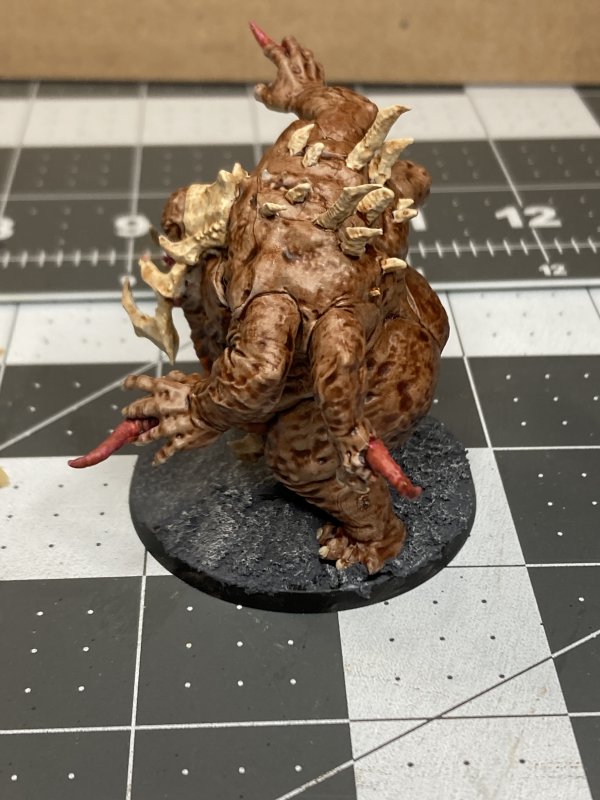
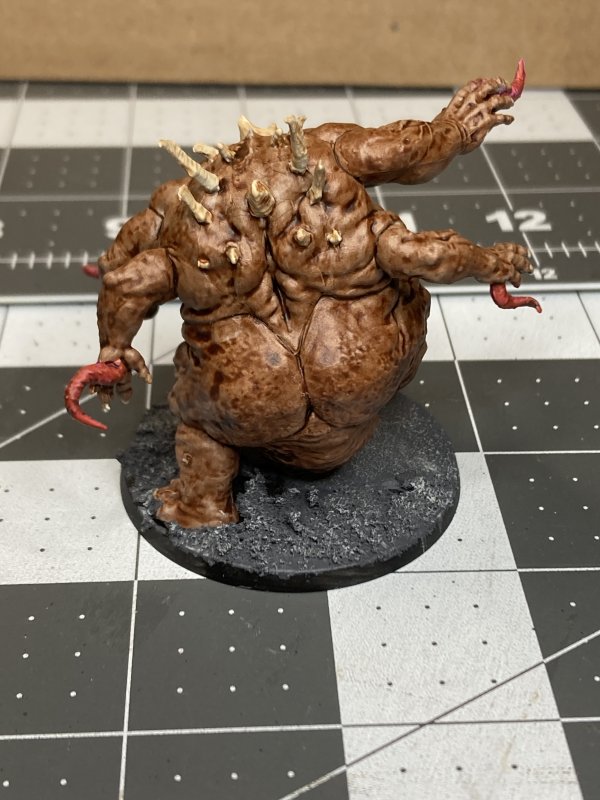
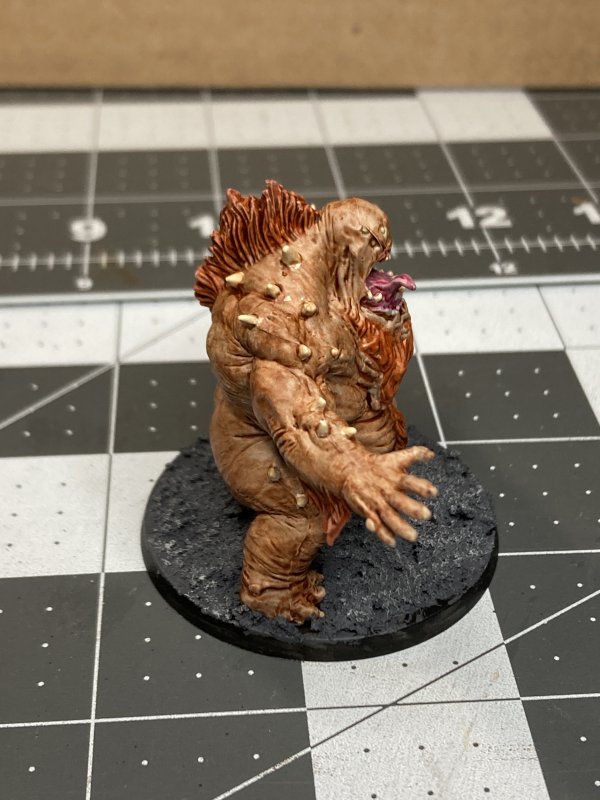
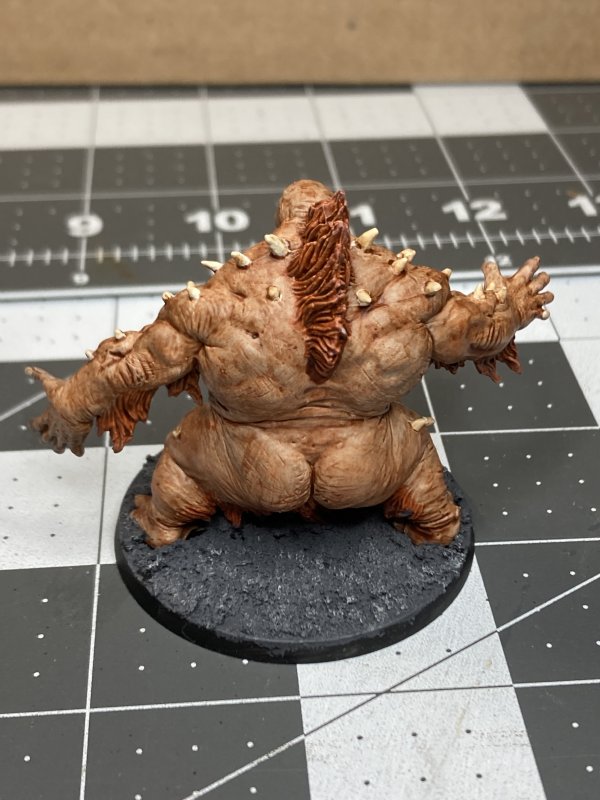
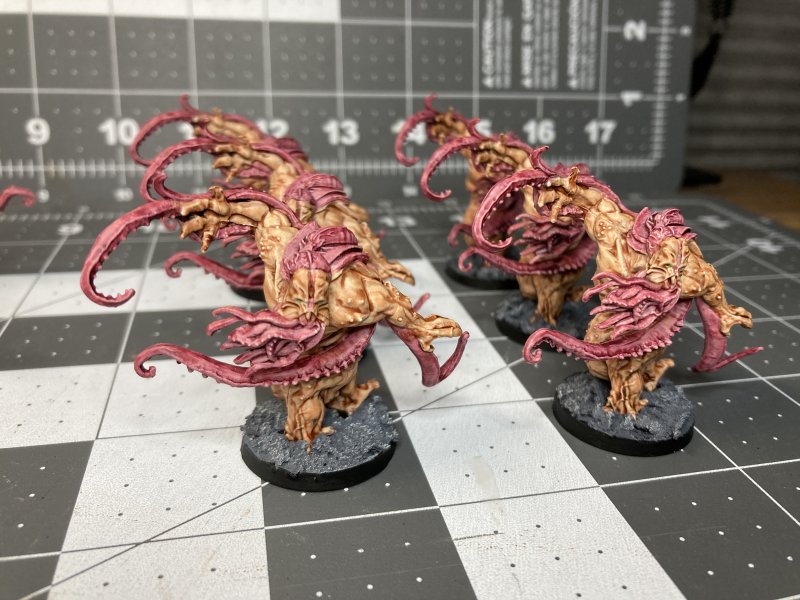
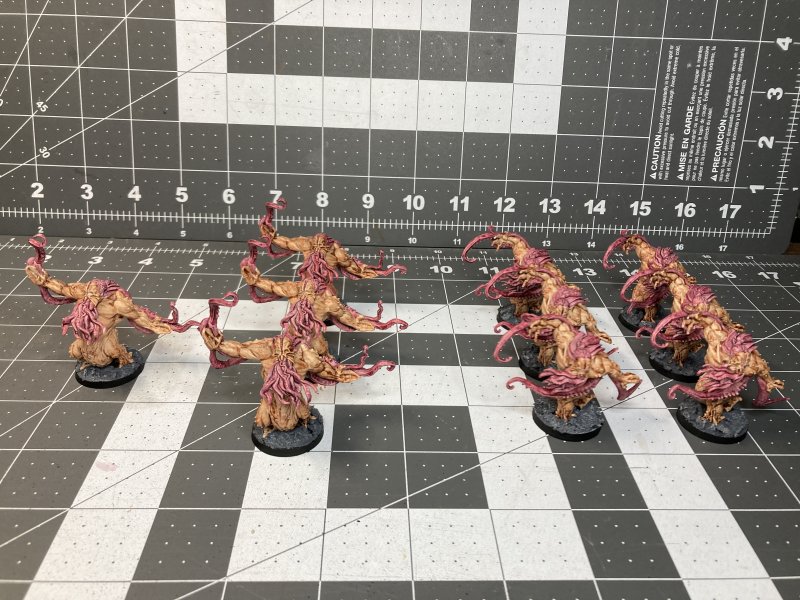
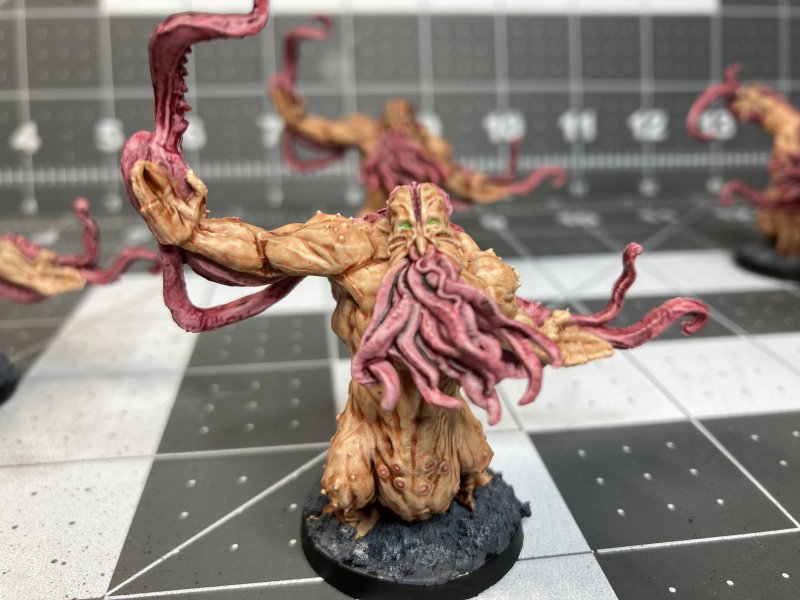
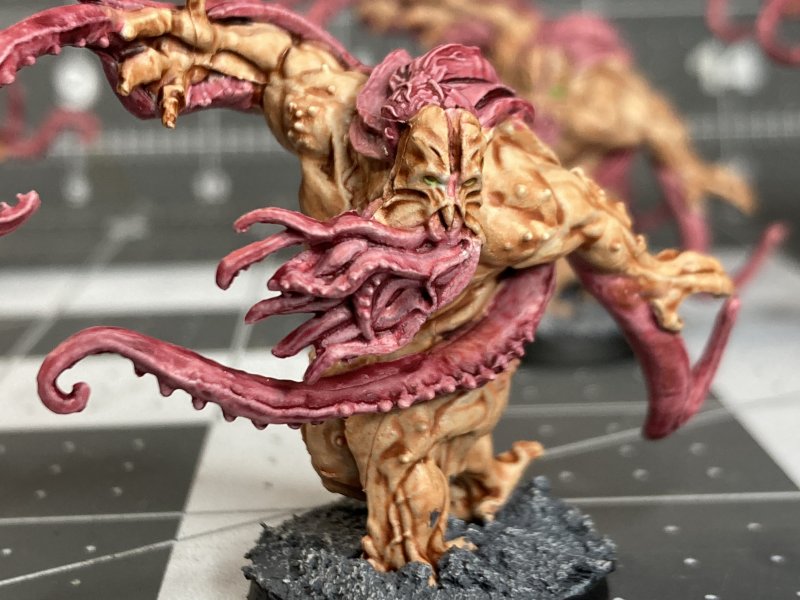
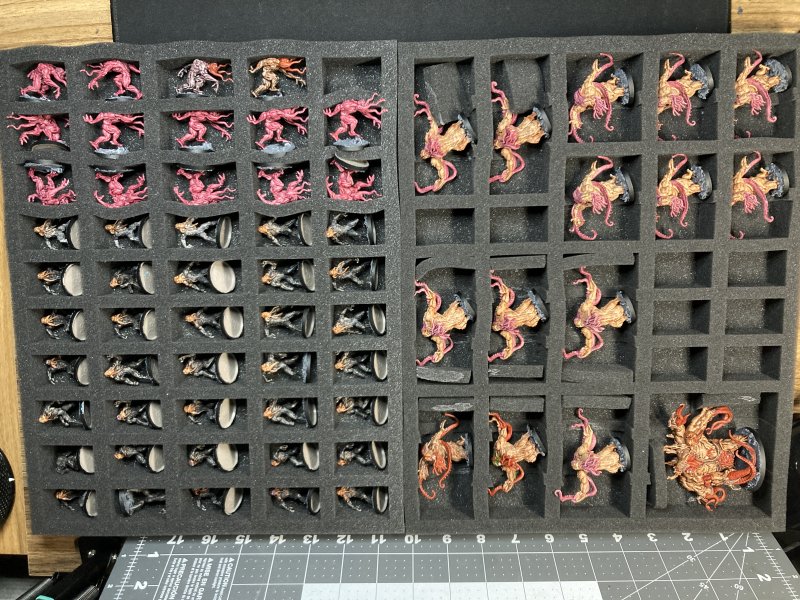
Ok, more xenomorph monster zombies painted. This time there was a better tweak to meaty flash - Citadel Pink Horror (plus glaze medium) atop a grey primer seems to work. I added Citadel's crimson wash, which after the fact makes is all too dark & purple. To try to give the meat a wet look and armory-bits a hard/metal look, I added a gloss sealant instead of my normal matte. And boy is it glossy.
Close up, well, these don't look too good. These are definitely table-top quality. Far, far away table-top. I'm not sure why I'm consistently having a hard time getting a decent paint job on the minis for this game.
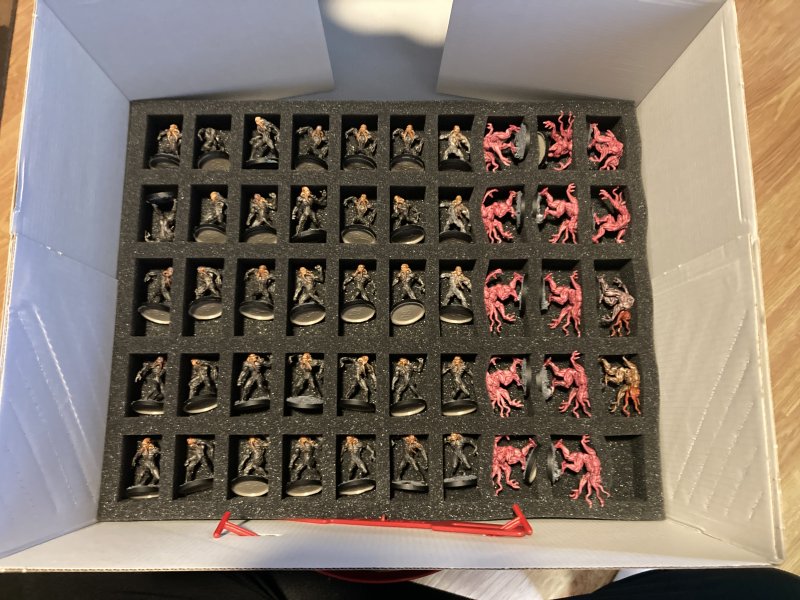
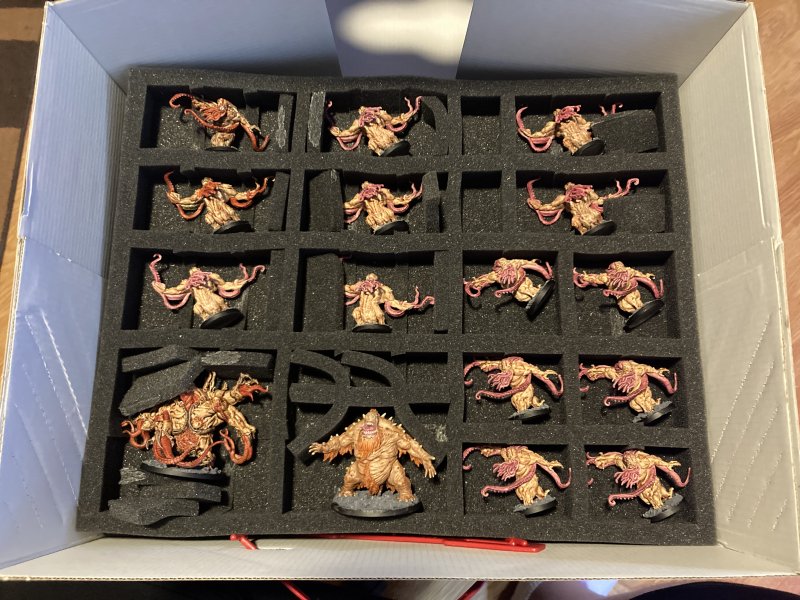
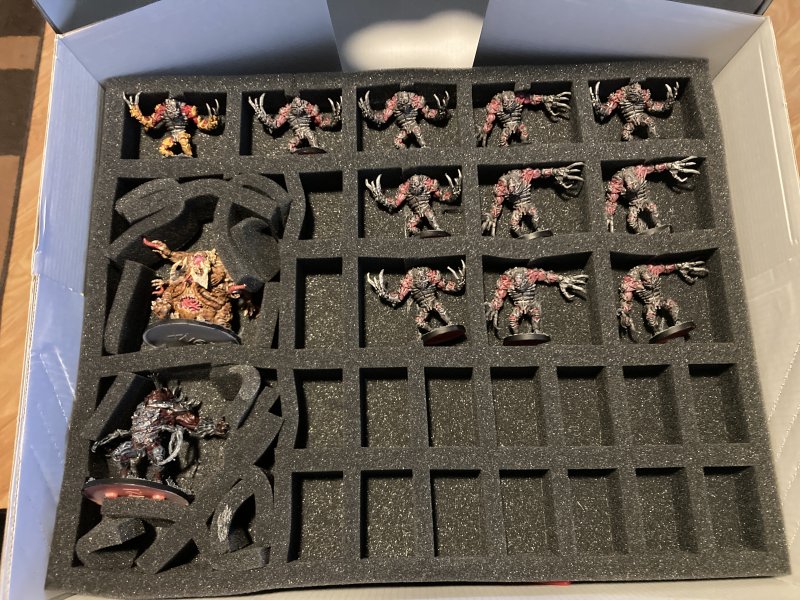
I keep all of my minis in Feldherr boxes. There still 31 aliens left to paint after this batch, and I think everything might fit into 1 box.
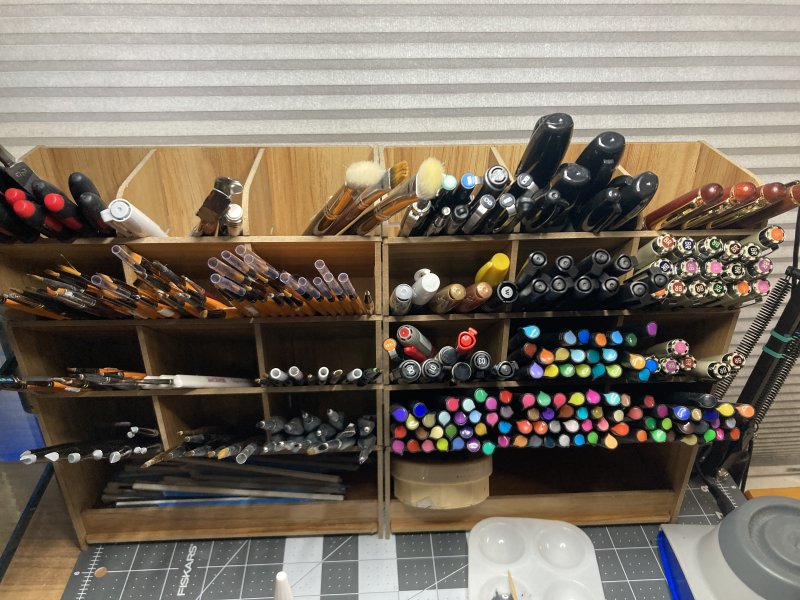
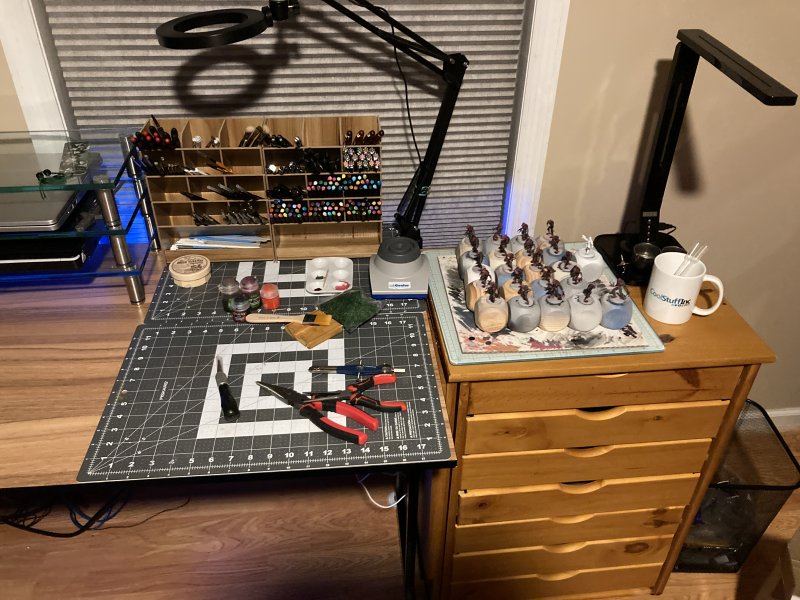
Along the way has also been some desk optimization. All of my art/hobby pens and brushes are now easily accessible and not as easily forgotten. I came across 22 paint brushes that were still affixed to their Hobby Lobby hanging-cards. I've also got a spot for sanding sticks so that I won't keep forgetting that I have them. All of this is thanks to a new desk I got from Amazon that features an extra 10" of desktop length, plus it's 24" deep instead of 21". I'm much more excited about the desk/layout than getting these minis painted.


Sarissa Trailer No. 1
04.13.2022
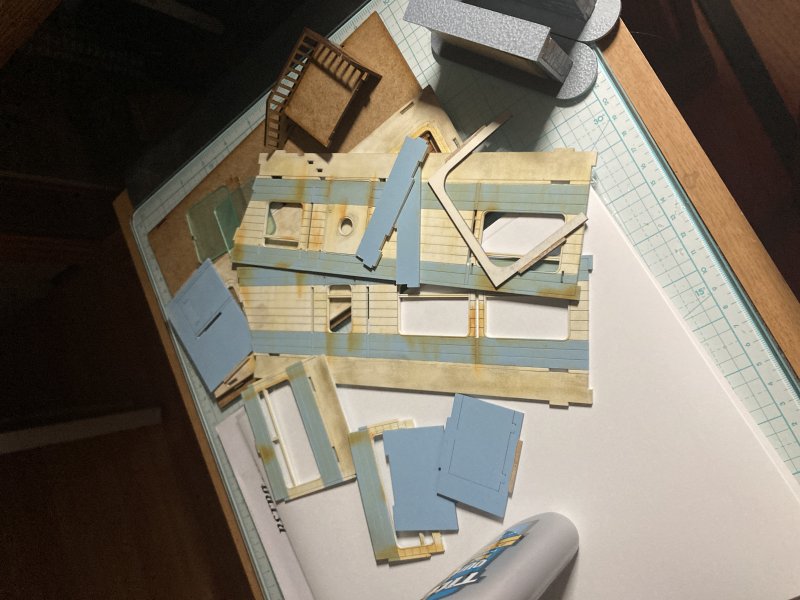
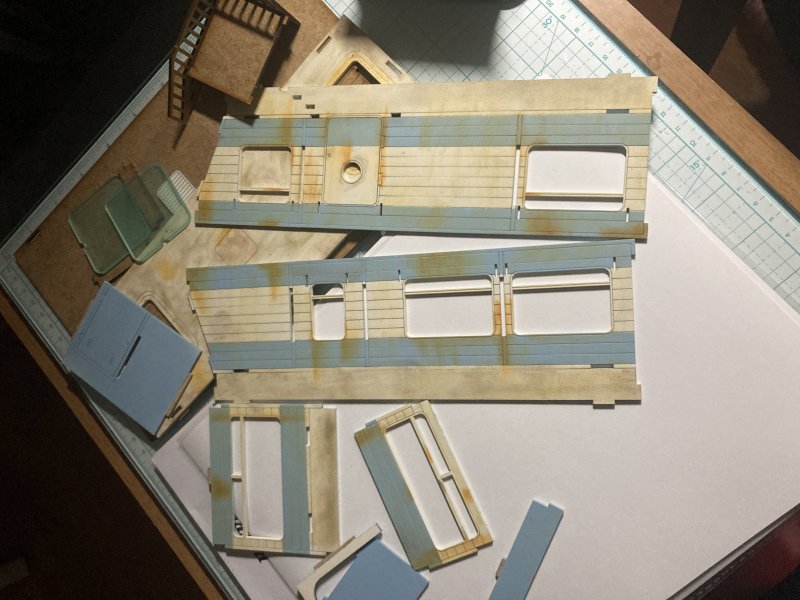
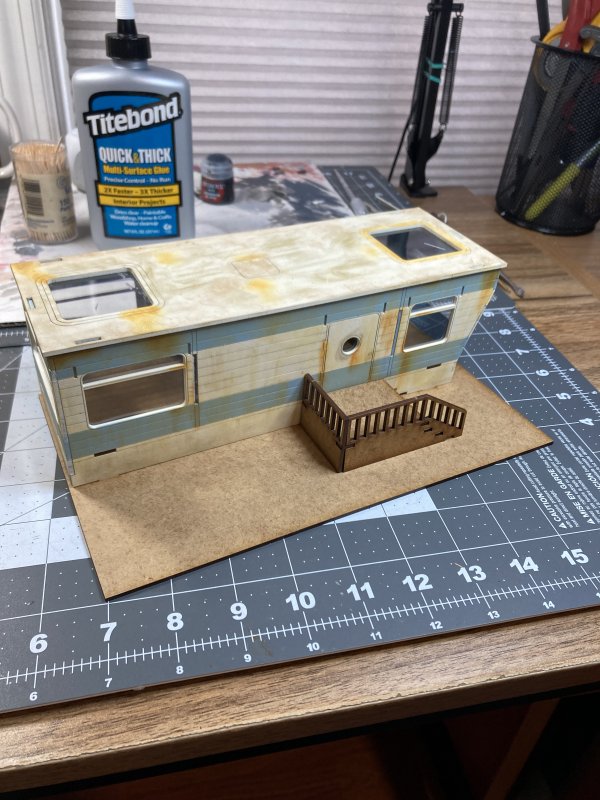
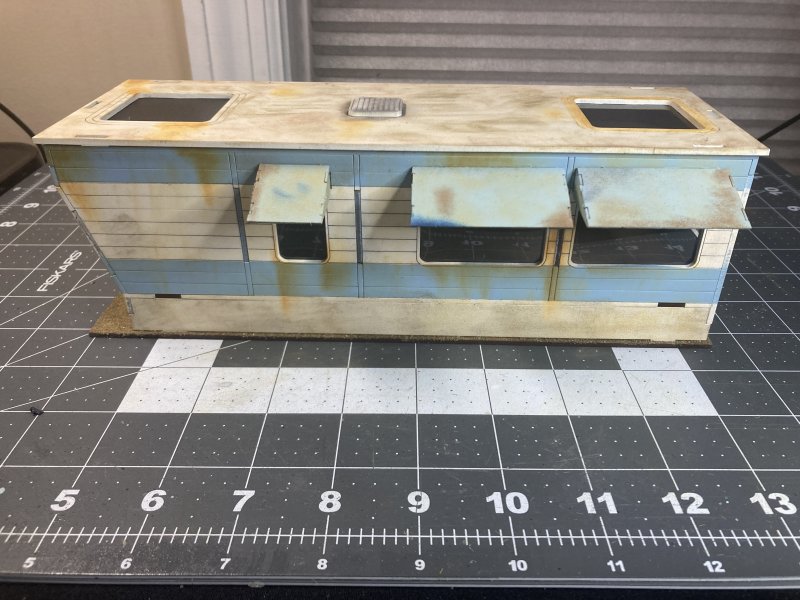
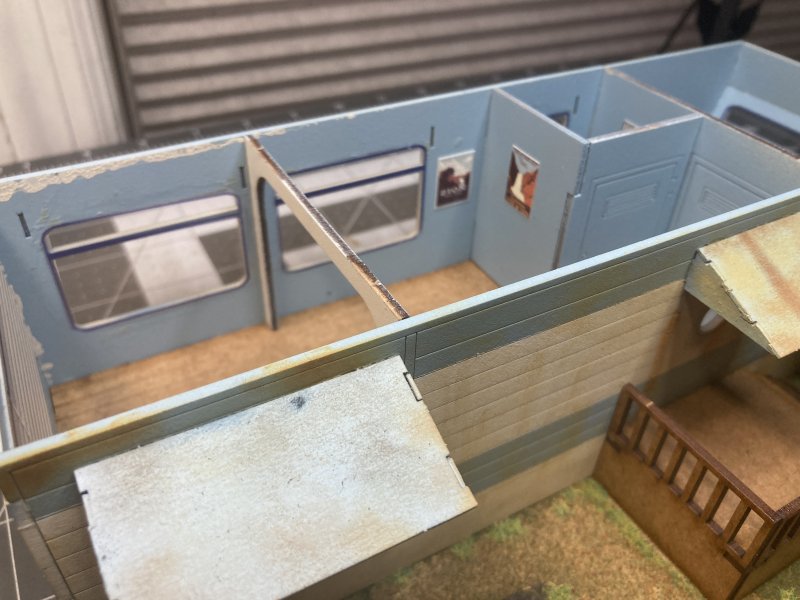
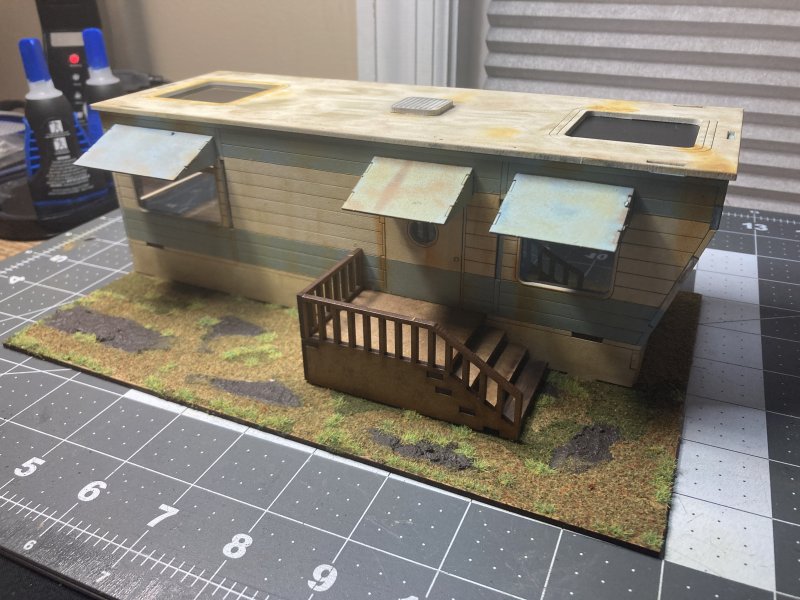
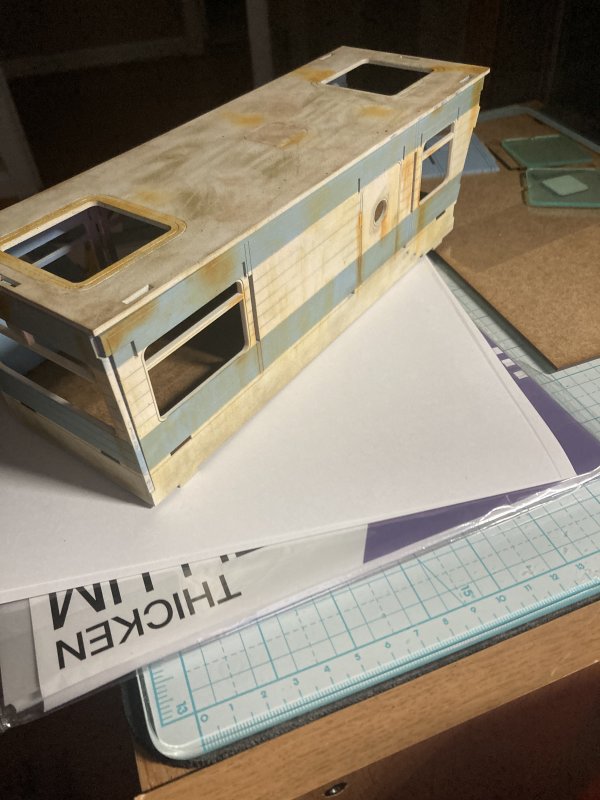
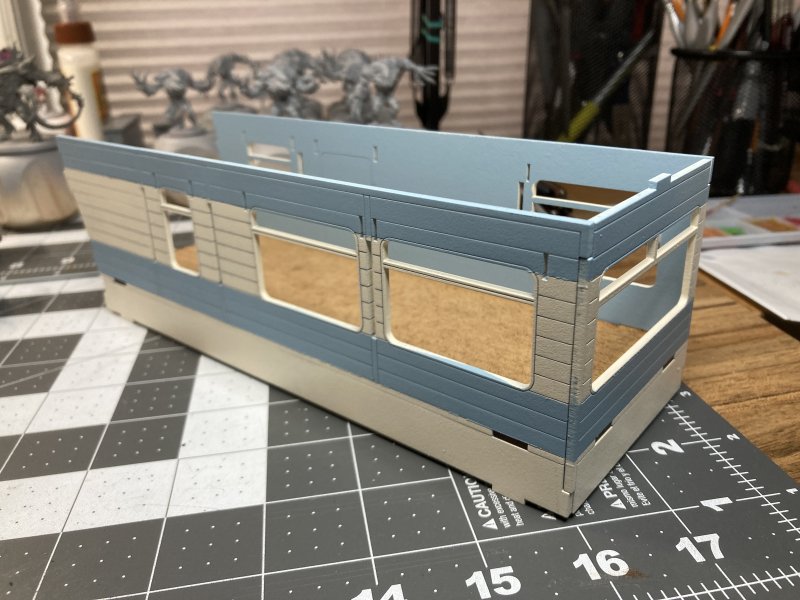
There was a sneak peek of this in mid-March, but after about a month and a half I've finally wrapped up (the first) Sarissa Trailer. There's also more in-progress pics for this build as I was trying to fix some mistakes made on buildings in the past.
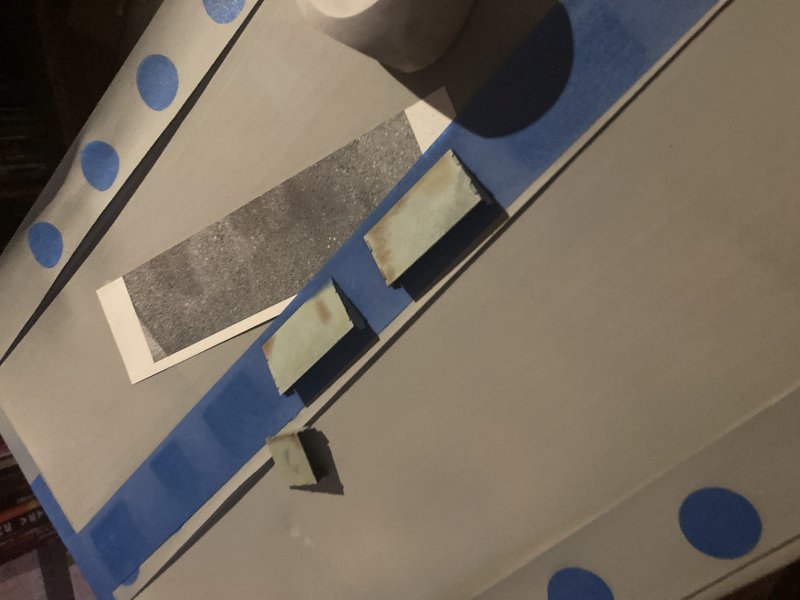
My first mistake from the past: masking. Sticking tape to something is easy. So easy that most of the time I pull off the paint the tape is stuck to (not good). In addition, I manage to get paint to seep in underneath the edges of the tape so that the nice, crisp line you're usually shooting for when masking.... isn't. Luckily the internet and Facebook groups are full of helpful tips, the biggest of which is "seal between layers". So that's what happened. White primer as the base, then seal it. Now the masking tape won't pull up paint when you peel it off. Mask, and then seal it again so that the seal, well, "seals" the gap between the tape and the paint underneath. Spray the next layer and let it dry, and (no, don't seal yet) pull off the tape. THEN seal it one more time. I could have waited on this sealing step, as I added weathering powders next, which of course need sealing after so that the powders don't rub off. By the time I was done, the outside of the trailer had gotten 2 layers of paint, 1 layer of weathering, and 4 layers of sealant. But it looks like it worked!
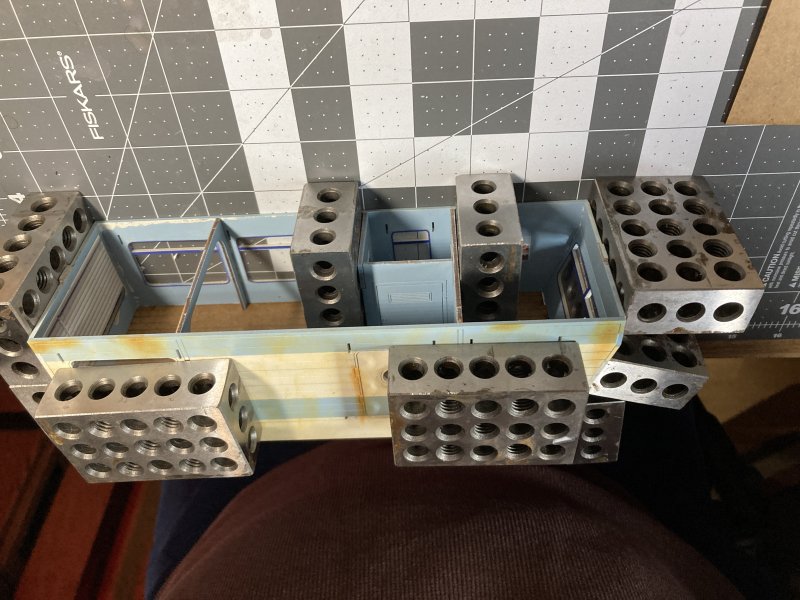
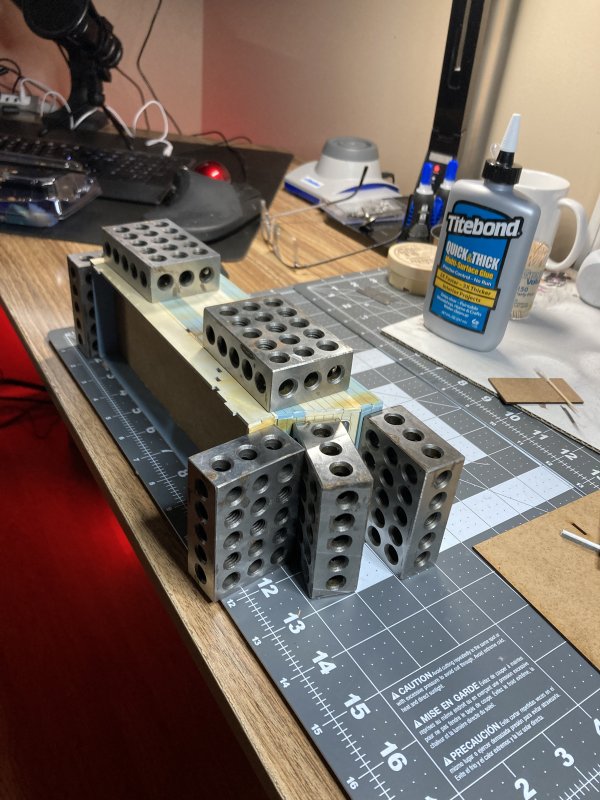
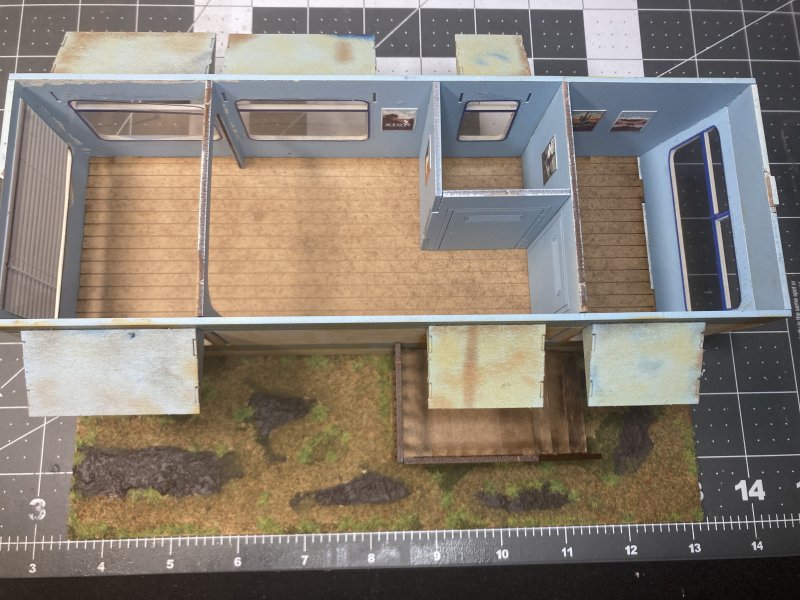
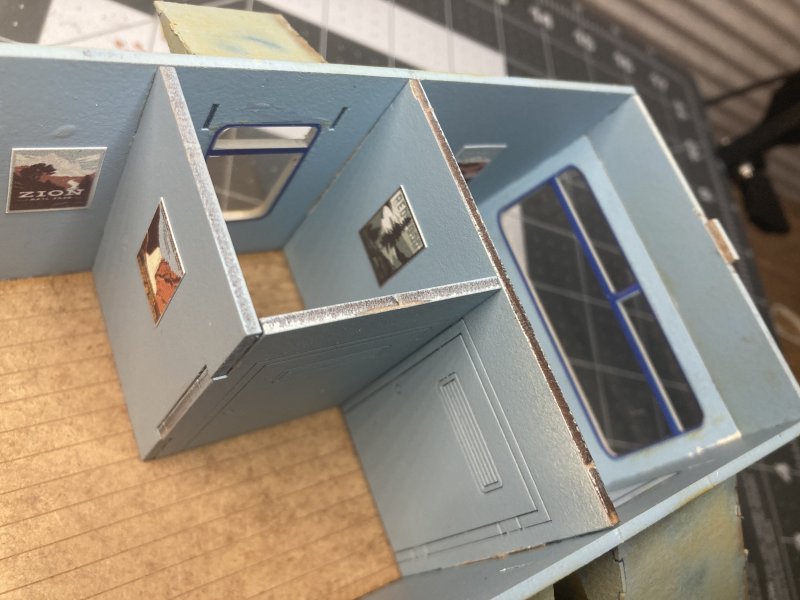
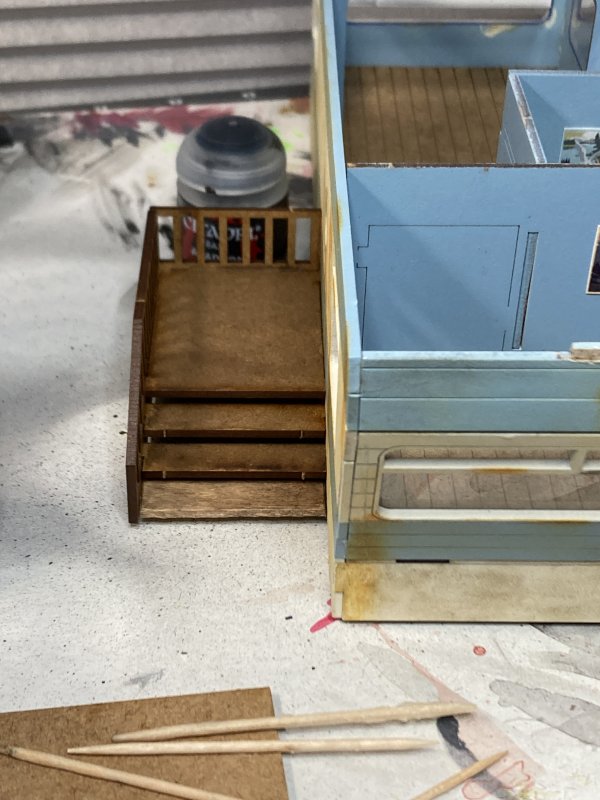
It wasn't a past mistake, but I could tell based on my past abilities that trying to mask straight lines around a constructed, slightly irregular rectangle was not going to lead to straight stripes. As such, all the painting, masking, sealing, and weathering happened before anything was put together. I lined up and laid out the outer walls and swooped in with 1 long strip of masking tape to make for straight stripes. Much like the above, it worked! The only drawback for a critical eye is that the slots where sides/floor fit in have the original MDF color instead of color-matching the base or strip color. I think I can live with that, though. Or maybe it's something I can touch up later if it really starts to bother me.
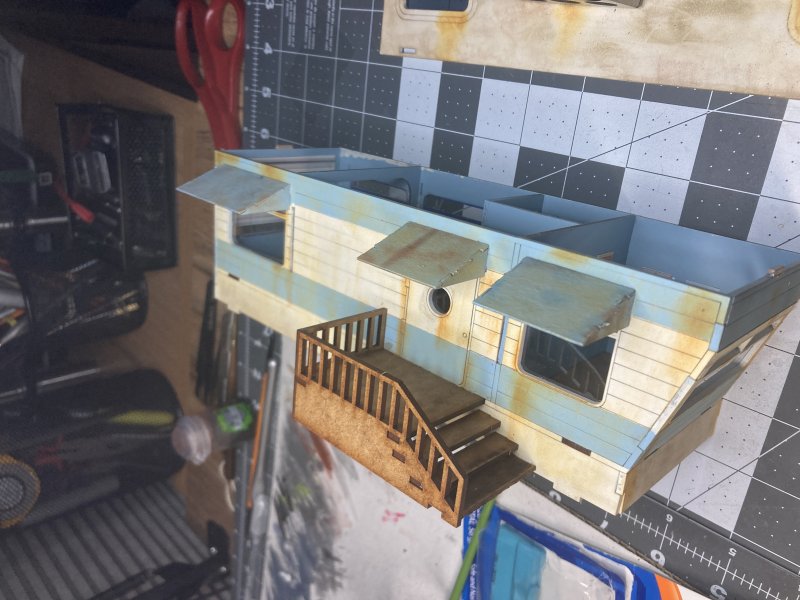
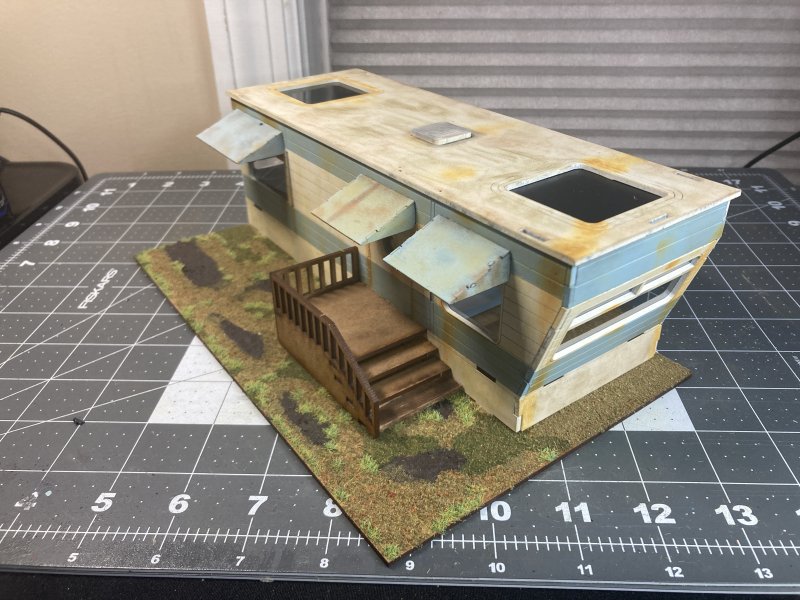
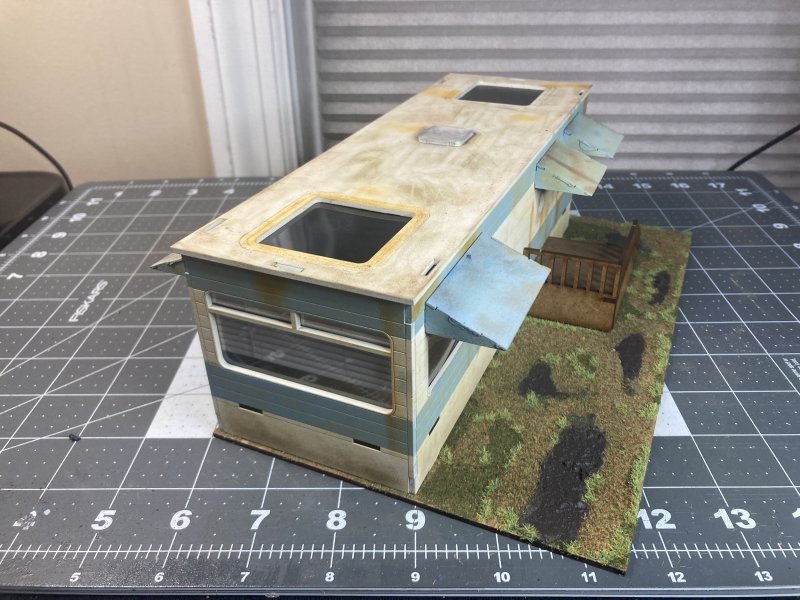
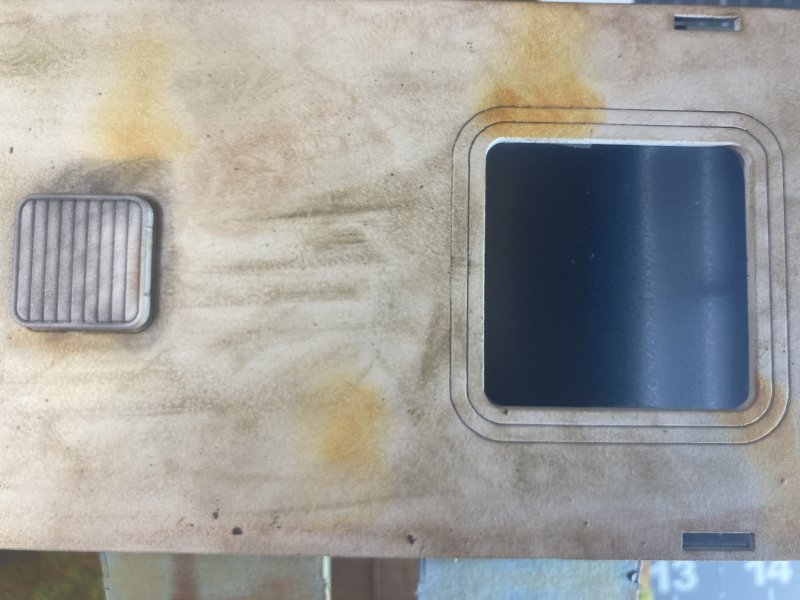
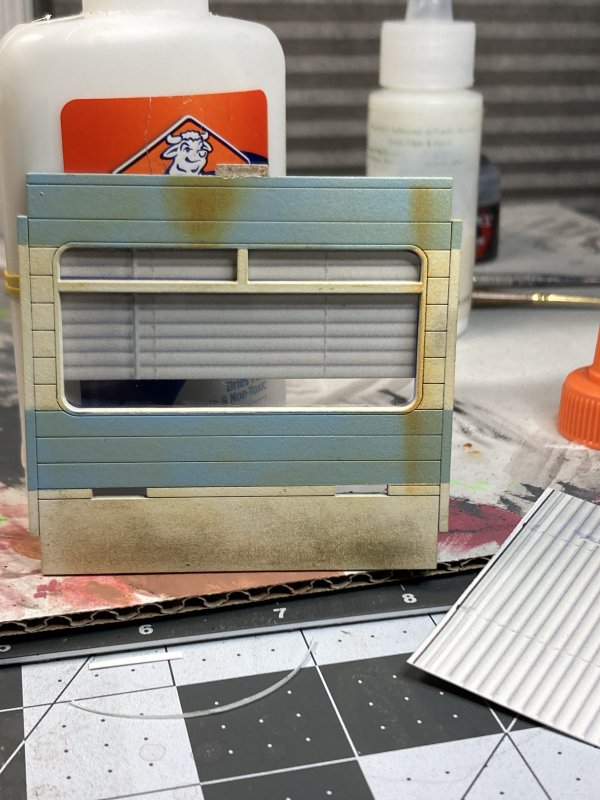
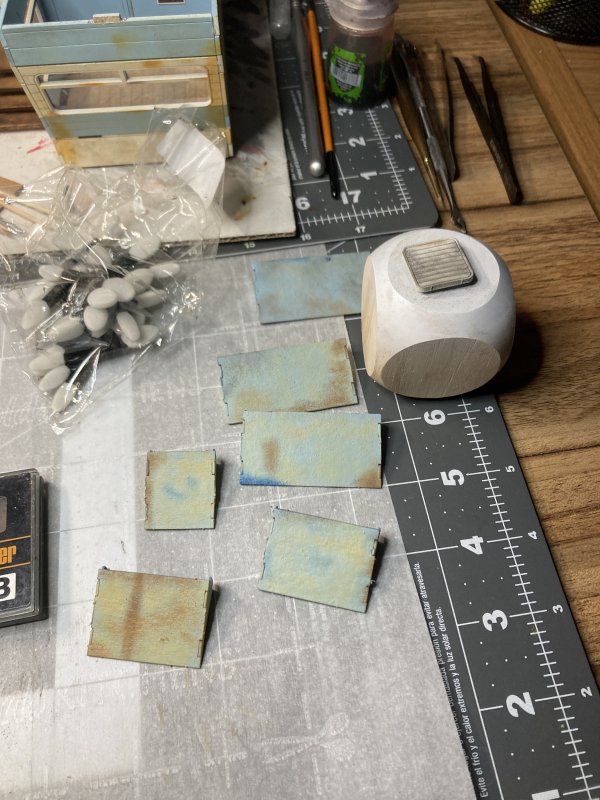
Next up was a brand new mistake that led to trying something new. The roof has skylights with opaque, blue-ish tint which, for whatever reason, didn't fit in the holes in the roof. I glued them underneath the holes so they just looked recessed, but the glue seeped onto the plastic a little while driving, thus giving it that "this is glued on semi-clear plastic" that every model plane from my childhood had. Additionally, the blue bothered me. Luckily, bulky plastic and Elmers make for an easy to pop-out fix when you're not worried about what the interior ceiling is going to look like. Thanks to sifting through old spray paints to find the 50's-looking baby-blue that became the trailer stripe, I found something else I wanted to try for the skylight - black window tint spray paint, which is just semi-translucent spray paint. I wasn't going to spray the bulky blue plastic pieces, though. Instead I pulled out a sheet of transparency film/paper (you know, from those overhead projection presentations in the 2nd grade) and sprayed it with the tint spray. After it dried for a day, I applied a liberal coat of the much-used-for-this-project sealant, and promptly let it dry for another day as I was hoping all of this would prevent the paint from peeling/flaking off when time came to cut it. Much like the previous 2 things I had tried above, it worked! I cut oversized windows and applied glue where I was as sure as I could be that nothing would seep to be seen from above.
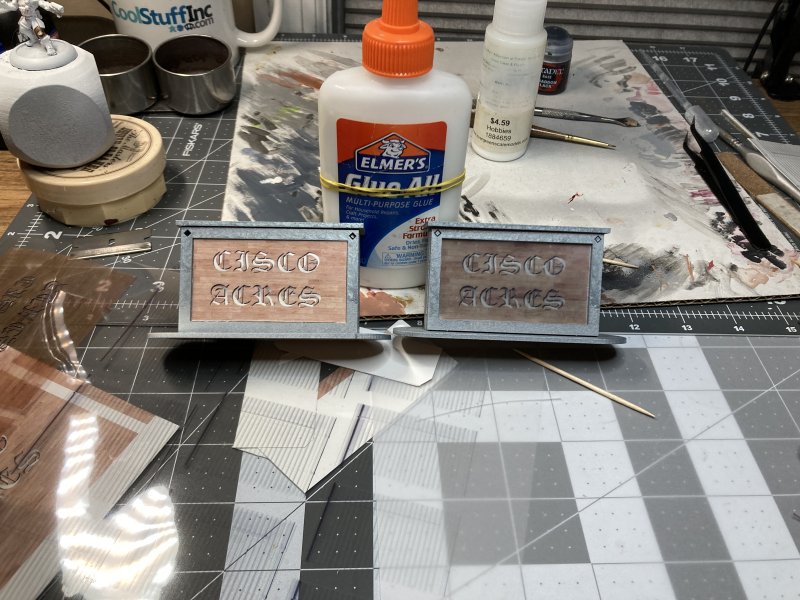
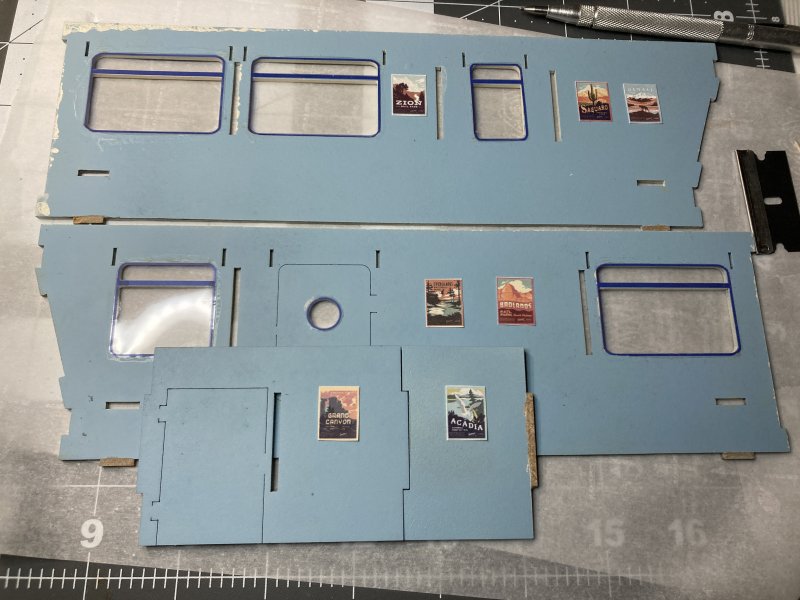
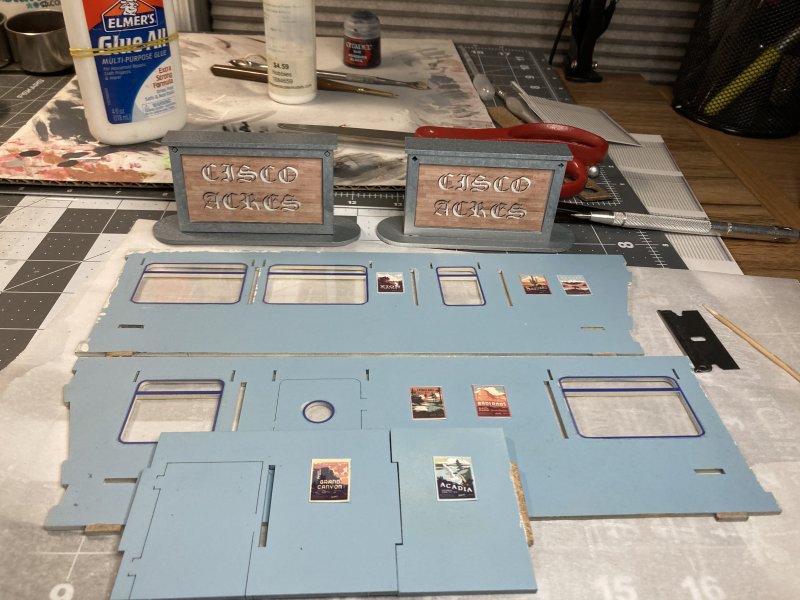
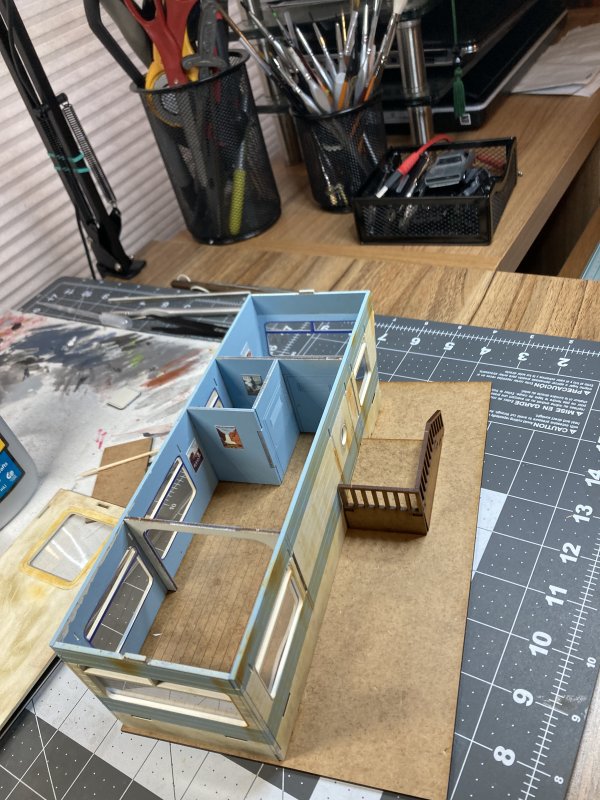
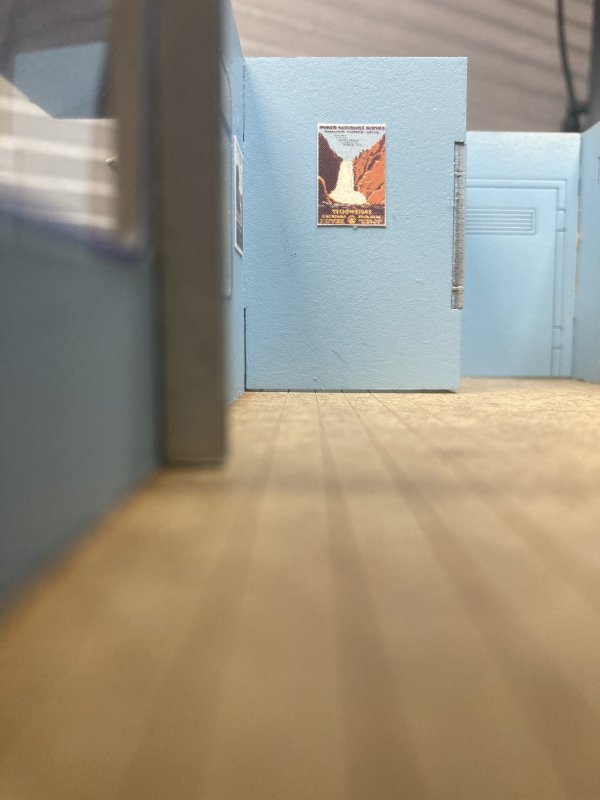
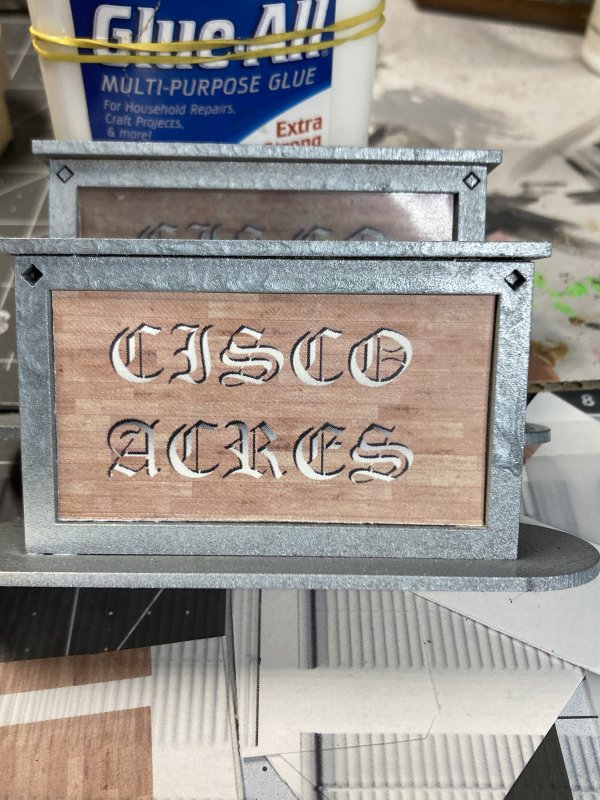
The rest of the work was the little things I like to add on. Google image searched, camping inspired posters printed to decorate the furniture-free interior. A smattering of different types of ground clutter because I wanted a stereotypical unkept trailer park yard. There's an "estate" sign added in where the sign is just printed cardstock, although I tried a test with printing on non-tinted transparency film and adding some white vellum underneath to try and give it some depth. The latter would have worked if it wasn't so dark in the end, so the former became the sign and thus Cisco Acres was born.


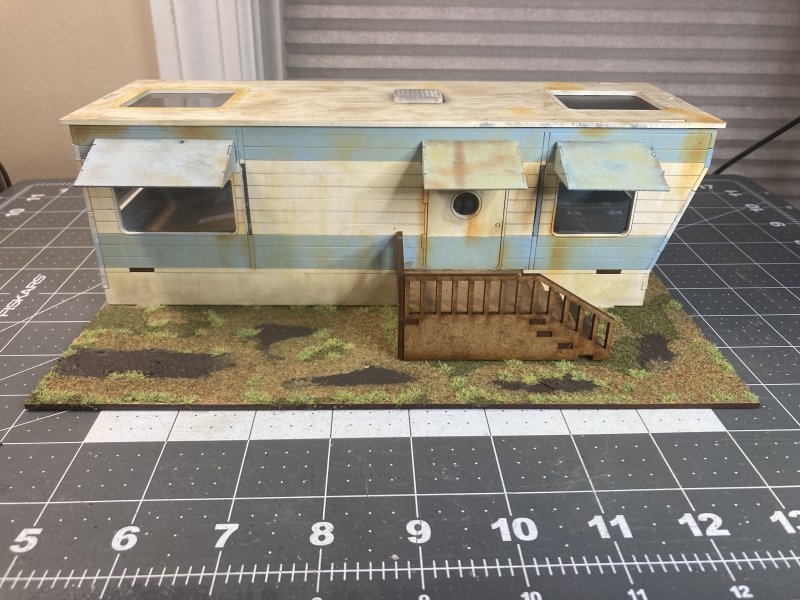
I have another one of these trailers to build - later, sometime. I'm going to let how this trailer turned out sit and percolate for a bit and decide what I can do better. There's also an Airstream-style trailer to add. Shiny silver MDF scares me a tad. But for now, I'll probably switch back to Zombicide Invader, and I've already got ALL of the remaining 50+ alien zombie-monsters primed.
Lordy, what have I gotten myself into?
Zombicide Invader: The Next Chapter
03.29.2022
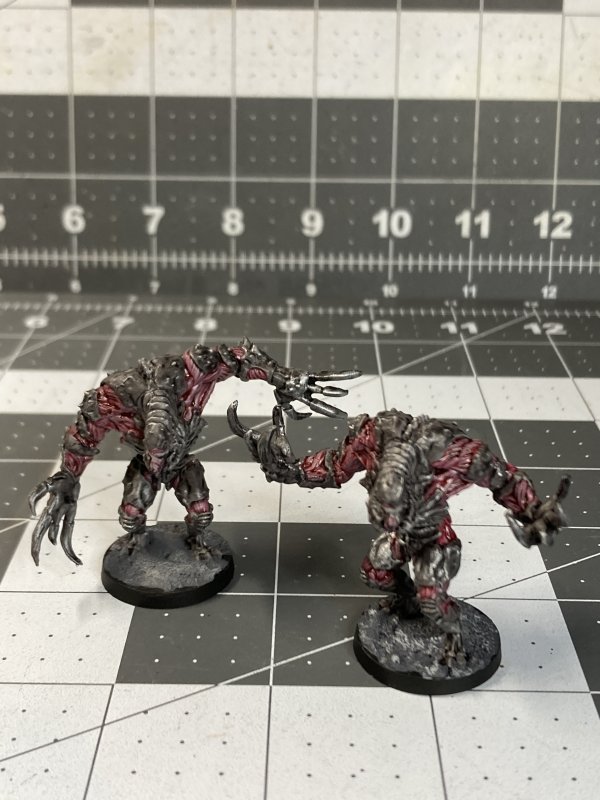
In the latest chapter of Zombicide Invader painting, we've got a dozen.. uhm... they're...
Ok at some point I'm going to look at the rules and see what all of this stuff is called. "The bad guys from the Dark Side expansion" is the best name they're going to get right now.
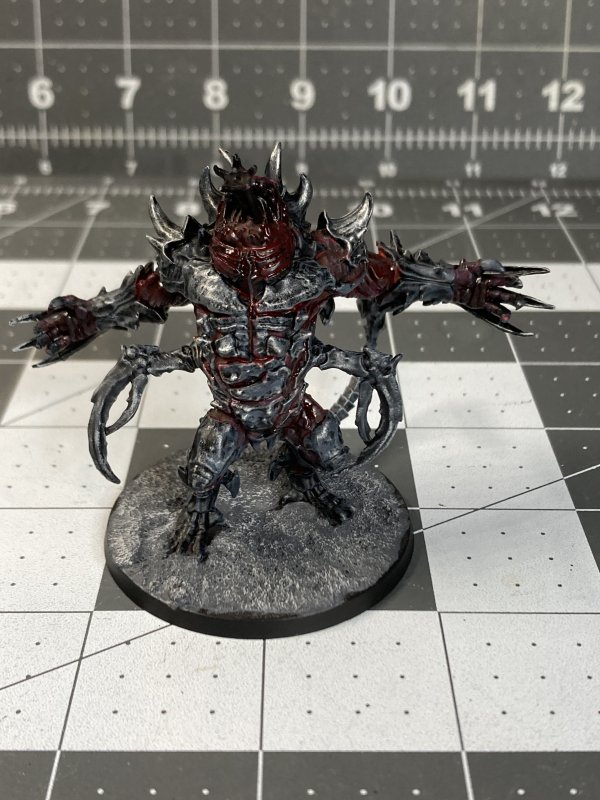
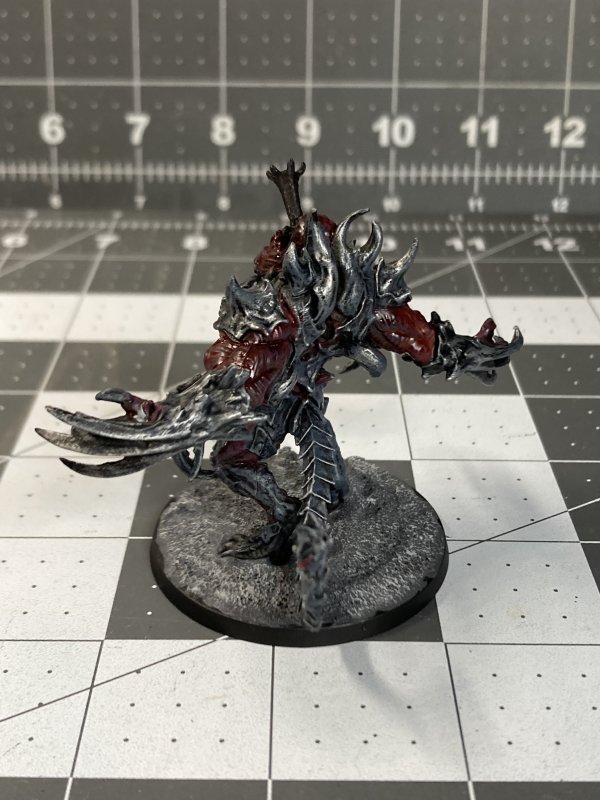
Back to the painting, as this was a time more of seeing what I could salvage. I was first trying for a "meaty" exposed muscle look. A red base coat was too dark, and I quickly abandoned it. A pink base coat was better, but too pink. Adding red/crimson wash helped - but it somehow skewed the pink basecoat to purple. A thinned down Blood of the Blood God helped to ease the purple into a little more of the red zone. By this point I knew it wasn't going to get any better, so I just stuck with what I had.
I found a pic of armor that I liked - black with a dark blue drybrush, and then some metallic highlights on top. You know, seeing a picture doesn't mean I can do what's in the picture. The first time my blue drybrush was WAY too bright. Then a 2nd attempt managed a lot more coverage than I meant with my drybrushing. I went back to a safer approach with grey + metal drybrushing, as I saw this going the route of the red-purple meaty bits of frustration.
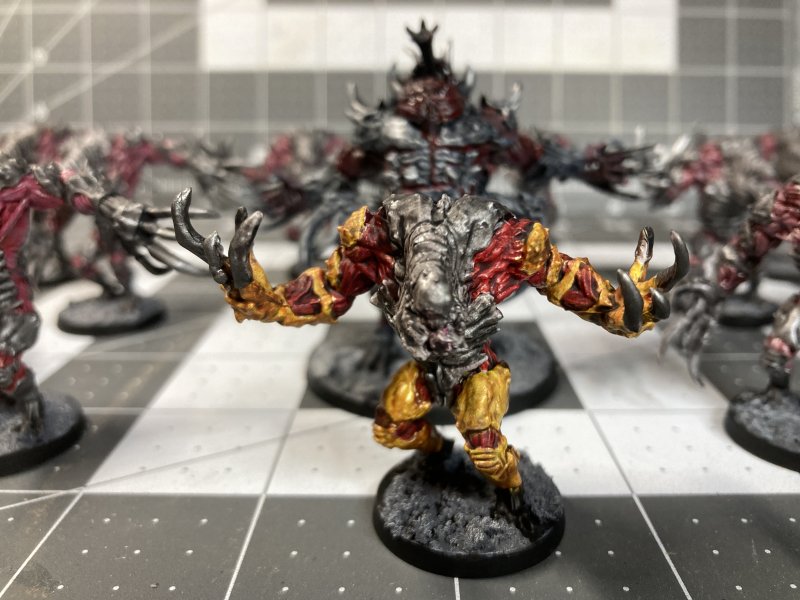
There is 1 special mini that thinks he's Iron Man. The main reason this one is different is he's got 3 coats of primer after being the unfortunate test subject for all of these failed color attempts. Even the Iron Man scheme is a failed approach, but honestly at this point all of the details on the mini were starting to get covered up and I decided to just go with whatever happened. Since the meaty bits were redder than the rest of the troop, I decided this would be the special stand out of the troop and get some different armor. I tried some yellow contrast (on white primer) and then hit it with some metallic drybrush, but the yellow wasn't even enough. Gold drybrush for all of those yellow bits! Ok, the gold was way too... gold. Clashingly gold. The old standby of hosing it down in Nuln Oil helped.
There's still 40 or 50 common fodder minis from the expansion left to paint - the remainder of my bulk-priming party from the last post. I don't really have high hopes for how they'll turn out. I think I'm just a human(oid) painter, and all of these alien zombo monsters are giving me fits.
Permalink
gaming miniatures Zombicide Invader
Zombicide Chapter 4: Expansion Abominations
03.12.2022
This past week I started on the Sarissa Retro Americana Trailer, or "dumpy trailer park home". This was my latest adventure into masking and spray paint, with an emphasis on how to not peel off the paint with the masking tape. The answer appears to be paint + seal + mask and repeat. I did all of this with unassembled MDF as that was my best bet to get straight lines since there's an oddly angled front. The tricky part was also painting the interior walls, which happened to match the masked stripe of the outside, as there was a little bleed through holes/windows. It think I can cover it up with some interior grungy weathering. For something fairly simple I'm taking a complicated approach - so far I've sprayed 6 coats of paint/sealant between interior and exterior sides. My plans for adding windows are appropriately complex, and we'll see how that turns out later.
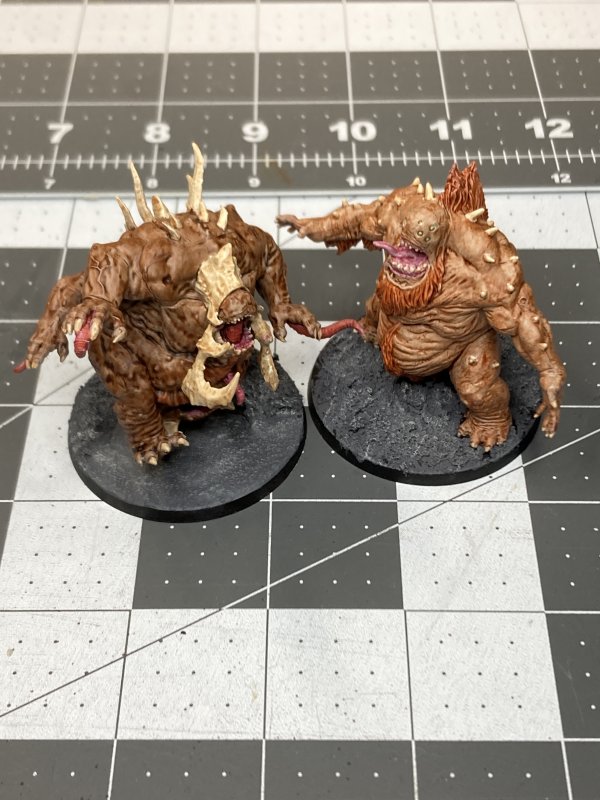
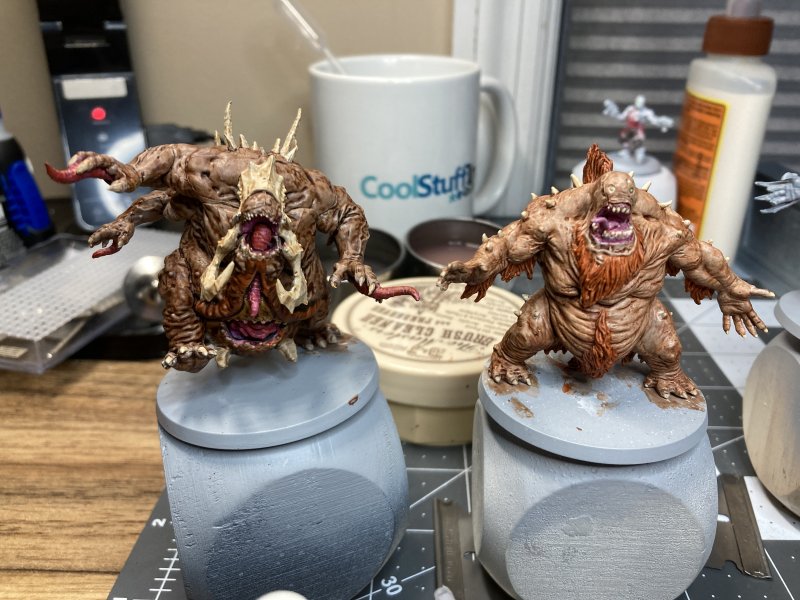
The weather was nice enough that I tried my hand at mass priming. Atop 2 cake boards with pseudo double sided tape I stuck 50+ Zombicide minis and primed. Primed like the wind! Most of the minis got about 90% coverage as I could not get the spray can to the right angle to hit all the nooks and crannies. When the time comes to properly paint, each one will get a touch up prime via my normal "stuck to a wooden block" method.
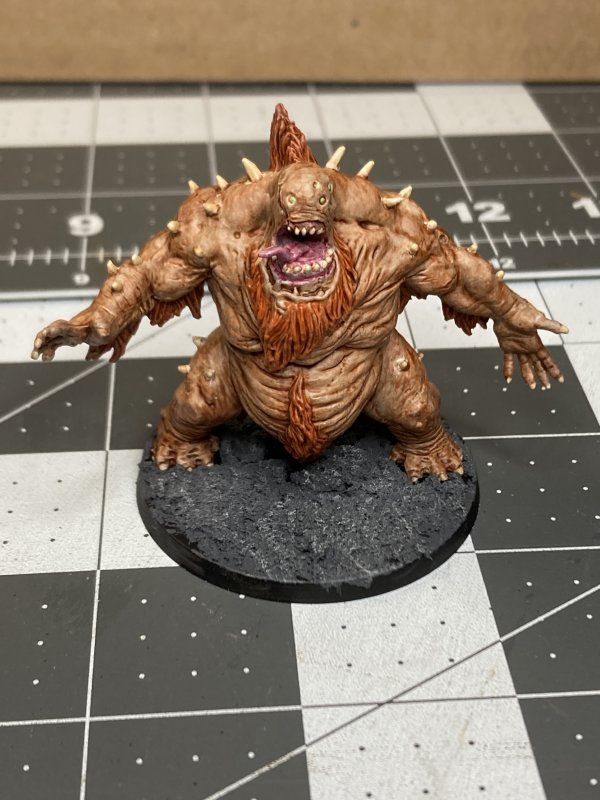
The above led me to stuck a dozen or so minis to wooden blocks and prime in my normal manner. 2 of those actually got painted! Zombicide Invader has 2 expansions - Dark Side and Black Ops. One of them was on sale for about $20, which is what got me interested in the game and then I subsequently went and got everything, as is my well documented way. The Abomination from each expansion piqued my interest enough to follow through with painting. My winning discovery this time was painting the boney bits. Thanks to Nathan at the Warhammer Store offering some advice, atop my white bones I added a 50/50 mix of Citadel fleshshade and sepia washes. While Daniel suggested some Screaming Skull highlight, maybe with some Steel Legion Drab mixed in to tone it down. I was happy enough with the washes to not add on Daniel's suggestion, but maybe next time...
There's changes afoot on the business side of miniature gaming that's going to affect me. Mantic Games is wrapping up the Walking Dead game - I'm guessing their license has expired. Mini-wise I think they've effectively matched the end of the comics, and that's what the game was based on. While I had fallen out of getting new boosters once The Kingdom and Whisperers expansions came out, their announcement that they were no longer going to produce items for the game after February made me think of how well I'd actually managed to keep up with the game. Although I don't game much, if you go back through posts for the past couple of years I think the Walking Dead game is the only one that shows any play time. As this has been a game I've actually enjoyed over the years, there's a good chance I will continue to enjoy it. I then did the "me" thing and ordered whatever I was missing that they had in stock. I think there's still a piece or three I'll be missing, and that's ok. For now.
The other news was that 4Ground, makers of the mall I've been posting progress pics of over the last year or two, will be shutting down in June. I've gotten a lot of 4Ground buildings (besides the mall) over the years, and I really like their stuff. Now that there's a deadline in being able to get anything from them, ever, I'll go through and make one last order. Probably a huge order. I'm glad there's no way to add more than 2 floors to that mall.
Permalink
4ground walking dead Zombicide Invader
Zombicide Chapter Three!
02.26.2022
These 10 wrap up the baddies from the Zombicide Invader Core Set. I think the previous 55 minis tempered my expectations on the paint job for these, but to be honest the final paint job here turned out a little better than I expected.
And I think I'm just going to leave it at that for now.


Blog Archive
As always, correct spelling is optional in any blog entry. Keep in mind that any links more than a year old may not be active, especially the ones pointing back to Russellmania (I like to move things around!).
Tags have been added to posts back to 2005. There may be an occasional old blog that gets added to the tag list, but in reality what could be noteworthy from that far back?
Blog Tags
3D Printer (27)
4ground (32)
4ground-mall (40)
5PFH (1)
action figures/toys (10)
airbrush (7)
Aliens (1)
Amazon (12)
antenocitisworkshop (11)
Atlas O Gauge (2)
Batman Miniature Game (2)
Battletech (1)
belt sander (12)
Blood Bowl (4)
boardgames (77)
books/comics (19)
computers hate me (5)
conveyances (15)
Cyberpunk Red Zone (3)
diet (53)
dreams (7)
fallout (1)
feng shui (1)
Firefight (1)
Foundry (3)
Gale Force Nine (1)
game dev (23)
gaming miniatures (237)
gaslands (10)
gastric sleeve (34)
Green Stuff World (2)
Hasslefree (9)
Hero Forge (1)
hobbies (102)
Jailbirds Minis (2)
kevin smith (1)
Knight Models (2)
malifaux (3)
Marvel Crisis Protocol (2)
mckays (1)
models (11)
mom (32)
moon light (5)
movies/tv/dvd (60)
Necromunda (4)
ninja division (1)
Pathfinder Deepcuts (1)
pilonidal cyst (5)
plastcraft (2)
programming/interweb (41)
rambling (60)
random (367)
random maintenance (3)
Reaper Bones (3)
reaper chronoscape (32)
renovation/remodelling (25)
road trip (27)
salesforce (1)
sarissa precission (2)
scenery (19)
Star Trek (2)
Star Trek Away Missions (3)
Star Wars Legion (1)
studio miniatures (3)
ttcombat (12)
video games (51)
vs Factions(PDFs) (1)
walking dead (36)
wargame foundry (3)
work (6)
wrestling (45)
zombicide (2)
Zombicide Invader (19)
zombie mall (23)