Web Exclusives
11.03.2019
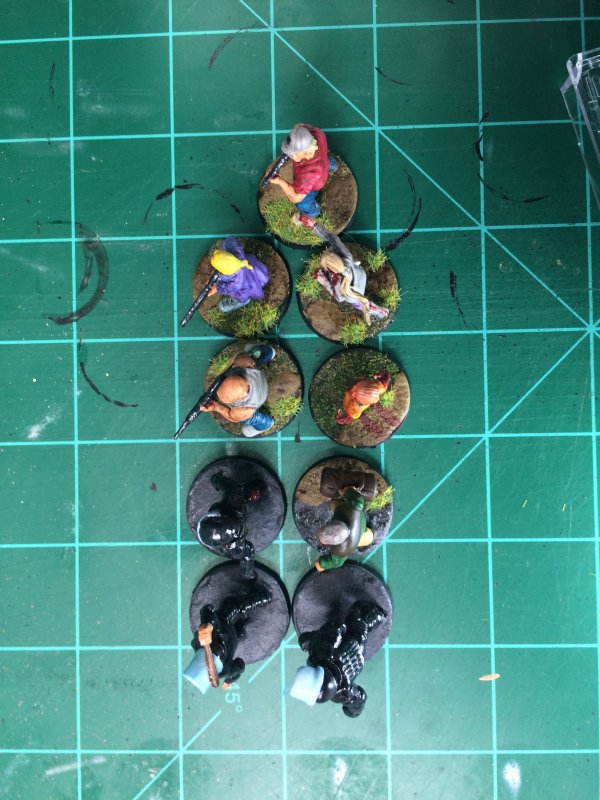
I didn't mean to paint anything. Not really. I wasn't planning on priming a batch and then spending the week working through them all and trying to get them done. And I didn't do that. I primed some stuff I thought would be interesting to paint, and then I painted a little here and there when I thought about it. I didn't worry about "I have yellow on the brush, what all needs to be yellow?". I didn't rush through the final color that a mini needed to be called finished. Just some nice, relaxing painting.
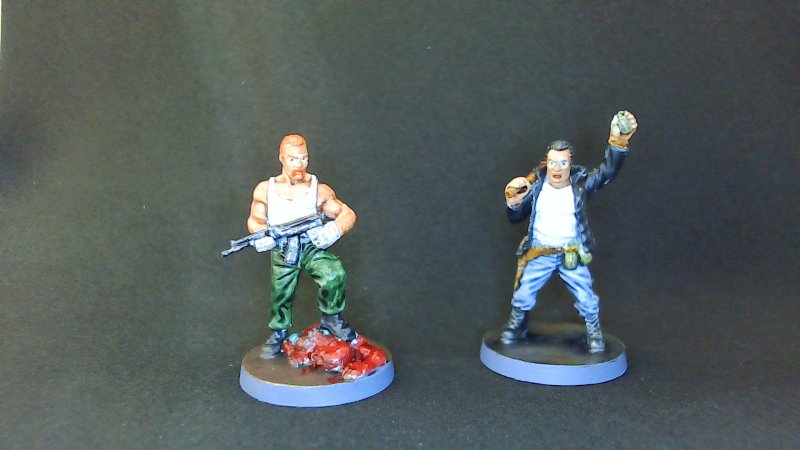
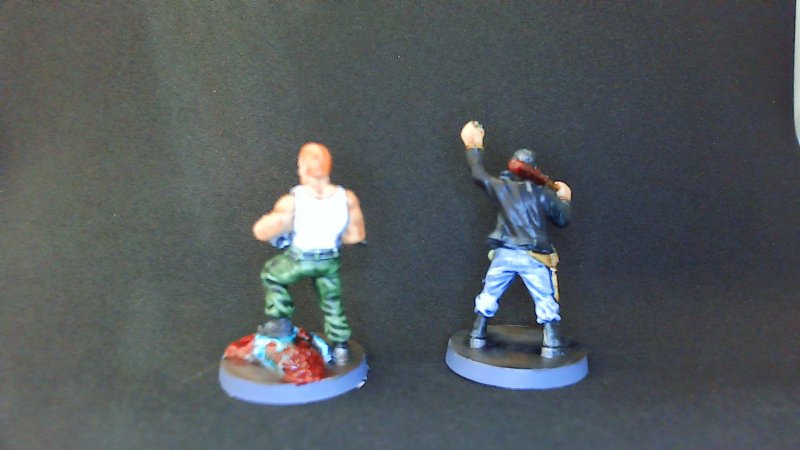
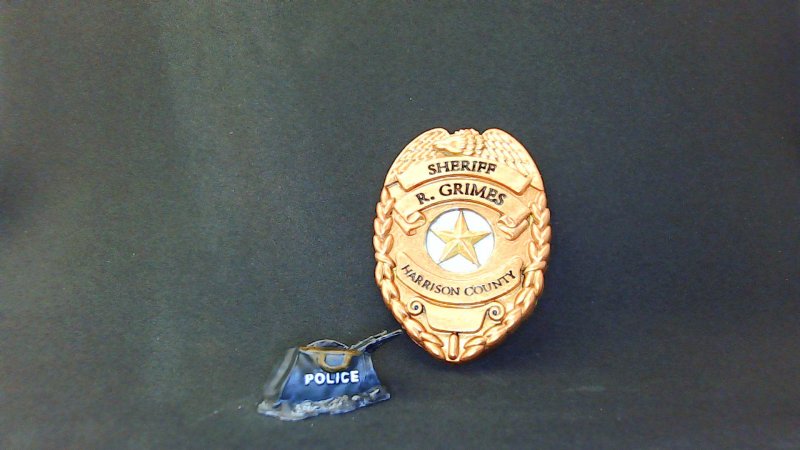
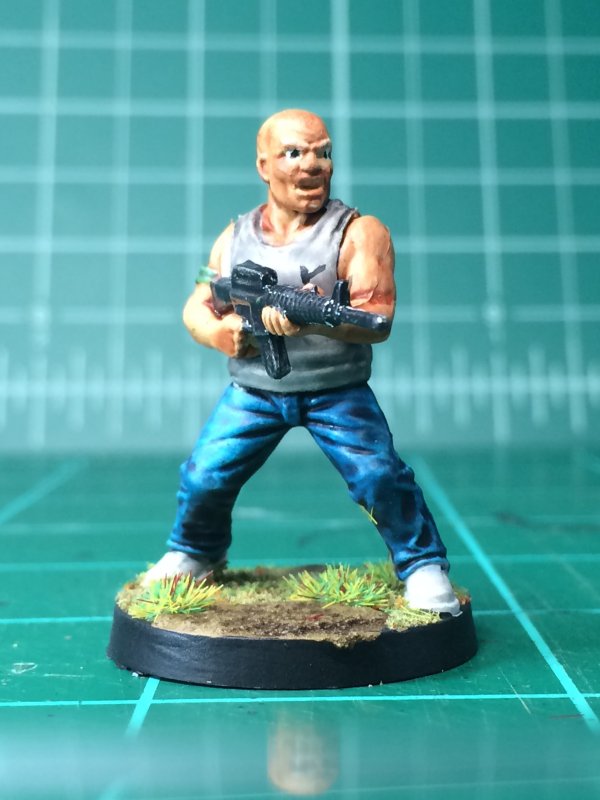
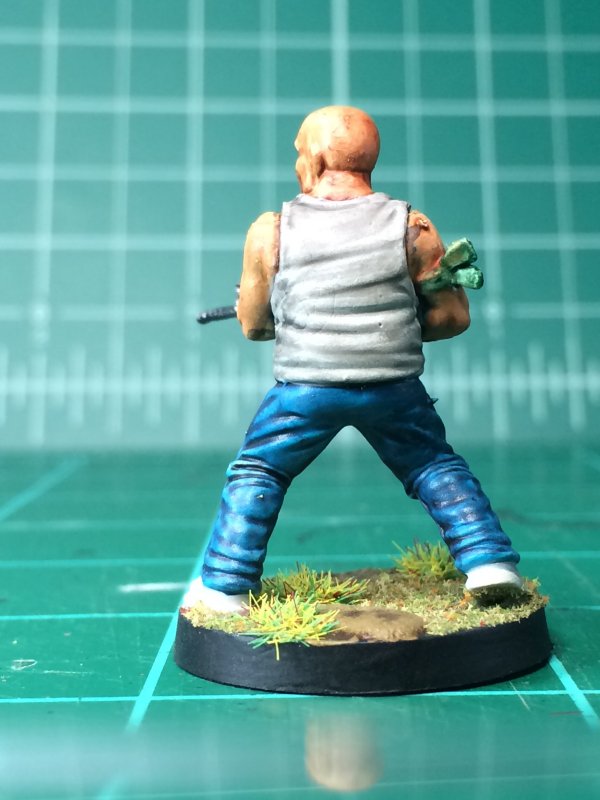
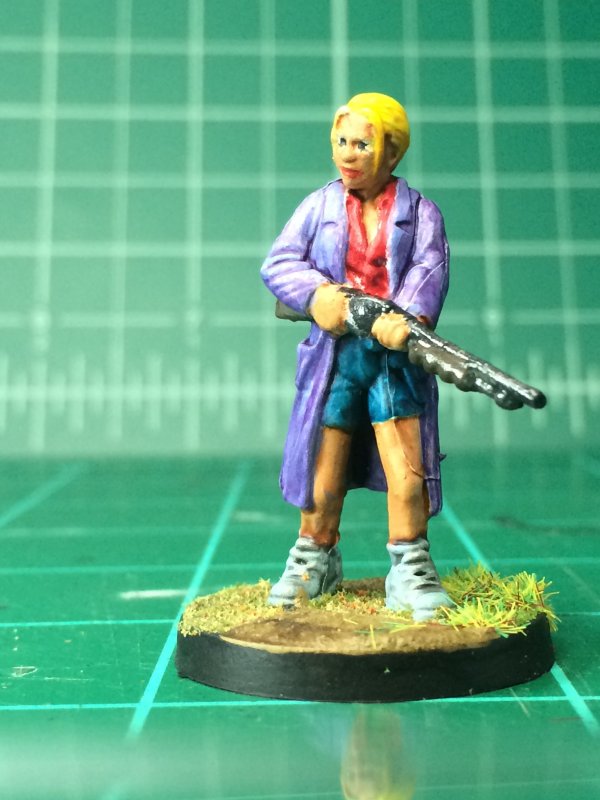
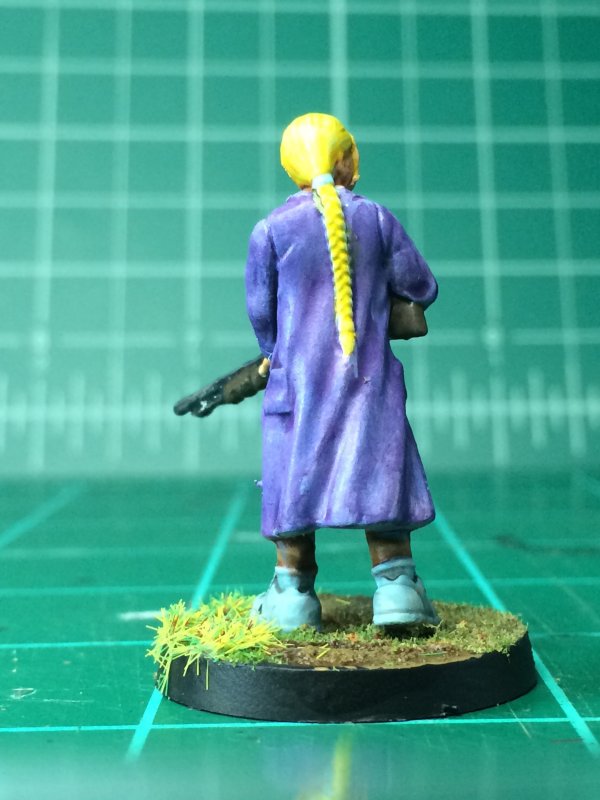
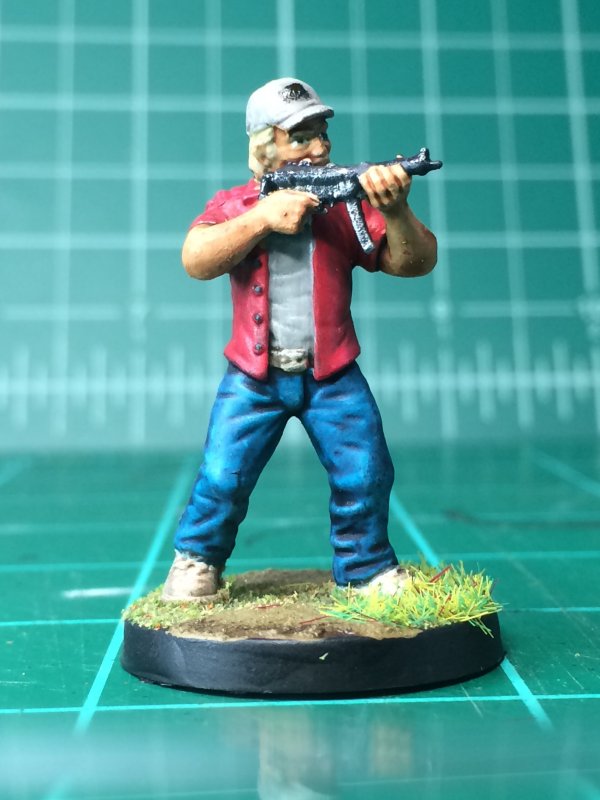
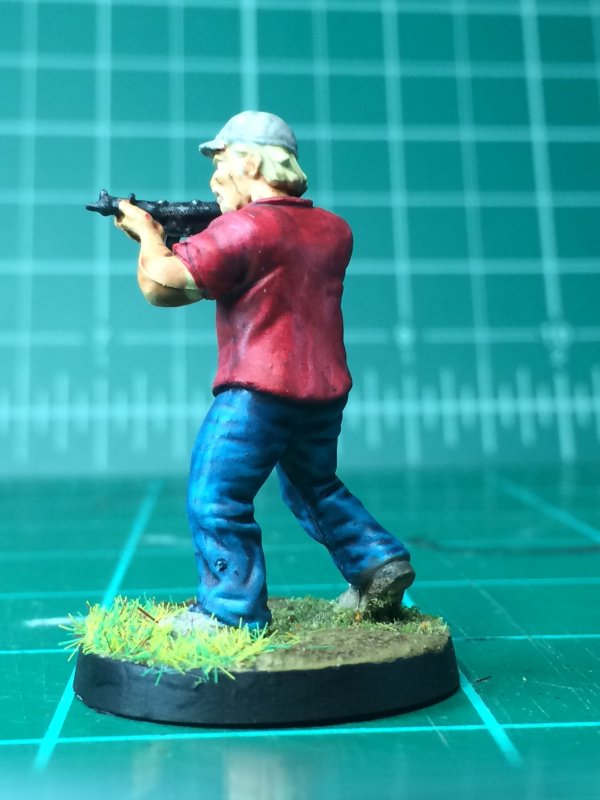
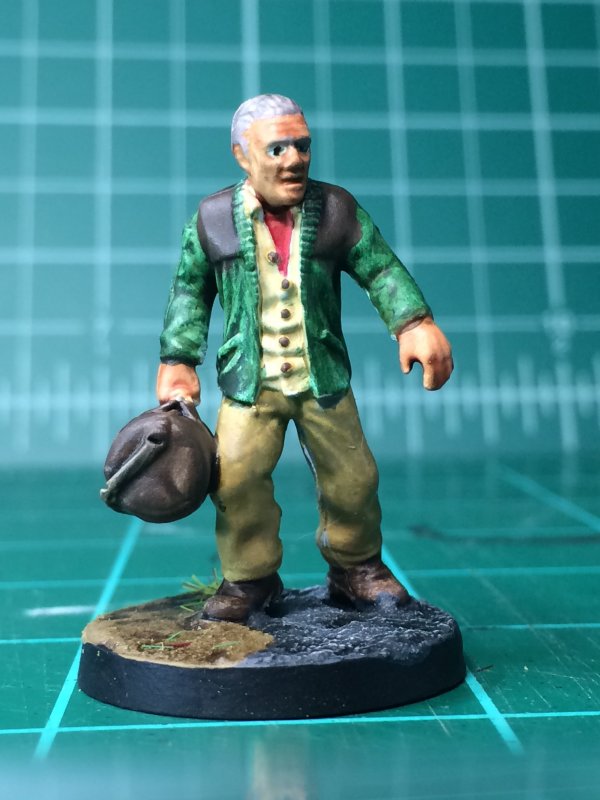
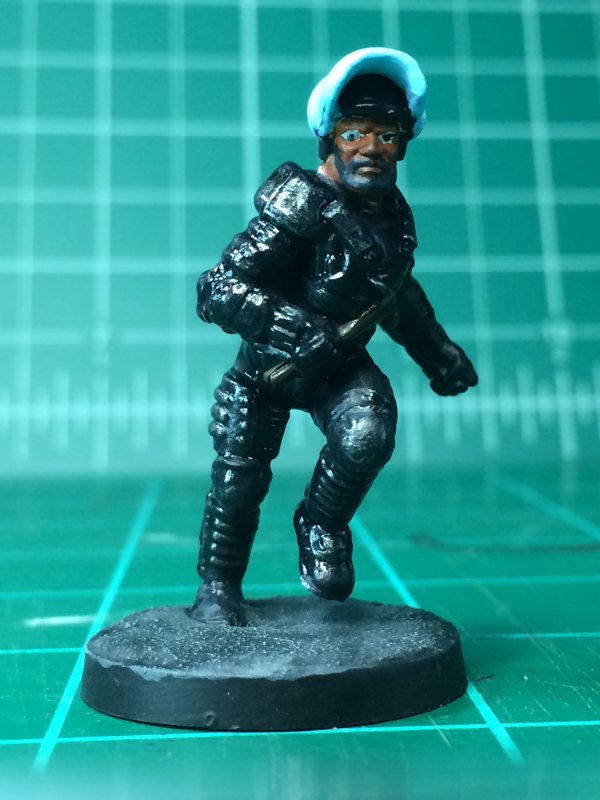
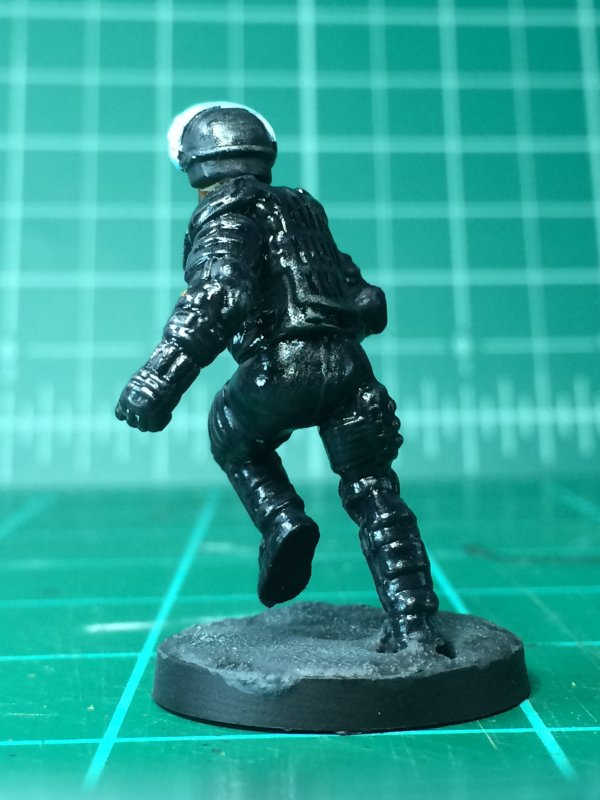
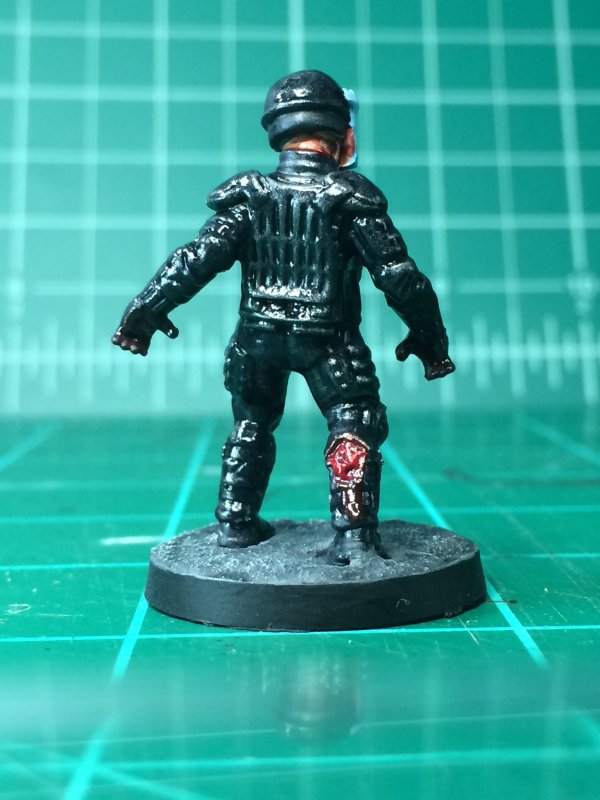
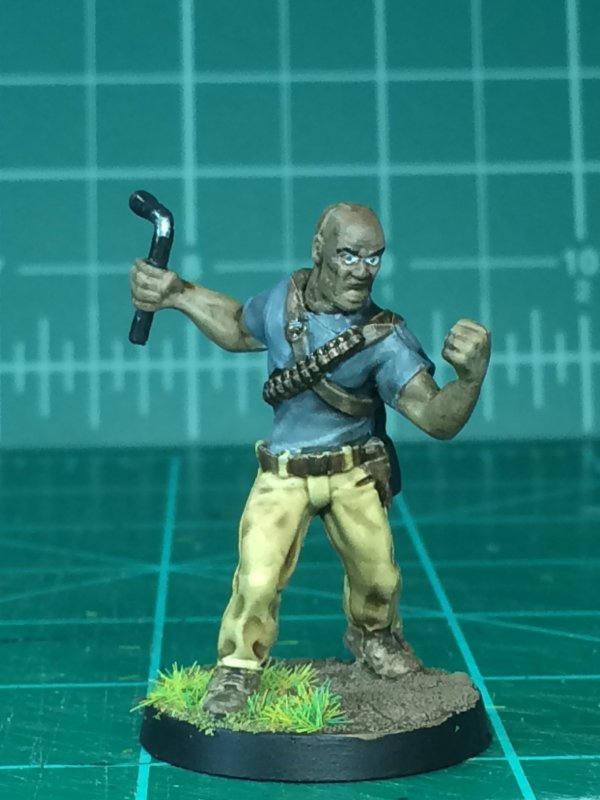
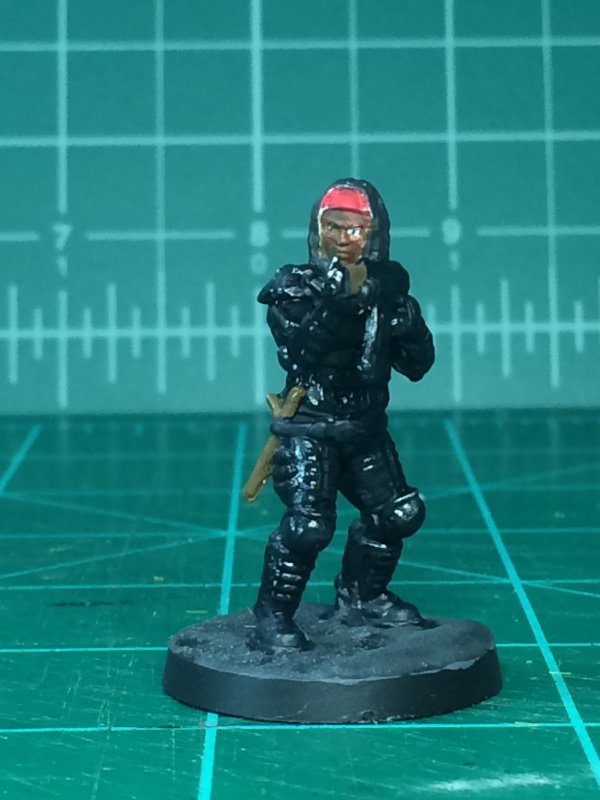
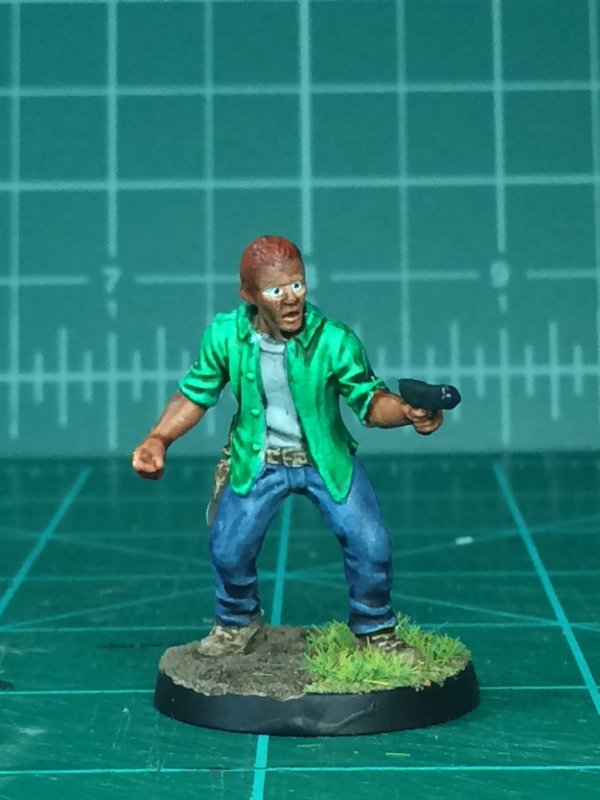
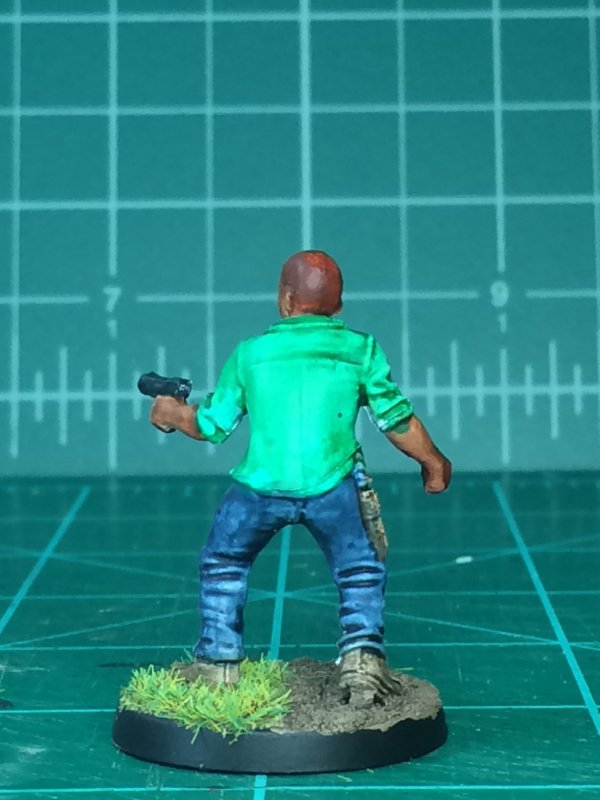
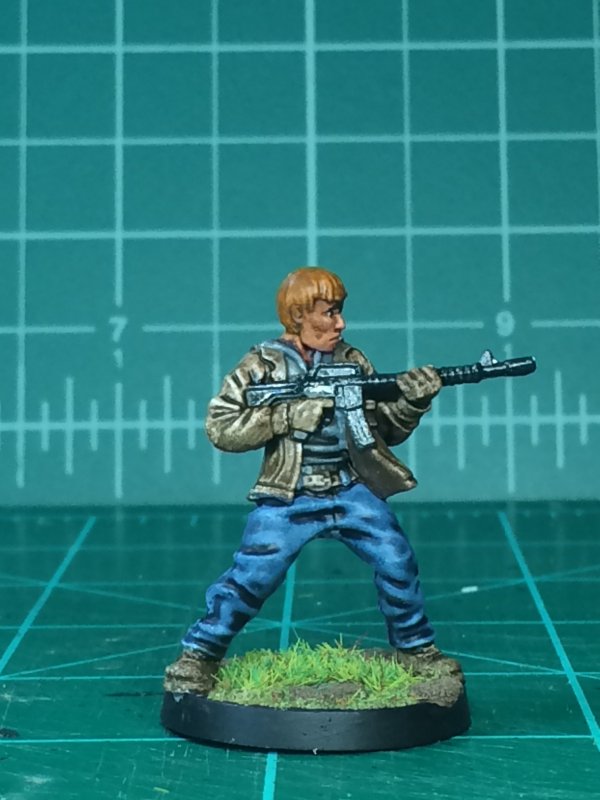
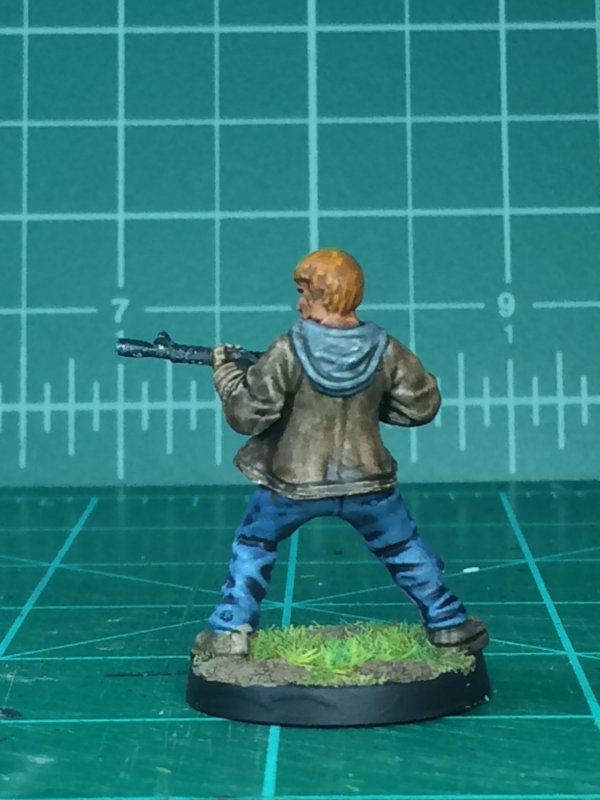
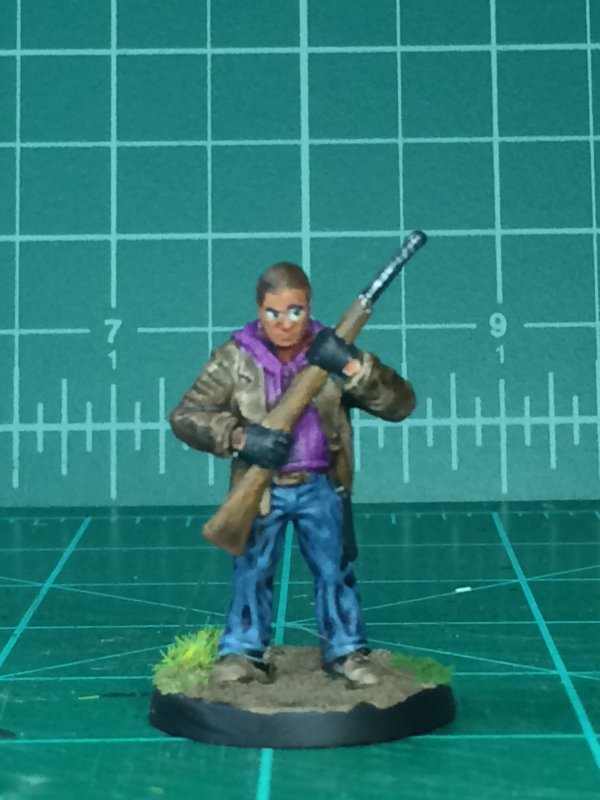
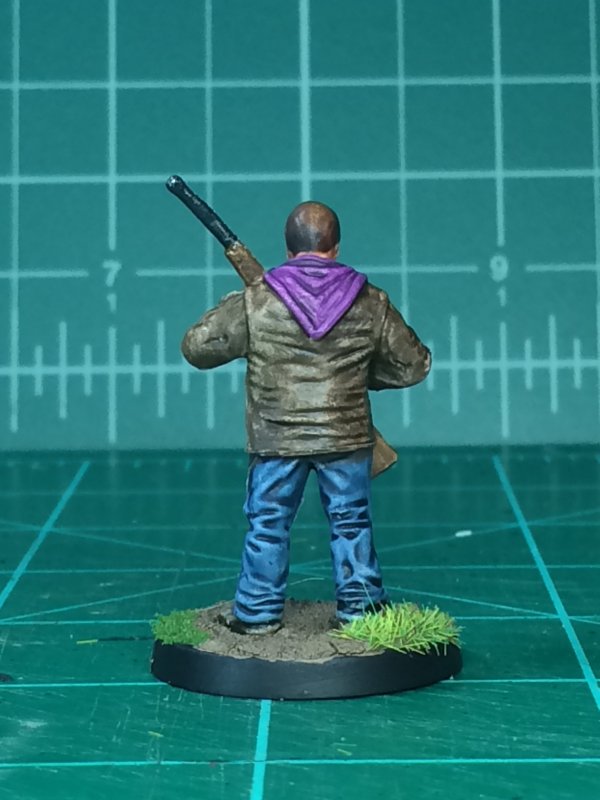
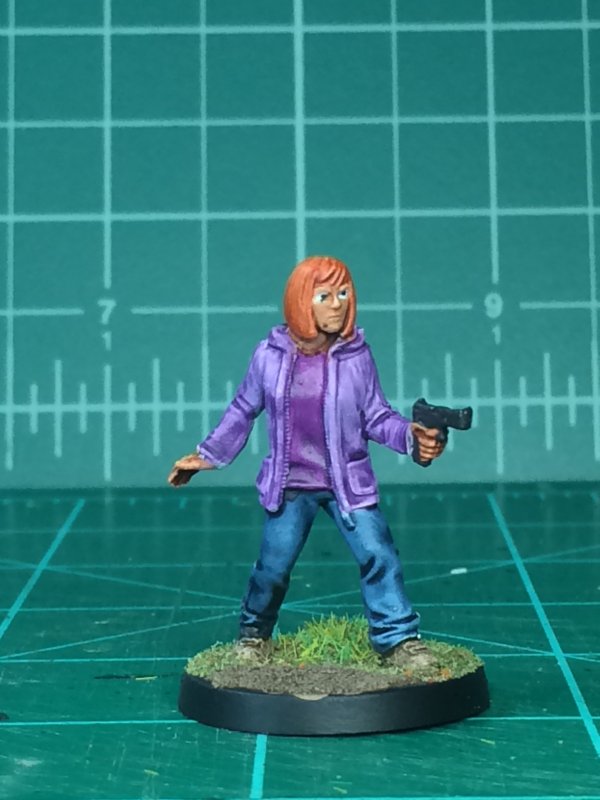
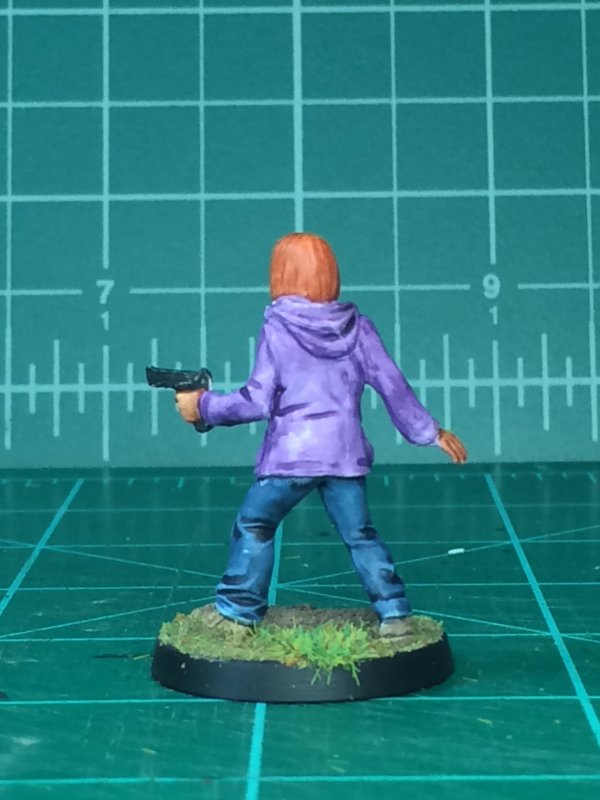
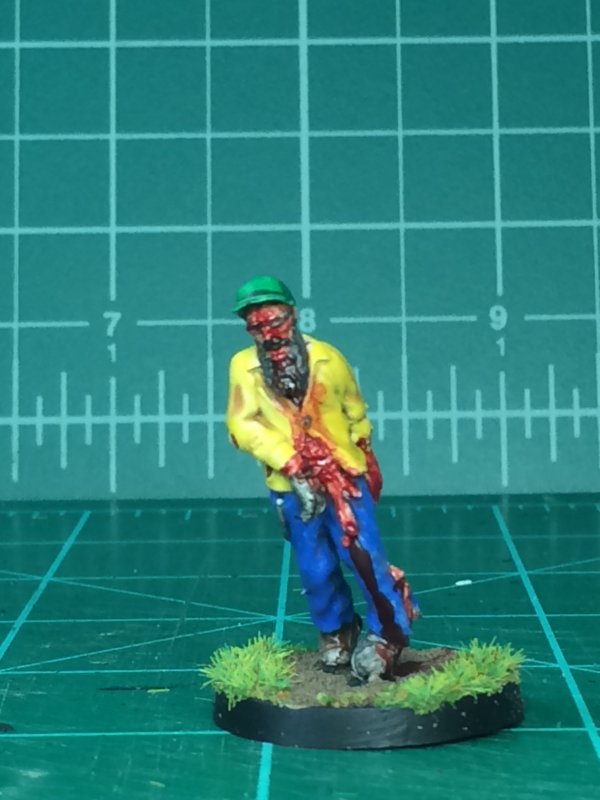
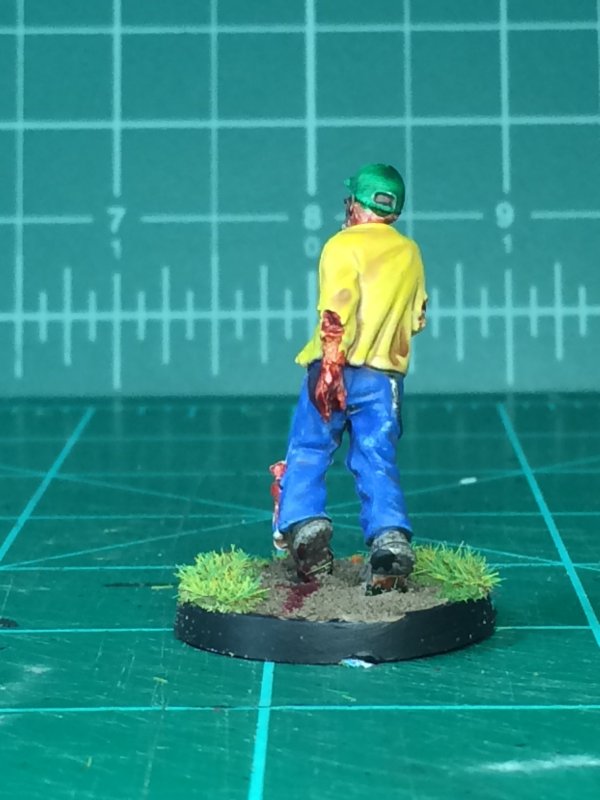
I had purchased some "web exclusives" from the Mantic website. I'd shown my batch of points I sent in previously on a post I'm too lazy to link to. A special Abraham and Negan were bought. There was also Rick's Badge to replace the cardboard 1st player token - I play solo, so why do I need a 1st player token? A bag of guns rounded out the web exclusives. Those last 2 just sounded like they would be fun to paint. What else am I going to spend Mantic Points on?
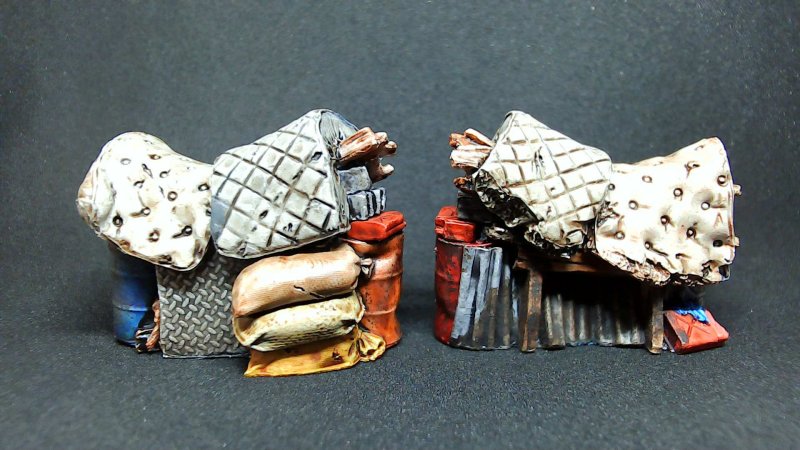
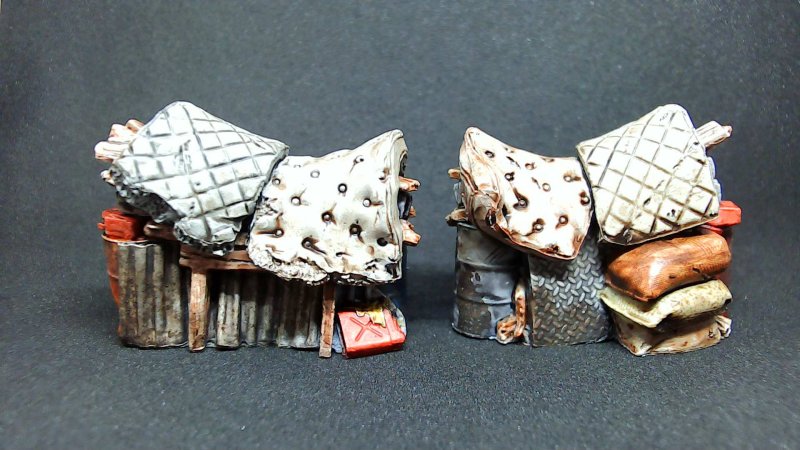
I've been grabbing Zombicide minis for test painting (those details are really too boring to go into). Amidst all that grabbing I came across a couple of clutter minis. Mattresses piled on top of random crap. The cast was good enough to actually tell the distinct parts in the pile. Those could be fun to paint! As such, they made it into the batch to be primed.
Even though it's been rainy and humid, I really wanted to prime everything up to paint. I waited until the rain had quit for a day, but even then you can see that the primer ran and pooled a little. Some day I'll find the right patience to wait until the weather cooperates, or I'll switch to airbrush priming.
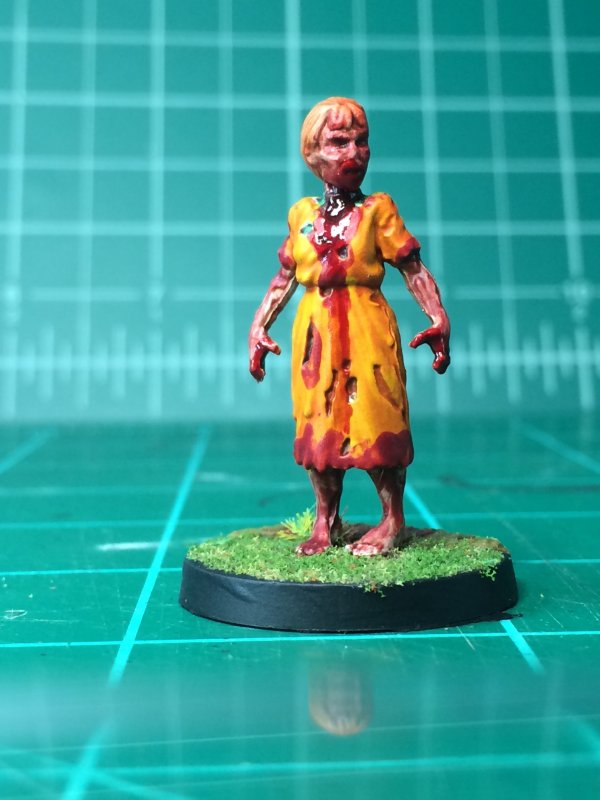
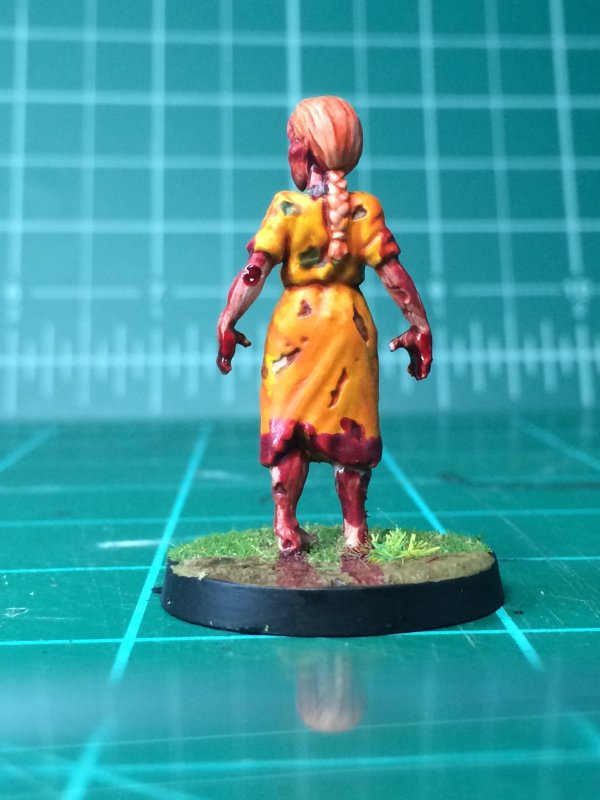
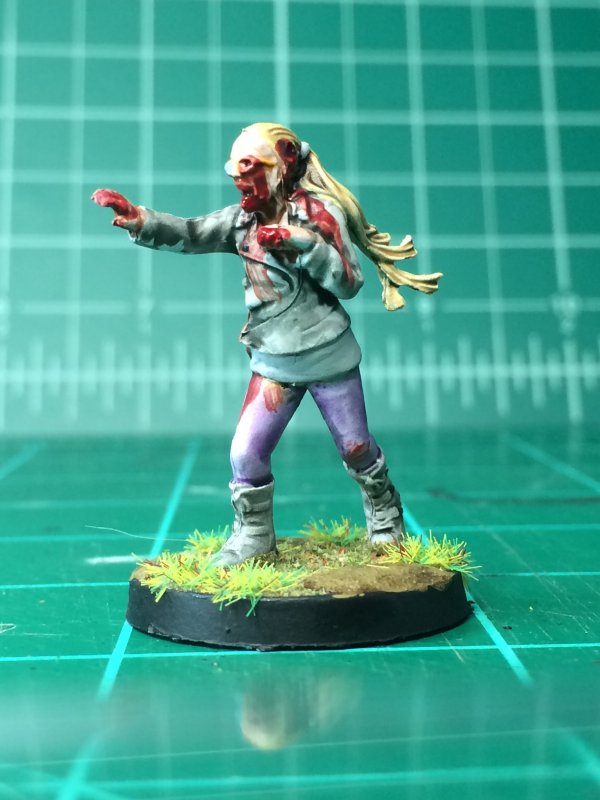
Over the course of a week I painted a little here and there. Taking my time, plus my $10 magnifier glasses from Amazon, really makes a difference. The 2 clutter minis were 95% contrast paints. The badge went through a few transitions of Tin and Gold before ending up with whatever it is now. The letters on the badge were fun. The letters are recessed and I just filled them with Nuln Oil and a properly small-tipped brush.
I've got to learn to work better with light colors, especially white. The white I put on for t-shirts is too thick. Thin layers weren't sticking to cover errant color strokes underneath. Thick (enough) layer shows mottled brush strokes. Going over the thick layer with just a wet brush helped, but it's still something I need to work on.
This is my 1st try at a new camera setup. There's likely to be lots of iterations on tweaking before settling on something for a while.
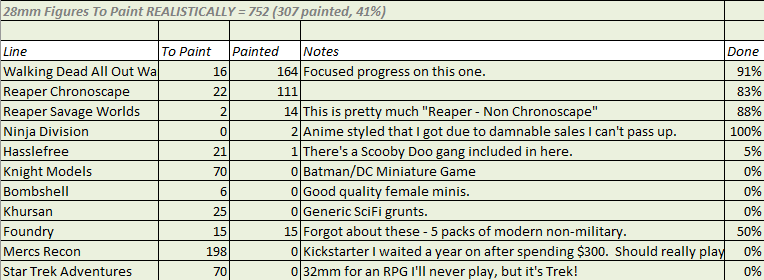
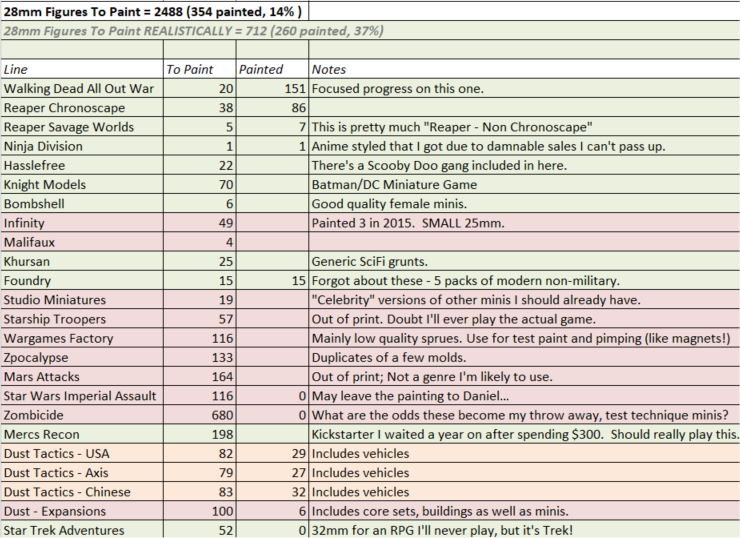
Normally I would mention something about progress here, but to be honest I've done more than what shows up on my little spreadsheet with things that don't count toward the progress I track. The case in point is that I painted parts of almost a dozen Zombicide minis as color tests for Star Trek Adventures. I've got a painting guide, but I don't trust it 100%. I don't even trust it 80%. For my peace of mind, I decided to test (and DOCUMENT!) color options before committing to the Trek figures. This is something that I wanted and needed to do, but I've got nothing shareable to show for it. Eventually there will be some Trek minis to show, but not now.
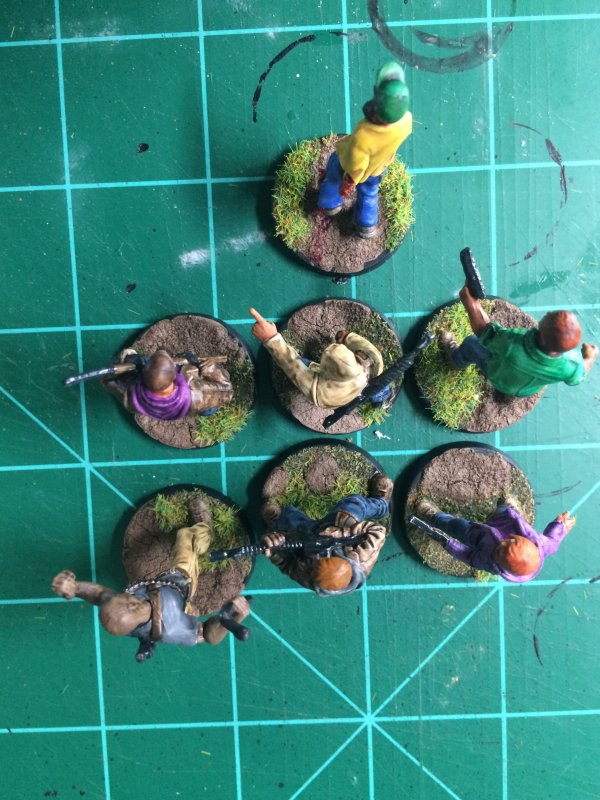
The 4 Walking Dead minis shown above were added to the Painted total, but they weren't in the To Be Painted total before. I believe that is a net gain of 0.
Permalink
gaming miniatures hobbies walking dead zombicide
House Trio Wrap Up
09.24.2019
After mentioning it 2½ months ago I'm finally done with the trio of Woodbury houses that I started. Not finished, but done. This turned into a nice little exercise of (1) finding out what my creative limits that I can actually accomplish are, (2) it's completely possible to bit off more than I can chew, yet still grind away at that gristle to where I can swallow, and (3) admit that I can be tired of looking at a project to the point of saying "ehhh good enough" and store it away to (maybe) finish tweaking some other time.
I may repeat myself from an earlier post, but most of a calendar season has passed.
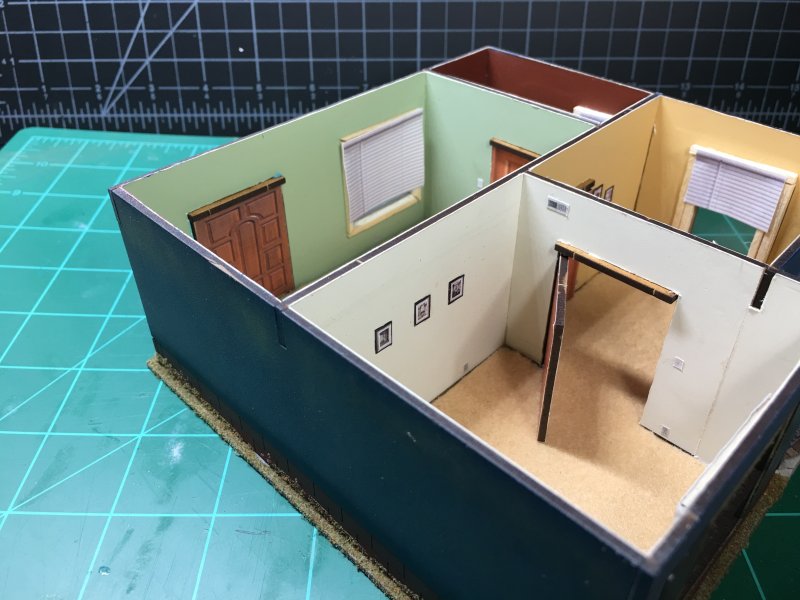
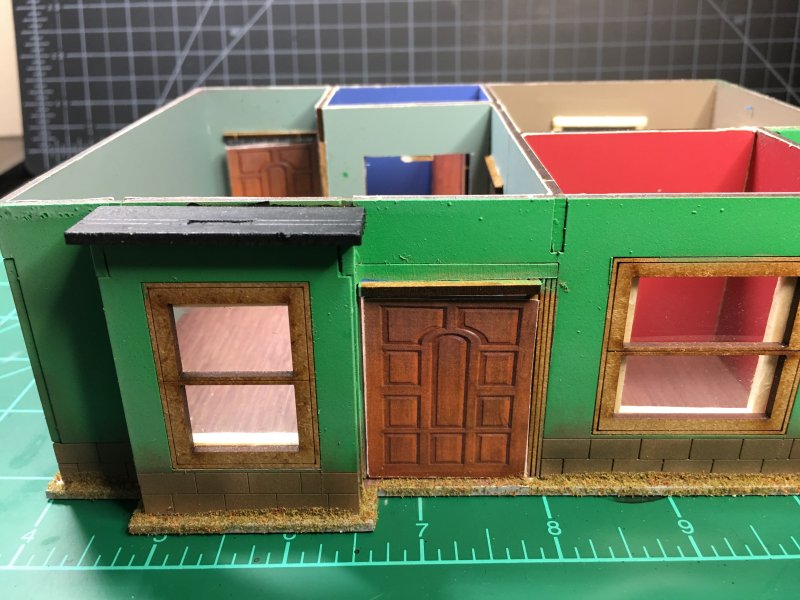
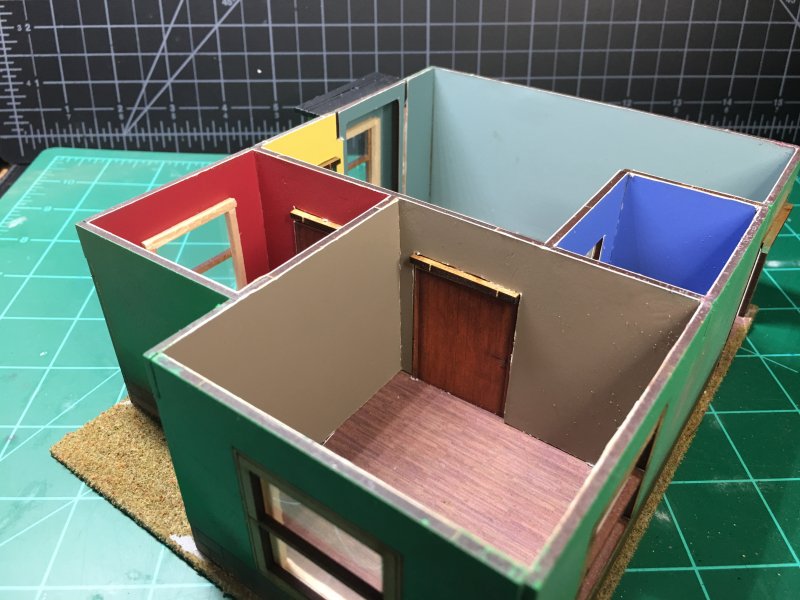
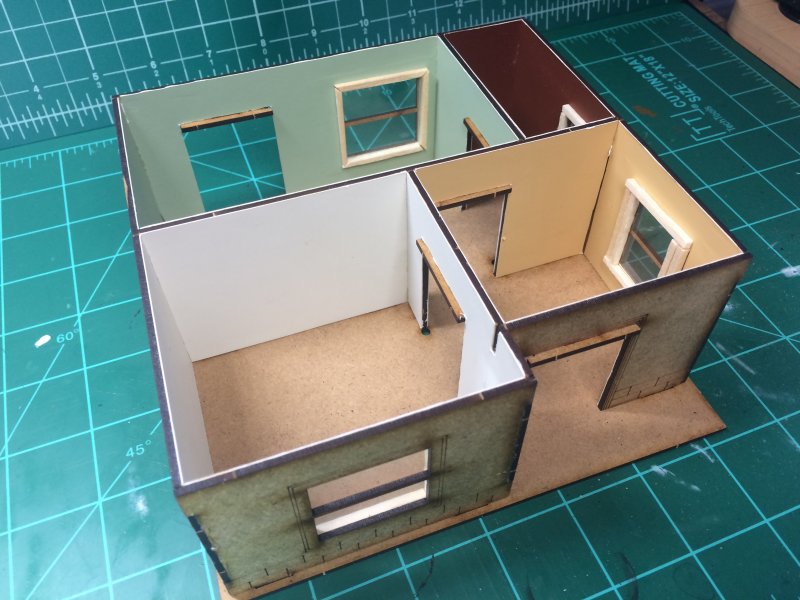
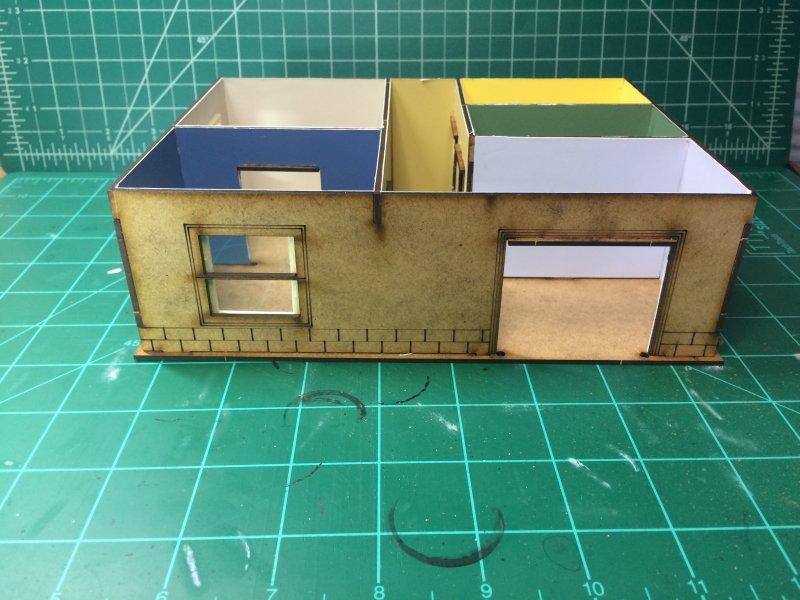
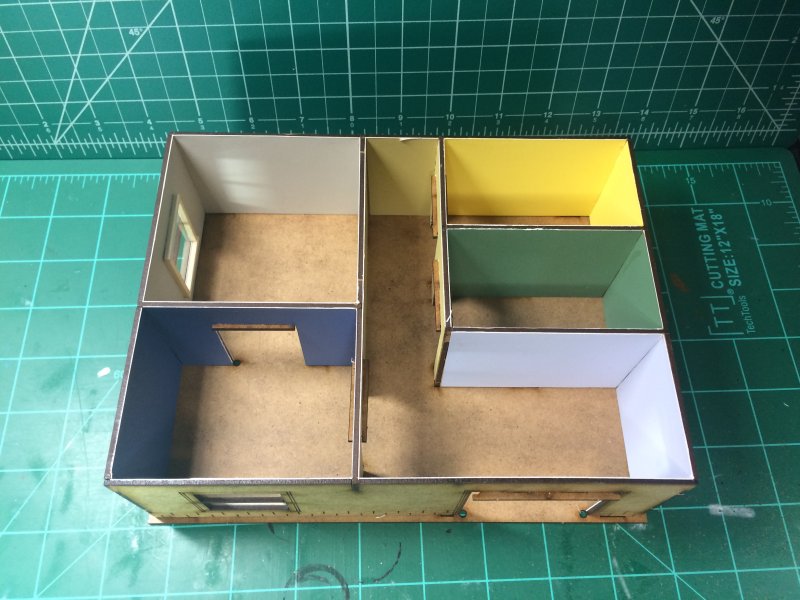
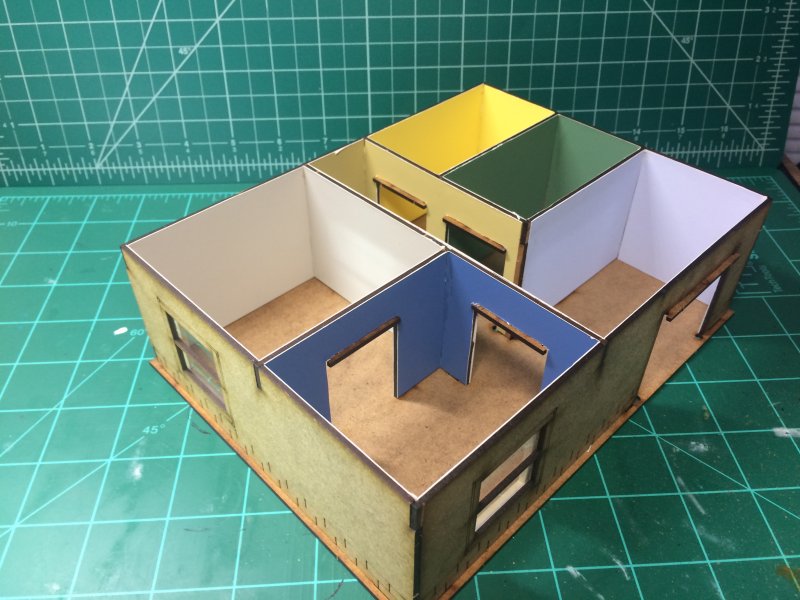
Once I started working on 3 of the 4 Woodbury houses that I had picked up during a good sale, I decided the basic kits were too plain. I went my tried route of using paint sample cards from Home Depot to use as glorified wallpaper and thus not worry about actually painting the silly things. Except I still end up painting the outside of the houses. I tested out some new things on the first house: 1mm felt (from Hobby Lobby) actually works as carpet! The clearance on the doors has to be tweaked a little, but it works. I made ample use of the printer and Home Depot, adding shutters, blinds, air vents, light switches, and electrical outlets.
By that point, I was tired of looking at the house. That was only 1 house. There were 2 more houses left.
In addition, I didn't like the cardboard roofs that came with 2 of the houses. The roofs reminded me of fast food/convenience stores. I'll try my hand at making roofs! A combo of foam core for support and cardstock for the actual roof. I was going with cardstock instead of all-foamcore because the MDF top of the buildings had a small lip everything had to fit withing, and I don't trust the exactness of my cutting skills. This turned into an omen, as everything fit. Fit, but only by the barest of definitions.
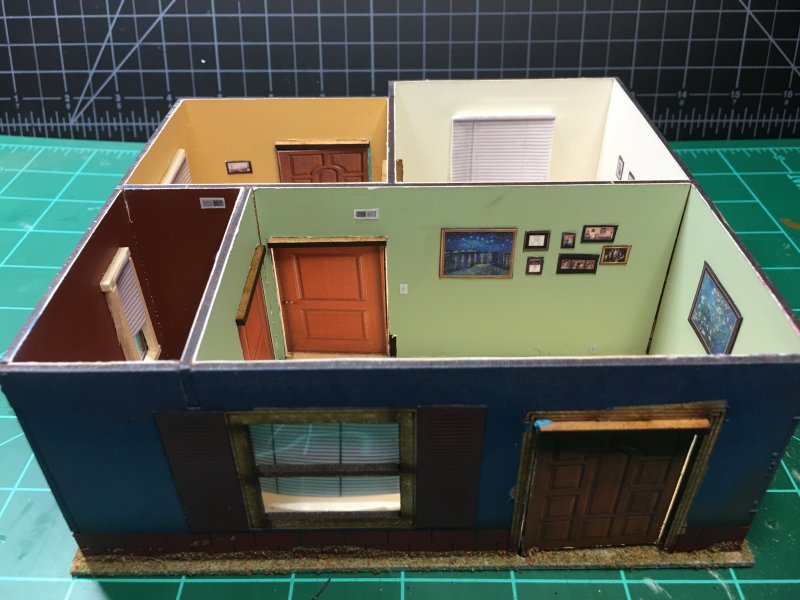
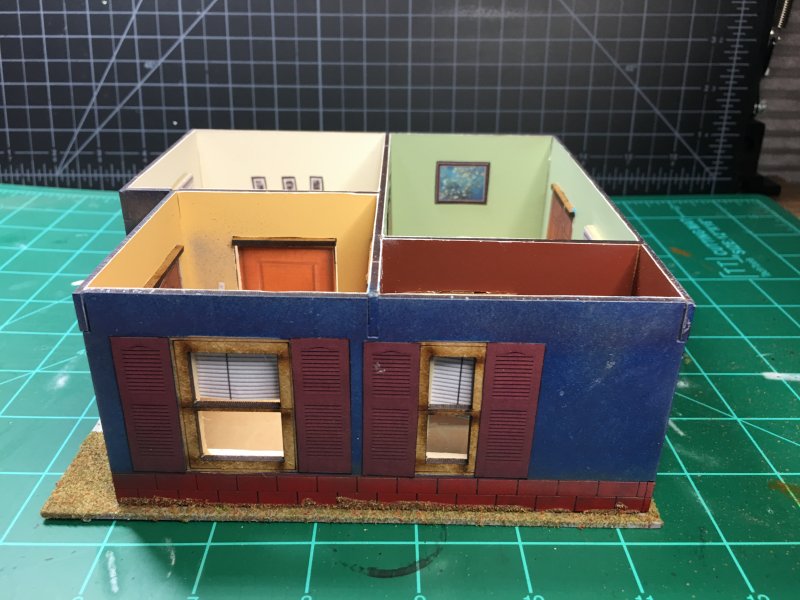
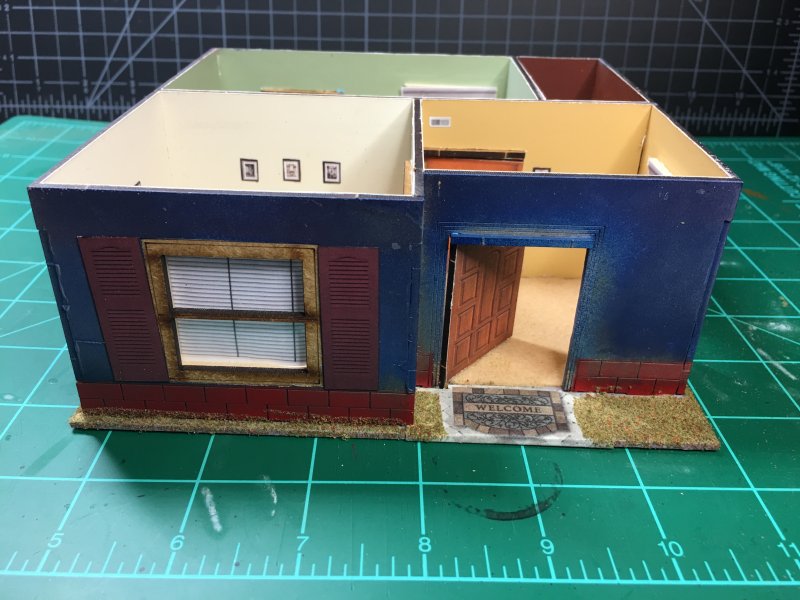
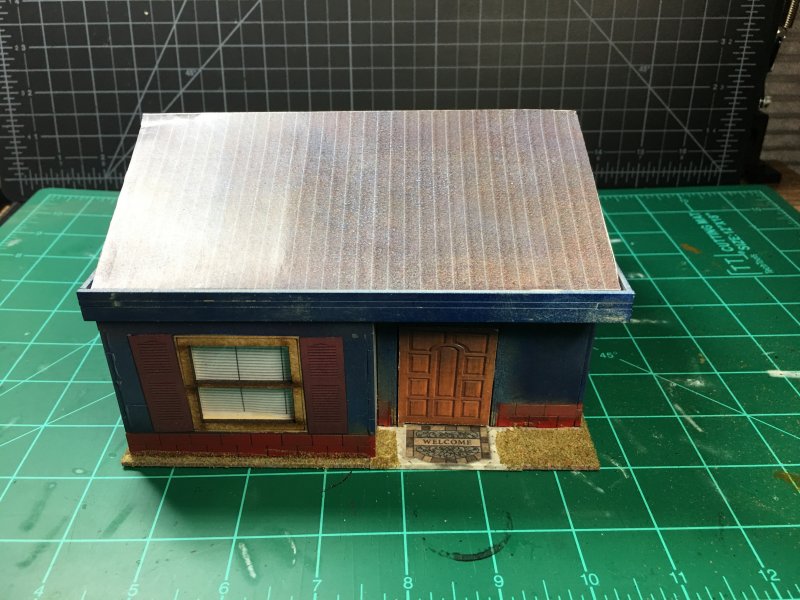
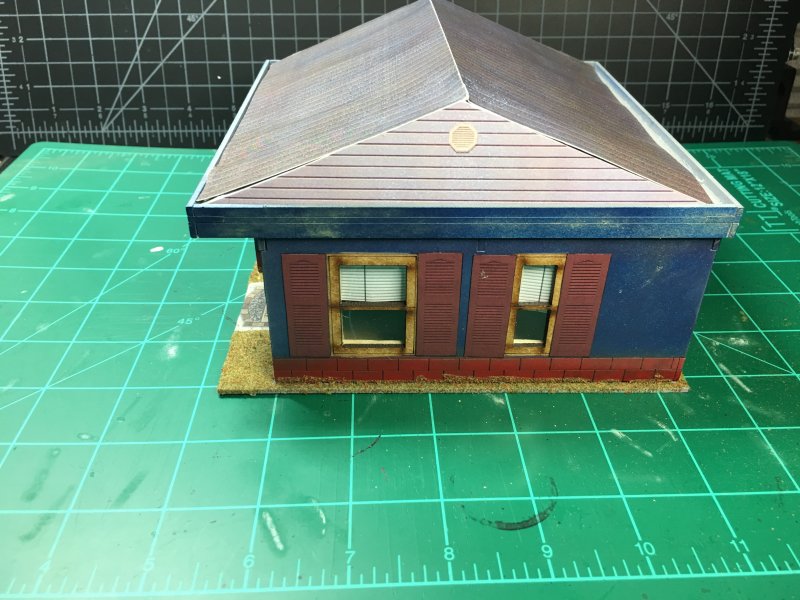
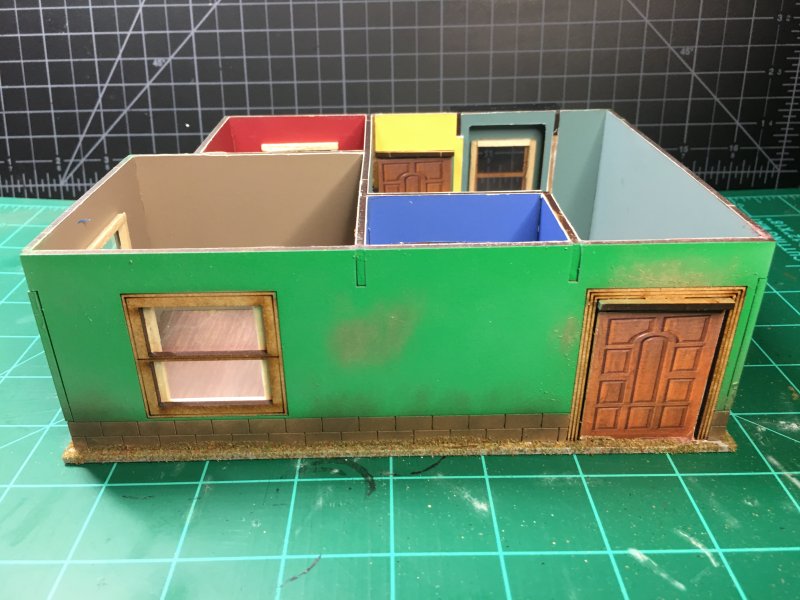
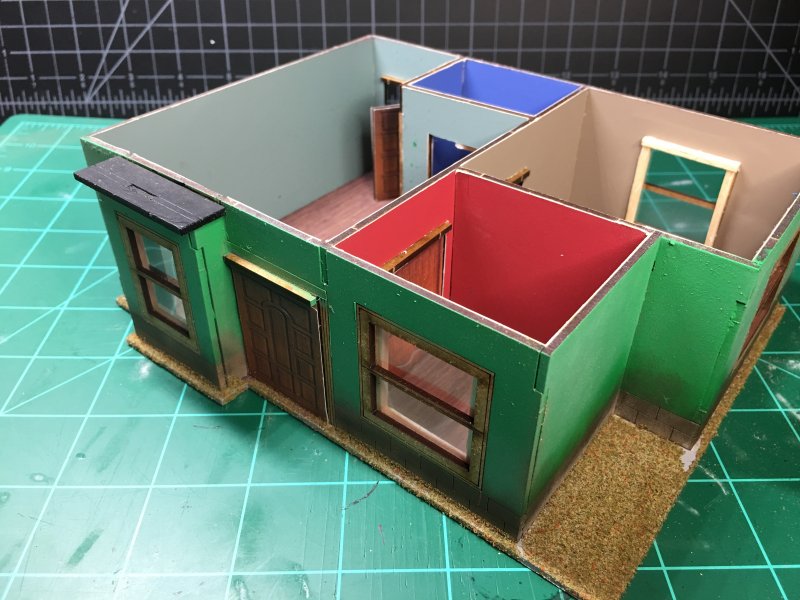
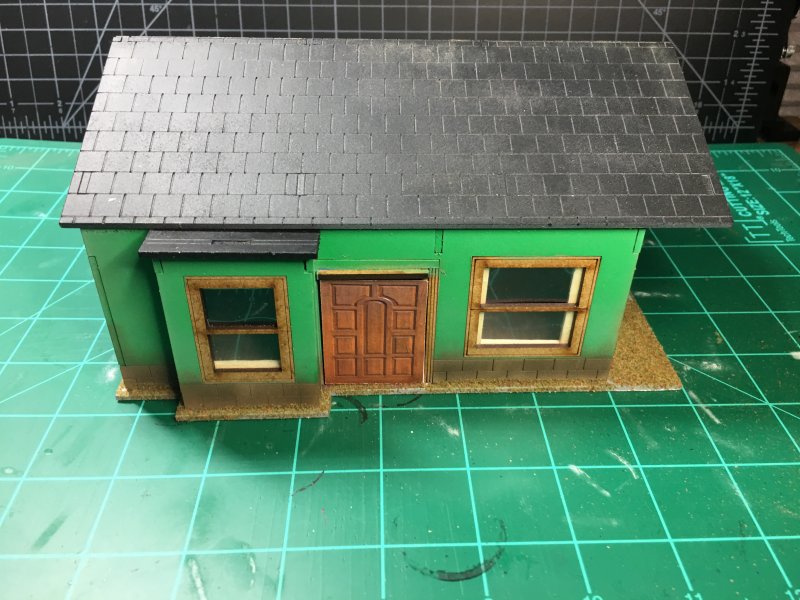
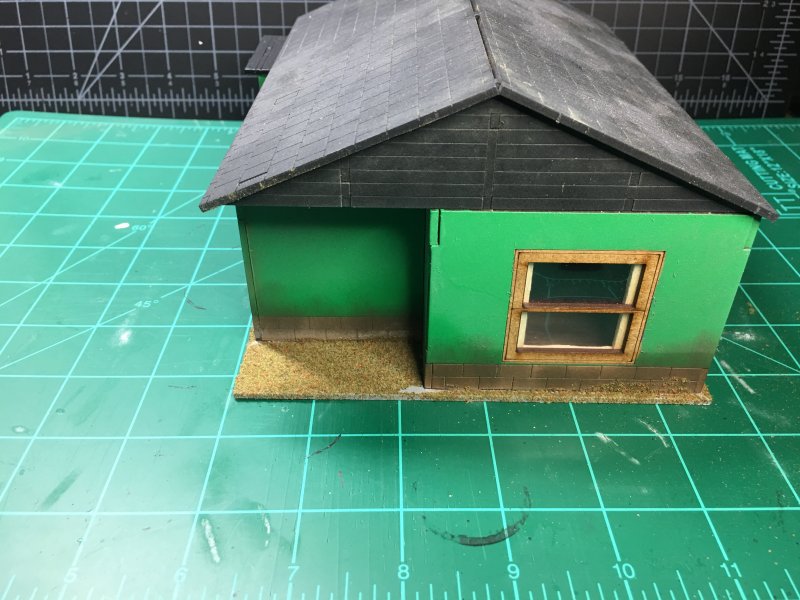
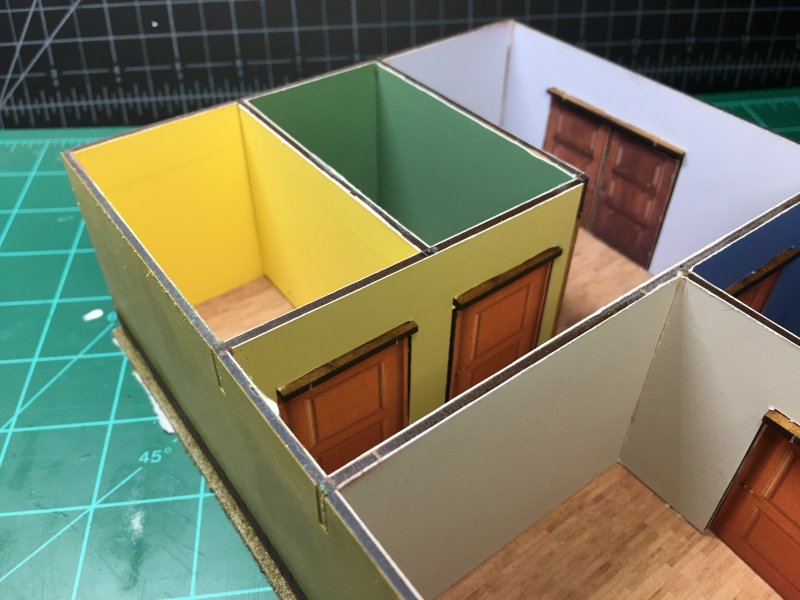

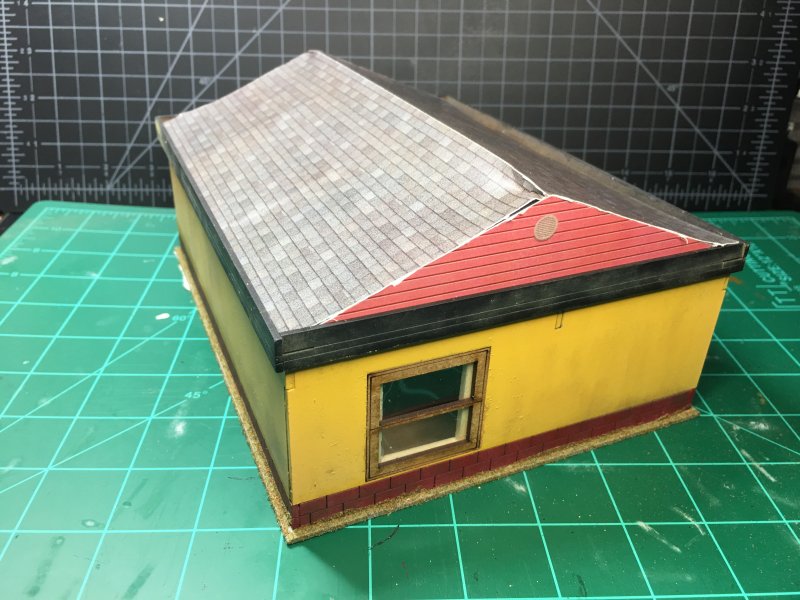
In the end, I've got 3 more houses done enough to fit into the modern/zombie apocalypse landscape. Like the Tobacconists shop I'll probably come back later, when I'm not sick of looking at these houses, and add some features and quirks. It's easy to tell I just gave up on the other 2 houses and was ready to be done with it all. Next I'm going to do something not building-related. Some figures, that's it! I have to see how much mini-painting I've forgotten.
Permalink
gaming miniatures hobbies walking dead
3 Houses May Be Too Much At Once
07.07.2019
Today is a little bit works in progress, a little bit random/behind the scenes. This is what happens when projects get a little carried away and look to take longer than intended.
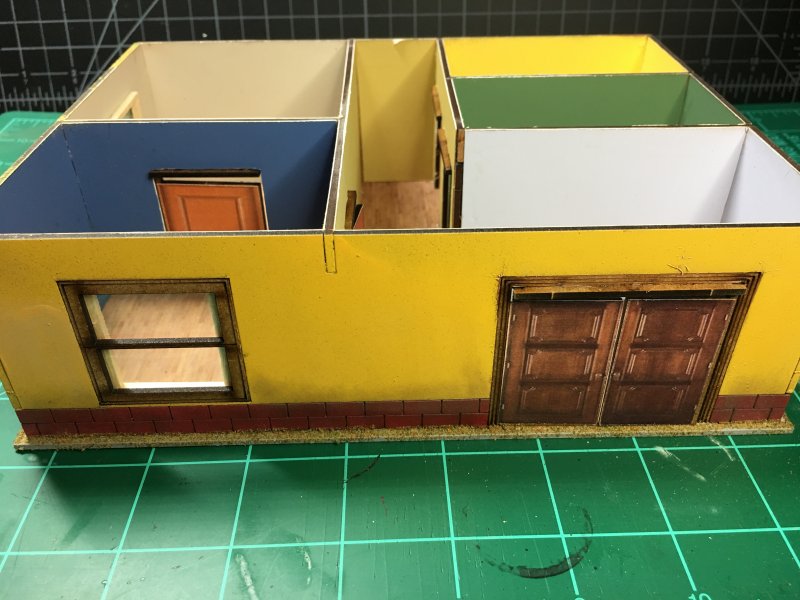
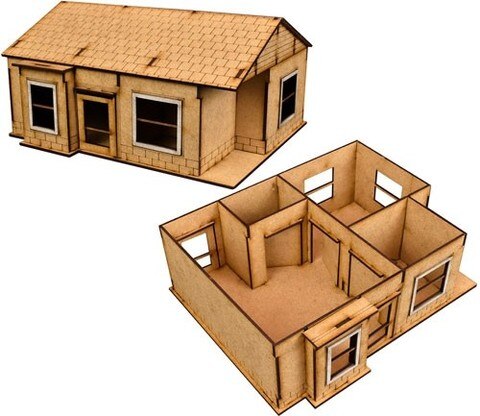
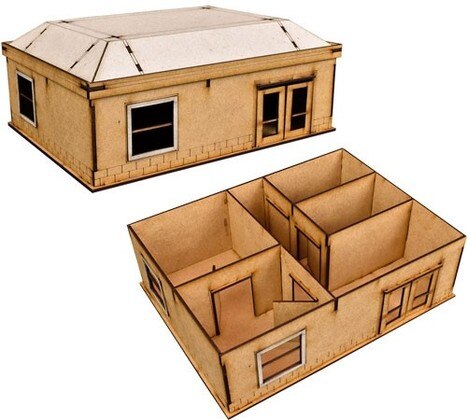
The hobby project that's turning into a big hobby project has been a trio of MDF houses. There's a 4-house set for Walking Dead of which I picked up 3 during a sale at some point or another. As my theater project got delayed (more on that some other time) I thought I'd just whip out these 3 houses. My method of whipping takes a while.
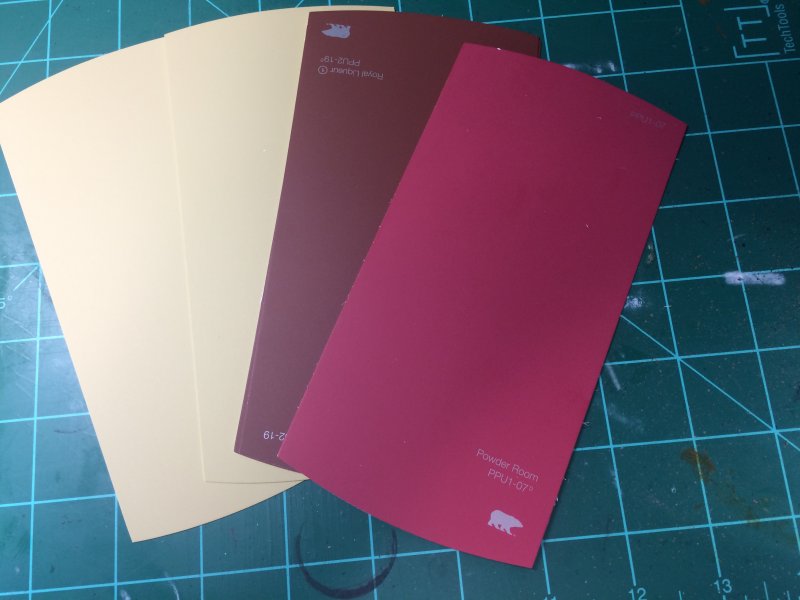
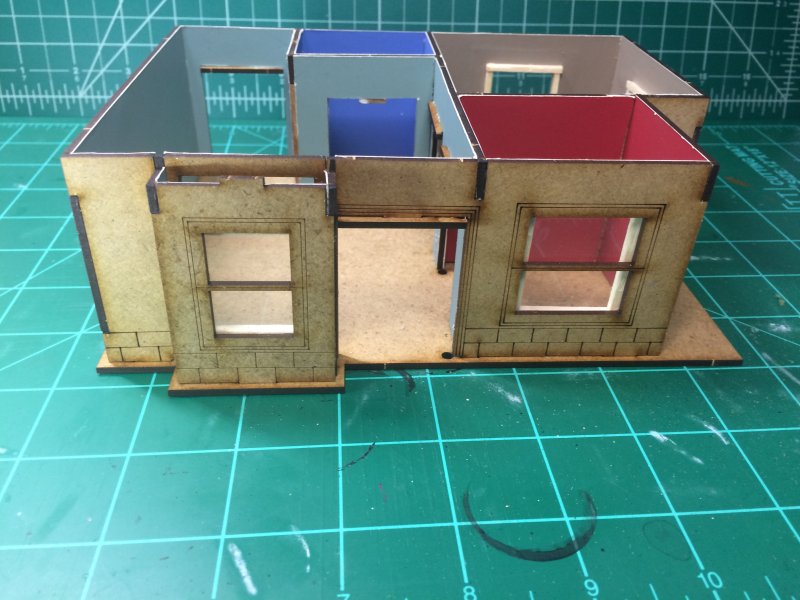
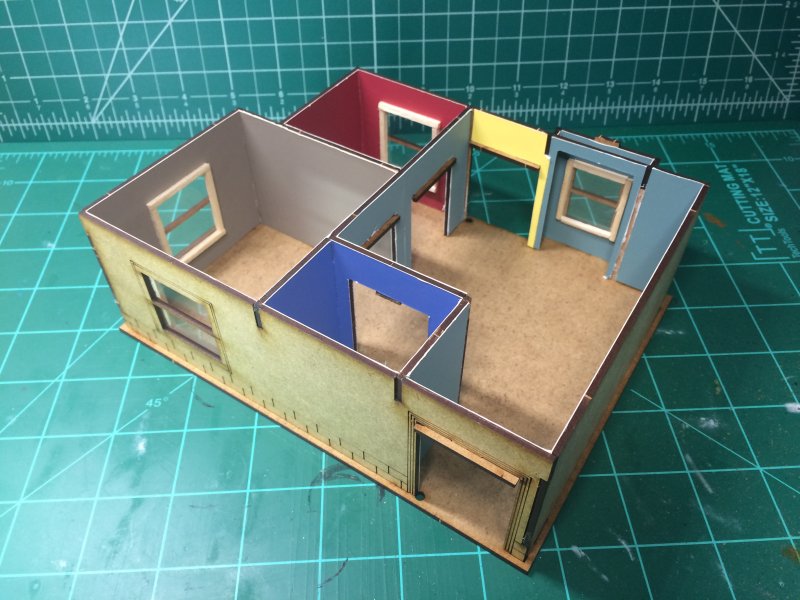
I've long been hesitant to paint MDF as stories of it drinking up paint are legendary. I've not really experienced it myself, but I've really been limited what I paint. The kits as they come are fairly plain. I went my favored route for home and instead of trying to paint interior walls, I went by Home Depot and picked up paint sample cards for Behr paint. These specific cards are really good for what I need. They're sized to cover most walls. There's a variety of colors. Nobody in Home Depot seems to notice or mind when I grab 4 samples of 10 colors and merrily walk out without buying anything.
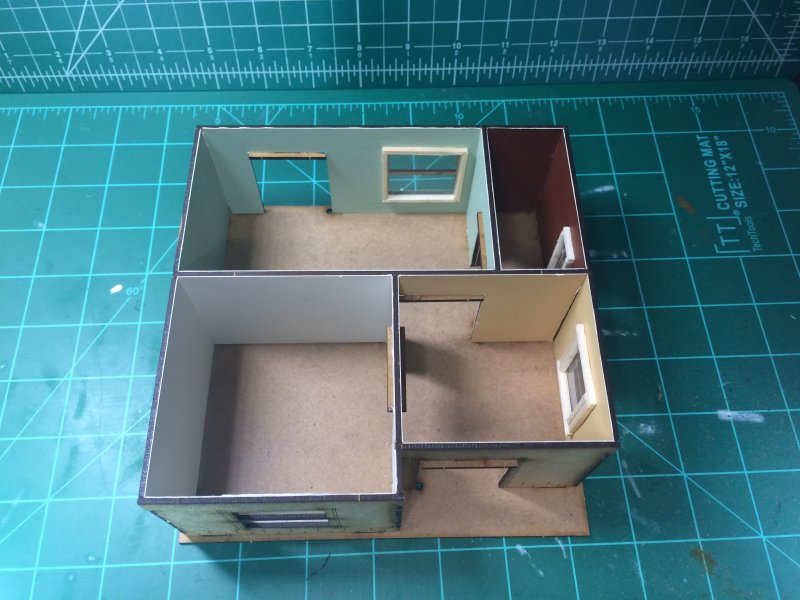
I've learned the method that works best for me is to glue the card to the wall and then cut and trim the excess. Before this, I dry-fit everything together (this will come in important on that theater project story for some other time) to make sure I get rooms with the same color. Once the glue dries, excess is trimmed so the walls will fit flush, or as flush as I can make them, with each other and the floor. I tend to get a little overboard with the color choices. My house has tan (Gourmet Mushroom) walls throughout, but here I pick a different color for every room. It's colorful, if nothing else.
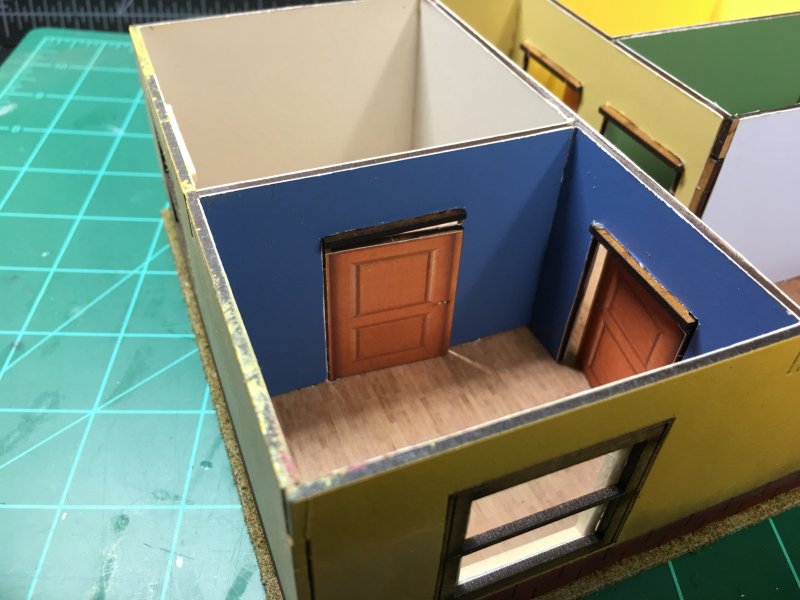
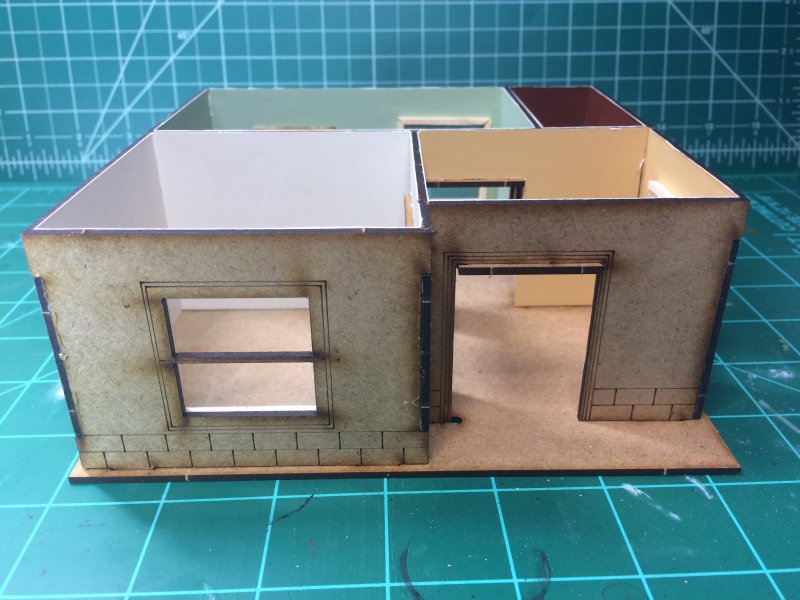
Interior window openings have been tricky in the past, with lots of mistakes learned. Just a square opening, thank you square hole punch, doesn't look right. Windows have trim. I tried a couple of craft-stick, fine - square toothpick - frames with 45 ° corners, but my Chopper wasn't making consistent, flush cuts. Being lazy, I opted for and old fashioned square frame with longer top and bottom, and the sides are trimmed to fit between. With transparency film cut to fit the window and glued in before the paint card, it all makes for a decent window.
With the walls dry-fit into the base, I went ahead and glued all the walls together with some wood glue and let it all set for a day. Now it's ready for the next step. Ah, the next step. What is the next step? Notice the lack of doors? Part of not gluing walls to the base is so the doors can still be added - and this time I took extra care to make sure the holes for the door hing/axis are on the correct sides. I learn from my mistakes! Sometimes. The outer doors have openings for windows, so I'll likely go the transparency film + toothpick frame route for those. The interior doors are very plain. I'm currently planning on printing out some door textures and gluing them on. Door textures may not be the proper term. There's some nice pics of interior doors on the Home Depot website that I'll likely be cropping and printing. I use Home Depot a lot for this stuff. Maybe I can get a sponsorship?
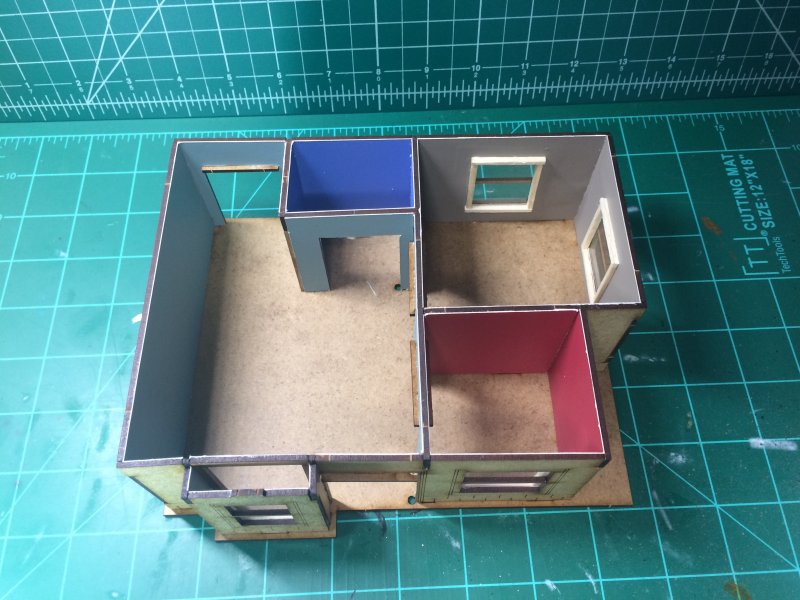

There's some other little details I'm going to print out and see how they look, but I'll save further explanation until we see if it's worth it. The one part I will mention is how the floors of these 3 houses work horribly for house floors. While I'm tempted to just print out floors, which is Plan B, I'm going to see how 1mm felt works as a carpet replacement. That's crazy, you say. Home Depot doesn't have 1mm felt! That's true. Hobby Lobby has felt!
Seeing as it took the better part of 2 weeks to get walls covered in color and glued, I'm not really sure how long to expect this next phase to take.
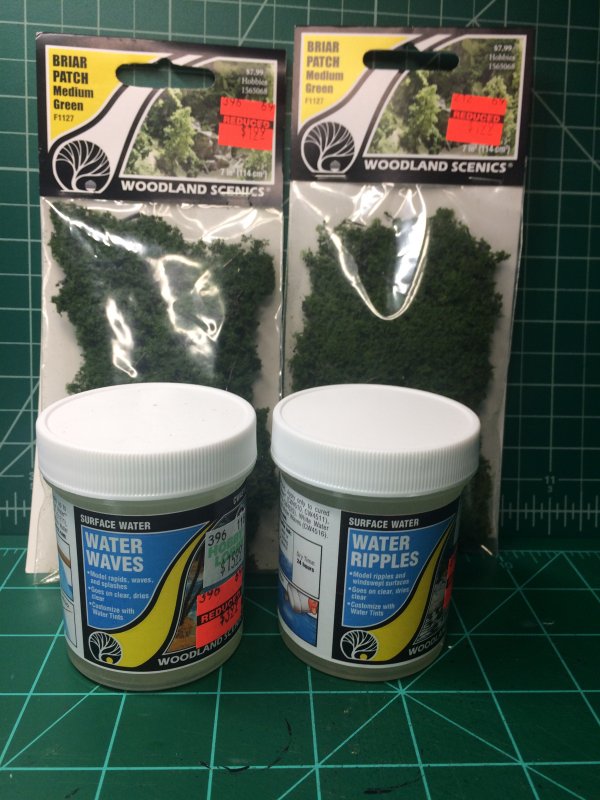
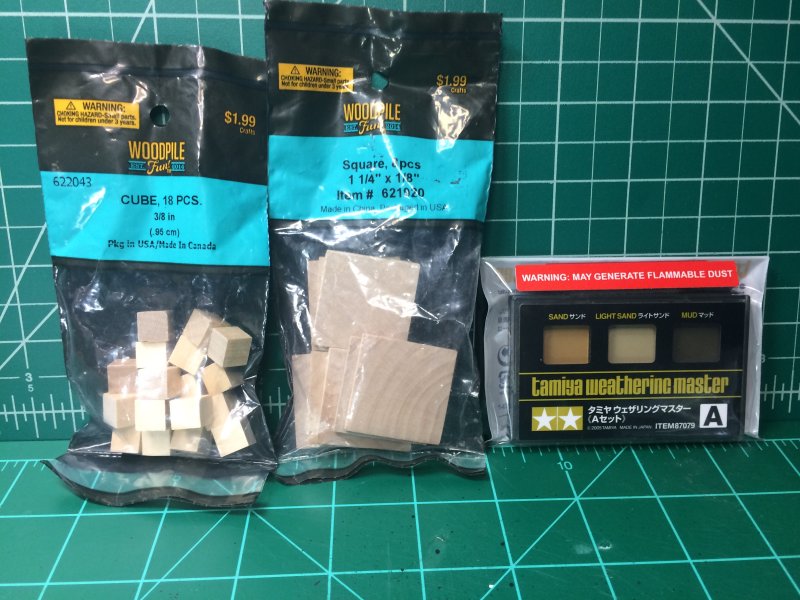
Segueing from Home Depot, it's clearance time of year. While I always drop in for coupon usage on Tamiya Primer I'll also wander the aisles looking for anything with a red sticker that I might one day use. This year that included some Brier Patch flock and a couple of water effects. I've yet to do much with water effects but if I keep watching Luke Towan I'm going to try something or other before long. I picked up some random odds and ends while roaming the aisles, too. I was starting to run out of the Sand & Mud pigment that I use, so instead of using my coupon on primer I picked up pigment. I also picked up a couple of random packs of wood pieces, because sometimes I just need random wood pieces.
After watching way too many videos on the pros and cons of contrast paints I decided to pick some up. Most people talk about how these paints work well for painting lots of minis quickly, although the colors tend to come out flat and in pastels. The thing I noticed is that these paints seem to work well with skin tones and fabric. I paint a lot of skin tones and fabric! Contrast paints are described as a thick wash. I like to paint with a wash!
I made a list of the colors I would be most likely to use and headed out to The Deep to get what I could. They had 7 colors in stock. 5 of them were colors I wanted, so I picked them up. From there I went to the Warhammer Store, and discovered they were closed on Tuesdays. Luckily, Adam at work mentioned a Warhammer sale of some type at JCs House of Cards. I thought they were mainly a Magic The Gathering & card games of that ilk shop. Facebook listed Warhammer in their stock, so I took advantage of social media and asked if they carried/had in stock any contrast paint. They replied "yes, we have them all". That afternoon, I saw they did indeed have them all. And then I may have left with too many. But they had them all!
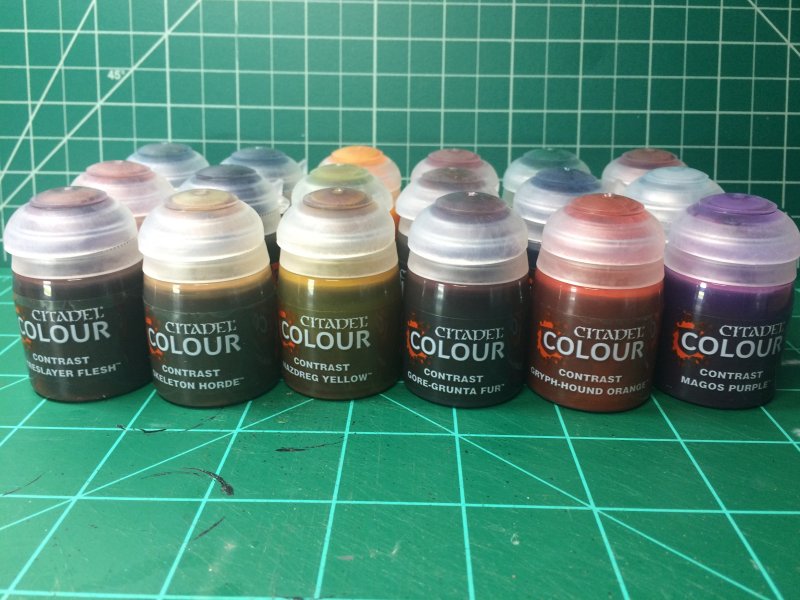

I'm going to practice with these on some Zombicide minis that will never see the light of day, just to get a feel for how they work.
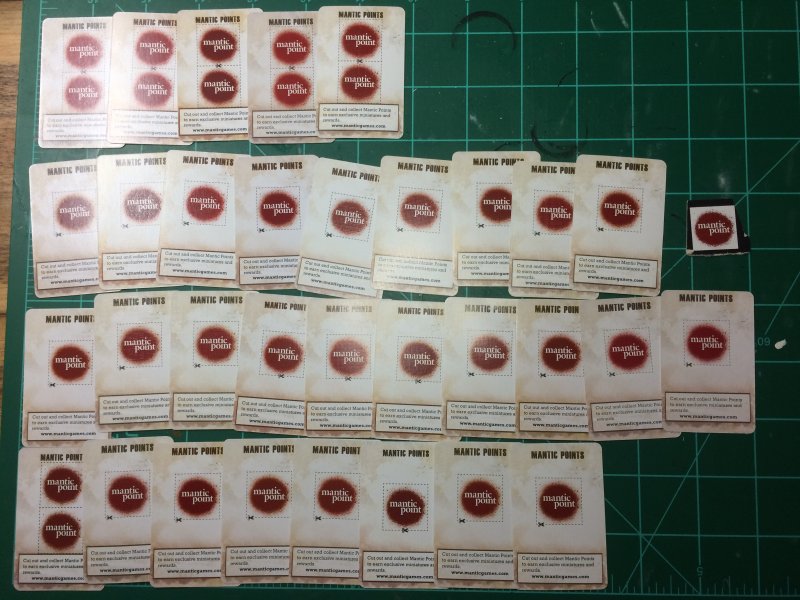
With all the Walking Dead minis I've gotten over the past couple of years, I've been racking up Mantic Points/Proof of Purchase. The Mantic web store had some more things in stock, so I finally got my points together and placed an order. I needed 40 pts, which I managed to get together - I had to raid a couple of not-yet-opened boosters. I'm not sure I've ever mailed anything to England, but I visited my local USPS to ensure I had everything packed, addressed, and properly paid. Sometime in the next 3 weeks they should receive my points. Hopefully in the ensuing 3 weeks I'll get my point paid booty.
Permalink
hobbies random walking dead
Another 9. Or 6? 2?
06.14.2019
Another batch of Walking Dead minis. This time, 3-mini boosters opened up were:
- Tyrese, Prison Advisor
- Glenn, Prison Guard
- Alice
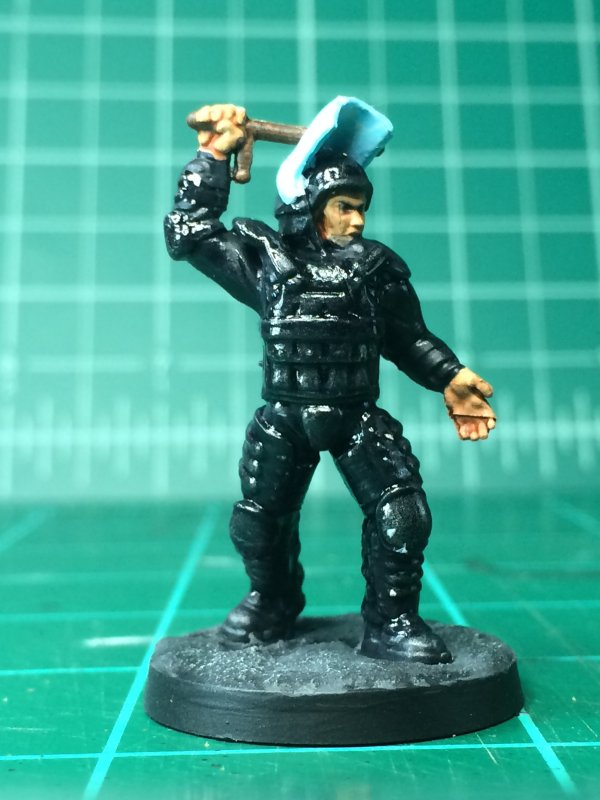
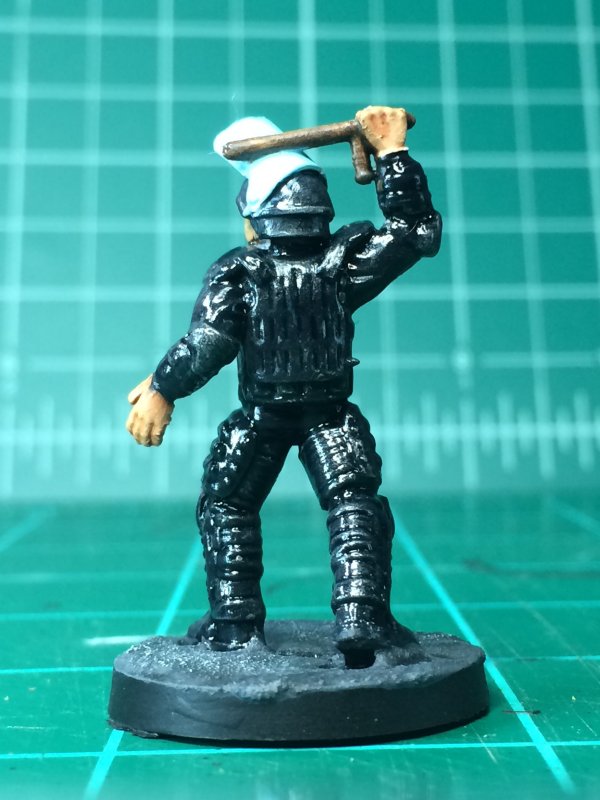
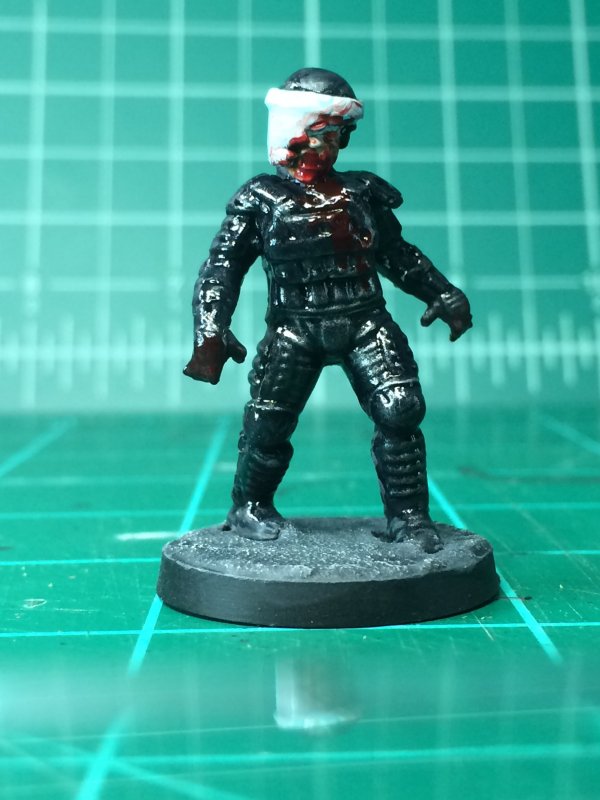
There was nothing exceptional about this batch one way or the other. After painting Riot Gear Michonne in the last batch, I thought I'd go ahead and wrap up the other minis that were in riot gear as they are 95% Dark Grey with a Blue Wash. The only "can I do better" attempts were to use grey (t-shirts and a cap) and, finally, a pair of white-ish sneakers. Flesh tones turned out ok. Bleed over of colors thanks to errant brush stokes was about average. Overall, everything was ok. And that's... ok.


Since the last post, the delivery from the last Miniature Market sale came in. 9 minis got painted, 7 new ones were in the order. Net gain of +2 painted. I need to go double check the math in the spreadsheet. There were no new Walking Dead minis in the order, yet paining 9 Walking Dead minis only reduced the Walking Dead To Paint entry by 6. For something I do for fun, this spreadsheet keeps popping up to be a pain in my tuckus.
There will be a painting break for a little while. I'm going to concentrate on (A) putting together the new and improved map tiles, and (B) at least START on the movie theater that I'm overly ambitious about adding a 2nd floor/balcony. The theater is more of a long term project as it involves my first attempt at creating 3D models to print. They're simple 3D models, but who knows how first attempts will turn out?
Permalink
gaming miniatures walking dead
Tom is Not The Rock
06.05.2019
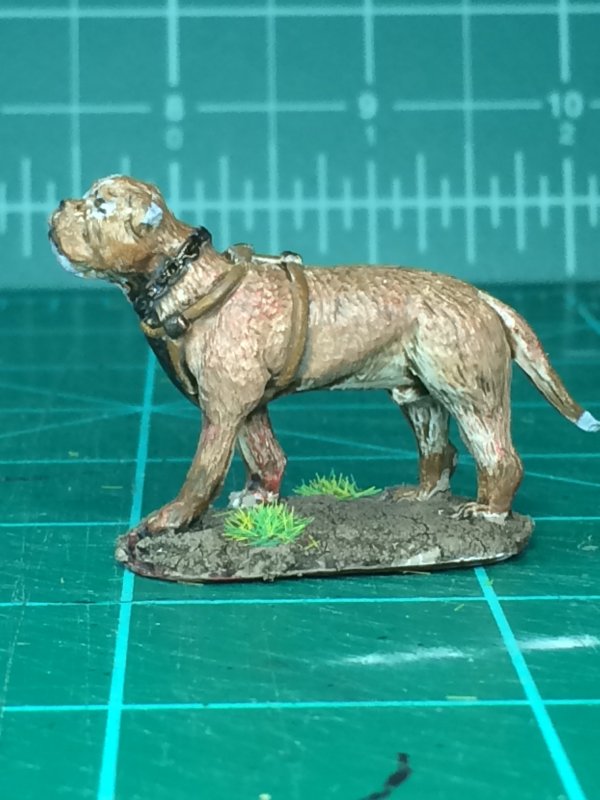
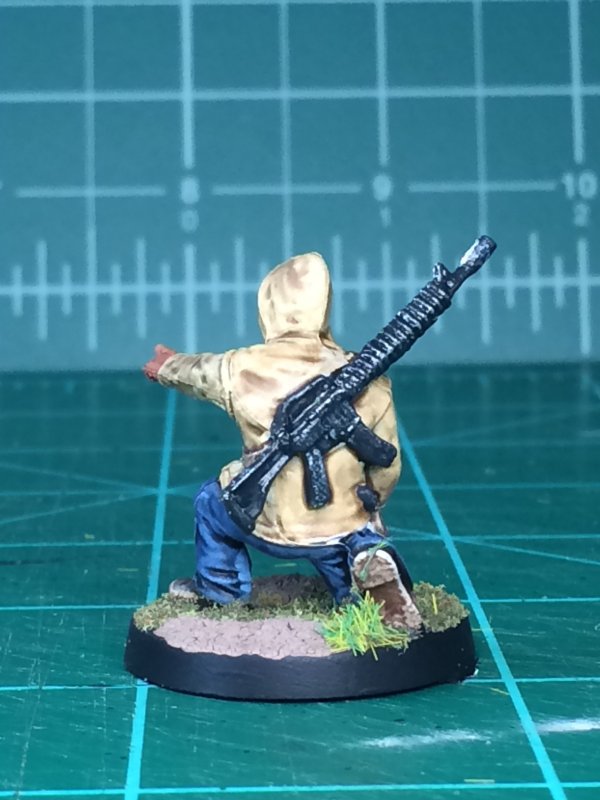
This batch of minis came from the Fear the Hunters and Michonne Prison expansions from the Walking Dead game, plus a puppy.
I'll start out with the puppy. Reaper, for one of their fantasy lines, has a giant dog called a War Dog. As part of my "I need to work on my animal painting skills" unknown effort, I picked up said puppy because bigger dogs are easier to paint than smaller dogs. Granted, I likely won't have a lot of use for a giant medieval fantasy dog in the midst of the zombie apocalypse I keep painting toward, but when have I ever let that hinder me?
Tom, from the Michonne booster, started out as my focused, make this look better than the rest mini. The reference pic I was using made him look real similar to The Rock. That sounded fun! The first thing I did was lay down a dark flesh basecoat that would have made for a perfect American Indian. Normally this would leave Tom as an Indian. Instead I persevered to get back to Rock flesh. He ended up a little more brown than I intended, but as a fix for what I started out with I was proud of myself.
This batch had a #2 Pretty Good mini in David, who sports a fairly nice automatic machine gun of some type. Instead of trying to use whatever color was on my brush on all the figures applicable, I focused more on painting from the "inside" of the mini out (skin, shirt on top of the skin, skin of hand on top of the shirt). There was less primer and splotchy painting this way (finally!). Yellow and Red, my bane colors, worked better by mixing with Vallejo Glaze Medium. Thing for me to remember - glaze bright colors! See if it works next time, too.


+2% progress on the Realistic list!
The "To Do" side of the sheet will grow in the next week thanks to a Miniature Market sale.
Blog Archive
As always, correct spelling is optional in any blog entry. Keep in mind that any links more than a year old may not be active, especially the ones pointing back to Russellmania (I like to move things around!).
Tags have been added to posts back to 2005. There may be an occasional old blog that gets added to the tag list, but in reality what could be noteworthy from that far back?
Blog Tags
3D Printer (26)
4ground (32)
4ground-mall (40)
action figures/toys (10)
airbrush (7)
Aliens (1)
Amazon (12)
antenocitisworkshop (11)
Atlas O Gauge (2)
Batman Miniature Game (2)
Battletech (1)
belt sander (12)
Blood Bowl (4)
boardgames (77)
books/comics (19)
computers hate me (5)
conveyances (15)
diet (53)
dreams (7)
fallout (1)
feng shui (1)
Foundry (3)
Gale Force Nine (1)
game dev (22)
gaming miniatures (228)
gaslands (10)
gastric sleeve (34)
Green Stuff World (2)
Hasslefree (9)
Hero Forge (1)
hobbies (101)
Jailbirds Minis (1)
kevin smith (1)
Knight Models (2)
malifaux (2)
Marvel Crisis Protocol (2)
mckays (1)
models (10)
mom (32)
moon light (5)
movies/tv/dvd (60)
Necromunda (1)
ninja division (1)
Pathfinder Deepcuts (1)
pilonidal cyst (5)
plastcraft (2)
programming/interweb (41)
rambling (60)
random (366)
random maintenance (3)
Reaper Bones (3)
reaper chronoscape (32)
renovation/remodelling (25)
road trip (26)
salesforce (1)
sarissa precission (2)
scenery (16)
studio miniatures (3)
ttcombat (12)
video games (51)
walking dead (36)
wargame foundry (3)
work (6)
wrestling (45)
zombicide (1)
Zombicide Invader (19)
zombie mall (23)