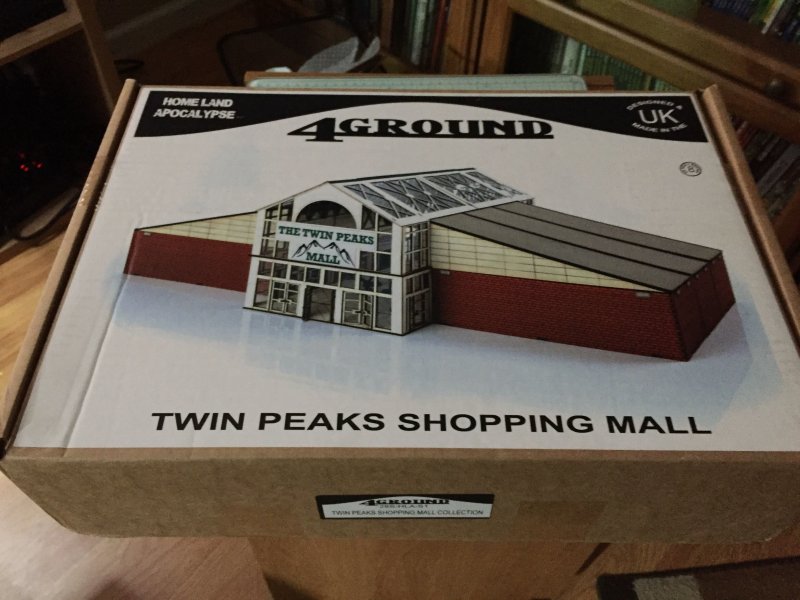
Breaking Ground on the Mall
03.04.2020
This year I've had so little going on I've barely posted once a month. Now I'm at my third post in as many days. A productive spurt!
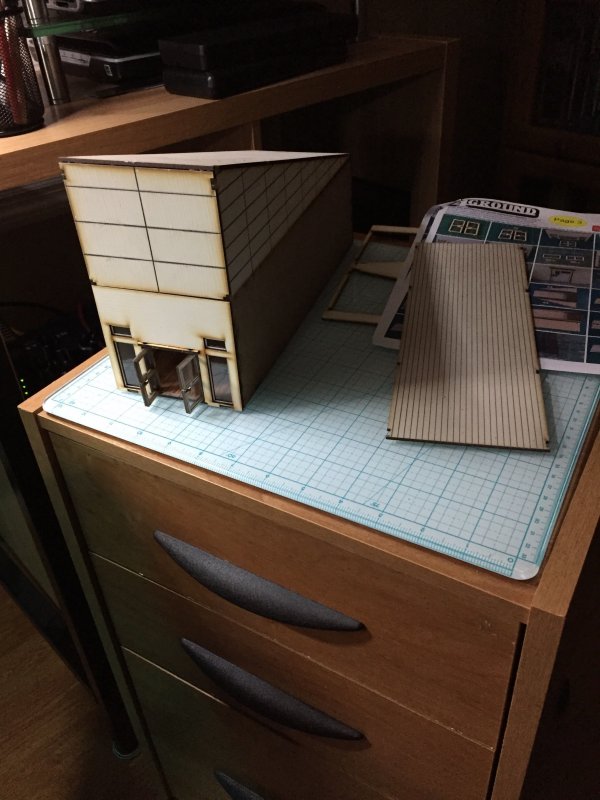
I FINALLY got around to starting on the mall from 4Ground. I picked a generic store and followed the directions, without taking shortcuts or things I thought would be easier for my fat fingers at an earlier time than suggested. Overall, it worked well. There's an alignment problem on the front wall, but that came from not knowing how everything was supposed to fit together and should (hopefully) not happen again.
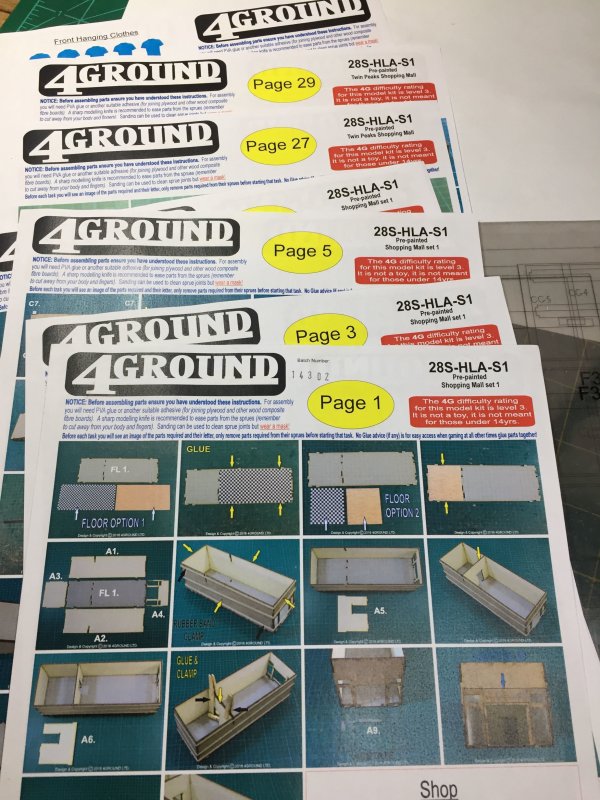
Disregard the order of the pictures, but after finishing the first store faster than I expected (less than a day), I opened up the "starter" bundle. 6 ground floor stores with 2 entrances. There were 29 pages of instructions. That was needlessly daunting, as only the first 8 pages are instructions for the stores, entrances, and roof. The rest is graphics for stores (signs, products for sale) and instructions on how to put it all together (lots and lots of shelves and counters). The way the bundle was cut/burned lends itself to an assembly line style. Instead of 6 ground floor store kits, like the first one I made, the set is optimized so 1 sheet has all 6 front entrance walls, another sheet has all the back walls, etc. Having just made a store, I think the assembly line method will work for me. I just have to remember not to get in a hurry.
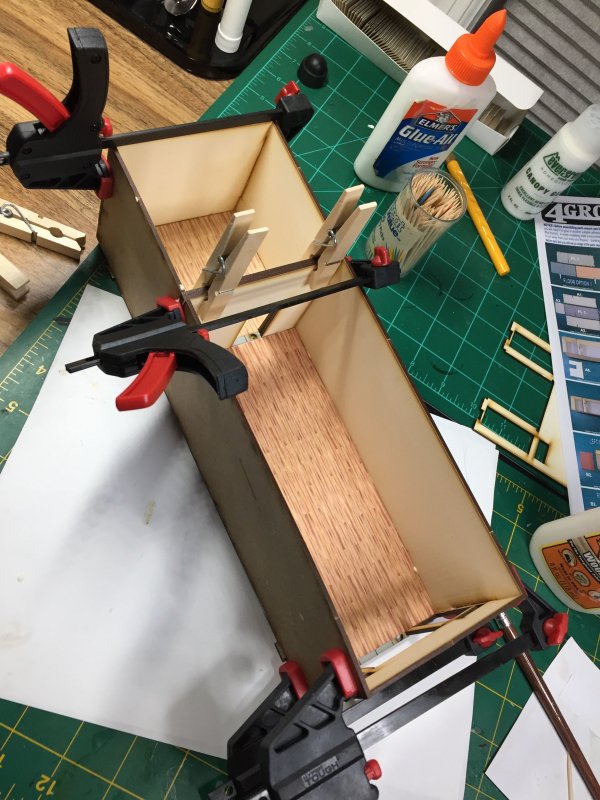
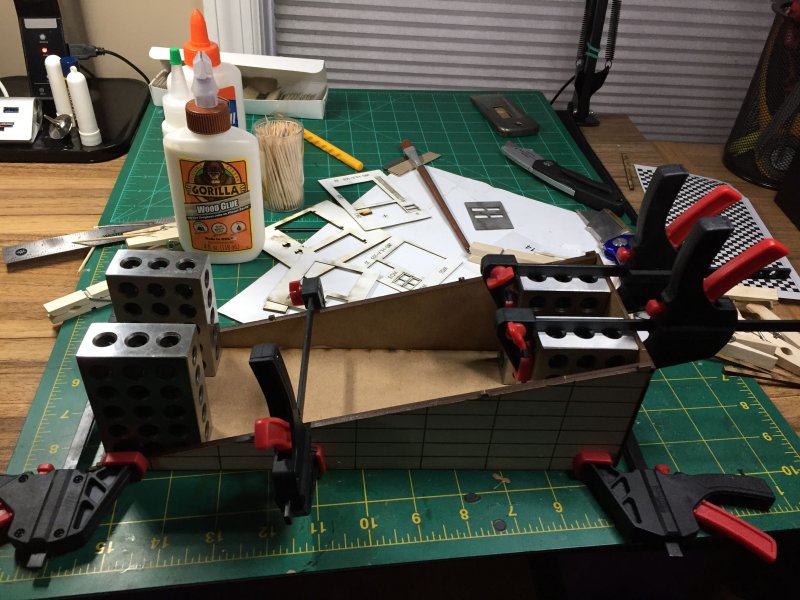
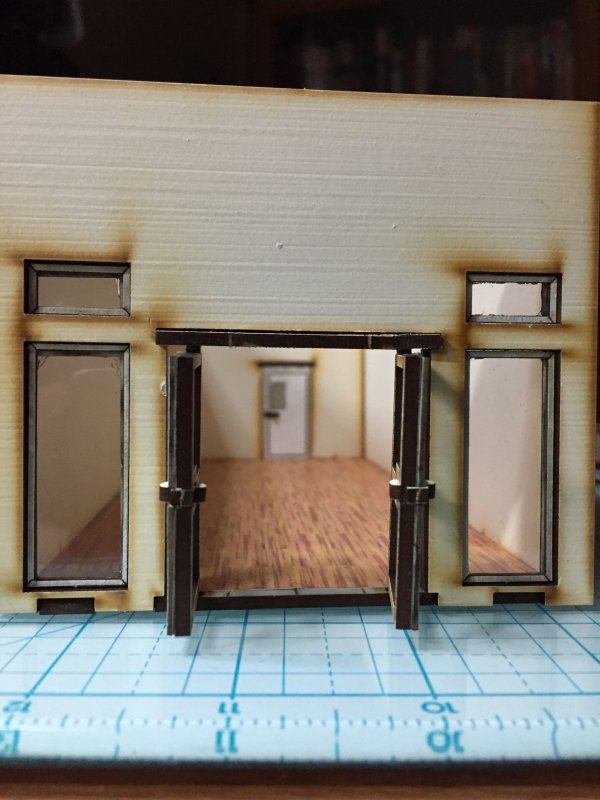
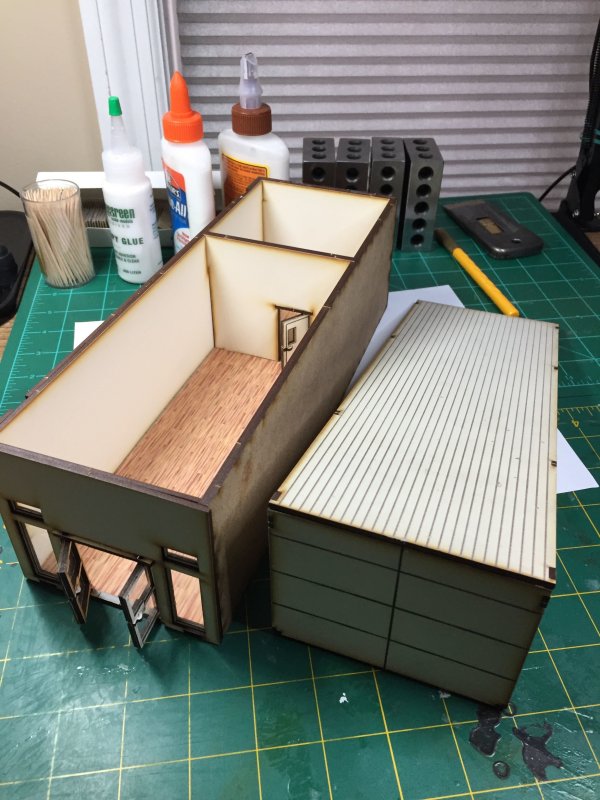
Using the 123-blocks with the clamps helped keep my walls/floors at right angles. That's what those blocks are supposed to do! I also used some canopy glue for the plastic windows. I've had problems with the plastic fogging or showing some glue-induced fingerprints in the past so I thought I would try something new since the bottle jumped out at me at Hobby Lobby. It's a very thin glue, which may be all it really is, but I didn't notice any glue splotches on the windows in the store. I'll keep using it going forward.
Now to see how far I get through building the basic bundle before, honestly, I get bored.
Permalink
4ground 4ground-mall scenery
Resin: 1st Pour
03.03.2020
Continuing with my early birthday loot from Green Stuff World, I picked up 2 silicone molds for Grids & Fans and Control Panels. The only molds I've used before were for plaster (based) rocks for train scenery. This was made for plastic resin. At some point in the past year, or two, I got a little mold-making and resin kit from Hobby Lobby. I never made a mold, but now I could use the resin.
I've never used resin. Anything with 2 chemicals you keep separate until time to use has got to be fun! I've watched enough people pouring resin on YouTube (usually for water effects) to have a good idea of how it works. Pour equal amounts of 2 liquids together. Mix. Pour. Wait. Easy enough.
The instructions for the exact kit from Hobby Lobby varied on how long to stir the 2 parts together. 3 minutes per the packaged instructions. 30 sec to "until it's not cloudy" on YouTube. The resin was supposed to set in 10 min. Armed with this knowledge, I poured and ounce of each part together and mixed it for a couple of minutes until I thought it didn't look cloudy. Then I began to delicately pour into each opening in the mold. Except I didn't have a precise pouring cup, so resin started dripping everywhere. That's ok, I'll just scoot it into the right places with my stirring stick. And then we'll go over to this next mold and tryt o aim my pour a little better. There you go, now that's
and at that point the resin started to solidify in the cup, on my stirring stick.
Well, might as well see how this batch turns out and try again later. Batch 1, to not know what I was doing, wasn't too bad. I never had a chance to get rid of air bubbles, so there were air bubbles. The details in the mold still came through. I mixed up another batch, not mixing as long this time, and shotgun-poured onto the mold to where the resin was basically a sheet on top and each part would have to be cut out later. I got rid of some bubbles, but I didn't de-bubble the resin enough. I repeated this for a total of 3 batches, because that's when I ran out of mixing cups.
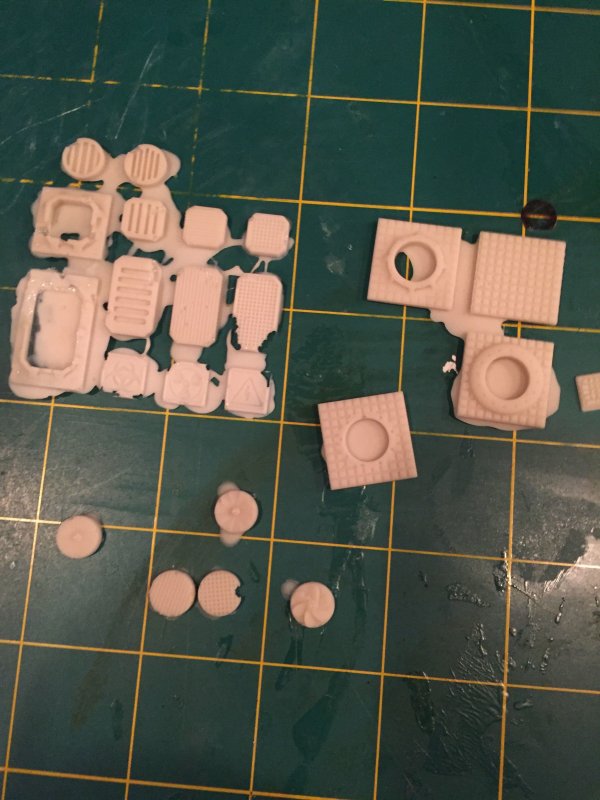
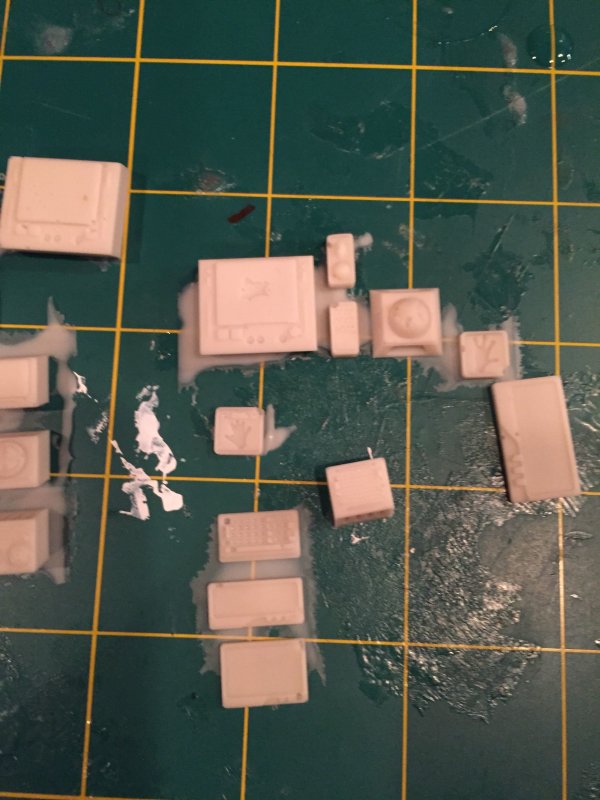
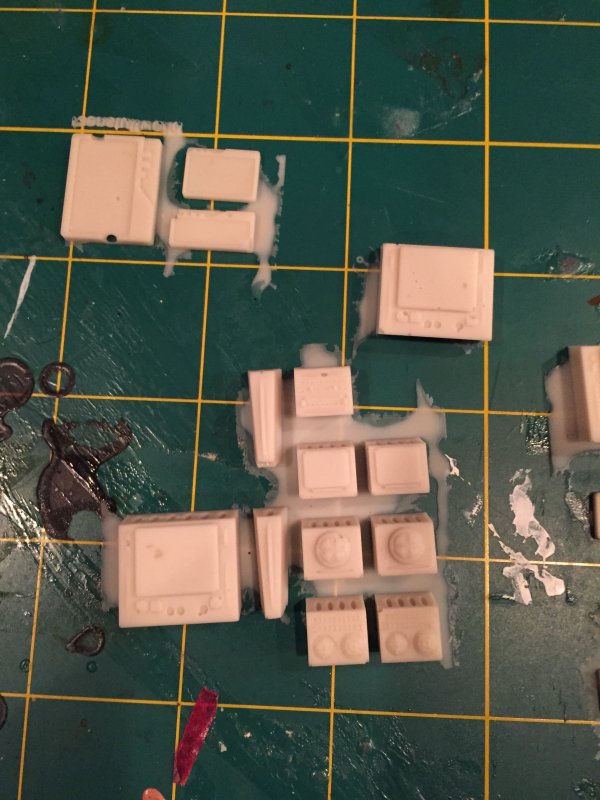
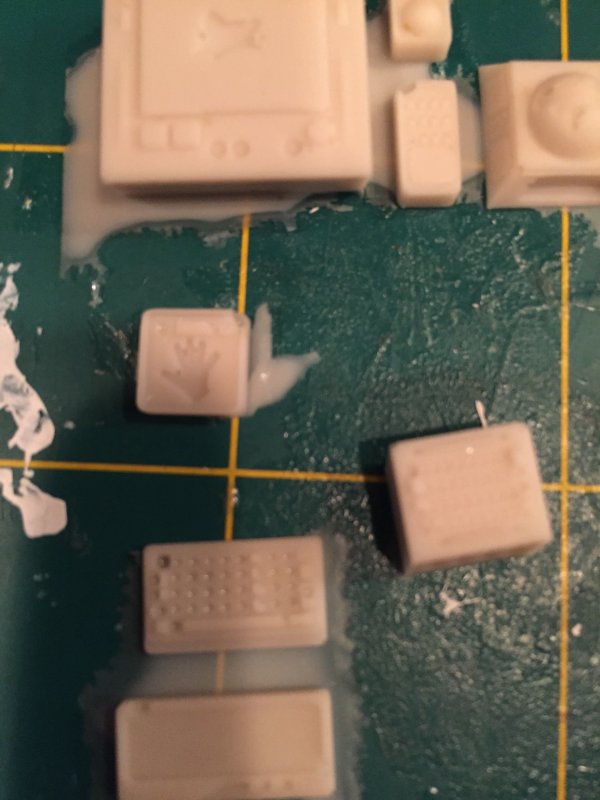
Going forward, I need to get slower curing resin. I also need some mixing cups with some type of spout so I can aim my pour and not have to cut all of this stuff apart. And tapping the mold to help release bubbles should also help.
Next time: breaking ground on The Mall.
Permalink
Green Stuff World scenery
Leaf Punch
03.02.2020
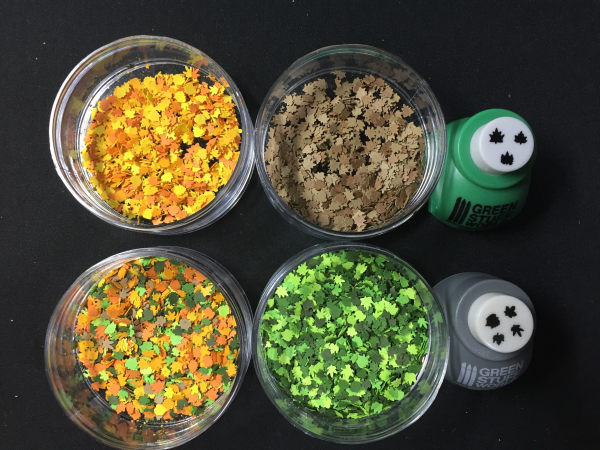
As part of my traditional pre-birthday online loot ordering, I placed an order from Green Stuff World and
picked up some leaf punches and silicone molds for resin. After a trip to Hobby Lobby for colored cardstock - can't have white edges on
leaves - I broke in the punches.
First, the cons. It may be the thickness of the cardstock, but the punches were having a hard time making the cuts. The part of the punch to press down on
is small for me. Since I've had my calipers out I went ahead and measured it - 19mm in diameter. To punch, I had to press on my thumb (which was on the punch).
I've read and watched plenty of tips on sharpening the punches, but out of the box I expected a little more fluidity. I tried using the punch with
my palm. This worked as far as punching, but the next day you can still see the 19mm redness that wants to be a bruise on my palm. Thanks to
necessity being a mother, a nearby empty and inverted frappuccino has turned into my solution. The top of the bottle fits well and presses down on the punch.
I think the slightly curved, metal top is an advantage here. The bottom of the bottle has a large enough surface area that my hand doesn't
scream back at me whilst punching.
That's the only con, and it's eventually been overcome. It shouldn't be a problem as I have no shortage of frappuccino bottles.
Over on the pro side, these things really do look like leaves. Most of the tips I saw online were using coffee filters with (ink) washes to get
the crinkly leaf look, but I like the solid cardstock look. At least for now.
I have no idea what I'll actually use these for, but I know me and it's better to have leaves punched and ready to use versus trying my
patience with punching them when I want to use them. Plus, punching leaves while various whatnot is playing on YouTube is my kind of multi-tasking.
Later we'll see how my first attempt at mixing and pouring resin goes.
Blog Archive
As always, correct spelling is optional in any blog entry. Keep in mind that any links more than a year old may not be active, especially the ones pointing back to Russellmania (I like to move things around!).
Tags have been added to posts back to 2005. There may be an occasional old blog that gets added to the tag list, but in reality what could be noteworthy from that far back?
Blog Tags
3D Printer (26)
4ground (32)
4ground-mall (40)
action figures/toys (10)
airbrush (7)
Aliens (1)
Amazon (12)
antenocitisworkshop (11)
Atlas O Gauge (2)
Batman Miniature Game (2)
Battletech (1)
belt sander (12)
Blood Bowl (4)
boardgames (77)
books/comics (19)
computers hate me (5)
conveyances (15)
diet (53)
dreams (7)
fallout (1)
feng shui (1)
Foundry (3)
Gale Force Nine (1)
game dev (22)
gaming miniatures (228)
gaslands (10)
gastric sleeve (34)
Green Stuff World (2)
Hasslefree (9)
Hero Forge (1)
hobbies (101)
Jailbirds Minis (1)
kevin smith (1)
Knight Models (2)
malifaux (2)
Marvel Crisis Protocol (2)
mckays (1)
models (10)
mom (32)
moon light (5)
movies/tv/dvd (60)
Necromunda (1)
ninja division (1)
Pathfinder Deepcuts (1)
pilonidal cyst (5)
plastcraft (2)
programming/interweb (41)
rambling (60)
random (366)
random maintenance (3)
Reaper Bones (3)
reaper chronoscape (32)
renovation/remodelling (25)
road trip (26)
salesforce (1)
sarissa precission (2)
scenery (16)
studio miniatures (3)
ttcombat (12)
video games (51)
walking dead (36)
wargame foundry (3)
work (6)
wrestling (45)
zombicide (1)
Zombicide Invader (19)
zombie mall (23)