Slapchop v Zenithal
08.07.2023
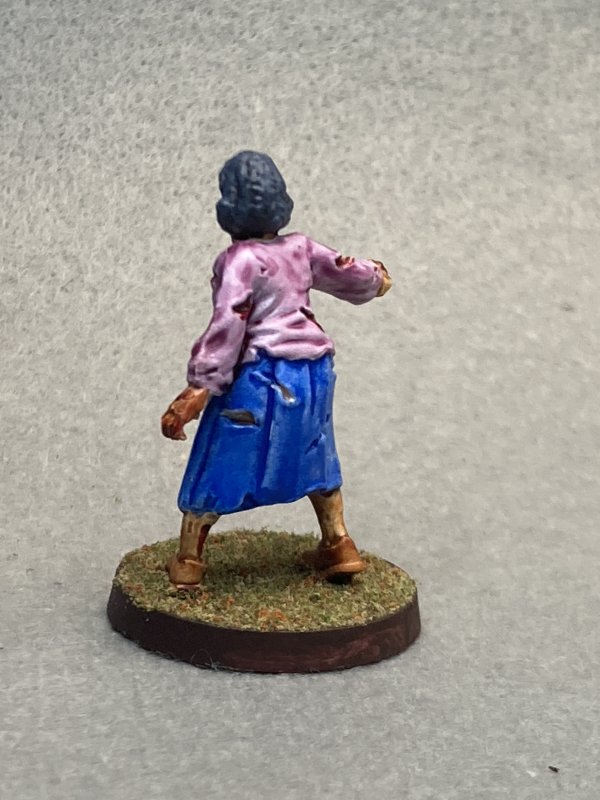
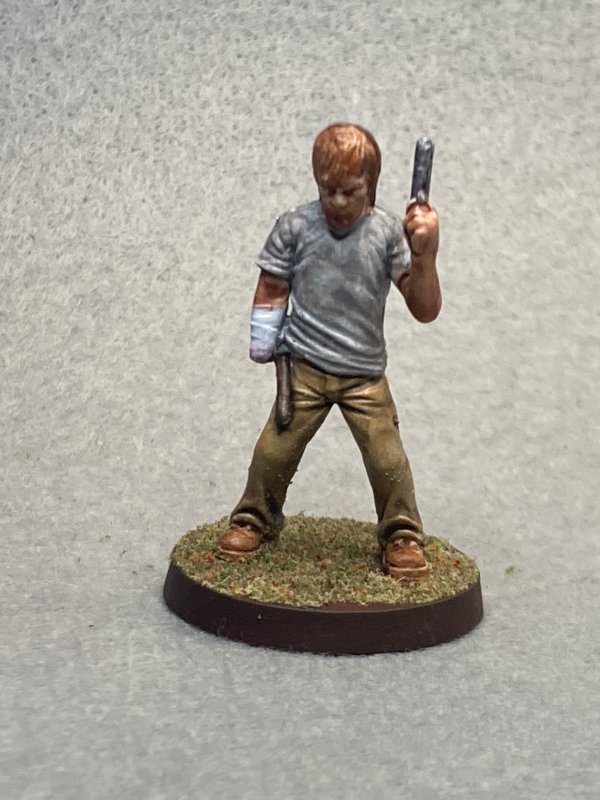
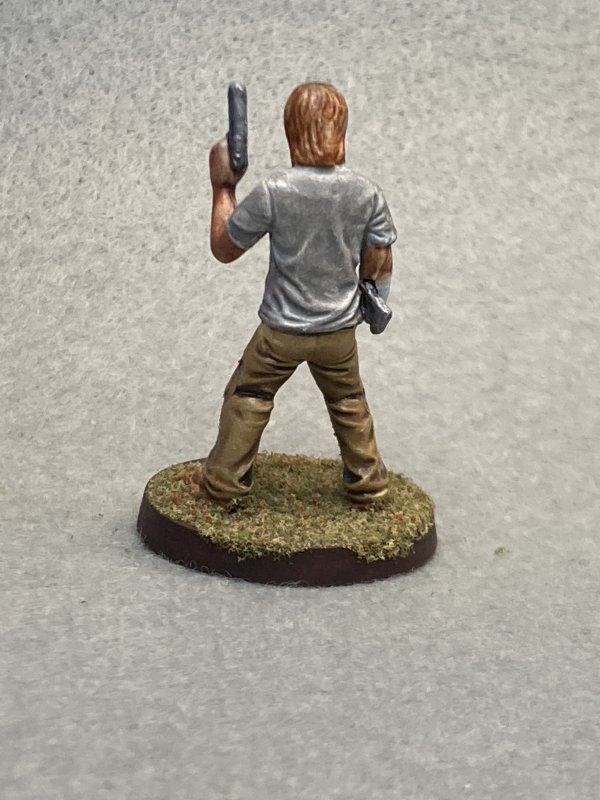
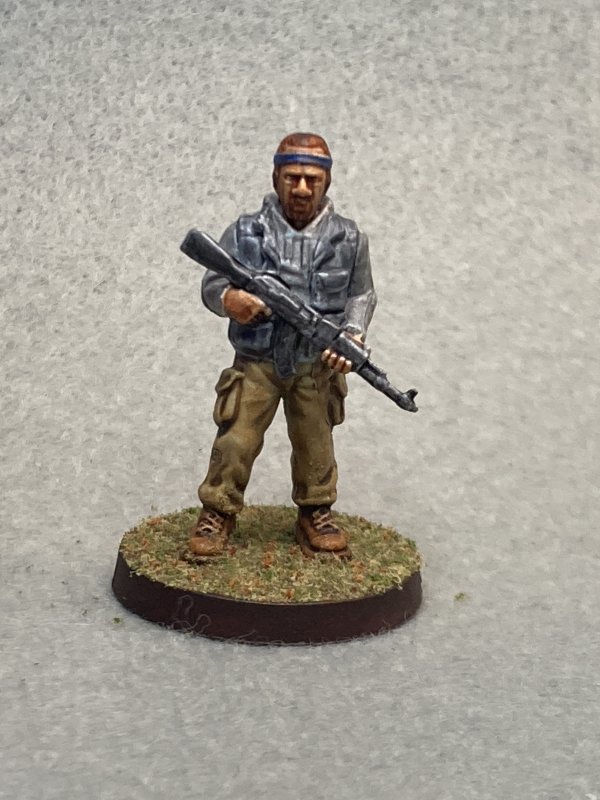
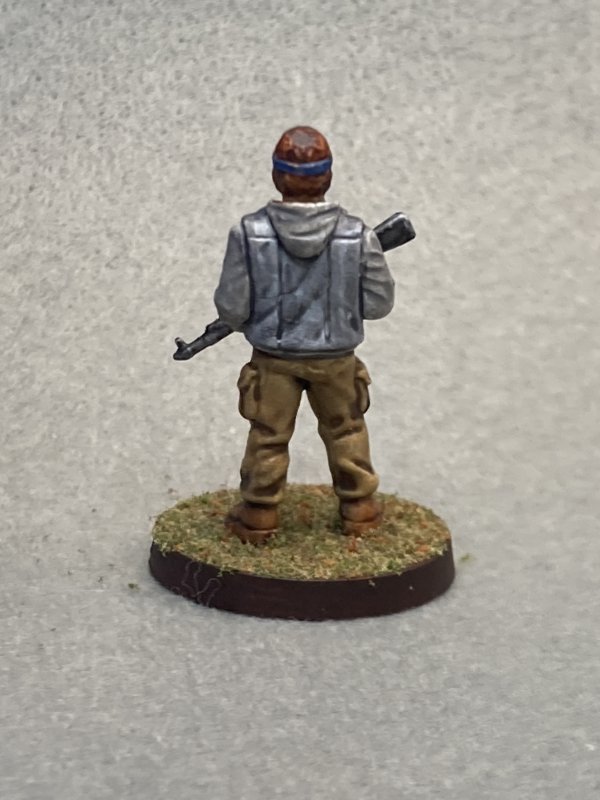
It's been longer than usual since my last post, and it's not because I was being ultra-productive and have the largest cache of newly painted gaming whatnot to share. Nope. I just wasn't in the mood to paint. Part of that was due to trying something new (for me). I finally jumped on board and tried a couple of priming/prep techniques that everyone has been using for years - Slapchop and Zenithal priming.
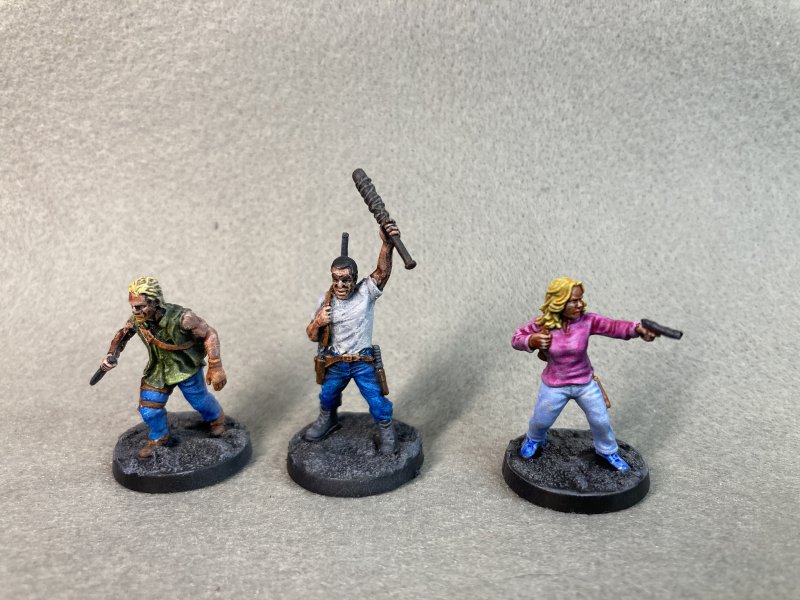
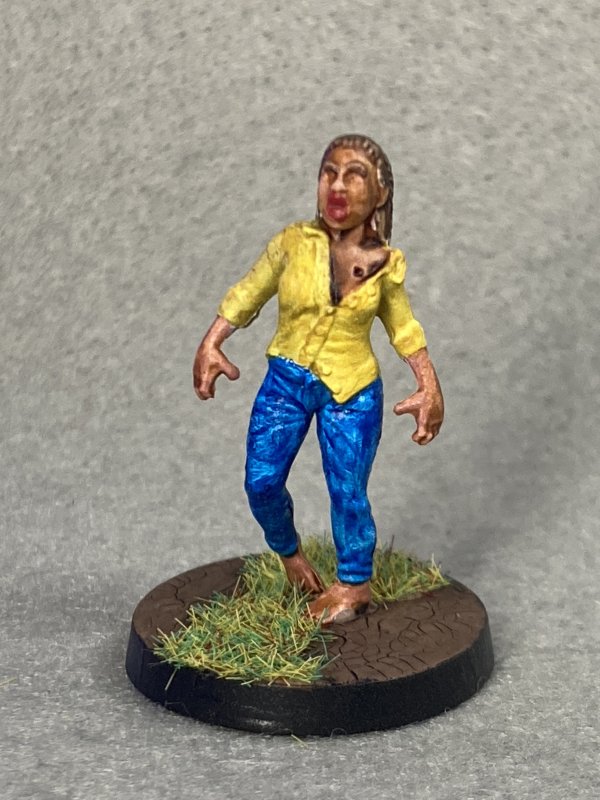
Thus, an experiment was begun using the Walking Dead Saviors expansion pack. 6 minis, which I would split into (my version of) Slapchop and Zenithal priming. Since I normally prime white and then get to painting, both of these methods just felt weird.
First up: Slapchopping
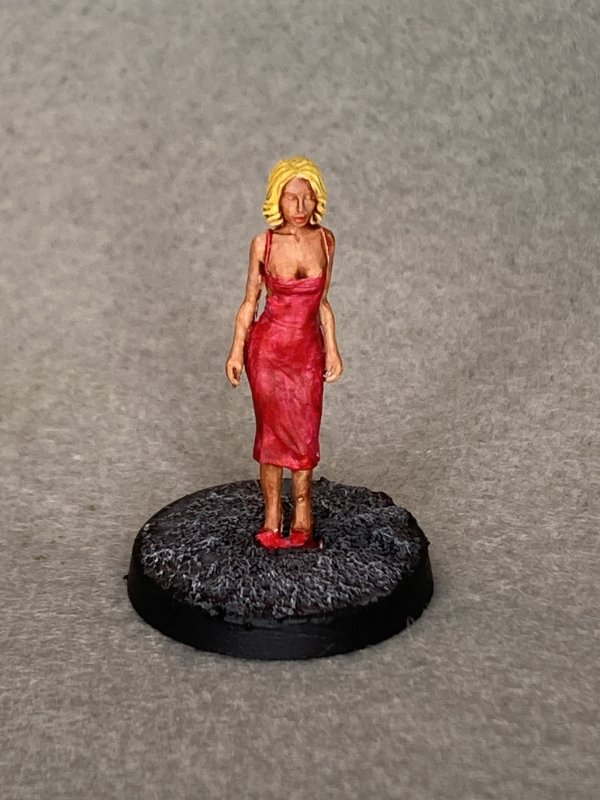
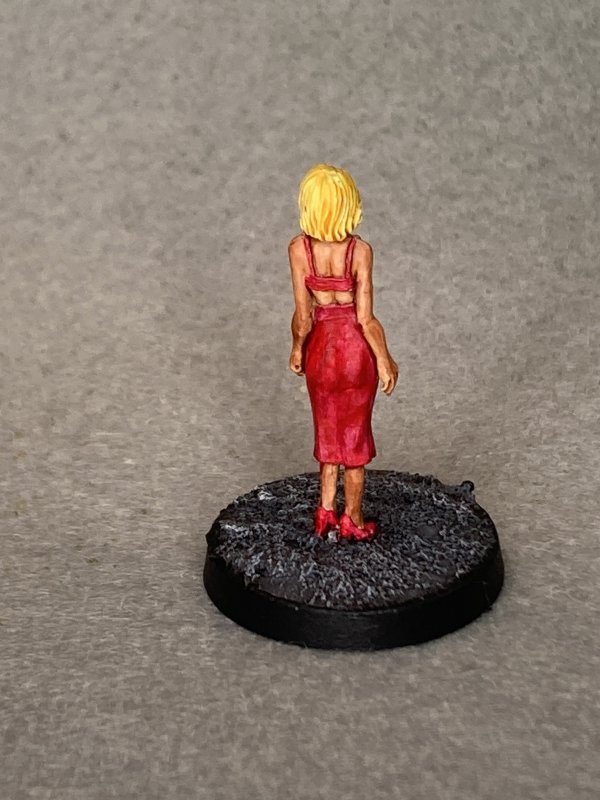
My version of Slapchop starts with priming black, then a heavy dry brush of some Vallejo dark grey that I randomly picked out of a box. While this really did bring out beginning highlights of raised areas and left the recesses with dark, well, black, shadows, the highlights came out very chalky. I know this is from the paint for dry brushing being too dry on the brush, but that's just the way I dry brush. I used Speedpaint and a little Citadel Contrast on these minis, which I also did for the Zenithal batch following. I think the end result is kind of a comic book style. The jump to shadowy black is a little too harsh and at times inconsistent (see Dwight's blonde hair). With some work on my dry brush method this could be better, but as it is I don't care for my end result.

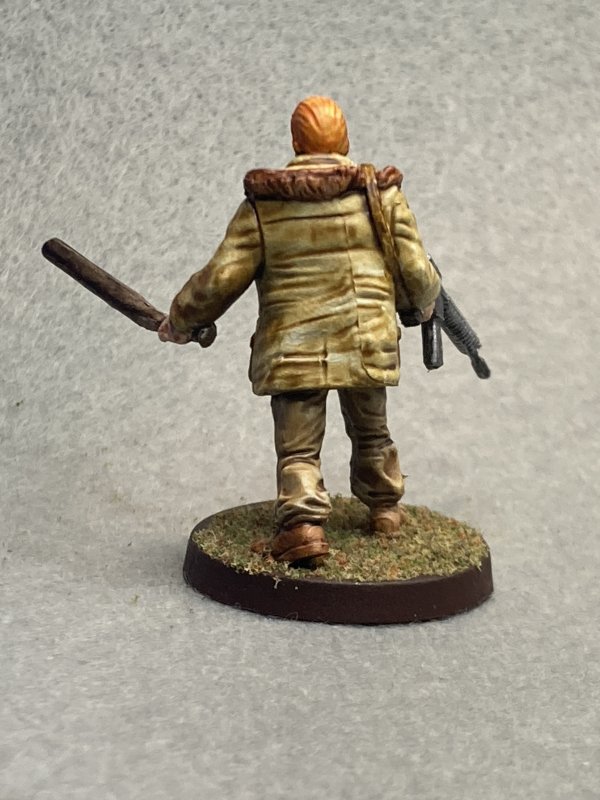
Next: Zenithal Prime
Zenithal priming felt a little more natural - prime black, then from above spray with white to emulate a natural light source. This wasn't just picking a spot and spraying from there, but more of a 180° from above to also include reflective light from above. Since this ended up with mostly white that wasn't chalky, like I'm used to painting, the follow-up printing process felt more normal. I may have sprayed from above from too many angles, as the dark shadows underneath weren't really there like I was expecting. This method worked better than Slapchop for me, but I don't really know my end result shows anything to make it worth the extra effort.
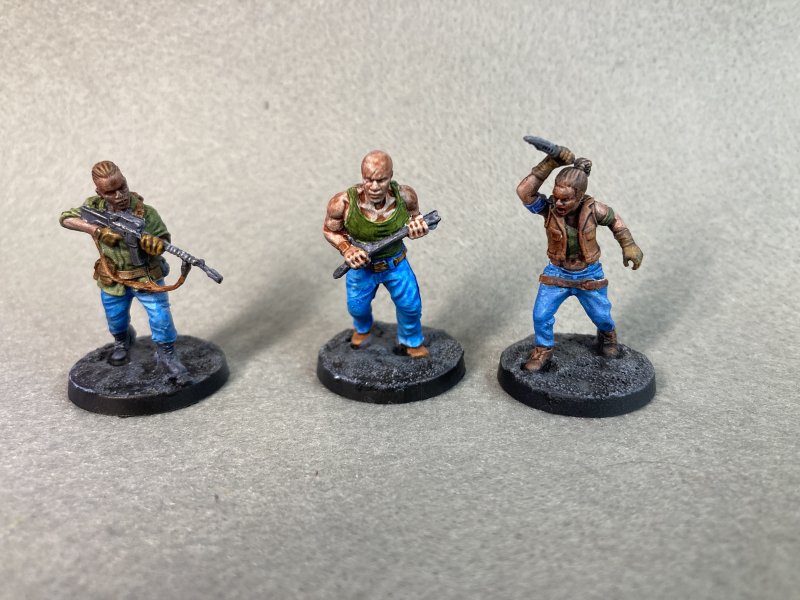
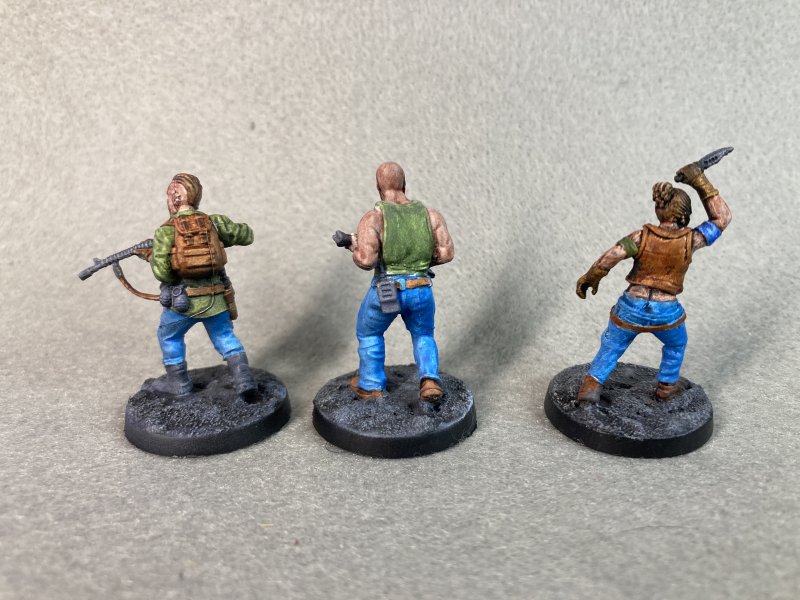
So, what do I think? Slapchop isn't for me, which is a shame because for everything it's hyped to do it sounds perfect for me. Zenithal priming is close to what I'm used to once I start actually painting. I may do another Zenithal test later and keep the highlight spray more vertical and see if that beings out shadows more like I'm expecting.
The next batch on tap is more Walking Dead - this time the Kingdom expansion, which will give me 3 horses with riders to paint. This will be a return to classic white priming, as I'm always unsure how animal painting will go at the onset.
Permalink
gaming miniatures walking dead
More No Longer Produced Walking Dead
06.20.2023
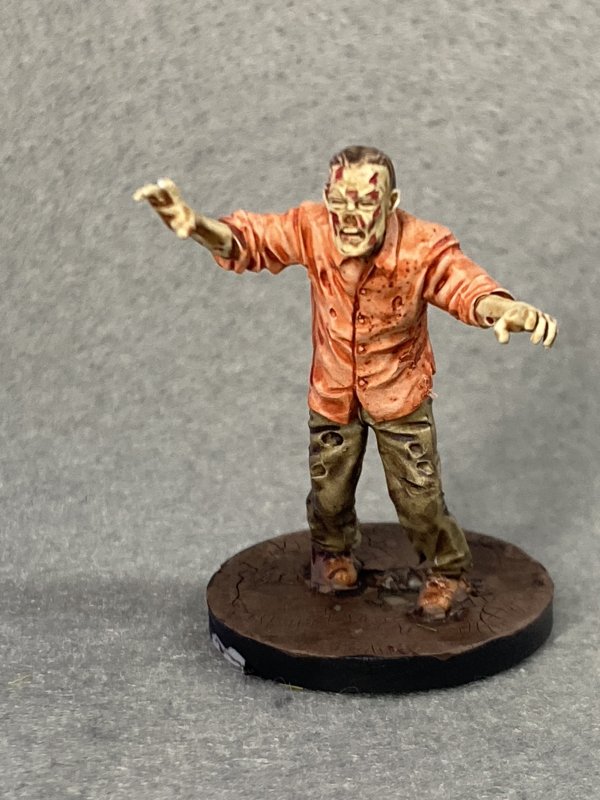
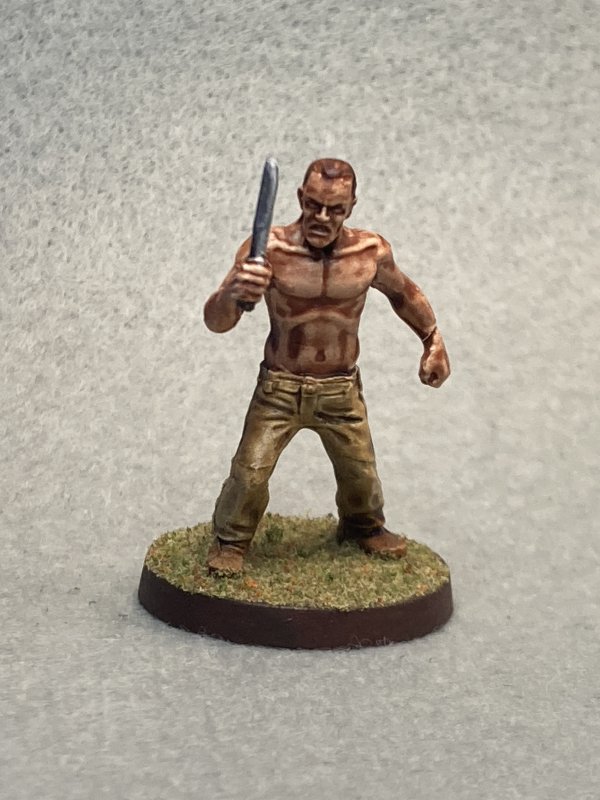
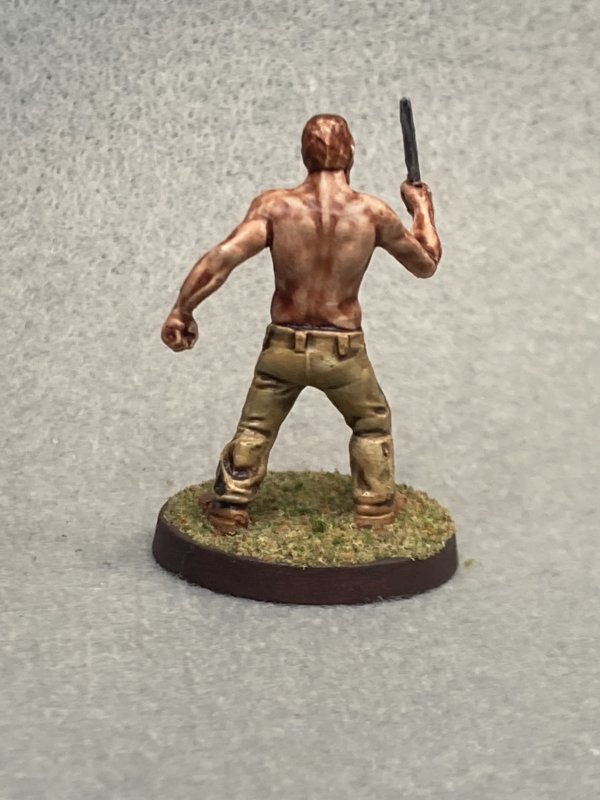
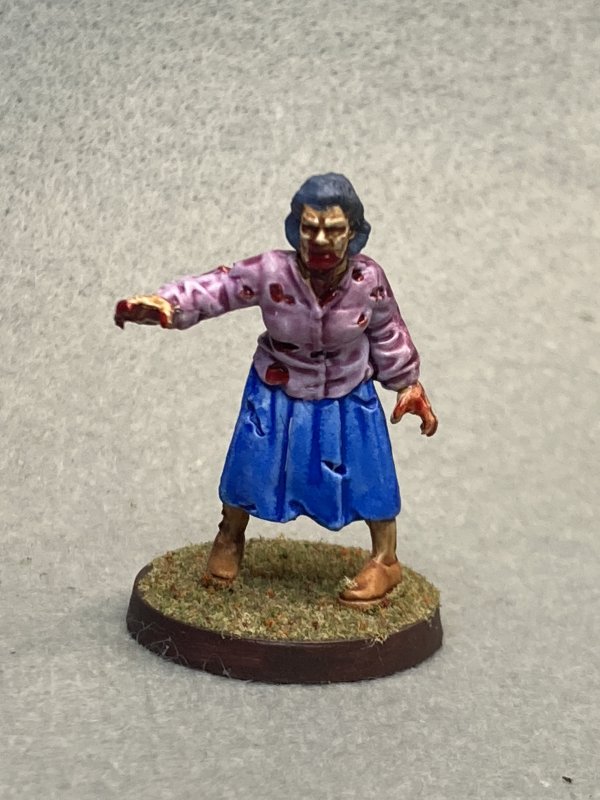
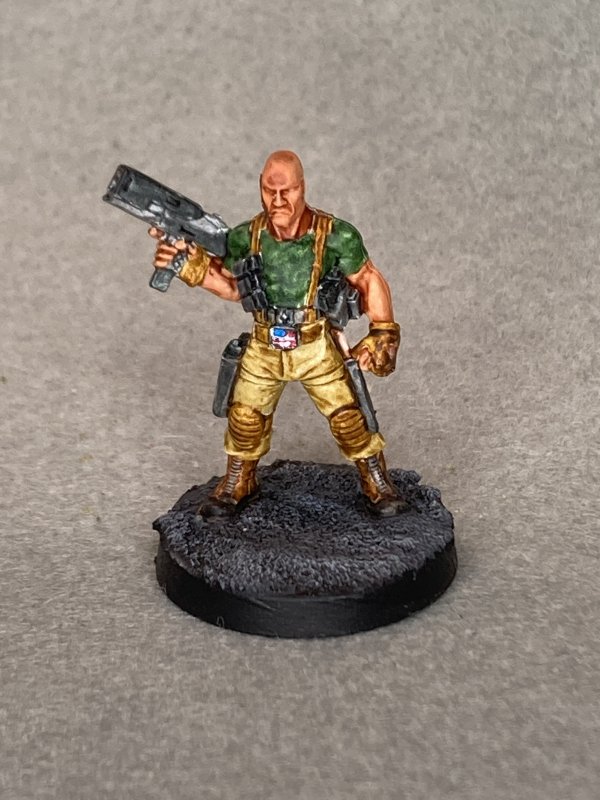
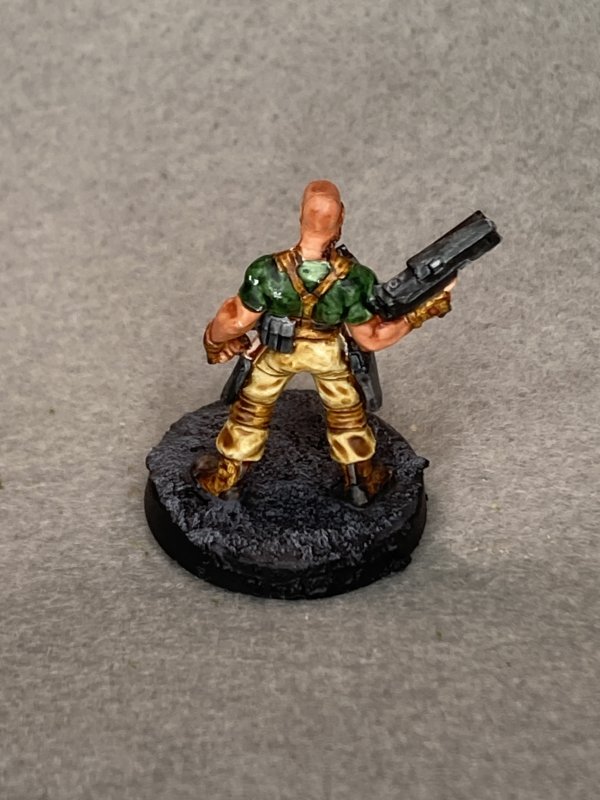
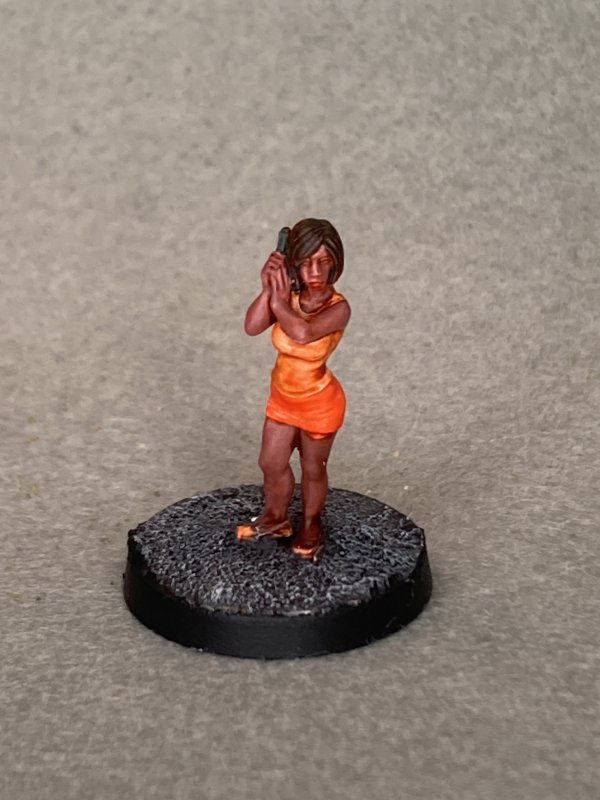
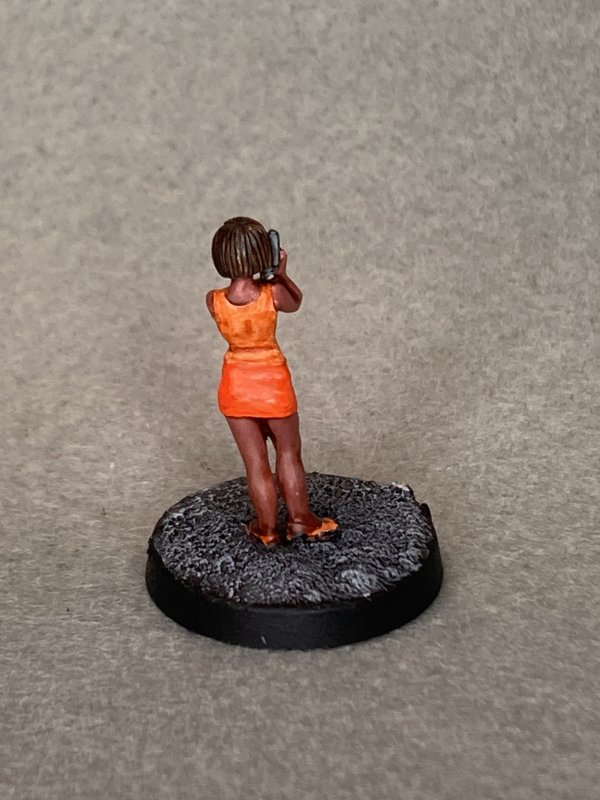
Continuing my admittedly slow progress into finishing out the Walking Dead minis, I worked on another batch of duplicates from before. Boosters of Tyrese and Chris & Julie. The only real item of note here was that I used the new Army Painter 2.0 Speedpaint set, save for bases and what ended up as red-beanies.
Since I'd painted these figures before, it really was just a test of the new paint. I got the entire 90 bottle set at a decent price online and wanted to go ahead and use them to convince myself I hadn't wasted money. Luckily, I think this was the case! I liked using these. Speed paints are the equivalent of Citadel contrast paint. I like the contrast paints, but I have a problem with smearing/pooling. This happens less so with speed paints - I'm not sure how much of that is the paint and how much is me getting ever so slightly better. I'll say it's a combo, though, and just keep using the speed paint when the color I want is available.
That testing of various colors is also a big part of the colorfulness of this batch - how often am I going to use orange, much less for a shirt? And in the end I think I liked the range that I picked out. While it would be a little blinding in real life, it works for picking minis out of a potentially cluttered map.
One negative from all of this is that I found my wet pallet generates some mold after a week or 2. This is the 1st time said mold has actually ended up in the paint I added to the mini. Or at least noticeably (see orange shirt zombie). I've tried multiple internet hints on preventing wet pallet mold, but none work 100% with this set up. Maybe I need to revert to not-wet when stored away pallet.
Permalink
gaming miniatures walking dead
Delve Into Out Of Production
05.09.2023
This is not one of my usual "trying out new things" painting posts. This is just sharing some pics of the last batch I did. Not every painting session has to be a dive into learning and trying to get better. It's ok to just whip something out, too.
Around March of last year, 2 things of note happened in my hobby related world. Mantic Games no longer had the license to The Walking Dead, and 4Ground was ceasing production/folding into a parent company.
Walking Dead has been my go-to for the last couple of years when I actually follow through on playing a game. I like the rules, as they allow for quick play time and can be expanded to whatever depth I want (so far). Mainly, it feels like a good base on which to build house rules for most things I would play. Being a fan of the franchise, I've also gotten almost everything for the game as it came out and enjoy painting the minis. If my spreadsheet is to be trusted, I've painted 197 minis from the game.
Mantic had a sale (last March) for what was remaining in stock for their Walking Dead game(s). I went in and ordered whatever I was missing, most of which had made their way to Mantic's 3D printed product instead of old fashioned cast-in-molds. Once everything arrived, there was a missing part here and there which the company managed to eventually replace.
With all of that said, I now have everything I'm going to get for the Walking Dead game. Unless I go to eBay for the Negan and Governor special sets, and the last time I looked those were asking for more than $100/set. Not worth the price for my circumstances. But the point this ramble is getting to is that I really should finish painting what I have for the game. I came close to having everything painted, and then a new wave of minis was published. The only other "game" I've painted is Zombicide Invader. I could double the painted-game count!
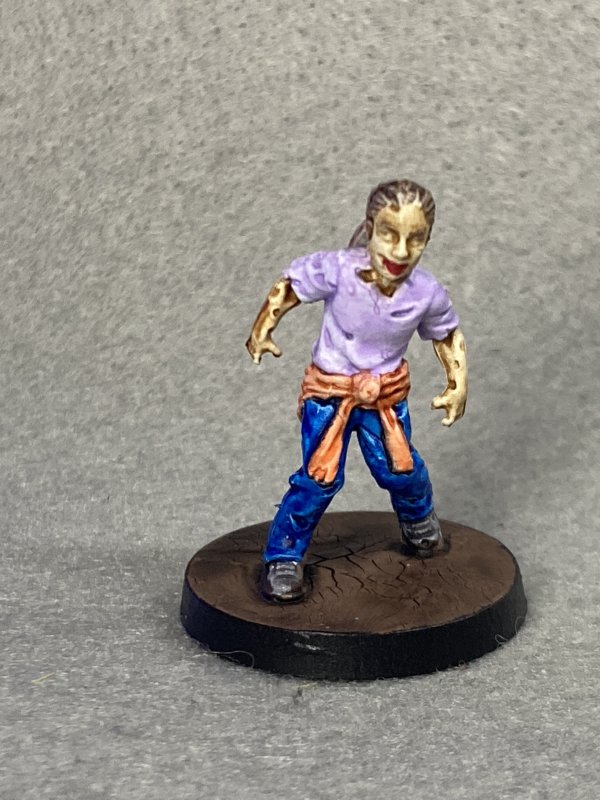
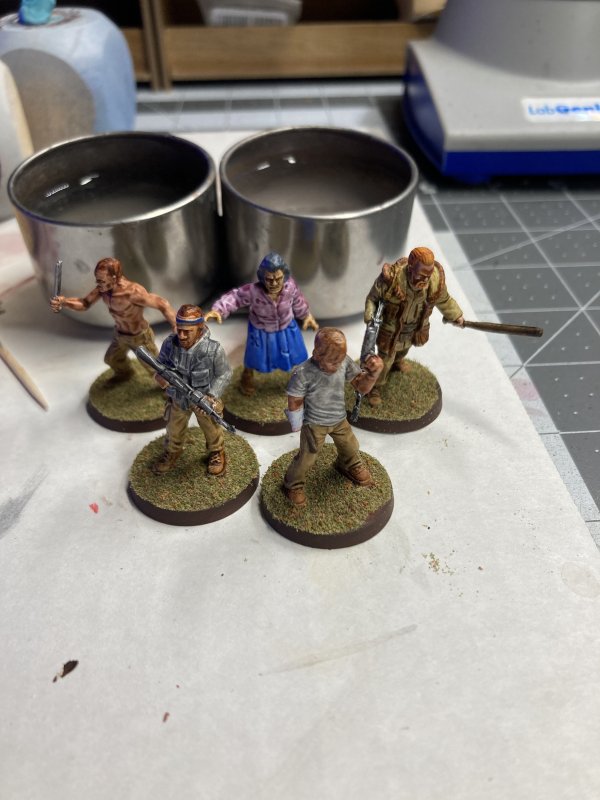
Outside of that last-March purchase, I've got duplicates of minis I've painted before. These are the last of the mold-instead-of-printed minis. I grabbed 3 packs and primed them... and didn't keep track of "who" they were. Normally I would make a note of the cards, or google the stats and match up with the pics, but since the game isn't published any longer that info requires a little more digging to share here. And in the end, it doesn't matter who these guys are supposed to be. I've already painted them once and they're in some past post. Now, they can just be "Walking Dead Folk".
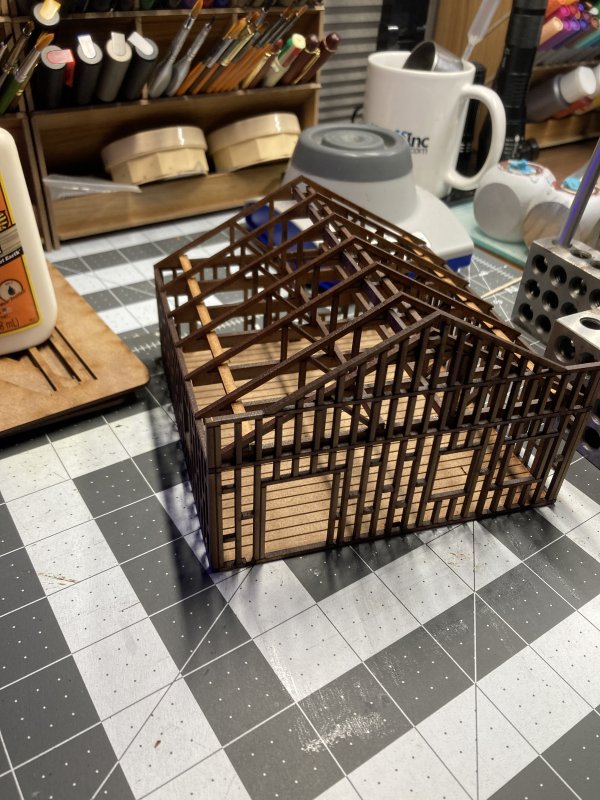
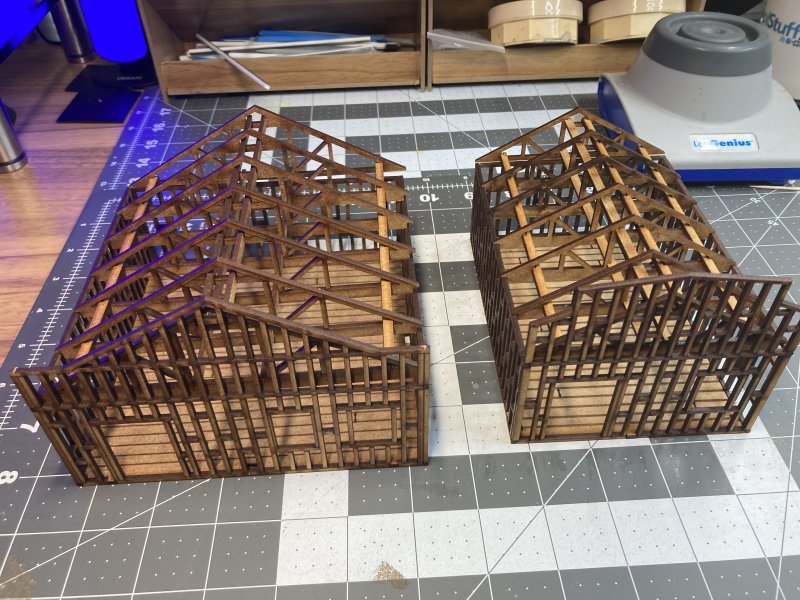
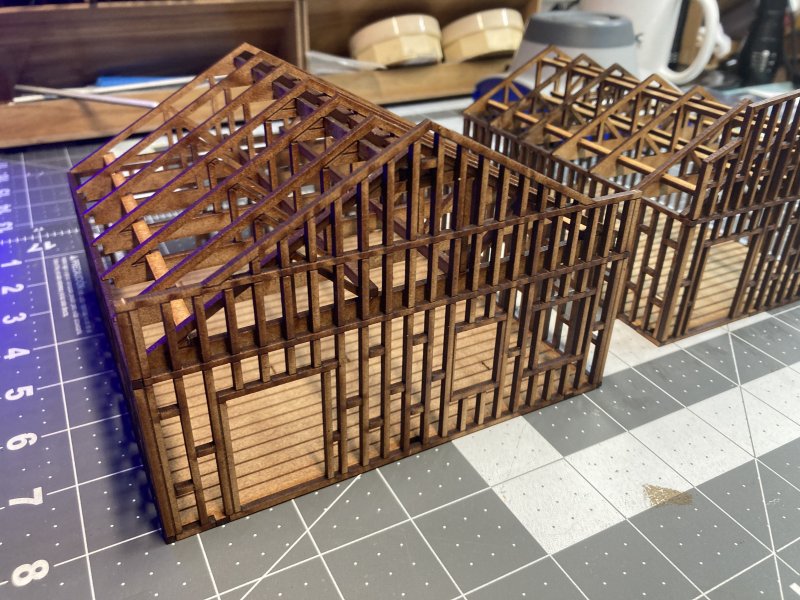
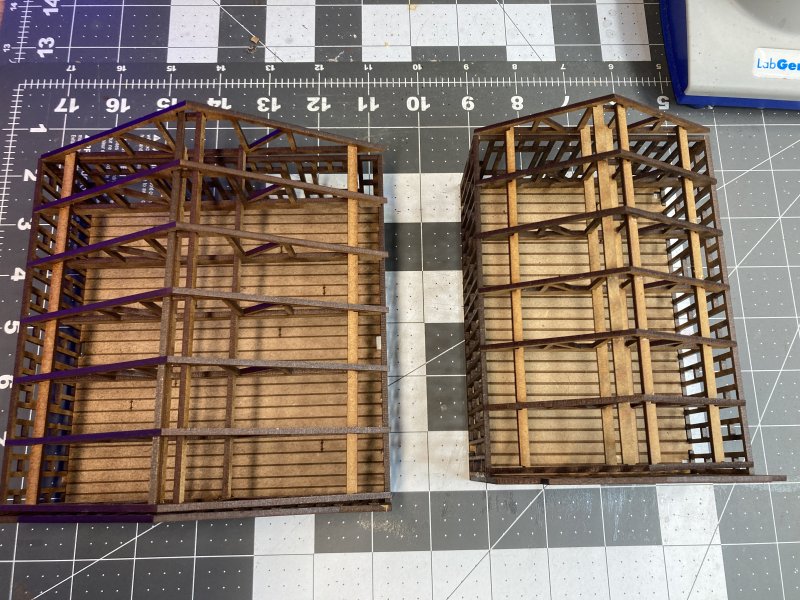
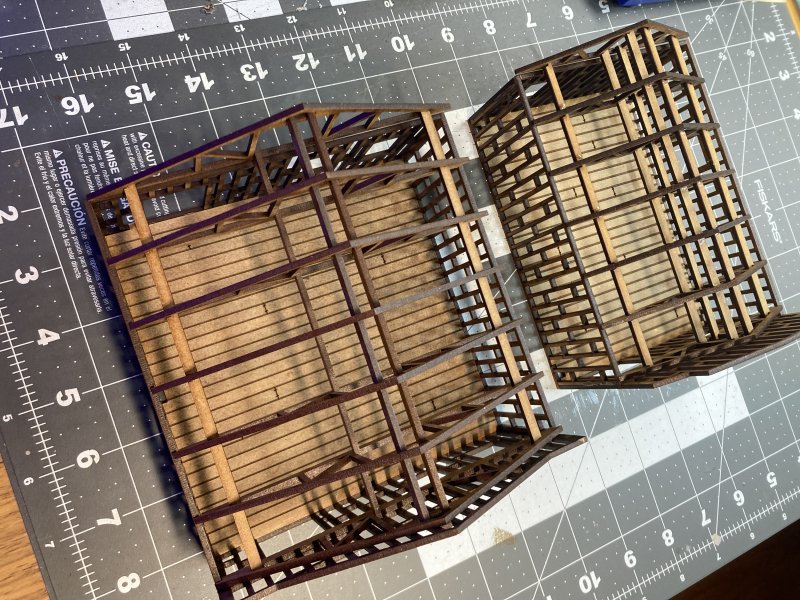
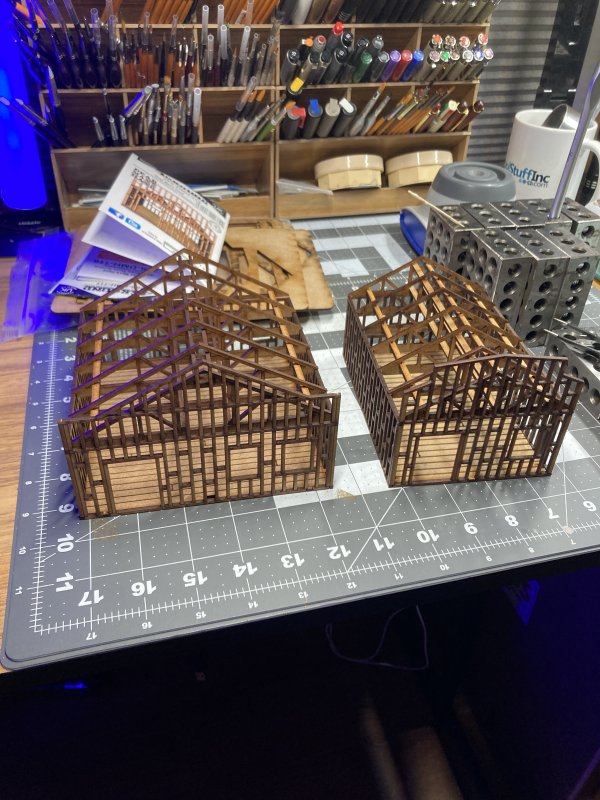
4Ground, makers of the mall I worked on for a year or 2, had been under threat for closing down for some time. Around last March, they announced a going out of business sale, also some things might still be available from their parent company (Tymeagain). This was going to be my last chance to get their product. Thanks to lots of planning, I had about everything I could think of for the mall. They had other lines/scales that always interested me. The church I have came from their Old West line. I came across some buildings under construction in that line and thought they would be interesting to fit into my minis city. Just the framework of a building could fit into most eras. I ordered 2, a large and small commercial building. Each was nice and straight forward - floor, 4 walls, and then fitting 6 triangles together for a removable roof. Looking at them afterward, they'll easily serve as under construction houses, strip mall shops, and other things of that ilk.


Permalink
4ground gaming miniatures scenery walking dead
Hassle, from Hasslefree
04.21.2023
I've been playing around with Warhammer 40K minis. Not to play 40K. Not to add them into different games. Instead, to test things out. Some might think this is an expensive approach to playing around with (learning? testing?), and I'll admit it's not cheap. The thing is, most mass produced and easily available things that I find fun or interesting to paint aren't cheap. I've got plenty of minis I could use as test fodder, but most of those I lump into "I'd really like to paint that well (some day)" and/or "It's out of print and expensive/impossible to get another if I screw this one up." So, 40K!
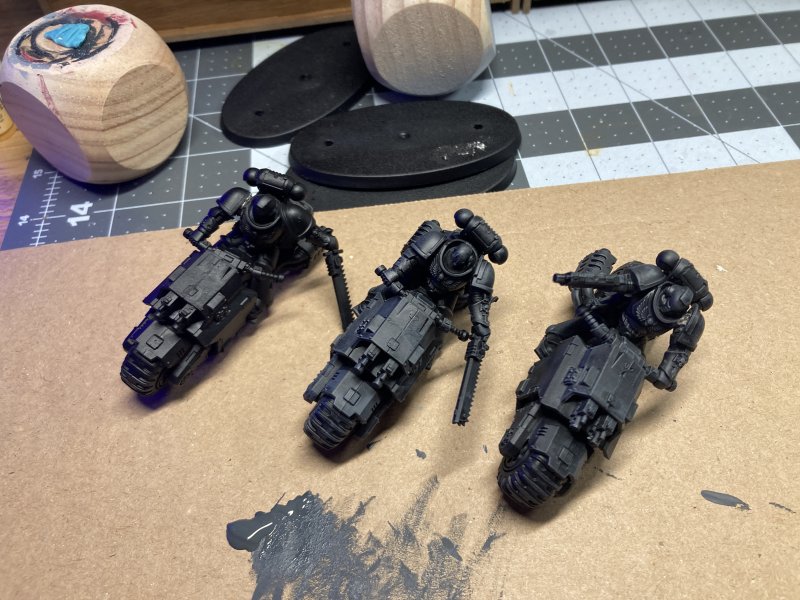
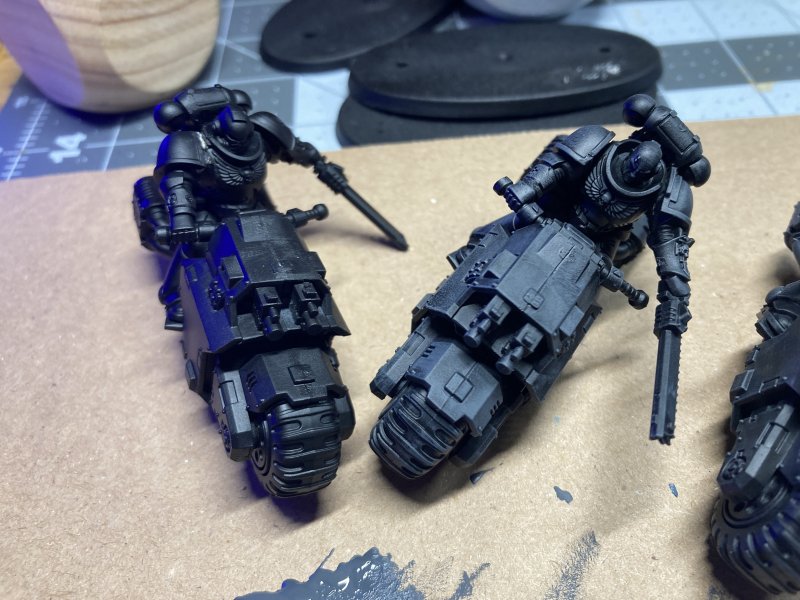
I picked up some Space Marines on Motorbikes thinking they would be interesting to practice magnetizing parts. Turns out this was a bad choice, because this kit does not have the classic Space Marine combo of Legs, Torso, 2 Arms, Head that I've grown accustomed to always seeing. This featured more new-fangled seam-hiding parts. Front of legs. Back of legs and back. Right arm and front torso. Well, not exactly that, but an odd enough combo that no magnetization was going to happen. Fair enough, there's other things I want to learn better. Black priming is something I suck at, I'll do that, and then some different things after. Overall drybrushing is a thing that's supposed to help bring out details for later painting steps.
And that's about as far as I got before I got bored. Drybrush highlighting atop black does seem to do a good job of bringing out the subtle highlights. Maybe (before) throw in some zenithal highlights. That's part of the joy of looking at these as "disposable". I can just go back and hit it with some more paint and keep trying things out.
The finished mini today (this month?) is Hassle, from Hasslefree. Somehow with a different head than what's pictured. I don't know if the pics from the site didn't include all the heads, or I picked a head from a different mini and didn't realize. In the end, it all worked out well enough. My new things to try this time were better painting pieces before assembly, so as to get into those nooks and crannies that are impossible once everything is glues together. May last attempt did ok, but once it came time to (super) glue bits together things started to go awry. Bad joint/seams, scratched off paint while fighting with glue, oh I completely forgot to paint that part. Lots of lessons learned that time, which I actually learned from as this go-around I didn't run into any mentionable problems. I felt like I've been skimping on base detail lately, so i went back to putting a little more effort into making the base more than a flat, painted stand.
Not sure what kind of method testing/learning I'll be up to next, but there's a group of Walking Dead minis being prepped for priming.
Permalink
gaming miniatures Hasslefree
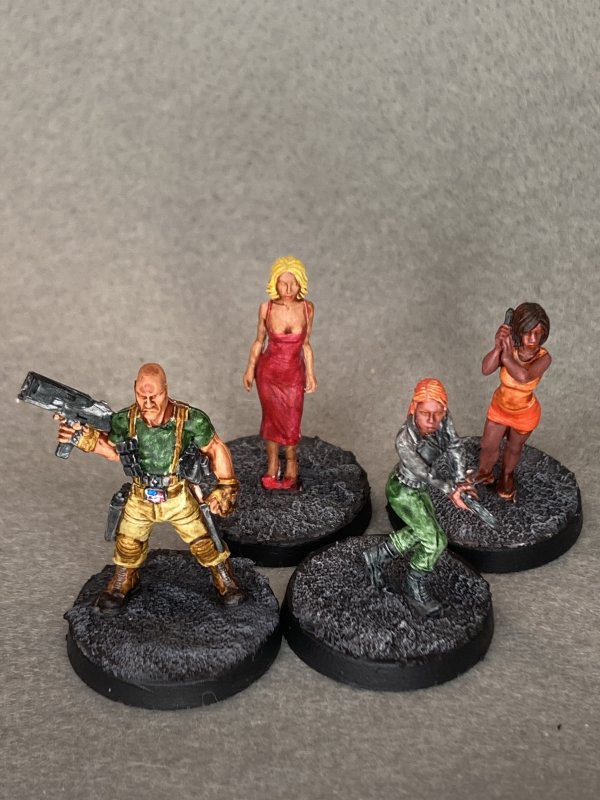
Shading Boobs and More
03.22.2023
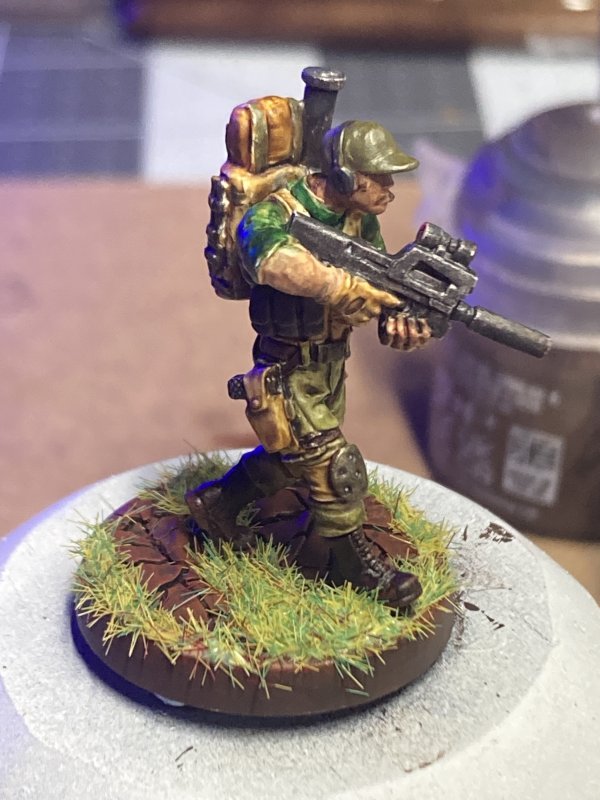
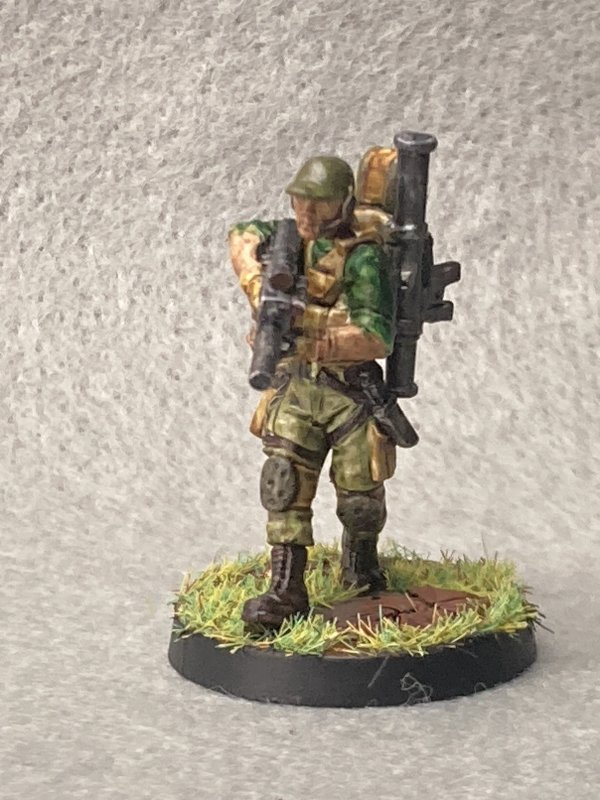
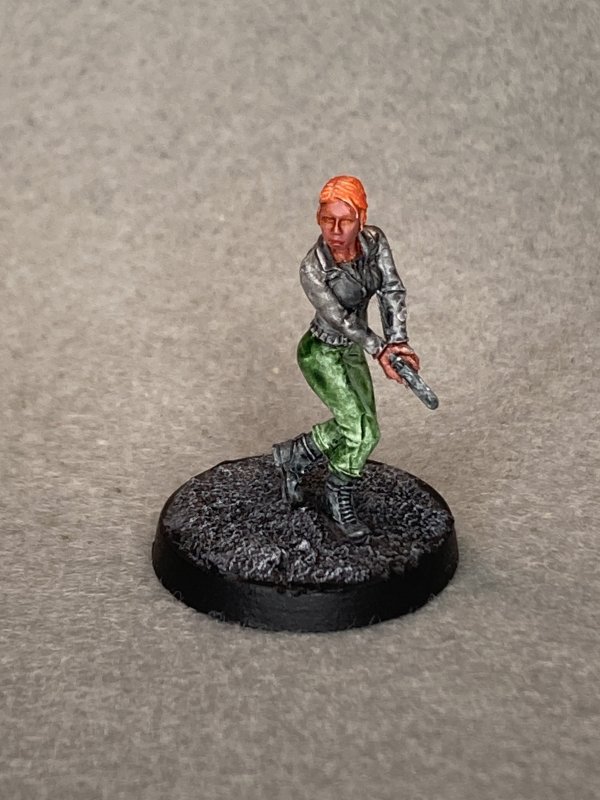
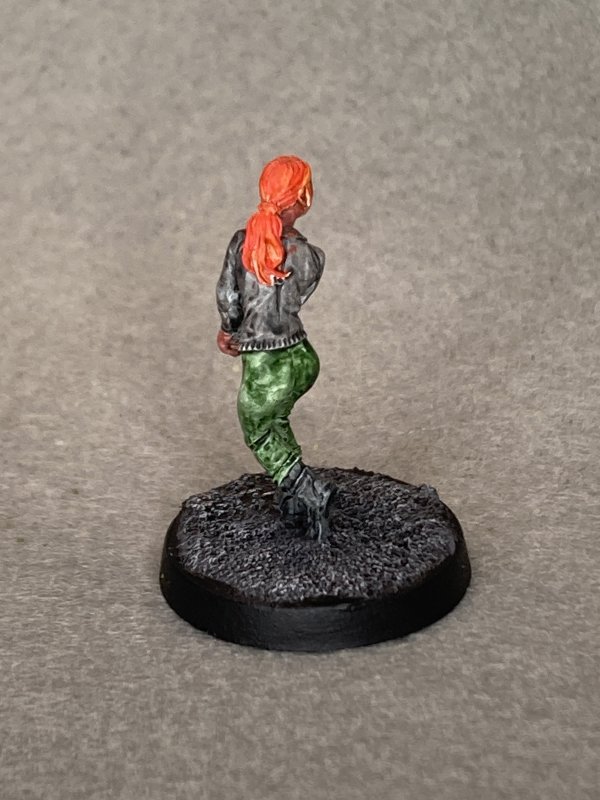
Following my posting of a small painted batch last time, I continue the trend with 4 minis I didn't take an assembly line method to, but instead focused on 1 at a time.
These are more Hasslefree minis, which I just find fun to paint. I primed these with the Not-BSG minis last time just because they were handy.
- Grant - Army looking guy!
- Taylor - Ready to peek around a corner!
- Morgan - Listening to her pistol?
- Rae - Not 6 from BSG (which I think I may have painted one of these before).
This time I continued on focusing on detail work when painting. I'm not sure which brush I picked up, but the point of the tip was working with the questionable steadiness of my hand/squint to see any details. I had particular fun with Grant since his mold has some good details with belts and add-ons. I even noticed his belt buckle was supposed to be a US flag, so I tried (with mixed results) to bring that out.
Rae/Not-BSG-6 was my chance to focus on flesh shading. Boobs are an area where trying shading techniques can be fun, although it can feel a little pervy, too. It's a self contained system of shadow and highlights. For once, I think I nailed it! The right base of light flesh color, then 2 darker layers of shade for the recesses.
On the remaining 2 female minis I tried some more non-Caucasian skin tone methods. While not as good as I would hope, it's better than I've done in the past. I'll count that progress as a win.
On the whole, I'm happy with how this batch turned out. Some of the clothes seem a little more mottled in the pics than when I just look at them. Hopefully this is a side effect of camera lighting and not how things always look.
Blog Archive
As always, correct spelling is optional in any blog entry. Keep in mind that any links more than a year old may not be active, especially the ones pointing back to Russellmania (I like to move things around!).
Tags have been added to posts back to 2005. There may be an occasional old blog that gets added to the tag list, but in reality what could be noteworthy from that far back?
Blog Tags
3D Printer (27)
4ground (32)
4ground-mall (40)
5PFH (1)
action figures/toys (10)
airbrush (7)
Aliens (1)
Amazon (12)
antenocitisworkshop (11)
Atlas O Gauge (2)
Batman Miniature Game (2)
Battletech (1)
belt sander (12)
Blood Bowl (4)
boardgames (77)
books/comics (19)
computers hate me (5)
conveyances (15)
Cyberpunk Red Zone (3)
diet (53)
dreams (7)
fallout (1)
feng shui (1)
Firefight (1)
Foundry (3)
Gale Force Nine (1)
game dev (23)
gaming miniatures (237)
gaslands (10)
gastric sleeve (34)
Green Stuff World (2)
Hasslefree (9)
Hero Forge (1)
hobbies (102)
Jailbirds Minis (2)
kevin smith (1)
Knight Models (2)
malifaux (3)
Marvel Crisis Protocol (2)
mckays (1)
models (11)
mom (32)
moon light (5)
movies/tv/dvd (60)
Necromunda (4)
ninja division (1)
Pathfinder Deepcuts (1)
pilonidal cyst (5)
plastcraft (2)
programming/interweb (41)
rambling (60)
random (367)
random maintenance (3)
Reaper Bones (3)
reaper chronoscape (32)
renovation/remodelling (25)
road trip (27)
salesforce (1)
sarissa precission (2)
scenery (19)
Star Trek (2)
Star Trek Away Missions (3)
Star Wars Legion (1)
studio miniatures (3)
ttcombat (12)
video games (51)
vs Factions(PDFs) (1)
walking dead (36)
wargame foundry (3)
work (6)
wrestling (45)
zombicide (2)
Zombicide Invader (19)
zombie mall (23)