Zombie Housing Authority
08.18.2017
Another round of quiet as I've been trying to force myself to learn Salesforce instead of painting and crafting the zombie apocalypse.
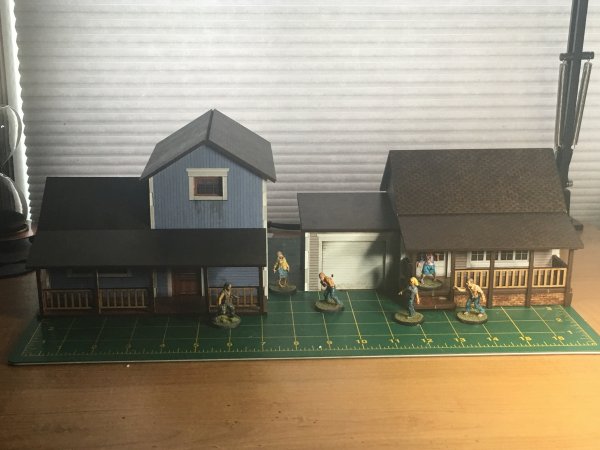
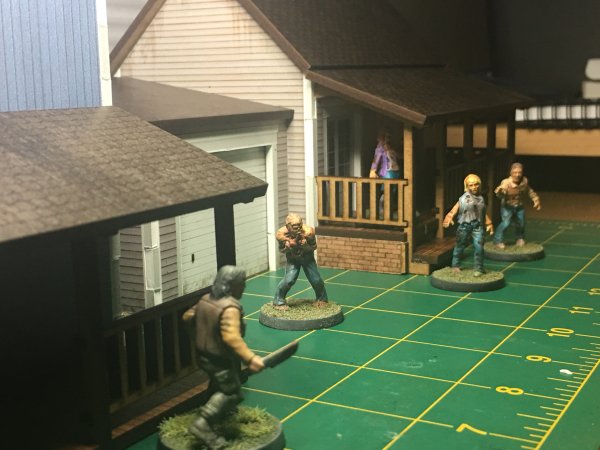
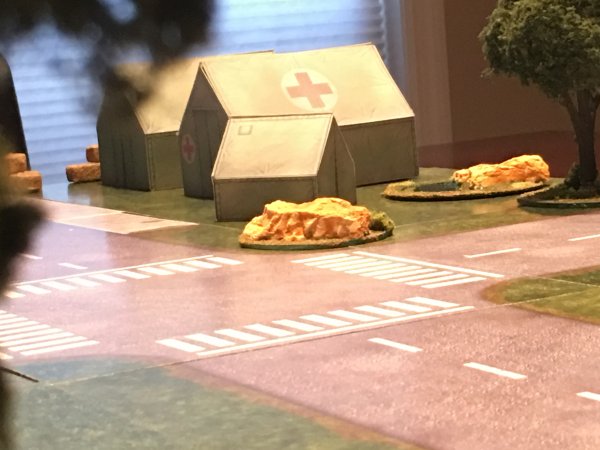
I picked up a couple of buildings from Plastcraft Games. They've just released a new line, Urban Landscape, with buildings that should fit the rural setting I'm going for. It's a line so new it's not really featured on their website. The buildings are made of a high density foam that you super glue together. The buildings only have exterior details which are printed on the foam, bit ti's all really good quality for what it is. As a bonus, the roof and porches are made of wood/HDF which ups the overall look well. Each of the houses took around 20 minutes to put together. There were no instructions (supposed to be available on the website, but they haven't made it there yet), but going by the front and back pictures on each box everything was fairly straight forward. In the end I didn't have any leftover pieces and nothing was falling off, so I'm going to say I did it right.
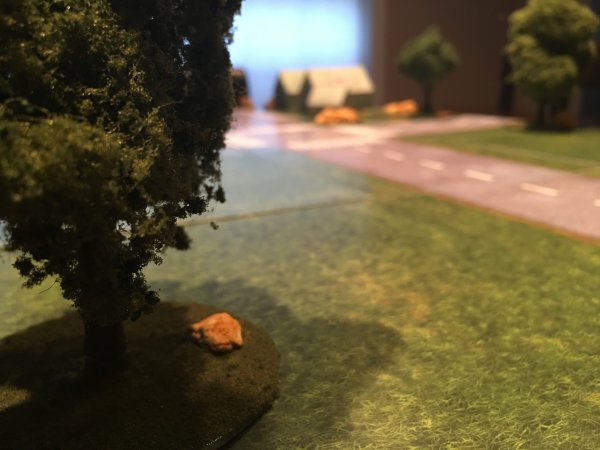
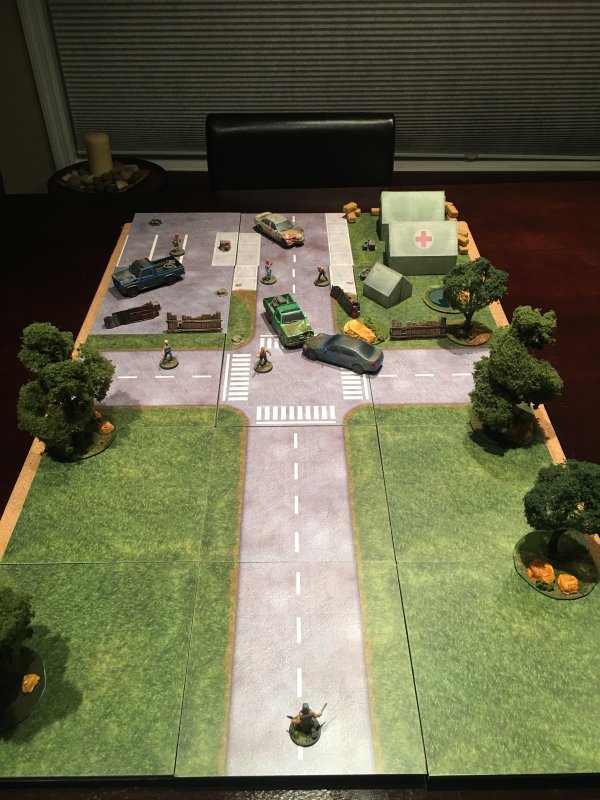
My game board is slowly evolving. I started with trees and a road. Road signs and power poles came along. Now there are some buildings to get in the way. What's next? Honestly, I don't know.
I've mentioned it before, but I have to keep an eye on getting carried away getting crap stuff. I like buying things. I have shelves full of shrinkwrapped things I enjoyed buying. There's lots of things I want to get and do with my scenic gameboard I'm building up, but I'm forcing myself to wait until whatever I'm wanting to buy is ready for me to work on, and not sit on a shelf until then, which makes it more likely to have something else I want to work on come sit on the shelf beside it later.
There are 2 companies that have buildings I want to add in, building with interiors. There's another company with a nice selection of vehicles I want to use. All 3 of these are in England, so shipping will take a little while. But I'm not going to allow myself to order all 3 at once, and I'm putting off the first (whichever it may be) until I'm actually ready to start on whatever it's going to be, even if I have to sit around for a month waiting on a boat to cross an ocean.
Besides, I've always got a couple of dozen figures to paint.
Power Poles and Signs
07.27.2017
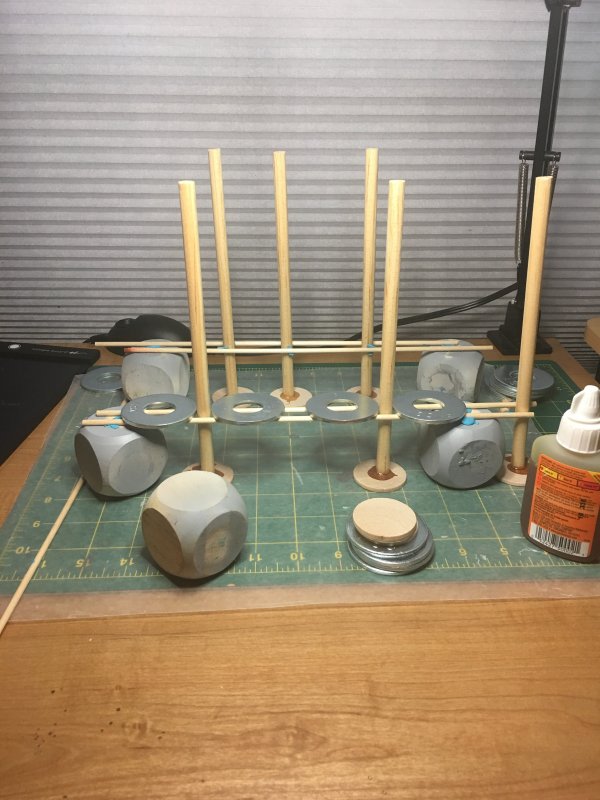
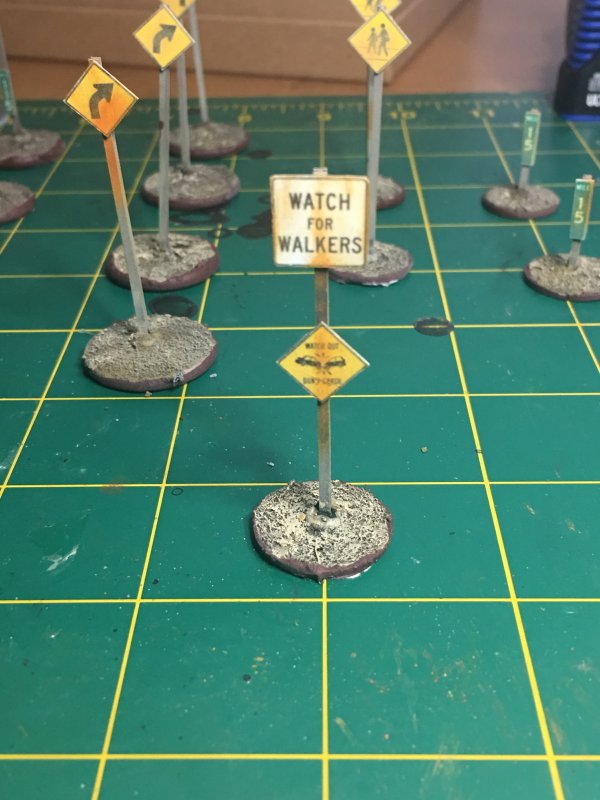
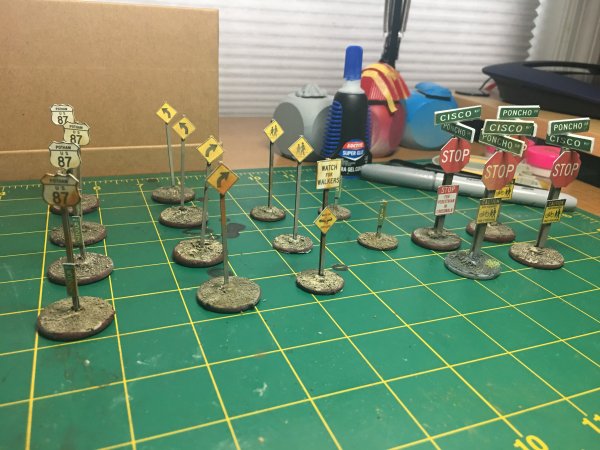
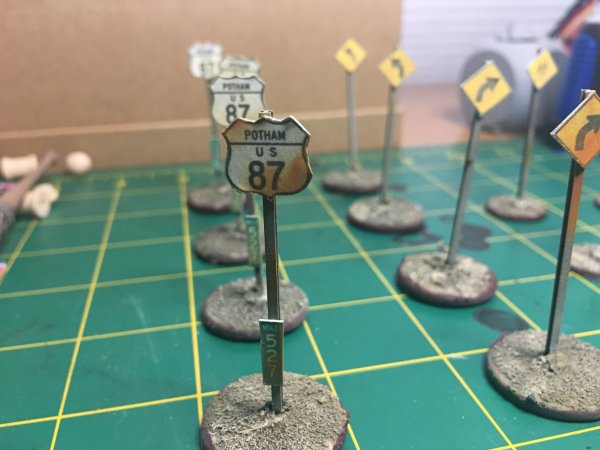
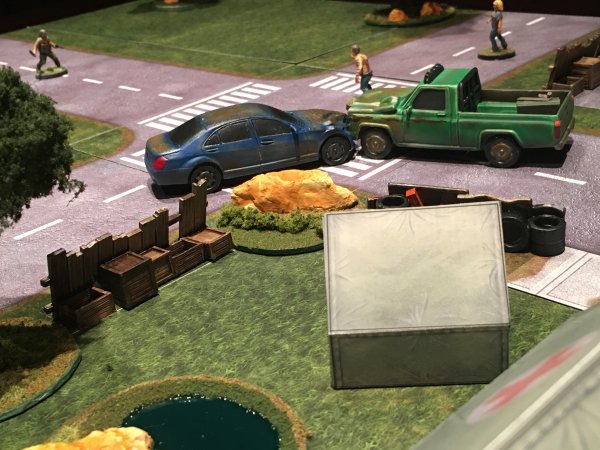
Another 6 weeks or so of silence. No games played in the interim, but I've been making more scenery. Power poles and street signs!

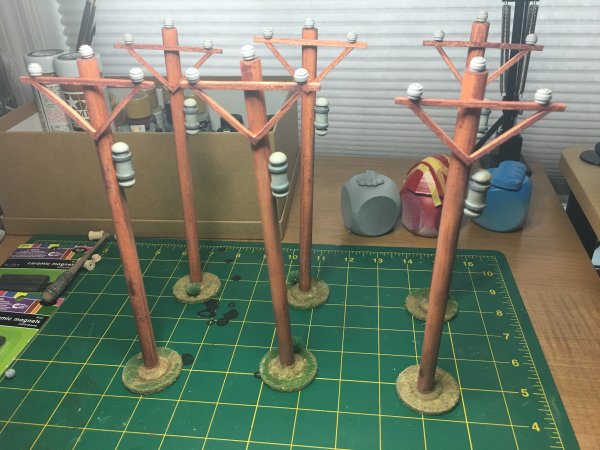
I also put together a pseudo-table topper for gaming. Cork panel covered in felt, glued to a lazy susan.
In looking at scenery other people have made, I've really enjoyed the little bits added for realism, bits that have no effect but make all more immersive. That's the route I've decided to go. Don't worry so much about huge, looming buildings for minis to run around in. I'm going to have a Curve Ahead sign that actually shows the right direction for the curve.
Maybe I'll get a huge, looming building later.
Game Time - Finally Walking Dead
06.18.2017
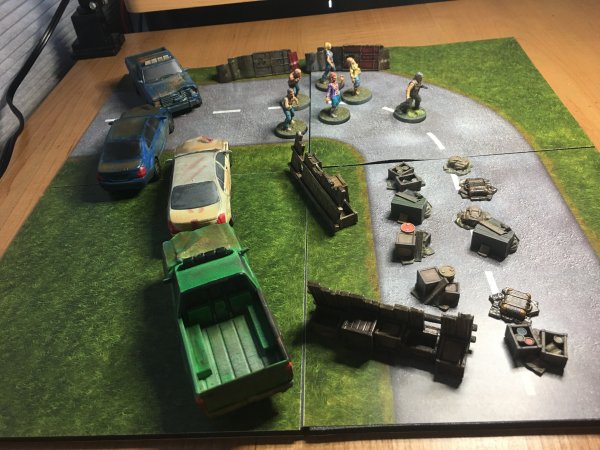
It's been about 6 weeks since I mentioned I'd started painting the minis and scenery for the Walking Dead game, and I probably started working on it a month before I mentioned it. For once I had a goal of "paint X amount of stuff and then play the game." I like painting and prepping more than playing most games, so actually having a goal of playing a game was somewhat novel. This past week, I reached Point X and played the introductory game/mission of Walking Dead All Out War.
I promptly lost. But it was fun to watch me lose. I played a 2nd game with a larger area and managed to survive, just to make me feel better.

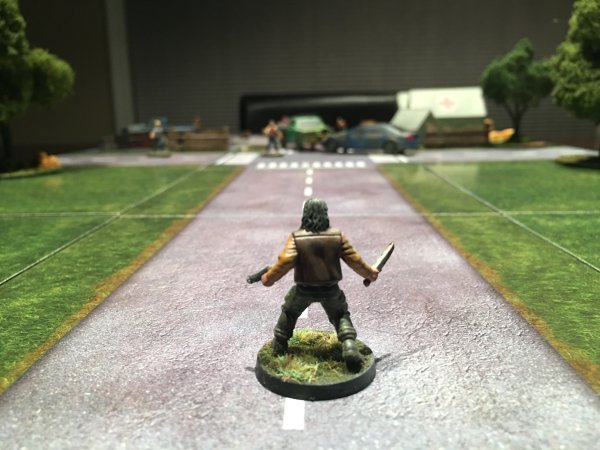

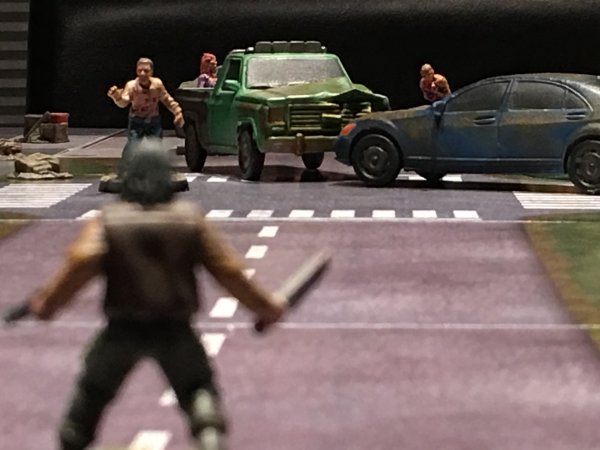

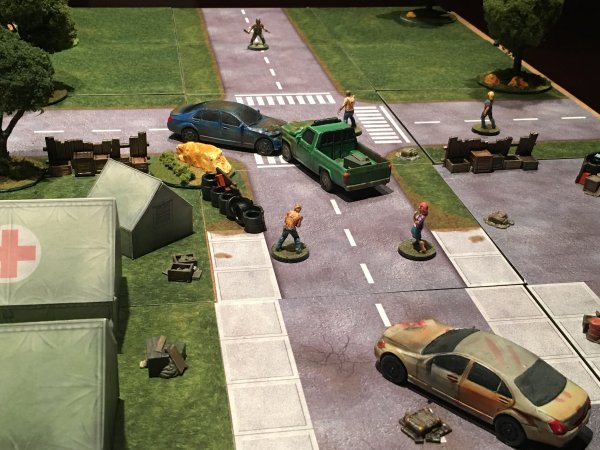
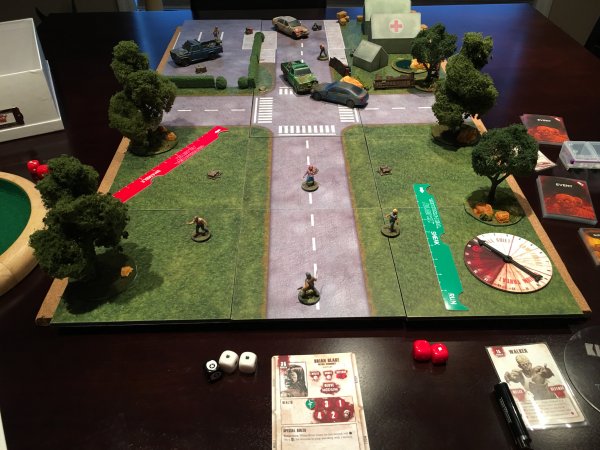
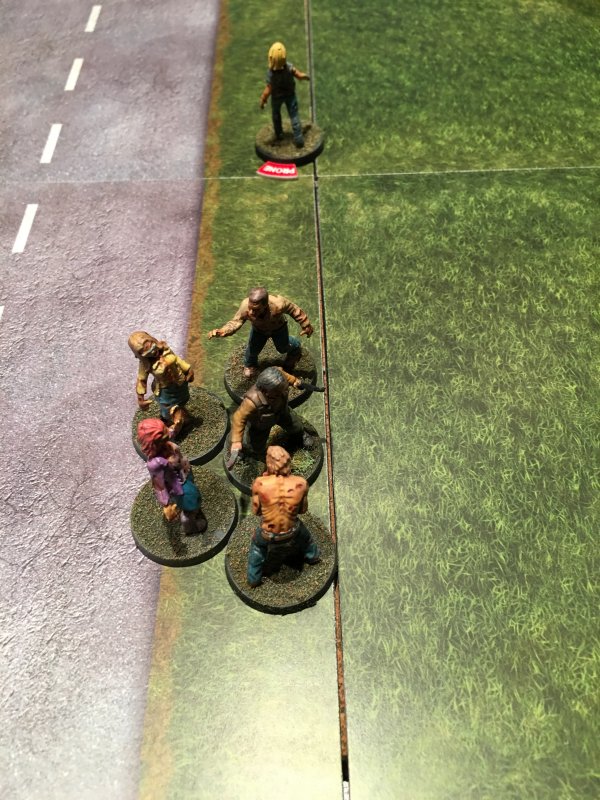

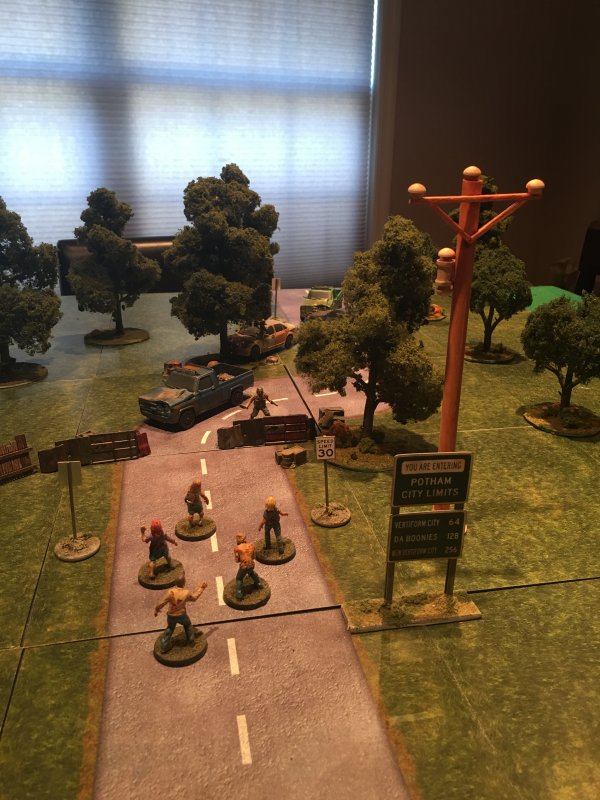
The 2 games I played used 10" and 15" square areas with no obstacles. I set up a lot more than that just because I wanted to see how everything I'd been working on looked. It looked pretty cool. As a bonus, I ended up enjoying the game as it was quick to setup and play through, with solo rules that aren't too hard to remember (especially with a quick reference sheet handy) while still frustrating enough to be a challenge.
Having a defined play area seems to be what controls the difficulty in this game - you can only run away so far.
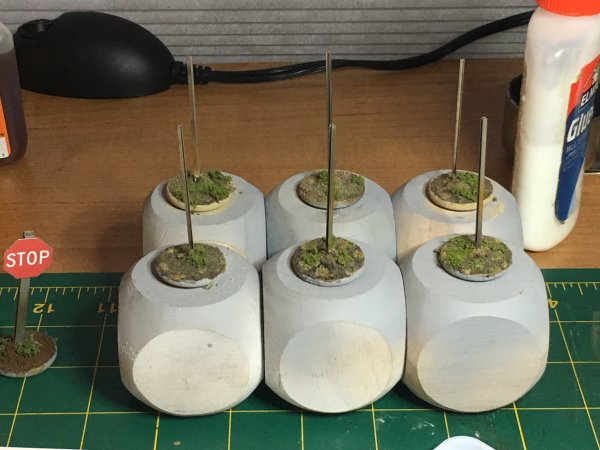
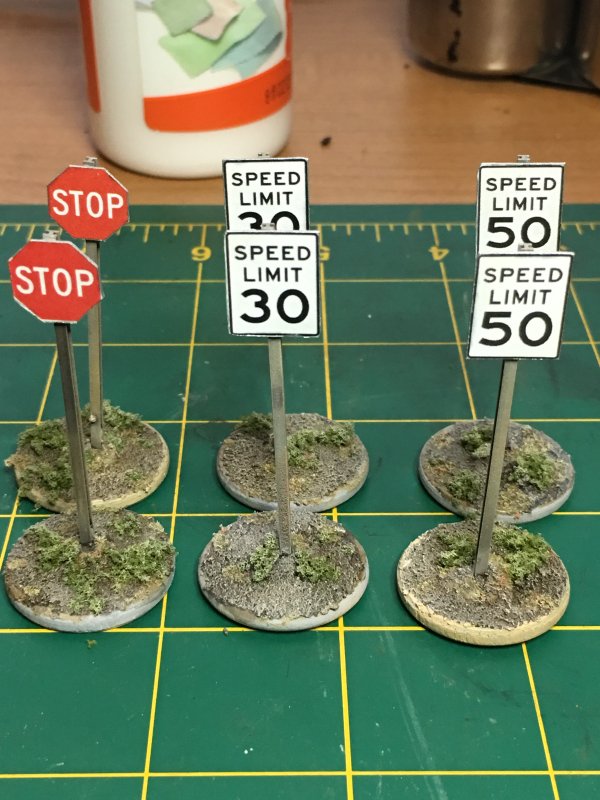
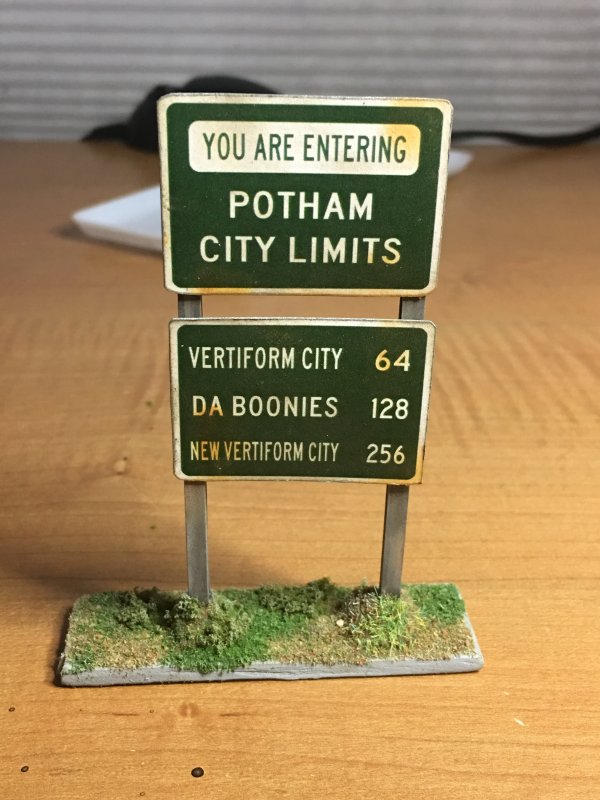
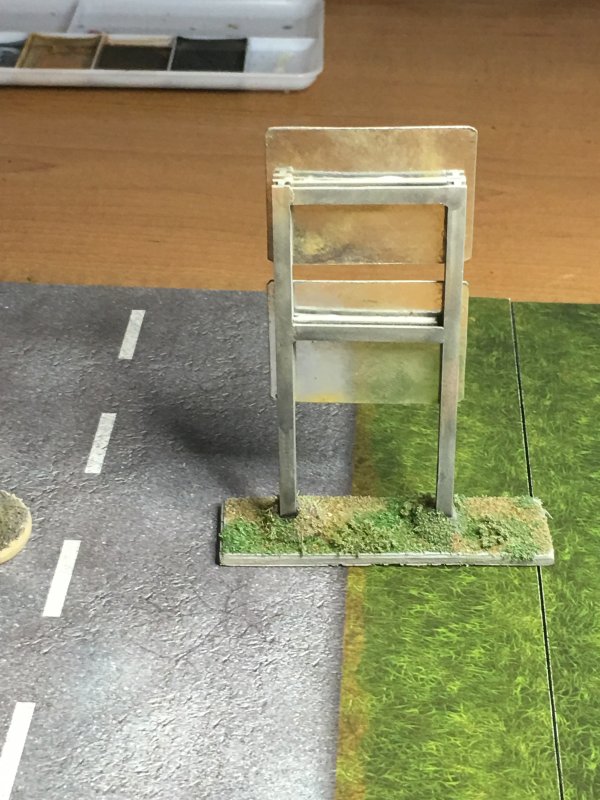
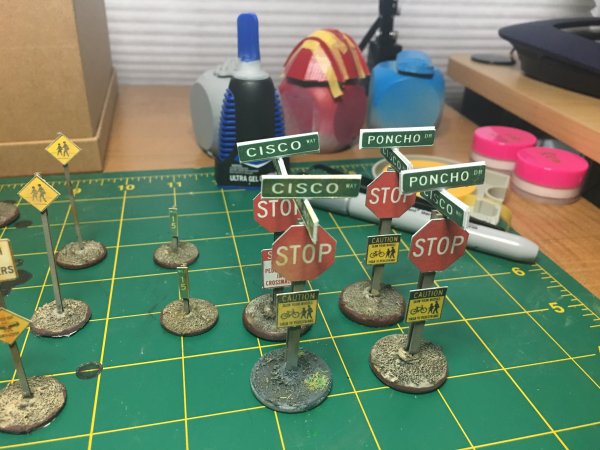
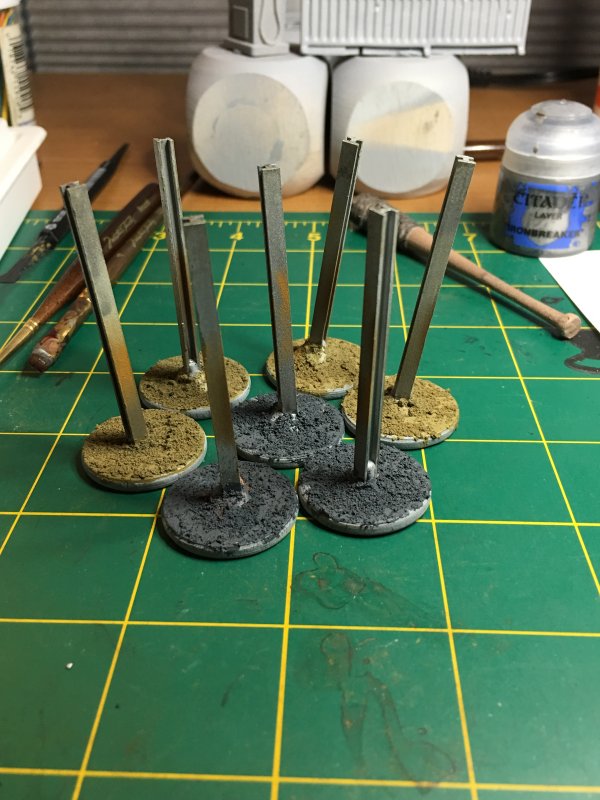
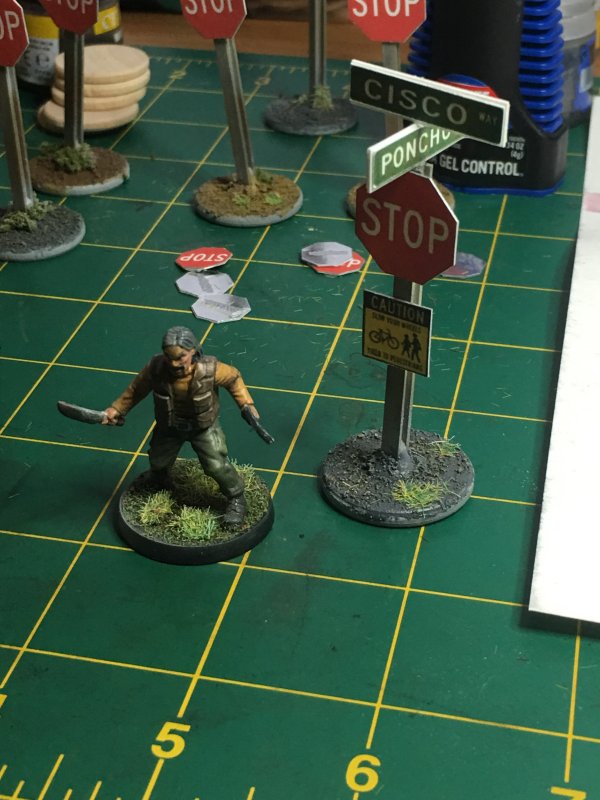
The first thing I noticed when I set up my (unused) play area was that my intersection really needed some stop signs of some point. I'd planned on making some later on, and thanks to a YouTube video I even had a route to take, but the lack of signs in the middle of the board bothered me enough that it became the first thing I messed around with after playing.
Originally I was just going to put a stop sign with cardstock printed street signs glued on the post, but that would obstruct part of the signage. There were also a couple of failed attempts at merging/crossingt the signs, but the cardstock wasn't stiff enough and ended up being too wavy. Thanks to a helpful suggestion from Daniel at work, I ended up gluing the paper signs to 0.25" x .06" styrene strips, which I attached to the stop sign post (a styrene H-beam) successfully with some thick/gel superglue. With everything I've worked on lately, this turned out to be what struck me as the coolest.
Next up is 2 more barricade walls from the scenery pack that I overlooked, and my first attempt at putting together an HDF building. This is my practice building from a long-ago Black Friday sale before I get to the really good 4Ground buidlings!
Rusty Cars Done, About Ready To Play
06.08.2017
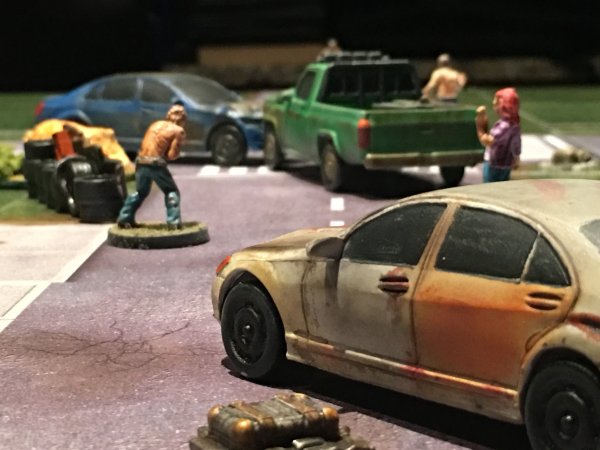
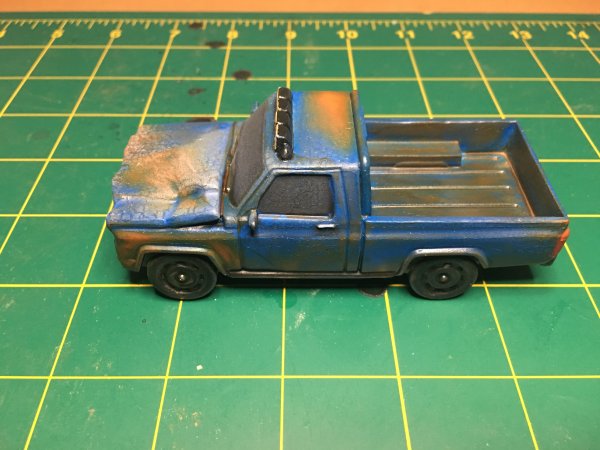
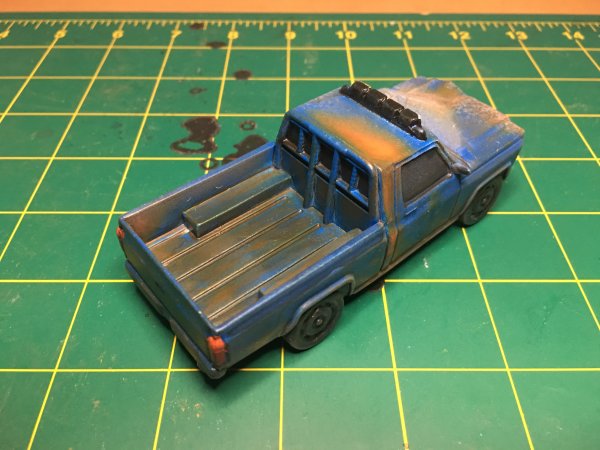
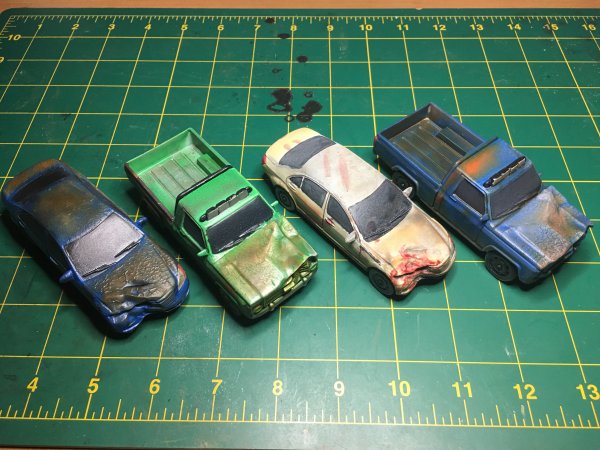
Ah, the final batch of scenery before reaching the point I'm committed to finally playing my first game of Walking Dead All Out War (A Prelude To Woodbury). 4 vehicles was all that was in this last batch. I primed and put a base coat of spray on them weeks ago. That was my first mistake. The spray color I used was little cans of Krylon from Hobby Lobby a few years ago. They needed more shaking. And the paint was shiny. Shiny paint doesn't like having water based paint added on top, or so it seems. As such, I fell to my stand by - weathering pigment to cover up painting mistakes.
Boy did I have a lot of pigment to use. The Facebook group I look at for painting inspiration for pieces of this game use a lot of weathering and rust effects on pieces. They like to "dirty things up". I hadn't really planned on over-rusting the vehicles, but it seemed that would be the route I needed to take to cover up the low-grade mediocre spray job I'd done on the vehicles.
I've got 12 types of Tamiya pigment, with 2 of them labeled as variations of "rust". The best thing to apply pigment with is disposable eyeshadow applicators. I don't know what YouTube video I saw this on, but a pack of 24 from Target is $2. Or a pack of 50 from China via Amazon is also 2 dollars, but takes a month to get here. Either way, I smudged pigment on the applicator, swirled it on the cars, and tried to follow a weathering pattern that made sense. I didn't stick to that plan as I had a lot of crap to cover up.
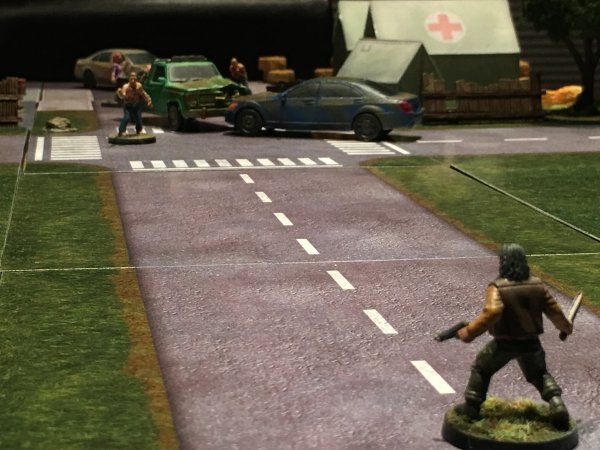
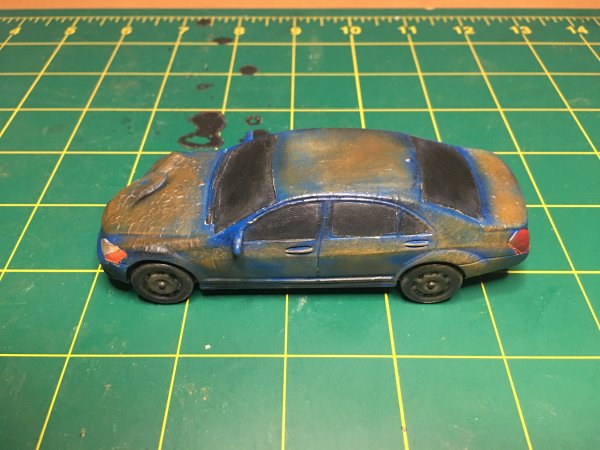
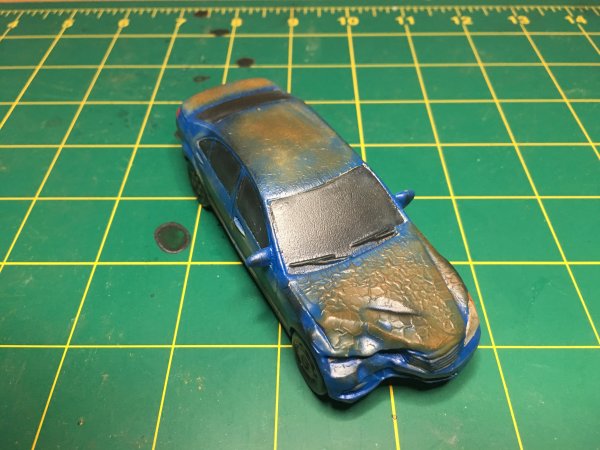
My favorite car while doing this ended up being the car I left at primer white. I wanted to play with the Citadel technical blood paint. I'd screwed up using this on zombies a while back. Screwed up so bad I never posted any results after I glued the stupid zombies together. This time I knew to use it more sparingly, and if I screwed up I could just paint over it since I had only applied primer. I decided to try and tell a story with blood splatter - you can thank me reading the first of the Dexter book series for "blood splatter tells a story"
>Dexter book series for "blood splatter tells a story". I bloodied up the crumpled front section of the car. Somebody(s) got smashed! On he passenger side, a blob and downward streak looks like a bloodied hand lost a grip while the car was moving. A few bloodied streaks across the top of the car meant somebody/thing made their way across, whether or not that wanted.
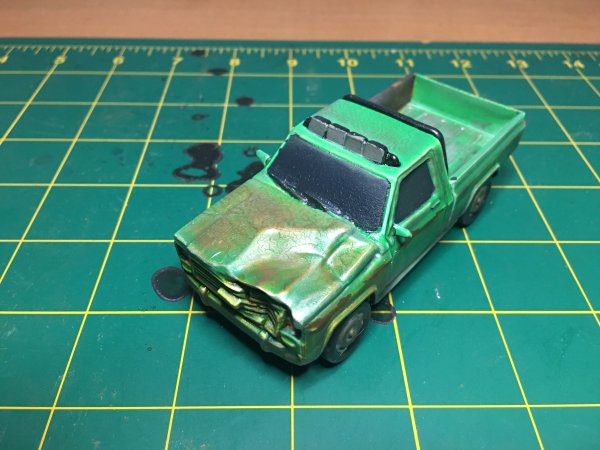
The blood effect for the car was fun and turned out well. I decided to try and stick to weathering it, but instead of rust go for a car that had just been sitting out, gathering dirt and dust. Along the way, my color combination made it look like there may have been a small fire under the hood. But an interesting fire!
Once rust, dirt, and mud was liberally applied everywhere, I went to seal it all and could call it done. Instead I sprayed sealant and screwed everything up. Either I didn't shake the freshly opened can of sealant enough, or the can was old enough that the contents had dried up some (evidently that's a thing). The spray started to dry quickly and looked "cracked". Crap.
A chance to make another discovery out of a mistake! Dammit. Rusted metal flakes off and has texture - maybe I could add more pigment and make everything look rustier? I gave it a shot. In the end, it looks ok - a combination of extra rusty and crackled paint from sitting wrecks. Nothing I can think of better to do with it all, so I added a final WELL SHOOK spray of sealant and said I was finished with everything I needed to finally play a game.


I took the last 2 pics for the Facebook group, explaining how I paint slow but made it my goal to paint the base set and scenery booster, and once that was complete I would play my first game. I got a couple of compliments on my painting skills and the ground/map tiles I'd made. It's a nice little group that's very supportive, unlike the 90% of the internet that is negative about anything that comes along.
Walking Dead Objective Makers
06.03.2017
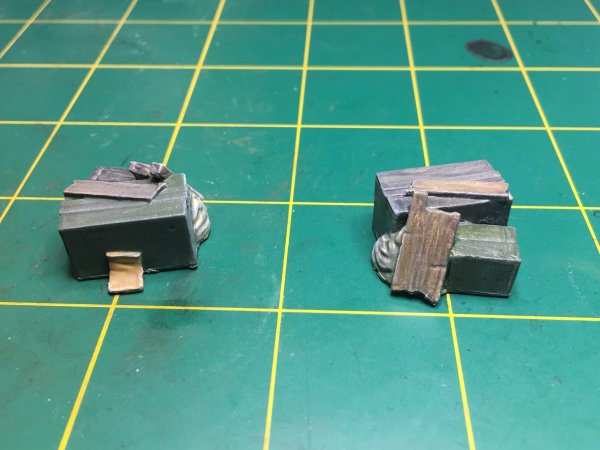
Substantial progress in less time that predicted! I'm not sure why I got finished with this batch faster than the last - maybe because I knew it wasn't going to go perfect and decided early on to just let weathering effects take care of most of the details. That'll be either my reason or excuse, whichever is best suited.
This batch of Walking Dead game goodies was made up of objective markers. Barrels, crates, bags. There were 2 of each mold, so I tried to paint each at least a little differently. When it can to cans, I wasn't sure what to do - should I be thematic and make them cans of much needed goods, such as fruits and vegetables? Nya, just treat them like cans of paint from Lowes and slap a color on them.


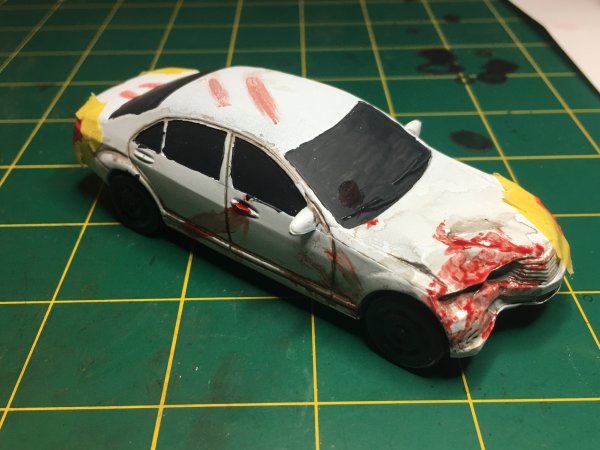
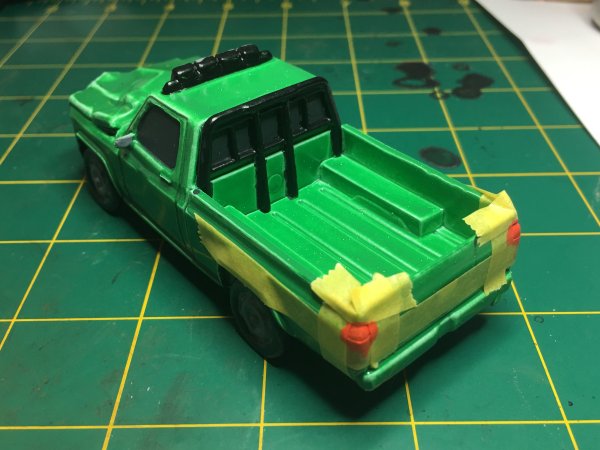
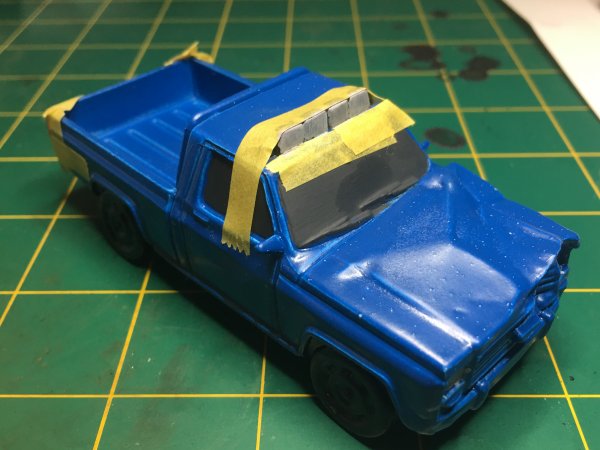
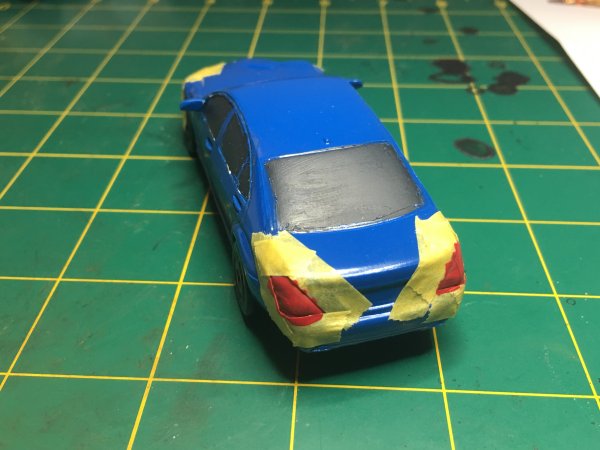

Once the markers were done, I went back and started the next round on the vehicles. This time it was applying masking tape so I could paint lights (head, turn, blink), and I tried to highlight the panel lines and door handles along the way. One of the cars I decided to leave primer white, and thought it would be fun to add some blood splatter to it. I may have gotten a little carried away, but the Citadel technical blood is just so much fun!
I'm planning on weathering the bejeezus out of these cars and trucks. Normally on the car above, I would have added the blood last, but I want to try "this car has been sitting out in the elements for a long time after the blood infused mayhem". Worst case is that I paint/weather over the blood and just apply it again later. And if I do, that's ok as it's all part of learning how all of this works.
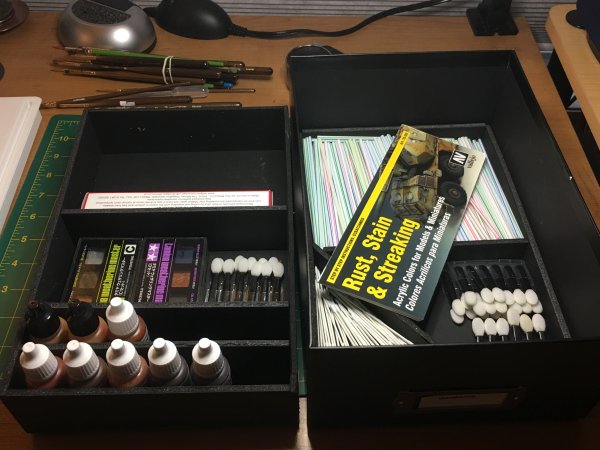
Speaking of weathering, I decided to dedicate one of my hobby boxes to weathering effects. I ended up buying a Vallejo rust, stain, & streaking set that I thought would just have some complimentary colors for weathering, but it also included a really nice instruction sheet on how to apply those effects. Add in the Tamiya weathering pigments and I should be able to weather the bejeezus out of everything. The objective markers in the pics above received lots of weathering pigment. I like that pigment.
Since I had some scrap foam board, I decided to try something that had caught my eye. Somewhere online I saw for sale laser cut MDF to hold your figures in place in the box (whatever box you were using, I guess). The MDF had holes cut for the bases to sit in. It seemed this laser cut MDF was the cost of the game for which it was holding figures. I'm all for pimping games, and MDF is cool, but expensive for what it is. I didn't want to pay $20 for something I knew I'd likely either outgrow quick or wouldn't fit well in whatever box I picked. Walking Dead bases just happen to be the size of a quarter. I picked a piece of no-longer-throwing-away foam board, stuck some quarters on, and cut them out. Lo and behold, my bases fit! I stuck another piece of foam board underneath and now the figures won't fall through if I pick the whole thing up.
Afterward, I did not forget to retrieve my quarters from the cut out pieces.
Next up is finishing up the cars and technically I'll have done everything I set out to accomplish in order to play my first game. Oh, there's plenty of other things on my list to do. Thanks to an eBay sale, I've gotten my first 4Ground building (ok, 3 buildings) to add in. But those are not required. Yet.
Blog Archive
As always, correct spelling is optional in any blog entry. Keep in mind that any links more than a year old may not be active, especially the ones pointing back to Russellmania (I like to move things around!).
Tags have been added to posts back to 2005. There may be an occasional old blog that gets added to the tag list, but in reality what could be noteworthy from that far back?
Blog Tags
3D Printer (29)
4ground (32)
4ground-mall (40)
5PFH (1)
action figures/toys (10)
airbrush (7)
Aliens (1)
Amazon (12)
antenocitisworkshop (11)
Atlas O Gauge (2)
Batman Miniature Game (2)
Battletech (1)
belt sander (12)
Blood Bowl (4)
boardgames (79)
books/comics (19)
computers hate me (5)
conveyances (15)
Cyberpunk Red Zone (4)
diet (53)
dreams (7)
fallout (1)
feng shui (1)
Firefight (1)
Foundry (3)
Gale Force Nine (1)
game dev (23)
gaming miniatures (240)
gaslands (10)
gastric sleeve (34)
Green Stuff World (2)
Hasslefree (9)
Hero Forge (1)
HeroQuest (4)
hobbies (102)
Jailbirds Minis (2)
kevin smith (1)
Knight Models (2)
malifaux (3)
Marvel Crisis Protocol (2)
mckays (1)
models (12)
mom (32)
moon light (5)
Moonbus (1)
movies/tv/dvd (60)
Necromunda (4)
ninja division (1)
Pathfinder Deepcuts (1)
pilonidal cyst (5)
plastcraft (2)
programming/interweb (42)
rambling (61)
random (367)
random maintenance (3)
Reaper Bones (3)
reaper chronoscape (32)
renovation/remodelling (25)
road trip (27)
salesforce (1)
sarissa precission (2)
scenery (19)
Star Trek (2)
Star Trek Away Missions (3)
Star Wars Legion (1)
studio miniatures (3)
ttcombat (12)
video games (51)
vs Factions(PDFs) (1)
walking dead (37)
wargame foundry (3)
work (6)
wrestling (45)
zombicide (2)
Zombicide Invader (19)
zombie mall (23)