Mall Signs Up
05.15.2020
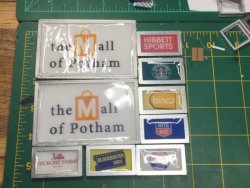
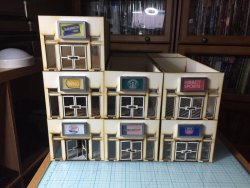
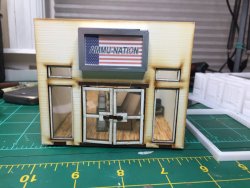
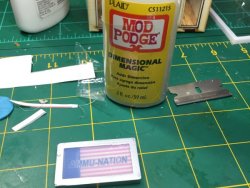
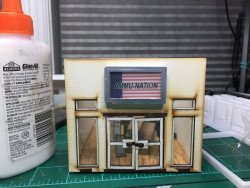
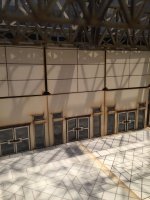
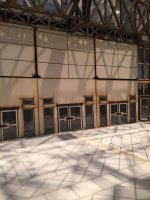
Since my store sign test went well enough, I decided to go ahead and make all the signs for the first 6 stores
that came with the mall bundle. I'm not sure id I've stated it here before, but my goal for these sign frames was to have something non-permanent so
I could both switch out store names, plus when I come up with a better idea for how to display store signs I won't have to tear everything apart since these are just held on with sticky-tack.
The store names are mixture of third tier chains you might find in the dwindling days of a mall's existence, plus shops from Grand Theft Auto. For whatever reason, that just felt right.
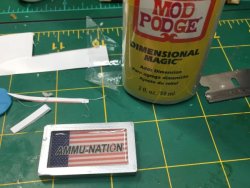
I learned that the plastic for the larger mall entrance signs was a little too porous for the Elmer's glue I was lopping on. The paper sign ended up with a bit of the wavy, "too much glue" finish. Next time I'll add the glue to the paper instead of the plastic. Since this is all printed in paper and plastic, printing up another batch of each just takes a little set up and time.
Adding in the Mod Podge Dimensional Magic, or "e-z clear resin", really helps to keep these from looking like paper in a plastic frame. I was printing the images on glossy paper, but with the Mod Podge on top I don't think I have to do that as the resin gives the glossy look.
Overall, I'd mark this as a nicely decent first pass at signs.
Permalink
4ground 4ground-mall hobbies
Mall Signs V1
05.12.2020
Over the past month I've been working on the furniture included with the 4Ground mall. There's furniture for a coffee shop, gun store, pharmacy, clothing store, sporting goods store, and a hardware store. All of this furniture is on thick, laser cut cardboard.
I don't like it.
It's finicky, and the pieces don't quite fit together like I want. Things don't seem straight enough. Or flush enough. I'm not sure which. After a month, I've got most of the coffee shop and gun store furniture together. There's also some generic shelves that (can) go in all 6 stores. There's some other shelves that may go inthe clothing store, I'm not sure.
One of my nit-picks is the pieces aren't grouped per store, but in a way to maximize used space when the laser cuts. That's fine, I understand the economics in that. My nit-pick is how pieces fall off/out over time as I shuffle pieces laser cut sheets around trying to find part AE4 when it's not with AE1-3, and all the miscellaneous parts that fall away from their identifiers that I'll have to try and match up later.
Waiting for glue to try between pieces on a 14 piece sales counter takes some waiting time, too.
While making seemingly random furniture, I've moved forward on my test for store signs. My goal was to have non-permanent signs so that I could switch out store names based on my whimsy of the moment. To work well, plus add to the cool factor, I decided to model and 3D print some kind of frame I could stick the store sign in. My first endeavor into printable 3d modelling! In preparation, I'd picked up a few modelling lessons on Udemy during a good sale and had worked my way through about half of them when I had an idea of what to put together in Fusion360. It took a handful of false starts, but I finally had a 2-piece model that should work for what I needed. I then went about fiddling with the damn printer bed leveling off and on for 2 weeks. Interesting thing I learned about my 3d printer in the garage - don't print if it's under 60 degrees. Things don't turn out well. My glass bed is ever so slightly warped up in the middle. I'm not sure if heating the bed makes this better or worse over the time of a multi-hour print, or if it makes any difference at all. As it is, I try to keep most of the printable area as close to the middle as I can, and so far that's been working.
After I printed my sign frame, I went into Paint Shop Pro and made some testing signs for size and resolution. It seems that no matter what resolution I set my images (300DPI) or printer (600DPI) I always get pixelation. Maybe it's the graphics program from 2004? Anyway, I printed/cut/glued and saw that the sign looked about right on the store front.
This was a test sign, so it was ok to mess around with - I didn't bother cleaning up the edges, as part of the test was "will just using chrome spray paint without priming work?" (yes!) One of the things I wanted to try out was to use Mod Podge Dimensional Magic to give the feeling of a glass insert on the sign. This stuff was mentioned in a Facebook post for a gaming group where they were putting this on their cardboard tokens. It helped protect the top (images get scratched sometimes) plus gave some depth to the flat cardboard.
Turns out it worked pretty good. The Mod Podge makes for a decent glass substitute, plus it helps cover up some of the pixelation on the print. The other bonus I was hoping for is that it doesn't look as much like a piece of paper stuck behind some plastic.
Next will be properly trimming up the plastic - it was printed with a skirt to help with bed adhesion, but they don't snap off as clean as one would hope. Soon I'll have signs for all the stores.
And then they'll just need some freakin' furniture.
Permalink
3D Printer 4ground-mall
Last of the Foundry Minis / Monkey Time Zoom
04.15.2020
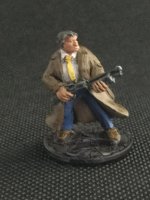
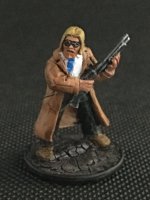
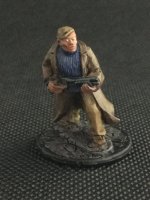
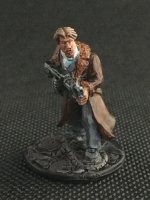
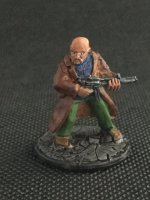
That last of the batch of 10 Foundry Hitmen (and either Professionals or Detectives) primed in December now have a coat of paint. I've complained before about the quality of these sculpts. They're most likely not as bad as I make them out to be, they just don't jibe well with my level of painting skill. My new technique (for me) to try out this time was to finally switch brushes while painting a color/area based on need. Using a detail brush to swath the back of a coat wasn't doing the detail brush any favors toward longevity. I also tried to remember to work from the inside of the mini and out, instead of hitting everywhere the color on the brush was needed. This gave some better lines between skin tones and whatever they abutted to. For once, I did the heads last - and I'm not sure if it made a difference.
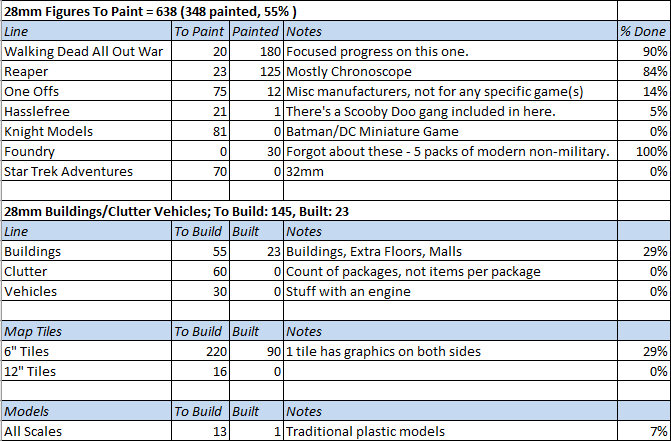
It's been long enough since the painting spreadsheet was updated it's hard to tell what's changed. Foundry, Buildings, and 6" tiles have all had progress marked since the last shown update of the spreadsheet.
Next up on the hobby table: I don't know. Mall stores need furniture. I liked having primed minis to paint for when the painting mood hit, so I may go ahead and prime another batch. There's some 3D-printing associated things I need to do (mostly mall related).
Tangentially, in today's pandemic world, I've been working from home and staying sequestered like everyone else, or at least everyone else has been encouraged. As homelife is just me, my social interactions have been a Friday trip to the chiropractor (he's not just my chiropractor, he's my buddy!), avoiding people when I go to Publix, and a couple of Zoom meetings for work. Repeat this weekly for a month. I'm ok with the day-to-day living (or maybe isolation?) as I've geared myself to live mostly this way over the past couple of years. Within that, Jer pointed out that once our pandemic is less pandemicy, I need to make sure I force myself to get out and socialize.
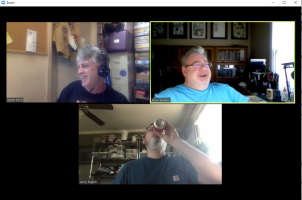
This made me think of when he, I, and Keith worked together at whichever job it was at the time (I alternate riding their coat tails, so it's hard for me to keep up with when things happen). We developed a tradition of taking a break at 3:00 to grab a Coke. Thanks to Google, 3:00 is also The Hour of the Monkey, even though it's 2 hours long. 3:00 became Monkey Time not long after, and calls for Monkey Time would have us grab change and head to the vending machine. Keith also referred to this as Jingle Time, as a past job had a coworker who would walk by and jingle the change in his pocket as the sign for taking a break and grabbing a beverage.
Last week, thanks to Zoom, the 3 of us had a virtual Monkey/Jingle time.
That's now a recurring meeting on our calendars. Even if you're stuck at home, take some time to virtually socialize with your friends.
Permalink
Foundry gaming miniatures random
Mall Is Ready For Tenants
04.12.2020
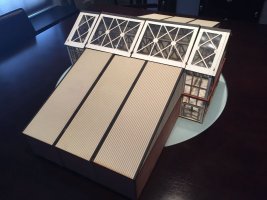
The final 5% of the outside of the mall ended up being 4%. The roof sections had a piece to add to cover seams. These were a little more straightforward than how I was interpreting the instructions. I can see Alabama humidity and the durability of Elmer's glue requiring some touch-up adhesion as time marches on.
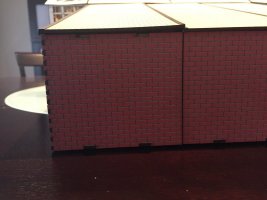
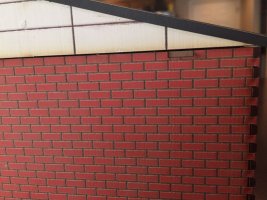
There are notches at the top/bottom of the outer brick walls. I think these come into play when adding a second story - which is part of my long term plan. There are single bricks and vent covers to place over the notches, but I'm going to wait and see how the second floor attaches before going forward on that part. I'd hate to cover up a notch that's needed to keep something above in place.
For now, I'm calling the exterior of the mall done.
What does one do with an empty mall? Stock it full of store stuff! The kit came with various shelves, counters, and sellable goods. ½ the instructions are for putting all of that together. And that's what I'm going to do. Later. Next I'm going to take a mall-break and paint some more of those minis I primed in December.
Permalink
4ground 4ground-mall
Entranced Mall
04.09.2020
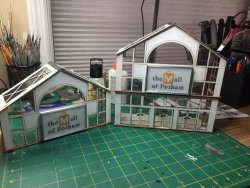
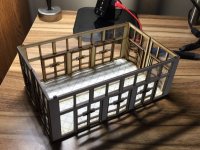
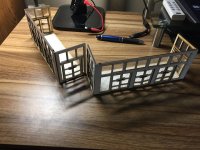
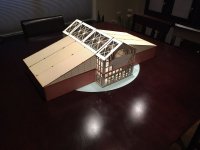
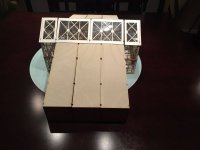
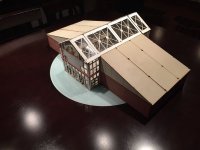
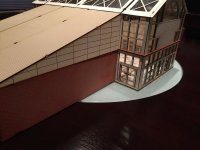
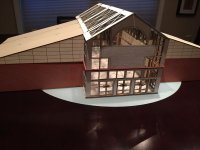
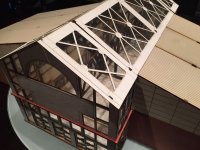
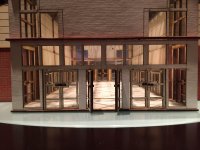
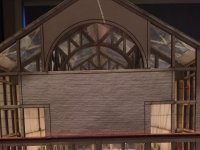
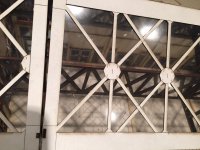
I'm not sure if it really took 2 weeks, but the mall now has entrances. I must admit, putting together the entrances was boring. I'm not really sure why, but I kept finding other things to do. Cutting 5 sheets of clear plastic into windows for roofs and doors may have been a bit part of it. Cutting clear plastic - not fun. Sandwiching little bits of that clear plastic between 2 pieces that make up a door - not too awfully bad. Repeating for 20 doors - back to not fun.
The basic (kit) mall is 95% done. There are some pieces that go on the roof sections that should cover up gaps. There's also some vents and little bits that go on the outer brick sides of the stores. At that point, I will have a little empty mall. There are still pieces in the kit to help fill the mall out - furniture and stuff for sale. Signage - there's signage to put up. That's where I'll have fun.
Now I'm going to take a little mall break. Not sure what I'll do for the next week or so. Probably paint a mini to 2. I don't think I'll be as productive as Christian, but just enough of a break to where I look forward to getting back to the next stage of the mall.
Blog Archive
As always, correct spelling is optional in any blog entry. Keep in mind that any links more than a year old may not be active, especially the ones pointing back to Russellmania (I like to move things around!).
Tags have been added to posts back to 2005. There may be an occasional old blog that gets added to the tag list, but in reality what could be noteworthy from that far back?
Blog Tags
3D Printer (29)
4ground (32)
4ground-mall (40)
5PFH (1)
action figures/toys (10)
airbrush (7)
Aliens (1)
Amazon (12)
antenocitisworkshop (11)
Atlas O Gauge (2)
Batman Miniature Game (2)
Battletech (1)
belt sander (12)
Blood Bowl (4)
boardgames (79)
books/comics (19)
computers hate me (5)
conveyances (15)
Cyberpunk Red Zone (3)
diet (53)
dreams (7)
fallout (1)
feng shui (1)
Firefight (1)
Foundry (3)
Gale Force Nine (1)
game dev (23)
gaming miniatures (239)
gaslands (10)
gastric sleeve (34)
Green Stuff World (2)
Hasslefree (9)
Hero Forge (1)
HeroQuest (4)
hobbies (102)
Jailbirds Minis (2)
kevin smith (1)
Knight Models (2)
malifaux (3)
Marvel Crisis Protocol (2)
mckays (1)
models (12)
mom (32)
moon light (5)
Moonbus (1)
movies/tv/dvd (60)
Necromunda (4)
ninja division (1)
Pathfinder Deepcuts (1)
pilonidal cyst (5)
plastcraft (2)
programming/interweb (41)
rambling (61)
random (367)
random maintenance (3)
Reaper Bones (3)
reaper chronoscape (32)
renovation/remodelling (25)
road trip (27)
salesforce (1)
sarissa precission (2)
scenery (19)
Star Trek (2)
Star Trek Away Missions (3)
Star Wars Legion (1)
studio miniatures (3)
ttcombat (12)
video games (51)
vs Factions(PDFs) (1)
walking dead (36)
wargame foundry (3)
work (6)
wrestling (45)
zombicide (2)
Zombicide Invader (19)
zombie mall (23)
