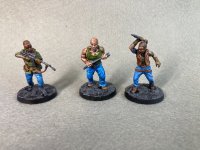
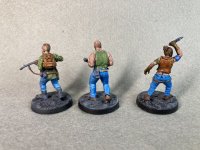
Cobra Sneaks In
11.15.2023
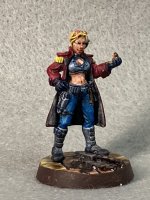
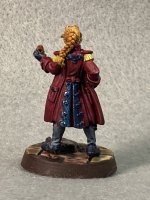
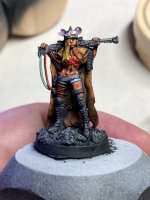
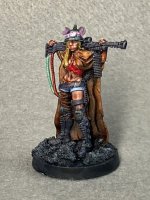
These minis were primed at the same time as the last minis I posted, and I continued my trend of just painting a couple at a time instead of everything I primed. And again, I think it works better than doing a bigger batch of painting. 2 or 3 minis at a time seems to be my sweet spot. Now if only I can remember that and not think the painting details I'm happy with when painting 2/3 will scale up when I paint 5 or 8.
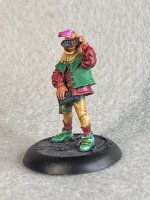
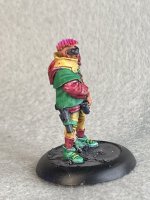
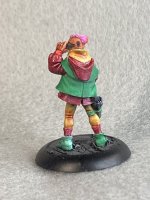
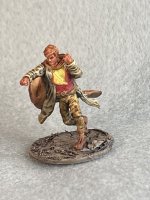
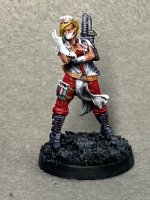
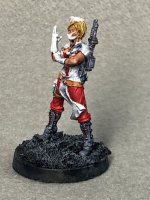
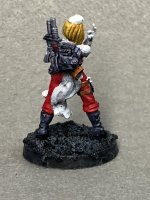
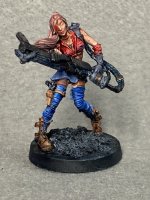
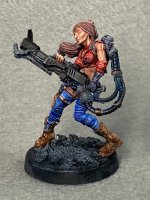
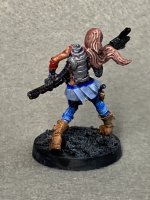
Still keeping with Reaper minis, this time we have :
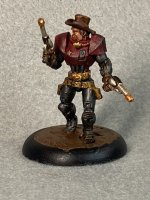
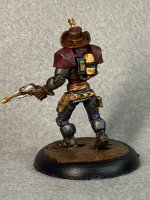
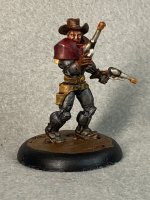
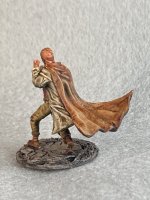
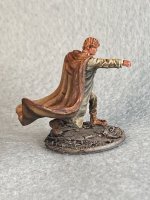
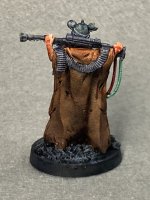
John Bishop, Space Marshal. Cyborg robot cowboy of the future past!
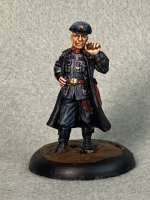
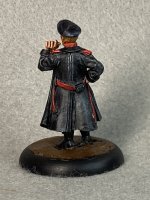
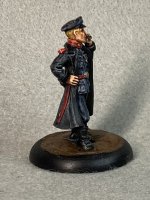
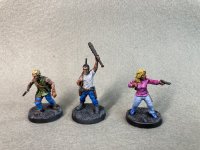
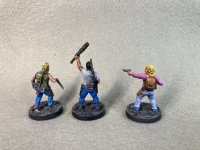
General Drake. 2nd time I've painted this one. This time, not green.
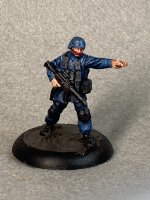
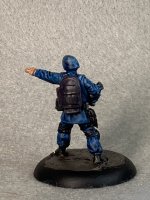
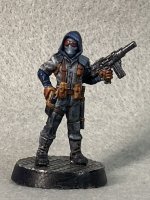
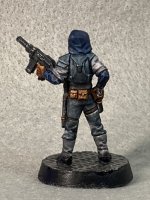
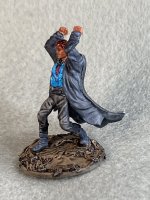
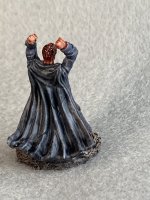
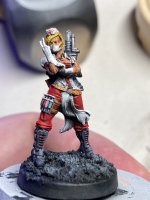
Delta Force Commando. I decided Delta Force is Cobra The Enemy.
I don't have too much behind the scene details on these as everything was pretty straight forward. I didn't have high expectations on Delta Force Commando as the sculpt seemed a little "mushy" - the left arm and head seemed to lack details. While it was sitting in the background as I painted the other 2, "Cobra Trooper" popped into my head. Yeah, it seems obvious now. A quick Google led me to use Citadel Kantor Blue for Cobra Blue. Luckily I had Kantor Blue within my 10 boxes of paint. There's not a lot of detail in the paint job - blue base, red mask, black boots, kneepads, gun, and then some greys on other bits just to break things up. I think it works, though.
Permalink
gaming miniatures reaper chronoscape
Sascha and Hunter
11.07.2023
While I primed a batch of 6 minis, I concentrated on a couple instead of trying a little bit of each one along the way. I ended up concentrating on 2 to start with, so I just stuck with staying on those 2 and going all the way through to completion. It worked out well, especially as I didn't like the bases that I started out with (that came with the minis) so I had my first in-progress base-ectomy... when I thought I was pretty much done.
The 2 minis this time were:
Sascha Dubois, Time Chaser. She chases time. And time waits for no one.
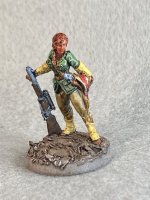
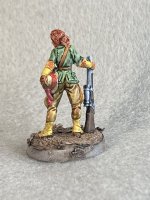
Post Apocalyptic Hunter. Poor guy doesn't even have a name.
I think I've painted each of these before. They felt familiar. Most of what I primed in the overall batch were minis I painted before, and this was to force me to use not-the-first color scheme that came to mind. That gave me an excuse to have fun, yet still try not to get into clown-gaudy. Sascha is a little more colorful that the pics shown on the Reaper website, but that's ok. I pulled out the blue gunmetal Vallejo, and like normal I went a little overboard with it. I think it works, but I should have used it a little less. Most important - she's got some of the best eyes I've done. They actually seem to be looking at her left-hand probably-a-clock.
Nameless PAH stayed muted in his colors. I was on the verge of just using grey-scale for this one, and dark blue seemed like a good alternate color to fit in. I'm not sure why he would have blue sleeves and hood, but it kind of works. Each mini got red lenses on their goggles thanks to a Citadel jewel stone something or other color. I'm so good with remembering details.
Time for a Random Assortment
10.11.2023
This time, the painting update delves back into the world of more random minis. I wanted to paint something that didn't follow a known color scheme or box art, so from the shelves of random minis I picked a D&D 2-pack and some Reaper minis that looked fun.
The D&D 2-pack was a pair of Revenant. Revenants? I have no idea what a Revenant is, but it looks like it can fit into any generic game since it's not a weaponized mini and looks to instead rely on fisticufs for combat. These minis are on the smaller size of what I normally paint - probably closer to 25mm than 28-30mm. Definitely not as petite as Infinity minis, though. For whatever reason, I decided one would be brown-themed while the other blackish-themed, while both got a splash of color with shirts that I thought were a little Wrath of Khan inspired. I used the included poker-chip bases and build up a little texture with some Tamiya Plastic Putty for something between dirt and smooth rocks. Overall this was just trying some different little things. Nothing exceptional learned or fantastic result, but nothing overtly bad, either.
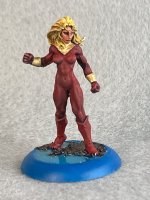
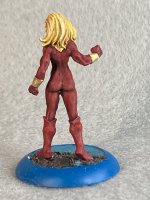
Over in the realm of Reaper minis was the second Incredible Woman I've painted. The first was about 5 years ago as I tried using greys and black to go a Batman route. This time was more Iron Man inspired. The reds weren't working for me on this one - there's actually 5 layers/shades of red, as I failed at trying to highlight body parts with different shades and then ended up just painting a coat of said shade to try to get back to something normal. To make up for it, I had fun with the base and added some water just because I like water features on a base when I can sneak it in. While this one is a little disappointing as I had higher expectations that how it ended up, I think it turned out better than the 2018 version.
The next Reaper mini was Jane Porter, Victorian Heroine. This one is definitely the most "meh" of the batch. Generic Indiana Jones style explorers generally end up with some combination of tan/khaki/green, and I found I was quickly going that route. I thought some yellow and red would help break things up. It did break things up, but not really in a good way. This mini was going downhill fast, so I decided to give it a similar base treatment as the D&D Revenant team and call it done without thinking too hard.
The final Reaper mini was Devo Ranks, Cyberist. While I don't know what a Cyberist is, I can figure it out easier than defining a Revenant. I actually had an idea for the color scheme to use on this mini when I initially bought it. The mini reminded me of Robin from the Dark Knight Returns comic. Looking at images form the comic, I don't know why I made that relationship, but I did. I stuck with it, and Devo became Carrie with some punk rock hair. The speed paint yellow I used ended up with too much red in it, but that's ok. I like the way this mini turned out - the end result is pretty darn close to what I originally envisioned. And to help that along - a nice, simple base.
About a week ago, Jerry joined me on a roadtrip to Kennesaw, Georgia and Hobby Town USA. I've been to this store 1 other time, in 2018, and was just amazed at what all they had. I bought models that were mainly 1/48 scale as that is close enough to the scale of the minis I paint - maybe stuff can be used in a game. I bought tanks, humvees, some space stuff, some other military themed things from Tamiya. In that 5 year interim, I put together 1 model (a tank). Lately I've wanted to make a model, but my skills aren't where I think they should be. I've started 2 models in the past year - both A-10 Warthogs, of different scales. On both, in the early stages, they just don't look right. Seams aren't lining up. I don't know the right order to paint vs assemble. Back in the last century, I used to get a model kit from any of a half dozen department stores, and 3 hours after getting home that model would be fully assembled. What happened? Where did my modelling mojo go?
This gave birth to the notion that I need a model(s) to practice on. Something that's ok if I screw it up and toss it. Being me, it also needs to be something I would enjoy putting together, at least on some level. Plus, maybe it'll turn out ok?
There are a couple of places around town that still have models. Hobby Lobby and their bi-weekly 40% off overpriced, mostly car models with a limited variety. Wal-Mart generally has some, but I swear it's the some ~20 kits they used to just have at Christmas. There's also a hobby shop in Huntsville which specializes in R/C cars and also carries an assortment of models. None of these local stores have left me slack-jawed as I walked through. I was spoiled by Kennesaw. Even though I was effectively planning to buy something disposable, a 3½ hour trip to the store to look and shop around, and then another 3½ hour trip back could be fun. As someone who generally maxes out a roadtrip as 2 hrs to Nashville, "could be fun" was stretching it, but I've been trying to talk myself into this for years.
With that long story out of the way, Jerry joined me on my roadtrip and a great many models were purchased. Mostly cars to practice on. I made lots of cars as a kid, but I never put the engines in. Now I want to practice on engine details - and if I screw it up, I'll just glue the hood shut. I also picked up some sci-fi stuff - a Trek model, some 2001 ships. Random supplies - brush-on primer, a couple of colors of Turbo Dork that I could have gotten here in town, some AK Interactive brushes to try out. Now I have stuff to practice on, and then stuff I can practice on with hopes of something good as a result.
While I still have batch of more Reaper minis to be primed for when the painting mood hits, plastic models may also make their way into the blog.
Permalink
gaming miniatures reaper chronoscape
Jailbirds Box 1
09.12.2023
This was supposed to be a batch of Walking Dead minis. The Kingdom expansion had 2 people on horseback, as well as 2 people not on horseback. This was part of the last batch of Walking Dead minis I got from Mantic, and they were resin-printed as most of the later expansions had moved to. I have to say, I'm glad Mantic no longer has the Walking Dead license and is making minis for the game, as once they switched to resin printed minis I've gotten screwed on almost every booster I've opened. This time, there was a left arm missing (but with an extra right arm). I say missing, but all the printed sprues matched up body parts. The 2 horse riders had legs that didn't fit/go around the bodies of the horses. There was nothing to assemble on the rider legs or horse-body - they just didn't fit. After an hour or so of fiddling and fighting, I decided I have enough unpainted minis laying around that it's ok to never make these. So I just moved on.
Enter Raging Heroes Jailbirds collection. Via eBay at some point in the past year, I came across these from a seller I had previously purchased from and thought "well I haven't seen that before". That was all the excuse I needed. Disenchanted with Mantic 3D printed minis, I instead switched to Company I Never Heard Of 3D painted minis.
The Heroines Box 1 gave me 2 minis which required no assembly, another that needed an arm and hand-holding-gun glues on, and then some weird space platypus pet I'll never do anything with. These minis had nice detail, so I opted for pass number 2 of zenithal priming. Additionally, I was going to wait and glue the arm/gun on the mini that needed it until after I painted everything, so as to better paint details and not get stray brush paint everywhere.
While using the box art as a rough template, I soon skewed my color selections as I kept mainly to the Army Painter Speedpaints. Using Citadel/Vallejo pale flesh and then a thin layer of Crusader Skin Speedpaint has become my latest favorite skin painting technique. For the "nurse" I left the white part as just zenithal primed. I could probably have dome some shading and highlights, but I like the primer only look enough to be wary of messing it up. Gluing tiny bits is my bane here. Trying to get parts flush, man-fingers, and trying to hold things with tweezers while super glue dries... all of this fought me. In the end, it was good enough.
Permalink
gaming miniatures Jailbirds Minis
Slapchop v Zenithal
08.07.2023
It's been longer than usual since my last post, and it's not because I was being ultra-productive and have the largest cache of newly painted gaming whatnot to share. Nope. I just wasn't in the mood to paint. Part of that was due to trying something new (for me). I finally jumped on board and tried a couple of priming/prep techniques that everyone has been using for years - Slapchop and Zenithal priming.
Thus, an experiment was begun using the Walking Dead Saviors expansion pack. 6 minis, which I would split into (my version of) Slapchop and Zenithal priming. Since I normally prime white and then get to painting, both of these methods just felt weird.
First up: Slapchopping
My version of Slapchop starts with priming black, then a heavy dry brush of some Vallejo dark grey that I randomly picked out of a box. While this really did bring out beginning highlights of raised areas and left the recesses with dark, well, black, shadows, the highlights came out very chalky. I know this is from the paint for dry brushing being too dry on the brush, but that's just the way I dry brush. I used Speedpaint and a little Citadel Contrast on these minis, which I also did for the Zenithal batch following. I think the end result is kind of a comic book style. The jump to shadowy black is a little too harsh and at times inconsistent (see Dwight's blonde hair). With some work on my dry brush method this could be better, but as it is I don't care for my end result.
Next: Zenithal Prime
Zenithal priming felt a little more natural - prime black, then from above spray with white to emulate a natural light source. This wasn't just picking a spot and spraying from there, but more of a 180° from above to also include reflective light from above. Since this ended up with mostly white that wasn't chalky, like I'm used to painting, the follow-up printing process felt more normal. I may have sprayed from above from too many angles, as the dark shadows underneath weren't really there like I was expecting. This method worked better than Slapchop for me, but I don't really know my end result shows anything to make it worth the extra effort.
So, what do I think? Slapchop isn't for me, which is a shame because for everything it's hyped to do it sounds perfect for me. Zenithal priming is close to what I'm used to once I start actually painting. I may do another Zenithal test later and keep the highlight spray more vertical and see if that beings out shadows more like I'm expecting.
The next batch on tap is more Walking Dead - this time the Kingdom expansion, which will give me 3 horses with riders to paint. This will be a return to classic white priming, as I'm always unsure how animal painting will go at the onset.
Blog Archive
As always, correct spelling is optional in any blog entry. Keep in mind that any links more than a year old may not be active, especially the ones pointing back to Russellmania (I like to move things around!).
Tags have been added to posts back to 2005. There may be an occasional old blog that gets added to the tag list, but in reality what could be noteworthy from that far back?
Blog Tags
3D Printer (29)
4ground (32)
4ground-mall (40)
5PFH (1)
action figures/toys (10)
airbrush (7)
Aliens (1)
Amazon (12)
antenocitisworkshop (11)
Atlas O Gauge (2)
Batman Miniature Game (2)
Battletech (1)
belt sander (12)
Blood Bowl (4)
boardgames (79)
books/comics (19)
computers hate me (5)
conveyances (15)
Cyberpunk Red Zone (4)
diet (53)
dreams (7)
fallout (1)
feng shui (1)
Firefight (1)
Foundry (3)
Gale Force Nine (1)
game dev (23)
gaming miniatures (240)
gaslands (10)
gastric sleeve (34)
Green Stuff World (2)
Hasslefree (9)
Hero Forge (1)
HeroQuest (4)
hobbies (102)
Jailbirds Minis (2)
kevin smith (1)
Knight Models (2)
malifaux (3)
Marvel Crisis Protocol (2)
mckays (1)
models (12)
mom (32)
moon light (5)
Moonbus (1)
movies/tv/dvd (60)
Necromunda (4)
ninja division (1)
Pathfinder Deepcuts (1)
pilonidal cyst (5)
plastcraft (2)
programming/interweb (41)
rambling (61)
random (367)
random maintenance (3)
Reaper Bones (3)
reaper chronoscape (32)
renovation/remodelling (25)
road trip (27)
salesforce (1)
sarissa precission (2)
scenery (19)
Star Trek (2)
Star Trek Away Missions (3)
Star Wars Legion (1)
studio miniatures (3)
ttcombat (12)
video games (51)
vs Factions(PDFs) (1)
walking dead (36)
wargame foundry (3)
work (6)
wrestling (45)
zombicide (2)
Zombicide Invader (19)
zombie mall (23)
