Gaslands Printing
01.20.2020
2020 is the year Jer and I play Gaslands. Attempt to play Gaslands. Play with Hot Wheels and say we're getting ready to play Gaslands.
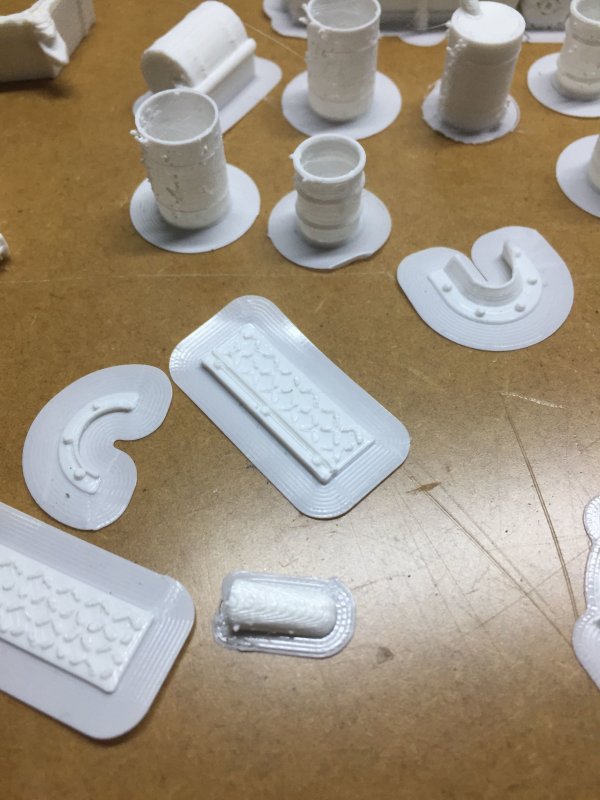
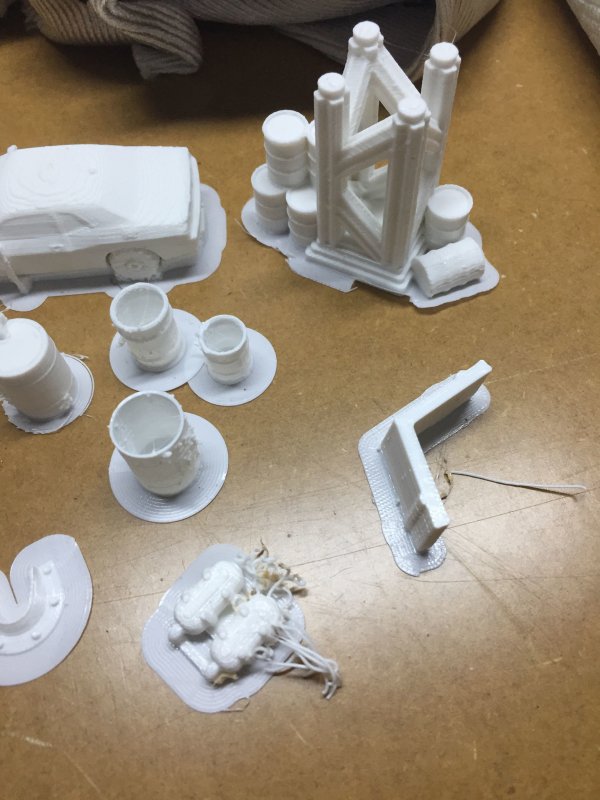
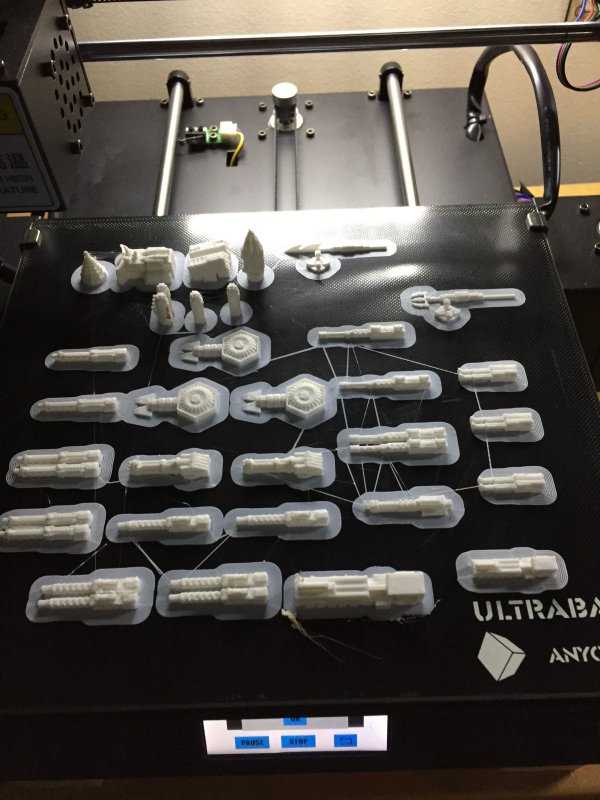
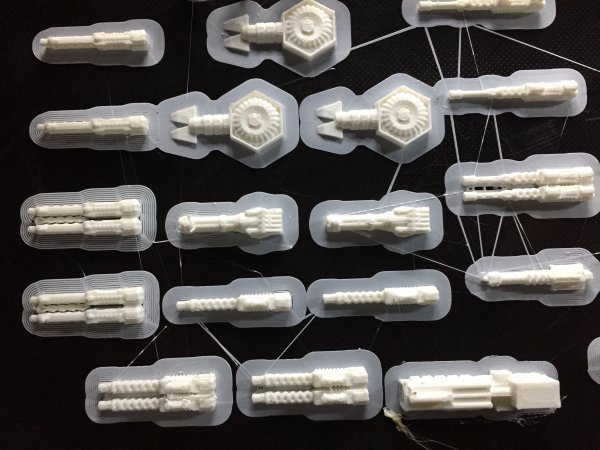
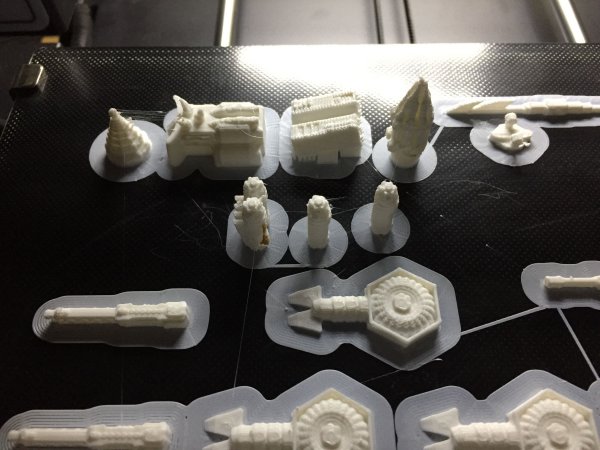
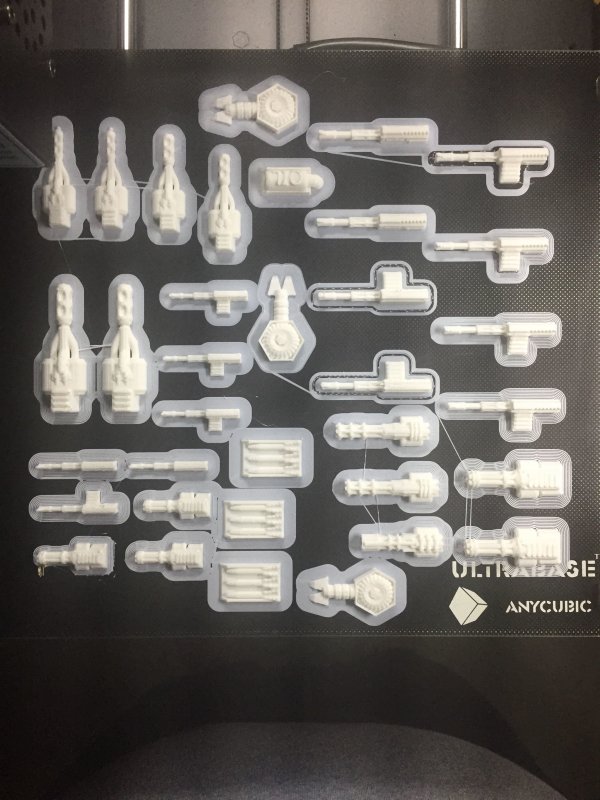
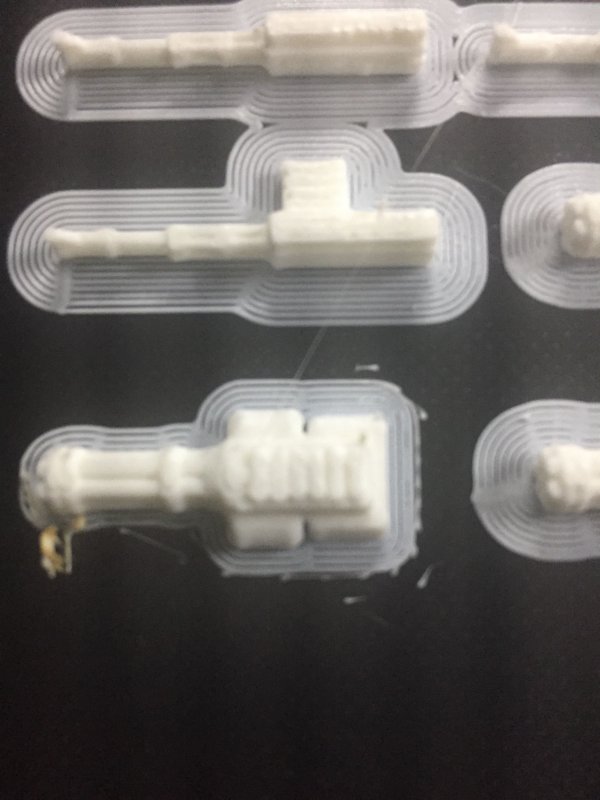
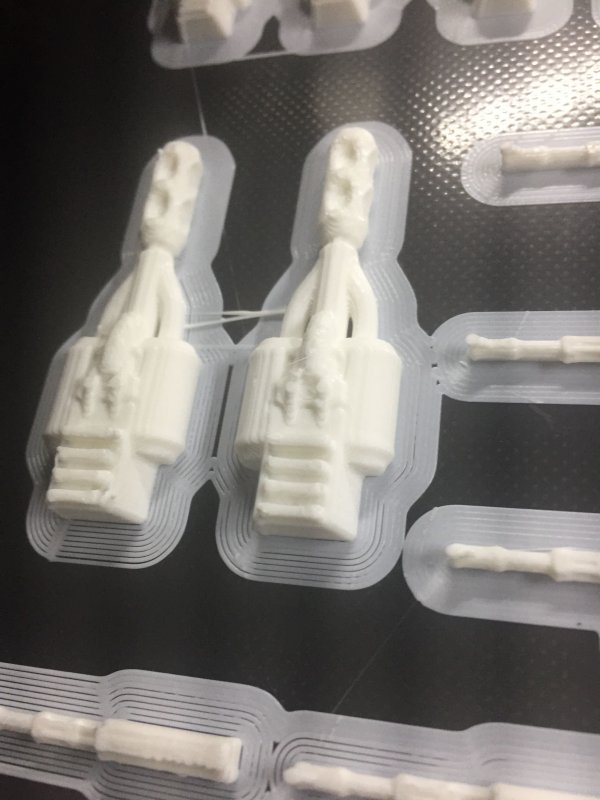
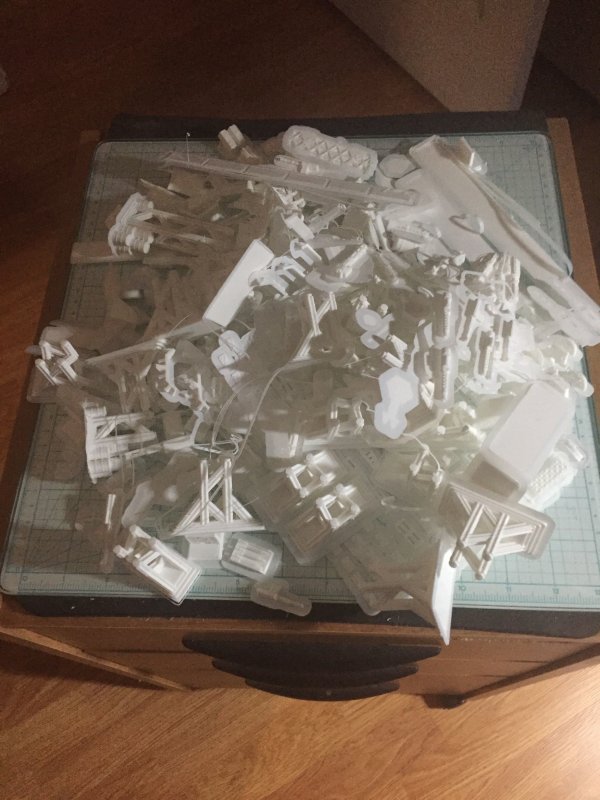
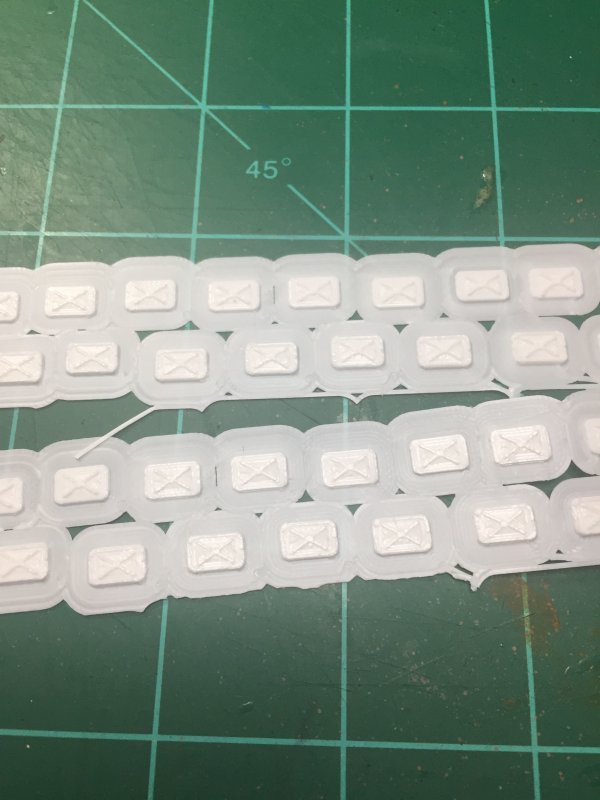
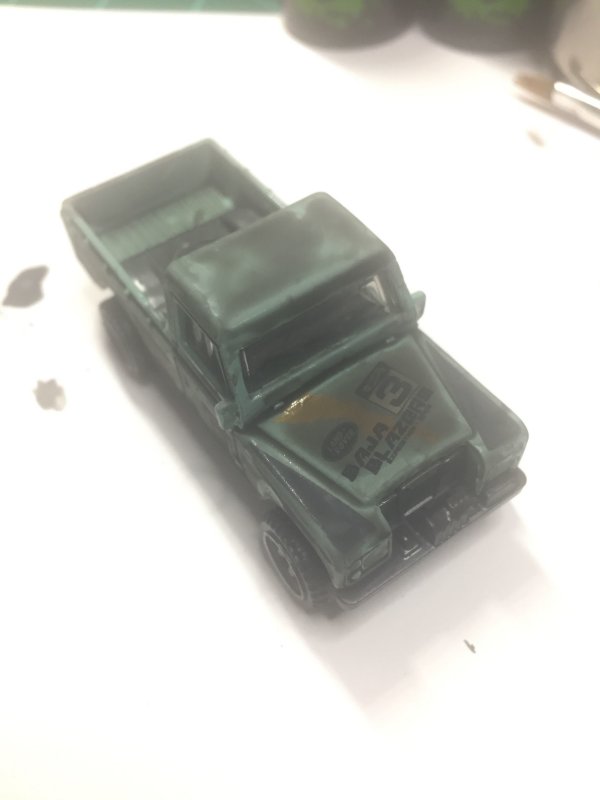
This past week, I fired up the "new" 3D printer and printed bites and pieces for Hot Wheels cars. I haven't done anything with the printer beyond the standard set-it-up print after I first got it. I've been watching more and more people use resin printers, which gets me wondering how the old fashioned printer will fare on small, Hot Wheels sized, details.
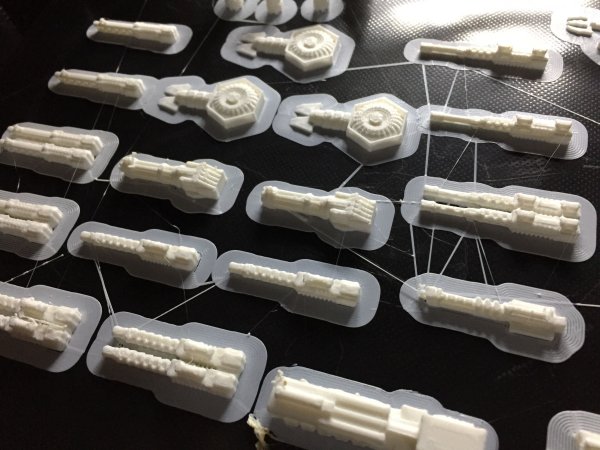
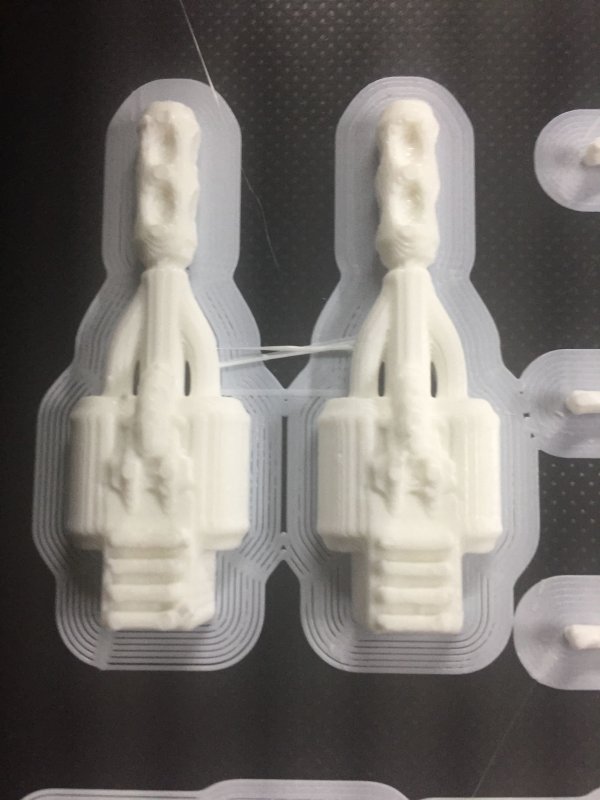
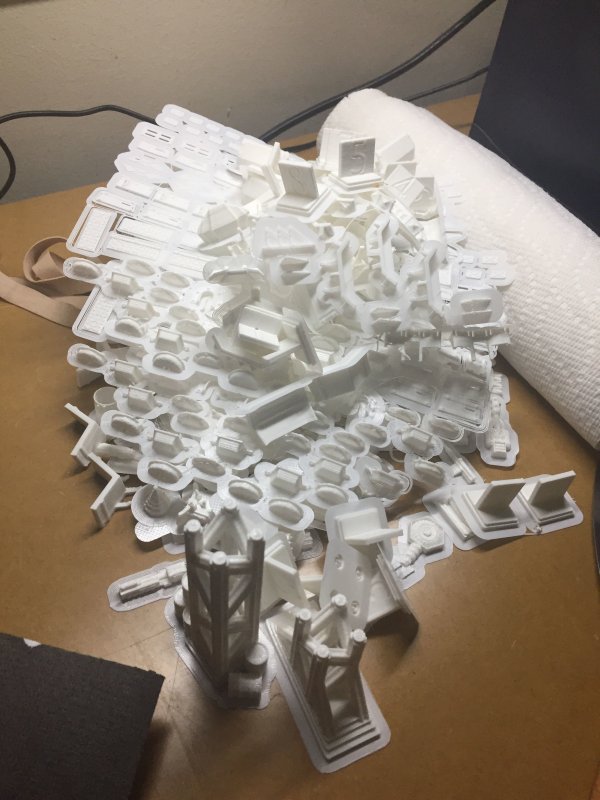
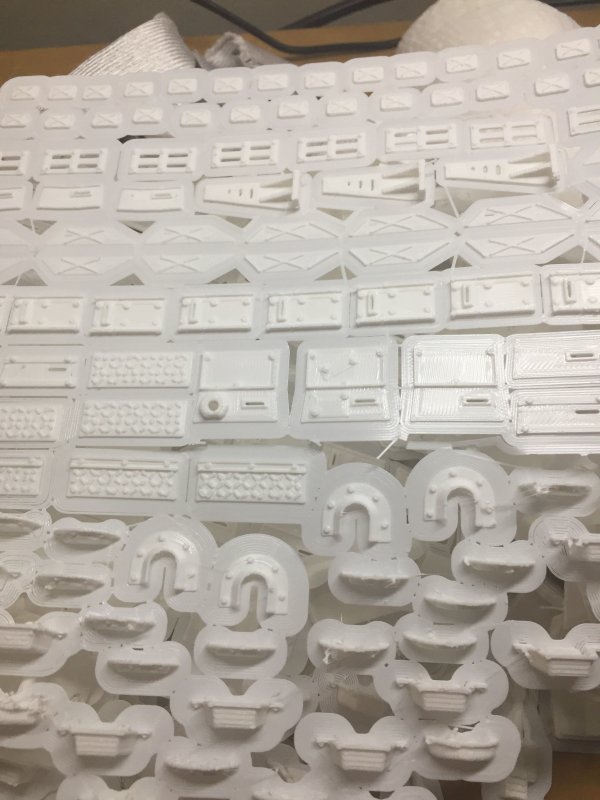
After copious Gaslands searches on Thingiverse and Yeggi, I had plenty of bits. Armor, guns, some rally/checkpoints. For the better part of a week the printer printed. And then I messed things up. When scraping prints off the bed, the bed scoots. My natural grabbing point for a scooting bed is the front leveling knob(s). Eventually, I unleveled the bed enough that prints started messing up. Possible associated, the garage got colder and my print settings weren't warm enough so that the plastic was cooling too fast - so I got some printed strings of plastic.
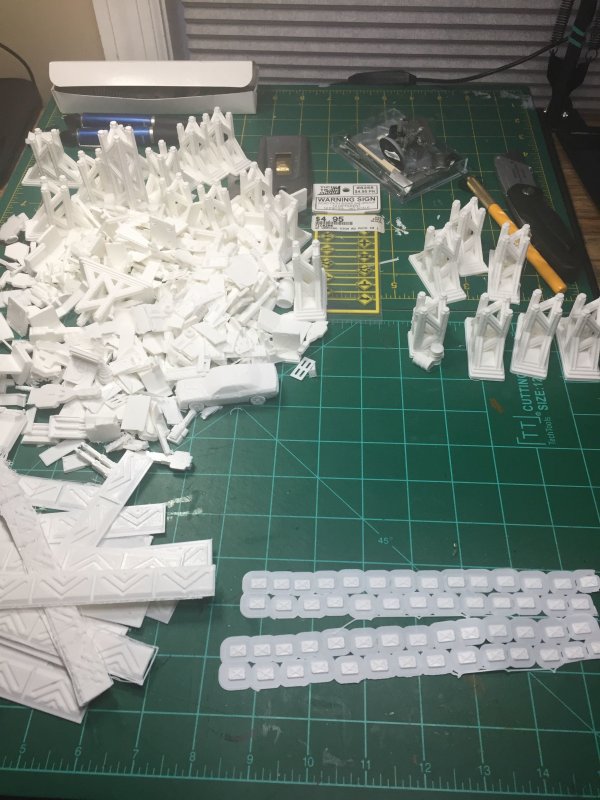
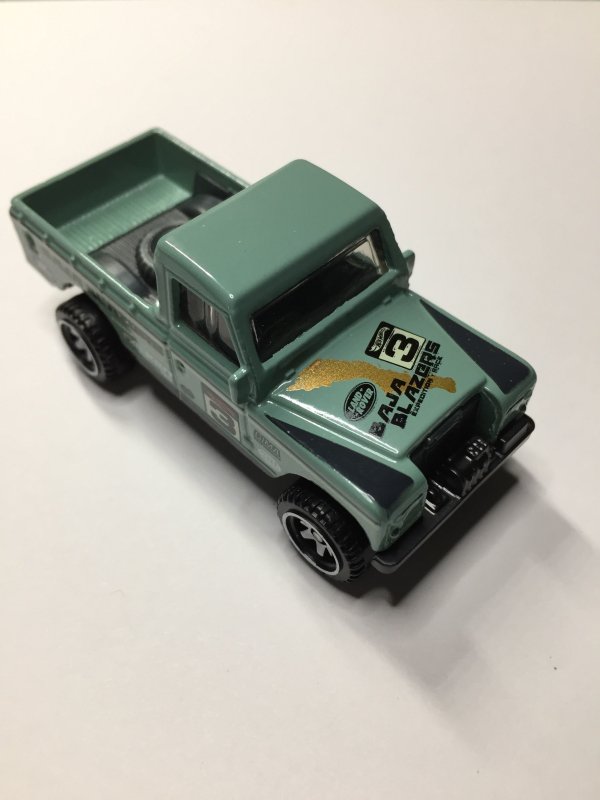
Overall, I think all of the printing worked out. The details seems good enough to work. We'll see how I feel after some priming and painting. I'm also going to try an easier route of painting/weathering Hot Wheels which doesn't involve drilling out the rivets to take the cars apart after reading an article on just weathering the cars. Weathering attempt #1 I hereby proclaim a success!
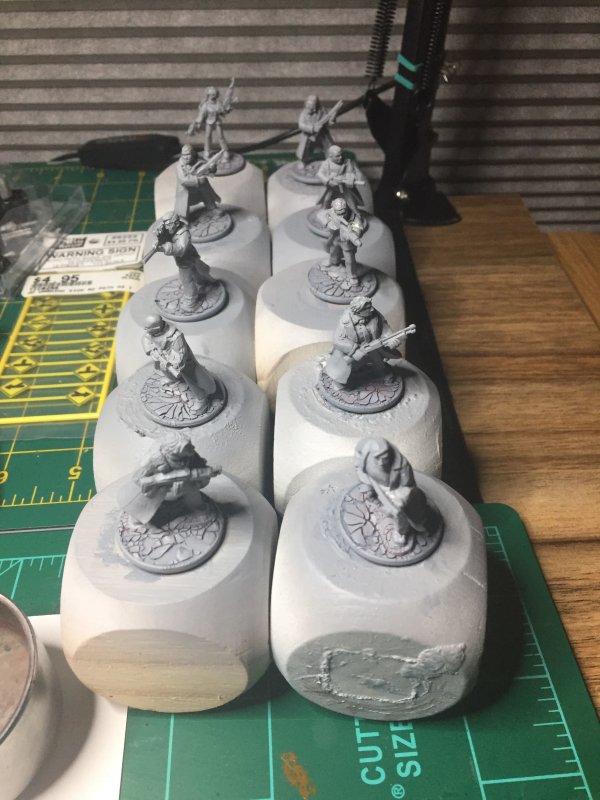
For when the painting mood hits me, the final Foundry minis are primed. They're primed grey, which is not my normal priming color. It will be interesting to see how that works out.


Whatever I do next will be somewhat weather dependent. Alabama is about to have winter for the next week or so as it gets down to freezing. Basically, nothing involving the garage will get done. While printing is the most obvious hold off, gluing map tiles (which is always on my to-do list) will also be held off. Mall buildings have yet to be started, so they're an option. As is playing around with the graphics of whatever I'll put in those stores.
Thanks to a Miniature Market sale, I ordered some more DC/Batman minis with which there will be a (negative) update to the spreadsheet to start out the year. As I have a love for racing games, I also placed an order for Rallyman GT, but not the Kickstarter version, last week.
My last odd purchase of late has been for a lot of Classic GI Joe TPBs which I used to have, but think I gave them away at some point in the past decade or so when it looked like IDW was going to reprint them all in hardback books. The Joe comics were my childhood, and I've been meaning to re-read (and even read some for the first time) for while. I've grown disenfranchised with modern comic stories as I can't find anything I like where I fall in the target audience. Now I'll see if I can relate to when I used to be the target audience.
2020 Hobby Prep
01.10.2020
2020, the start of a new year, the chance to get shit done anew, and the chance to dwell on what I didn't get done last year. Well, not dwell too much. My joy of hobby organization and progress is the spreadsheet I've been maintaining for the past couple of years. My pseudo bane is how the details of what I've been tracking kept popping up as incorrect every couple of months. I halfway joke that I've got so much to paint and build I'm not going to get it all done before I die. The truth is I've accumulated more stuff over the years that I'm not interested in doing anything with, and don't really want to do anything with it in the foreseeable future. With that, the 2020 Hobby Project list has gotten pared down to what I want to work on, conceivably, over the next year or two. Maybe three or four.
I spent a weekend and looked at what I've been working on, what I think I will continue to work on, and the things I'd like to work on. From there I tweaked a copy of my hobby spreadsheet to include only those things, and then I double checked the count (my bane) on those things. Now, I've got a list I can trust!
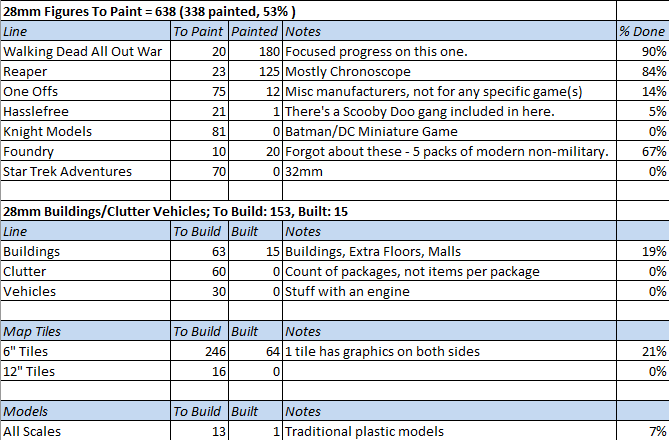
The new 2020 tracking list! Walking Dead, Knight Models, and Star Trek are still on the list. Most other things have gotten combined. The Reaper count is now Chronoscope + the other lines I get random assortments of. One Offs is for the brands that may not go with a game, or I get 2 minis from some company.
This is to be my year to focus more on buildings and scenery. Normally I've been tracking this stuff half-assed by manufacturer, as I was doing minis. Once again, I decided to combine into meaningful categories. Buildings, Vehicles, and Clutter. While Clutter can be almost anything, I've bought some packs of clutter over the years and found out I'd forgotten I even had about half of them. A lot of the clutter goes along with buildings - there's a pack of bank accessories for the TT Combat library that I was planning on turning into a bank.
The last 2 things listed are mainly so I don't forget that they're there. My project in converting my 7½" map tiles to 6" map tiles keeps stalling out - because I forget to do it. The same goes with plastic models. I've been picking up models I think would be fun to make over the past couple of years. I've made 1 - a tank - shortly after I got my airbrush last year. I used to crank out a model in a couple of hours when I was 10. While I don't have to speed build, don't leave stuff in a closet in the shrink wrap for years at a time!
For fun, here's how some of the worksheets are laid out.
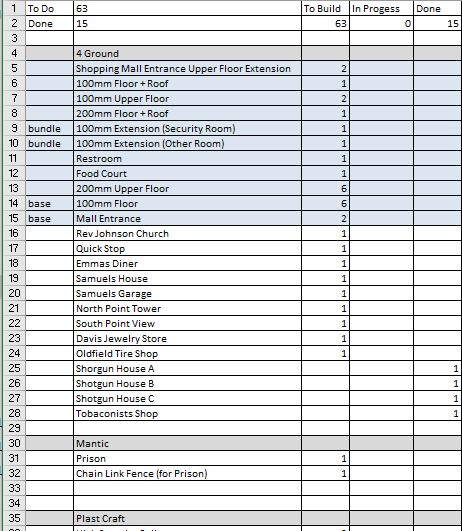
Subset of the building list:
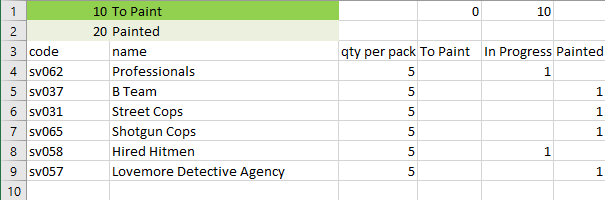
Foundry minis, mainly showing because the last batch to complete these is primed:
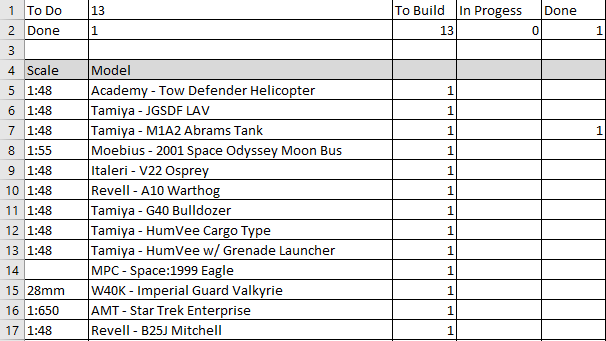
Plastic models:
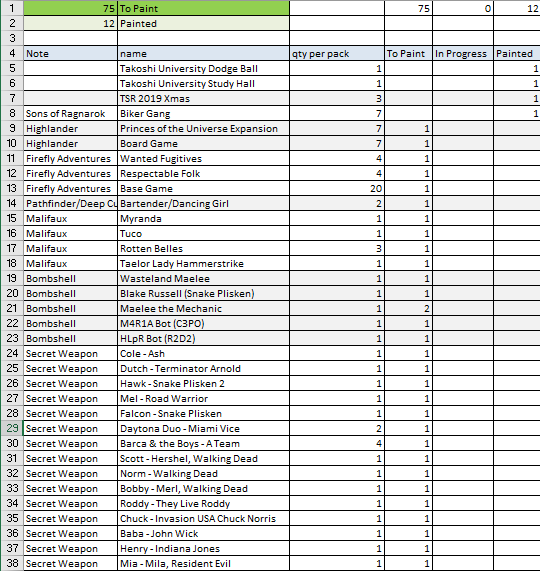
Subset (I think) of the One Offs, formerly a bunch of worksheets with a few entries on each:
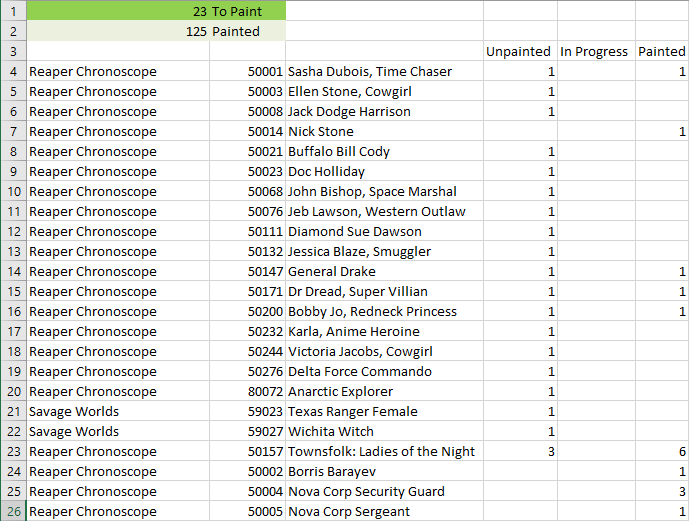
Most of what's left on the various Reaper lines. There's a couple minis that are pretty well dedicated to being technique/color tests that will never get finished:
Vehicles:
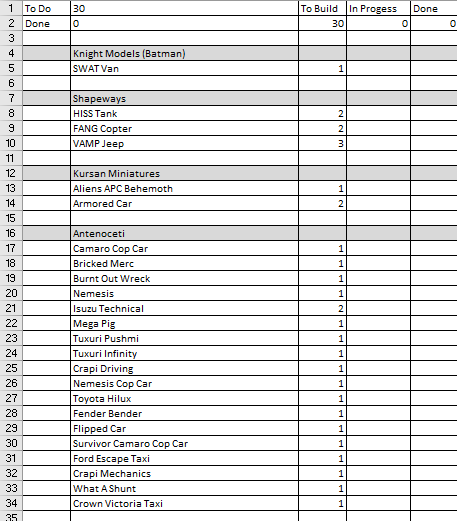
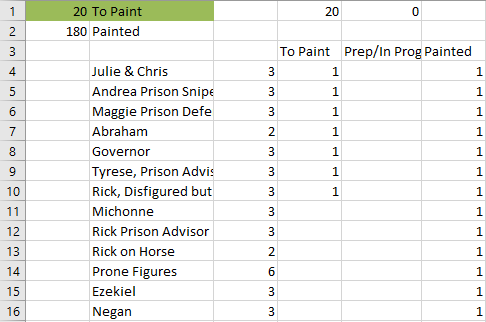
Remainder of Walking Dead boosters:
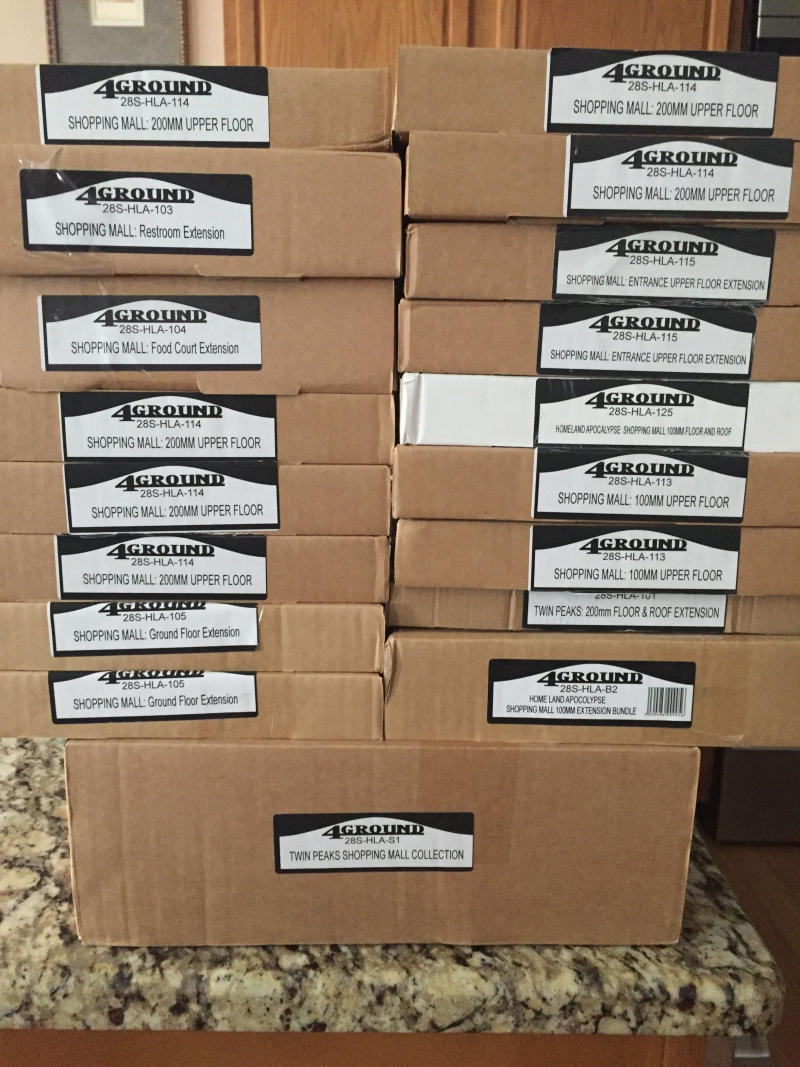
My big project for the year is the 4Ground Mall. Between 2 sales I acquired enough mall-stuff to build a 2 foot long mall with 2 stories. The bundle 4Ground sells for the mall creates a 1 foot, single story mall. I'm ambitious, it appears. More than half the fun is going to be branding the stores. Instead of printing out and gluing in the graphics that 4Ground provides, I'll scour the internet looking for a Chess King sign to replicate.
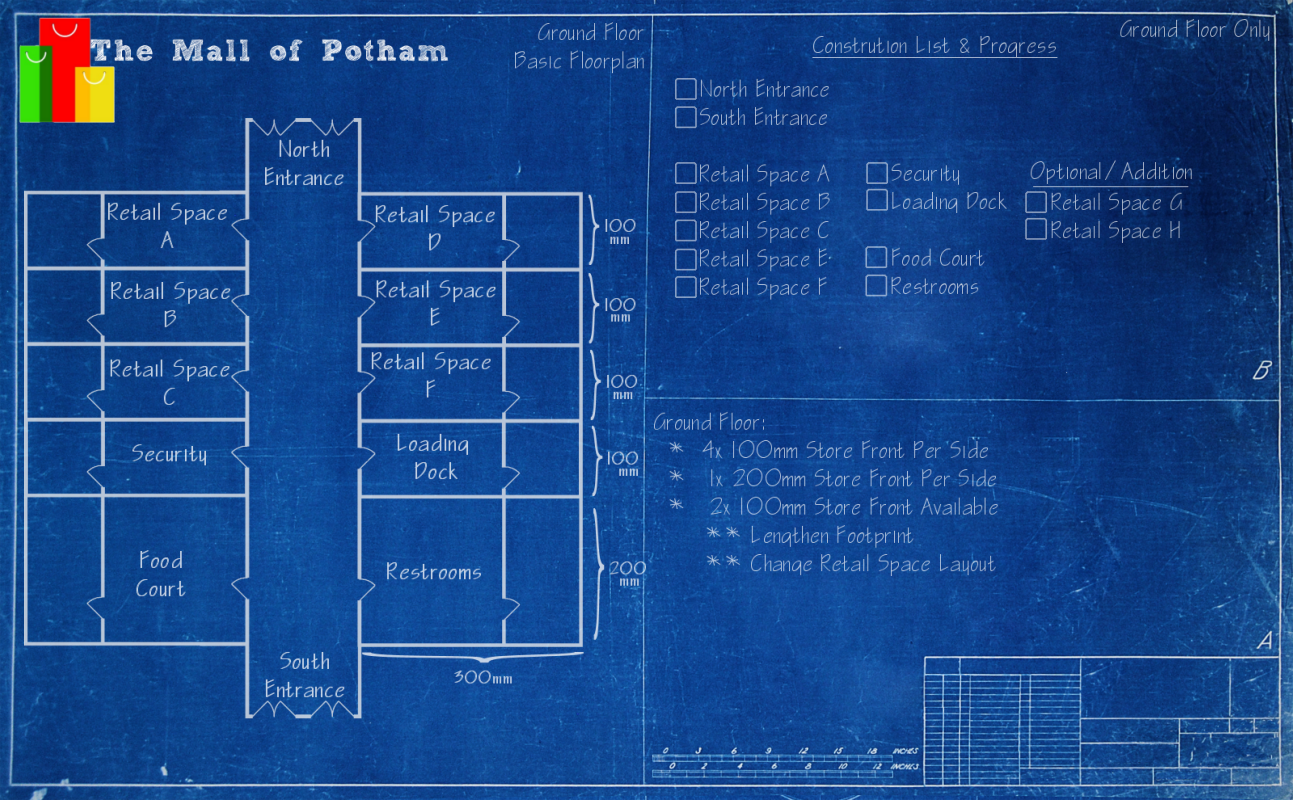
Since this, all of this, is for fun and not supposed to be a chore, I whipped up a fun little blueprint for the mall as an alternate way to track what I build along the way. Additionally, I had to go over measurements for what the 2nd floor needed as support just to make sure I'd gotten the right kits to make.
There's other things on my "fun in free time" list. Jerry and I are using Gaslands Refueled as an excuse to play & pimp Hot Wheels cars. I finally played a video game besides GTA and enjoyed it. I have plenty of video games through Steam I've never played, many of which I attribute to a steep learning curve. I've invested enough in base game + dlc that it's time I finally commit to conquering that curve on Arma 3 and Cities: Skylines. A good FPS and another Sim City replacement.
There's other things on my plate for fun, but those are the biggies I've mapped out for the year. Or four.
Permalink
4ground 4ground-mall gaming miniatures gaslands hobbies reaper chronoscape
Suffering From The Game Pimp Hand
04.28.2018
One of the joys of pimping out my games with scenery, or even trying to make print and play games a little snazzier, is that it's an excuse to break out the arts & crafts skills that I never fully developed as a child, but found I enjoy more and more as I get older. Plus, mom as all about the arts and crafts, so doing it makes me smile. I've yet to make anything perfectly right for any of the gaming stuff I'm played around with and made over the past couple of years. Well, ever, but I've been trying to actively do a better job the past couple of years. Most of the time I'm about to screw something up and along the way of fixing it, come up with something that will work - battle damage and weathering are great for covering up mistakes from little to big.
Sometimes, there's no weathering or battle damage to fall back on.
- The Gaslands Track Travesty
I've been moving forward with wanting to play Gaslands. I can't just print movement templates and start playing with cars on a table top. Hell no! The first thing I need is a map to play on. While I have a few roads for my zombie-infested streets, those streets are of the wrong scale for my needs. Enter Dave via RPGNow and his Wasteland Dirt Track. Although I love a modular map, I really like the layout of Dave's track. I liked it enough I bought it at full price - which I seldom do at RPGNow since they have almost as many sales as Steam. The map is scaled for Hot Wheels (1/64), but I've decided to play at a smaller scale of 1/87. Luckily, this is as easy as printing 1/64 at 73%.
Since this isn't a modular board, my plan was to print out the track at home and glue it to foam board. It's well documented that cutting a straight line isn't my strong suit. I ended up printing 25 7.5" square sections to glue onto 2 foam boards I would fit together. I couldn't find 1 foam board big enough at Hobby Lobby, unfortunately. With everything printed out, I used Aileens Stick Tack on the foam board, applied and lined up my printed and cut piece of track, and moved on the next square.
Once everything dried, it was unusable. The foam board had bowed up on the edges, thanks to the glue drying and contracting. When I held 1 end of the board flush to the table, the opposite end was curved up about 2½" above the table. Weighting the board down for 2 days didn't make a noticable difference.
Every other time I've glued onto foam board I've used smaller sections (8" instead of 30"), different glue (Elmers, or even spray adhesive), and usually card stock paper instead of the regular stuff I printed on. There's enough things to do differently, and I never thought about the board bowing up screwing me on this one, that I don't yet know what Plan B is.
- The Custom Dice Decal Debacle
#2 on the Make Gaslands Cool is custom dice. There's a nice chart to map dice numbers to the 6 symbols on the dice. You can fairly easily print out the dice, fold, glue, and have your own dice. We don't roll that way here, though!
I came across a video showing Mod Podge Photo Transfer goop. Laser print something, apply goop, stick it on thing to transfer to, come back a day later with a moist cloth and rub the paper away, leaving the laser ink (I know there's a better name, but I like the way it sounds). This sounds better than the ink jet waterslide decals I've had mixed luck with in the past. I wanted to try this method to make some Gaslands dice!
Back at Hobby Lobby, I picked up a bag of ¾" wooden cubes. I wanted to test this out on something my meaty fingers could easily manipulate. I printed out the dice icons from the Gaslands site, cut them, applied the Podge to 1 side of 1 cube to sample, and a day later rubbed it with a moist cloth. The videos I'd seen had people transferring family photos to wood, and I was basically doing the same. When I rubbed the paper off, the icon showed fine, but it also had a white background. For whatever reason, my paper didn't rub all the way off. Still, it looked fine, so I'll go ahead and do the other dice.
I proceeded to cut and apply 6 faces to 6 die. I allowed some proper drying time between each face just so I wouldn't move around a recently applied piece of paper while trying to apply another side - which ended up being at least 4 hours per side. At the end of the weekend I moistened a washcloth and began rubbing the paper off. Everything looked ok, but a little off. I could tell the paper wasn't coming off uniformly. Some of the videos showed going over with the moist rag multiple times. On the final die I decided to be a little more agressive, and ended up rubbing the paper, with the printed icon, all the way off.
It appears I'd not transferred a photo, but merely found an overly complicated way to paste paper to a wooden cube.
In tracking down the cause of this one, I think it's because my paper wasn't 100% laser printer compatible. It's marked for use in ink jet or laser, adn I noticed I could actually feel a little texture on some of the printings. While my oversized wooden cube dice are usable, they're not really worth moving forward with. It'd be better to just make some clear label stickers to put on blank dice.
- The Dremel Disaster
For my slowest evolving project - the water tower - I decided to move forward on a test version where I can learn some stuff. Paper mache style paper covering of styrofoam is the big hurdle here. What most kids learn while getting their hands sticky with water and glu in the 4th grade I skipped.
My test water tower needs legs to rais it above ground. &frag12;" square dowels will work! I simple square, 4-legged base is all I need. It owuld be easier if the legs were joined together by cross-supports and just let the tower kind of sit on top. The dowels were about a yard long, and I decided the legs would be 8". I could cut 4 legs and use the left over for 1" cross supports.
The last time I cut dowels they were small enough I could use some razor shears (again, not sure what they're really called, but it's a 5 inch razor blade attached to glorified scissor handles).Said shears did not work on these dowels. I got out the dremel and attached the wood cutting blade. 8" lengths were cut, then I went to cut 1" sections from the remainder. While the wood cutting blade works great, the body of the dremel was in the way of making a straight cut. In the end, I had 4 lengths for legs that I could even out at the same length, and 10 meant-to-be 1" lengths that were jagged and nowhere near each other.
My dremel is not good for fine cutting. In the end, I went back to Hobby Lobby and bought a bag of ½" cubes to glue together as needed.
- The Custom Template Consumer Conundrum
I've made scaled down movement templates for Gaslands. I attempted to make oversized dice. On the Friends of Gaslands page, people are linked to that sell customized whatnot for the game, and many make movement templates. 1 guy, who I don't want to name here, had a nice selection of colored acryllic templates. He also sold a set of dice that looked of pretty good quality. I contacted him and asked if he could make a scaled down (73%) version of the templates. We emailed back and forth a hand full of times as it seemed each time I answered a question it led to another legitimate question. After getting what felt like all the info he needed from me to put together a quote, I didn't hear anything back. Maybe I had too many questions? Maybe I came across as flaky (at least 1 of my answers led to not being able to use semi-transparent acryllic). Maybe the cost isn't worth the hassle?
While I could easily email him back, I've mostly convinced myself it's not worth moving forward on. at least not now. Later on I'll start thinking about getting a home CNC setup like Christian. I may have also spent too much time looking at YouTube videos of home laser cutters and acryllic - which require way too much tweaking for my attention to detail.
For now, though, my little cardstock-on-really-thin-chipboard templates will do. I went ahead and made left-turn versions to go with the right-turns instead of just flipping them over.
- The Spray Paint Overspray Sprain
Hoping to salvage a little something along the way, I decided to prep the garbage cans and camping set I got off an eBay sale from TTCombat a while back. I haven't painted anything in over a month, and trash scenery shouldn't be too hard. First up, some cut wood which just needed a base coat of tan.
I then learned what happens when that cheap damn Krylon, that I said I wasn't going to use anymore, is more empty than it first felt. First, there's a hiss and spew as compressed air tries to shoot out some paint. Next, a mostly liquid stream glops out. My cut wood now has the equivalent of maybe 6 coats of paint.
I've since trashed what was screwed up or stored away what I'll attempt to fix later. Time to go back to something more structured and get back into my groove. I have two more shotgun houses to make, sitting on a shelf. The first one was a good learning experience that wasn't too frustrating. I have an idea on how to make the 2nd pass better.
Blog Archive
As always, correct spelling is optional in any blog entry. Keep in mind that any links more than a year old may not be active, especially the ones pointing back to Russellmania (I like to move things around!).
Tags have been added to posts back to 2005. There may be an occasional old blog that gets added to the tag list, but in reality what could be noteworthy from that far back?
Blog Tags
3D Printer (26)
4ground (32)
4ground-mall (40)
action figures/toys (10)
airbrush (7)
Aliens (1)
Amazon (12)
antenocitisworkshop (11)
Atlas O Gauge (2)
Batman Miniature Game (2)
Battletech (1)
belt sander (12)
Blood Bowl (4)
boardgames (77)
books/comics (19)
computers hate me (5)
conveyances (15)
diet (53)
dreams (7)
fallout (1)
Foundry (3)
Gale Force Nine (1)
game dev (22)
gaming miniatures (227)
gaslands (10)
gastric sleeve (34)
Green Stuff World (2)
Hasslefree (9)
Hero Forge (1)
hobbies (101)
Jailbirds Minis (1)
kevin smith (1)
Knight Models (2)
malifaux (2)
Marvel Crisis Protocol (2)
mckays (1)
models (9)
mom (32)
moon light (5)
movies/tv/dvd (60)
ninja division (1)
Pathfinder Deepcuts (1)
pilonidal cyst (5)
plastcraft (2)
programming/interweb (41)
rambling (60)
random (365)
random maintenance (3)
Reaper Bones (3)
reaper chronoscape (32)
renovation/remodelling (24)
road trip (26)
salesforce (1)
sarissa precission (2)
scenery (16)
studio miniatures (3)
ttcombat (12)
video games (51)
walking dead (36)
wargame foundry (3)
work (6)
wrestling (45)
zombicide (1)
Zombicide Invader (19)
zombie mall (23)