WIP Friends are now just Friends
01.07.2024
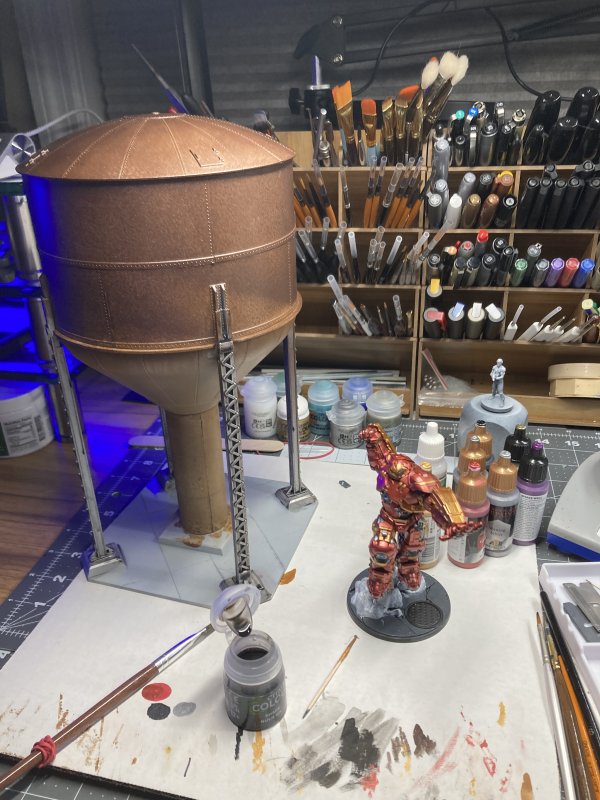
Thanks to annual company shutdown enforced PTO, I found myself both with some open time and in the right mood to finish up the Water Tower and Hulkbuster from last week's post. And by finish up, I reached the point where I could only see things going downhill if I kept trying things.
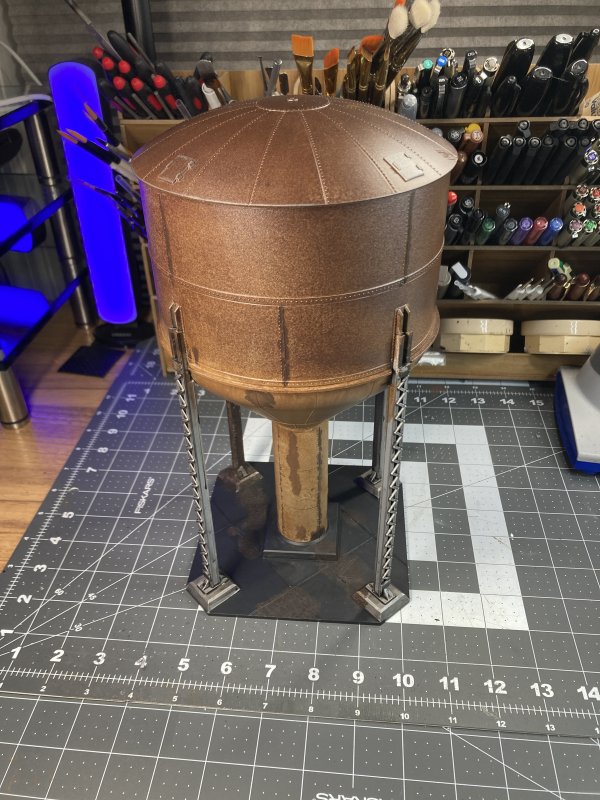
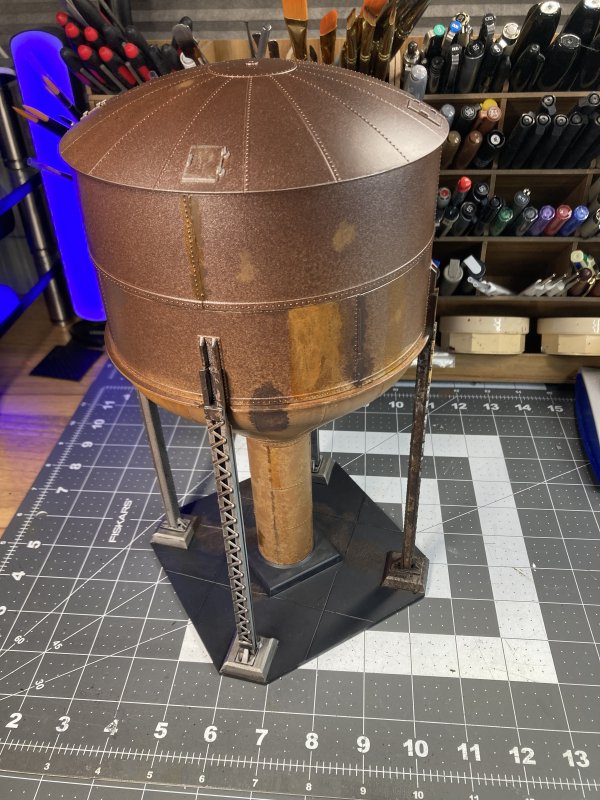
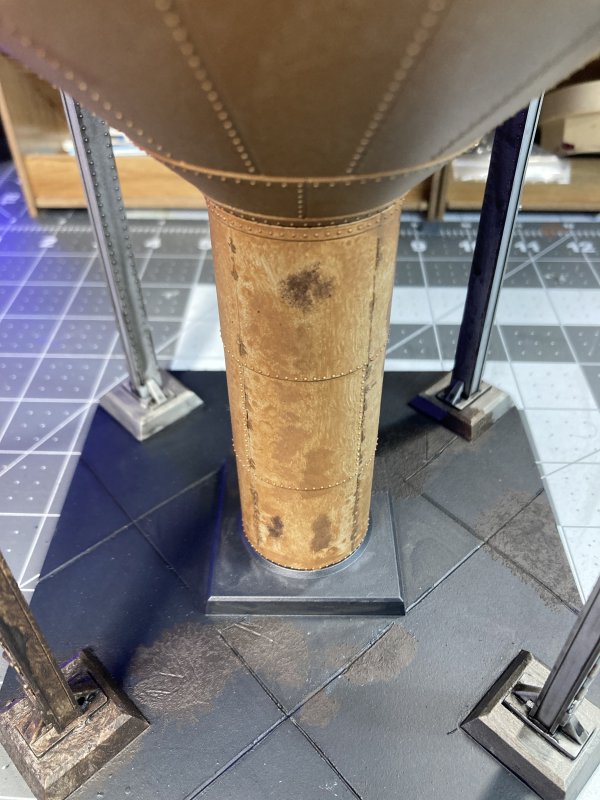
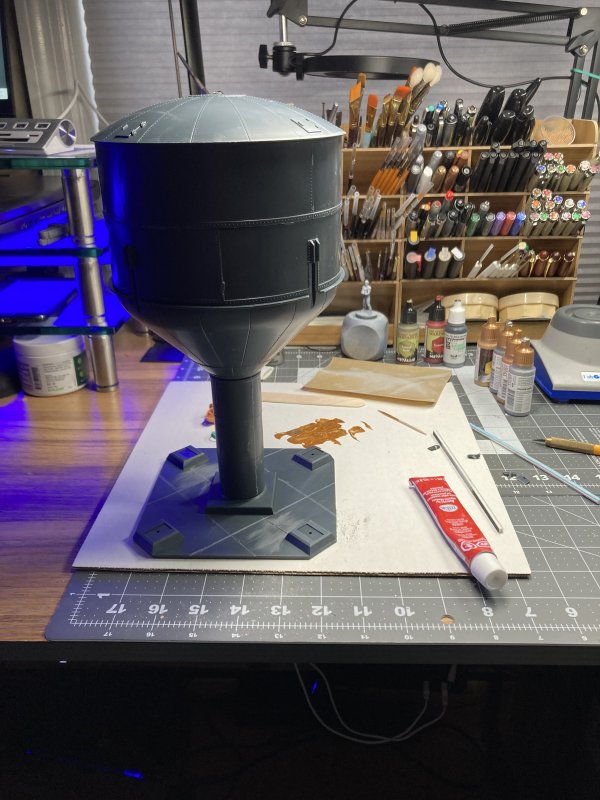
The water tower was not supposed to be completely rusted. I started with a light Vallejo rust wash in spots on the top. The wash really showed brush strokes too much. For some reason, I thought of applying the wash to the entire thing, and that didn't make anything better. For a cover up, I had some Rustoleum hammered copper spray paint. That's not a color that any water tower has ever been seen, you might say. But, if the metallic sheen is toned down to a matte finish - more rust! Hopefully evenly coated, non-brush stroke showing rust. And it does look that way! At least to me, it does. Add in some dark rust/orange/brown more-rusted spots and you've got a water tower you wouldn't want to drink any water out of. The legs got a silver base coat and then a mix of random Nuln Oil and Rust washes, and some Typhus Corrosion spotted on the base as well as a cou0le of random spots on the tower itself. There were more parts included in the kit for the tower - a ladder, some cross wire supports for the legs, but I left them off for potential better miniature game play-ability.
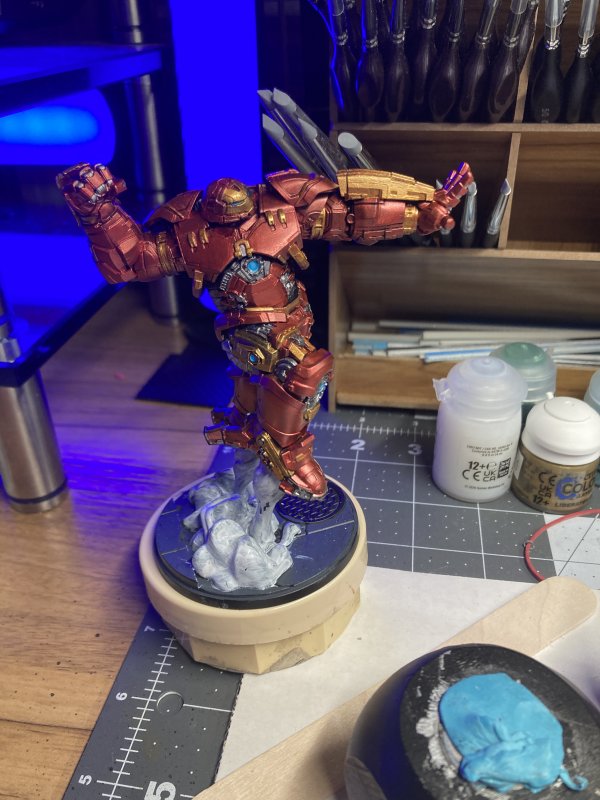
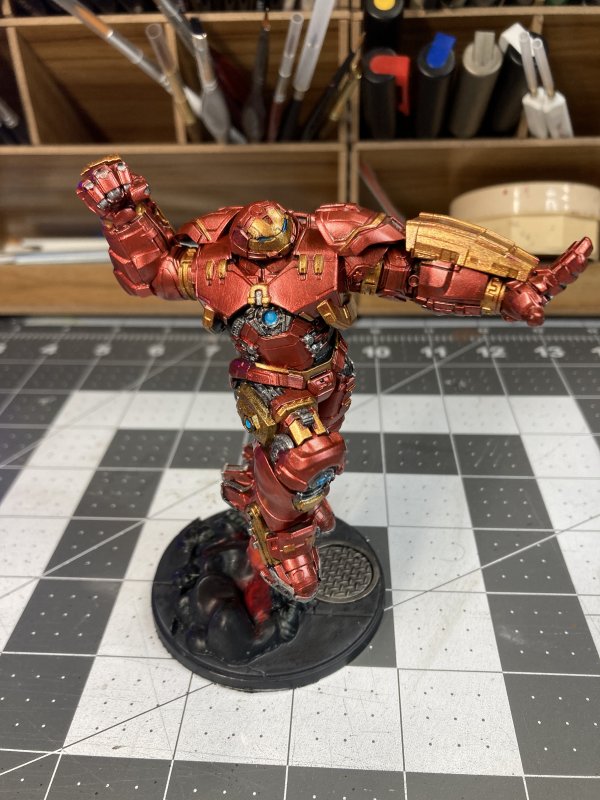
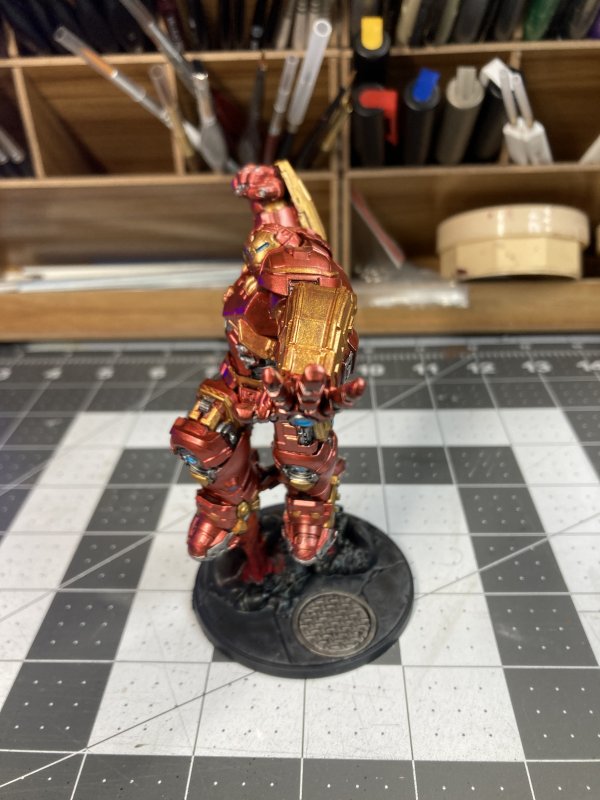
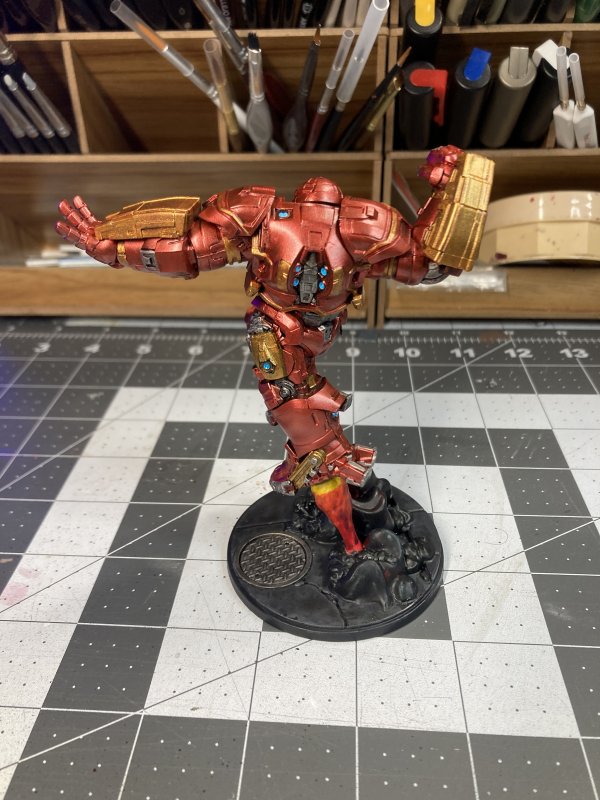
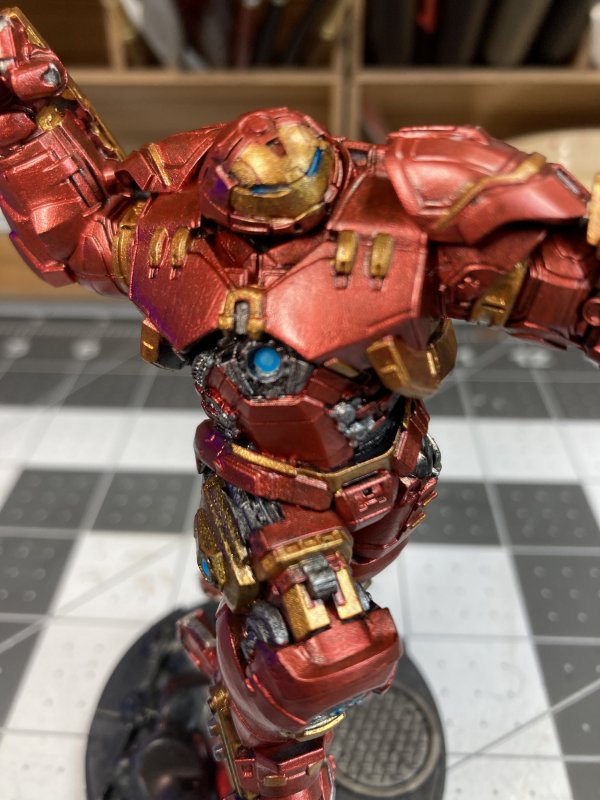
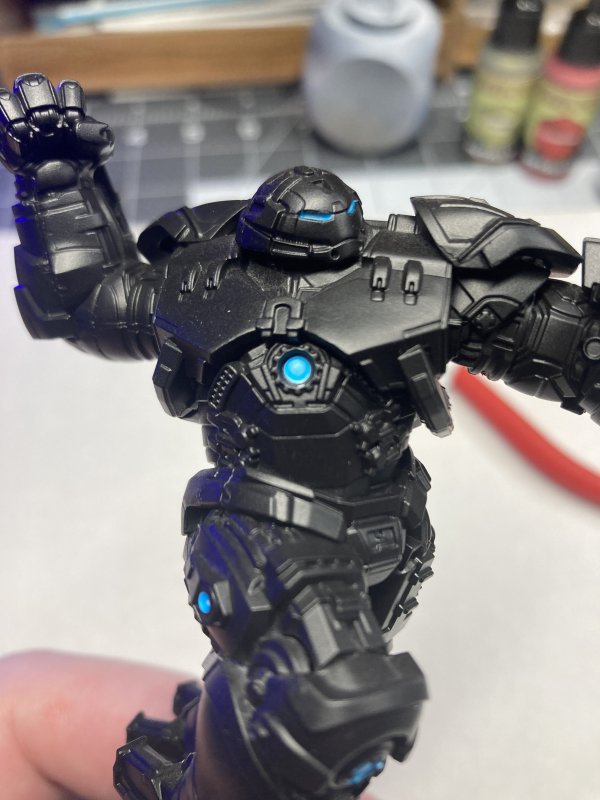
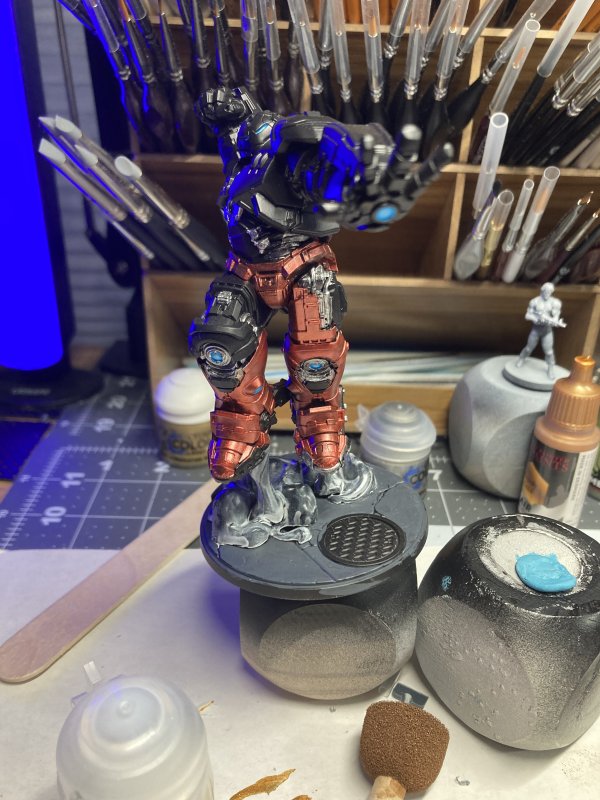
Hulkbuster is one I just gave up on. I was using Army Painter metallics on top of a black base coat, and I just could not get even coverage brushed on. Sometimes it was going on too thick (like nail polish) and smearing around. Other times, too thin and just not covering anything. There's still black primer showing in spots, but hopefully that'll look like dark recesses and not unpainted parts. I think using the metallics with a matching base color would work better for me. Alternately, I could follow the video that used a metallic silver base and then contrast paints on top.
With the start of a new year, I have a couple of hobby goals I'm working on for the year. One of which is to work on more scenery (like the water tower) along with my randomly primed minis. Maybe not with every batch, but I'd like to find a good rhythm to work them in as I've got a closet full of buildings and vehicles sitting unmade.
Permalink
Atlas O Gauge gaming miniatures Marvel Crisis Protocol
Iron Man and WIP Friends
12.29.2023
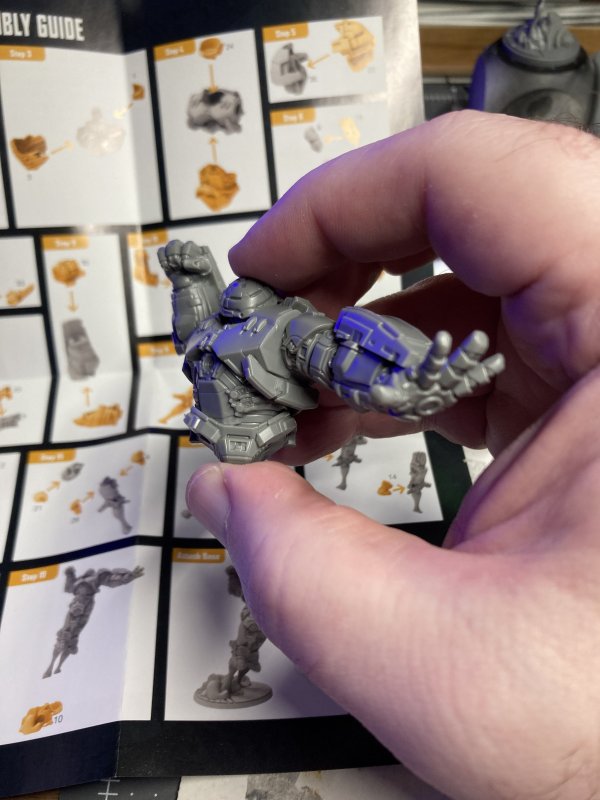
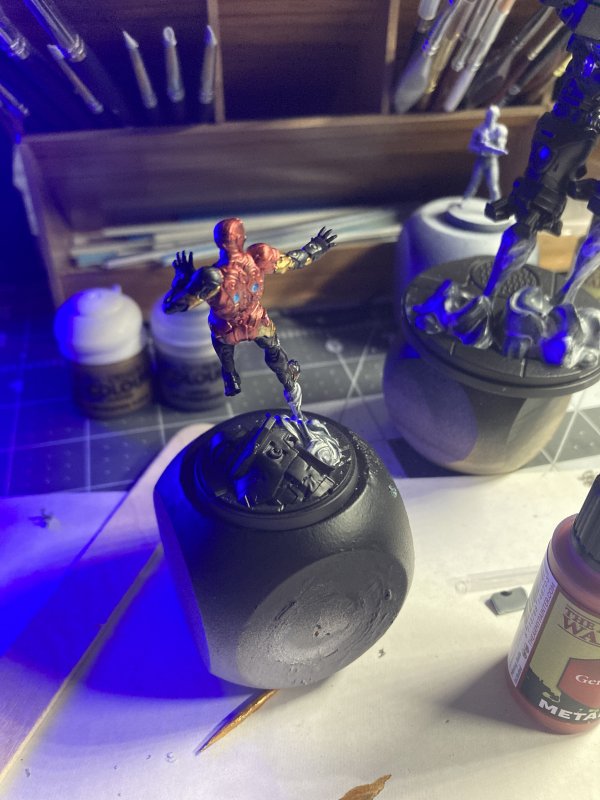
To wrap up the year I finally got around to opening one of the packs from Marvel Crisis Protocol that's been sitting on the shelf for a year. Or maybe three. The Hulkbuster pack has always been at the top of my list to open up and paint, but horror stories about various kits and microscopic parts to glue together has always given me pause. Un-pause, and I've finally moved forward!
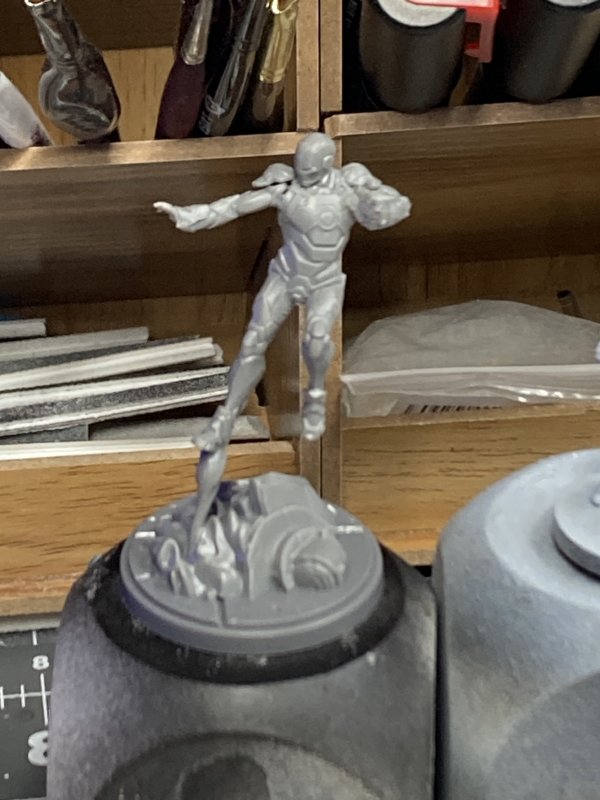
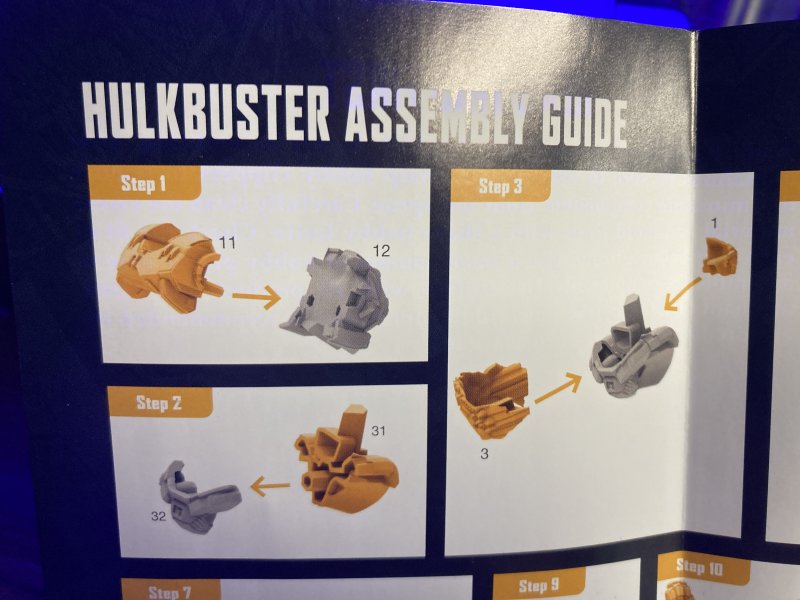
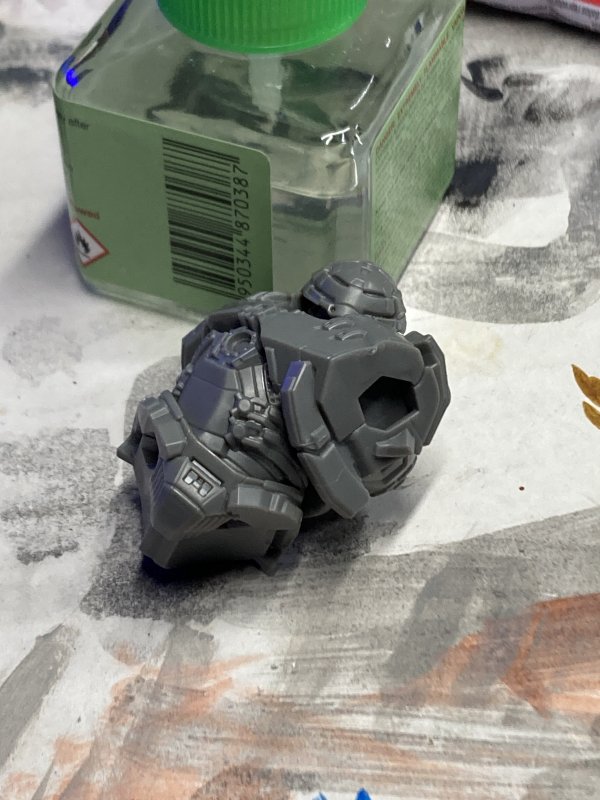
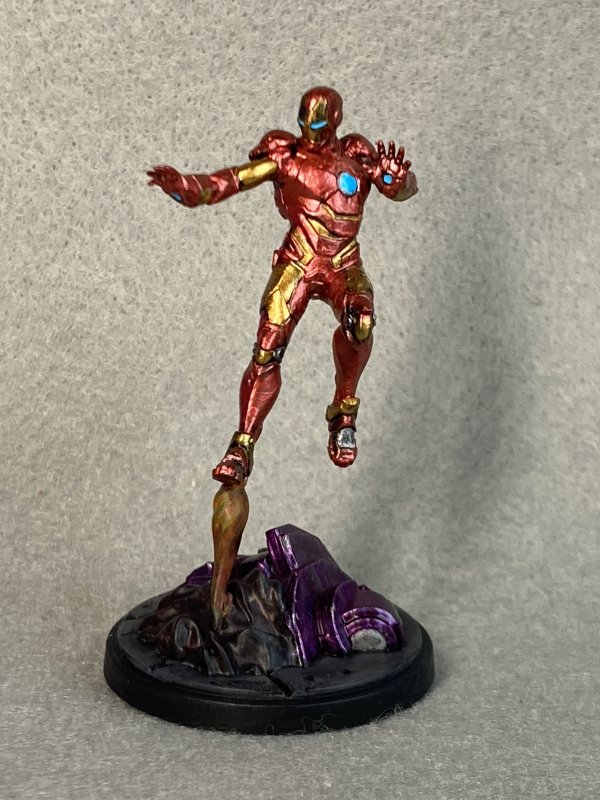
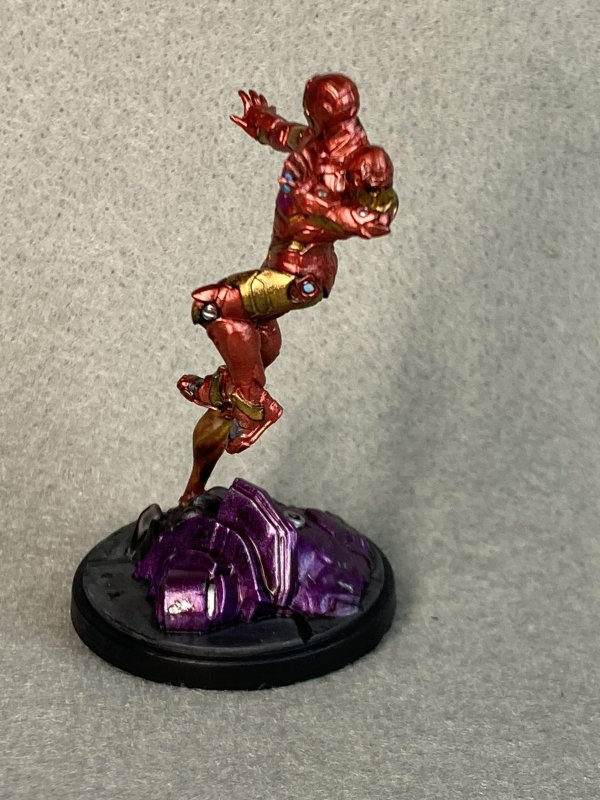
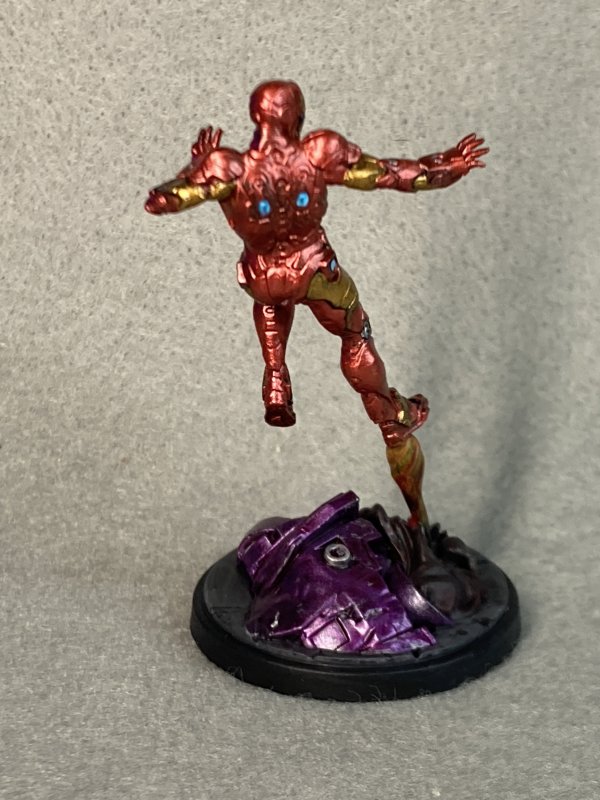
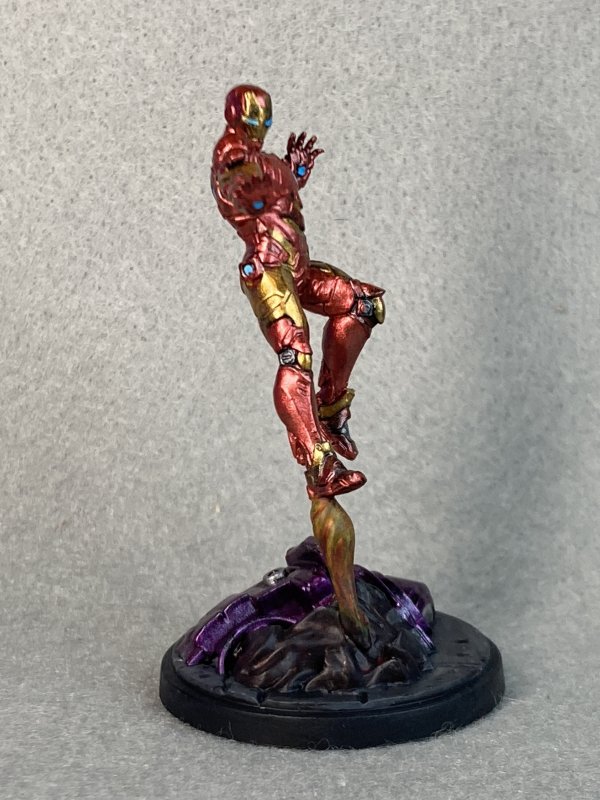
There's an Iron Man and Hulkbuster in the box. Iron Man was pretty straight forward. Hulkbuster was... confusing. I had to consult YouTube for help as the instructions weren't clear on the orientation of some parts. Even the videos I watched weren't clear on the orientation for those torso-parts where I was really confused. The action-angle of stomach/chest/shoulder where things are twisted and bent, without a slot A for tab B to definitely fit in, this is where I knew I would glue things in backwards, upside down, inside out. Luckily, the videos helped and everything ended up glued where it should be.
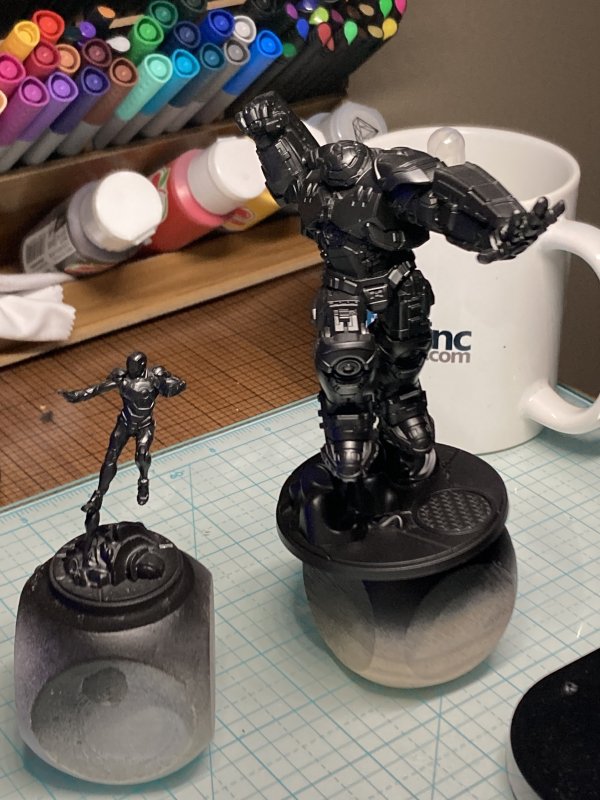
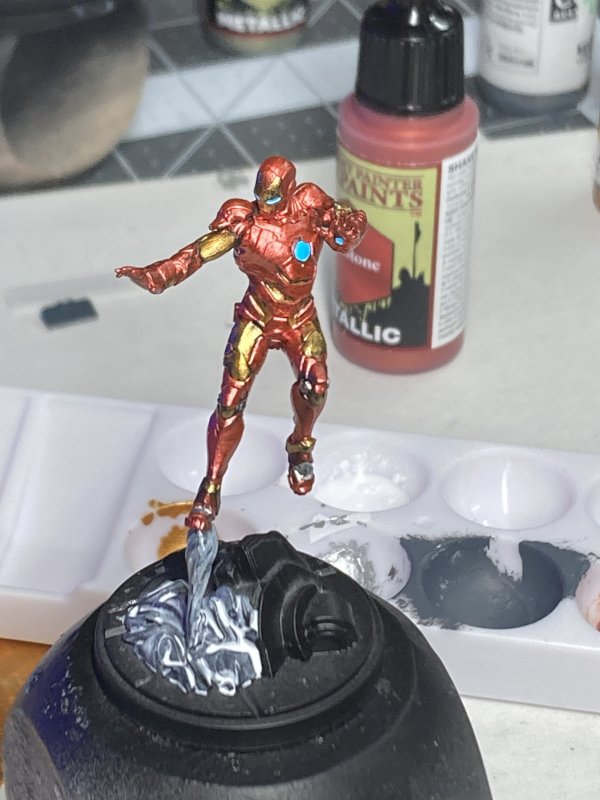
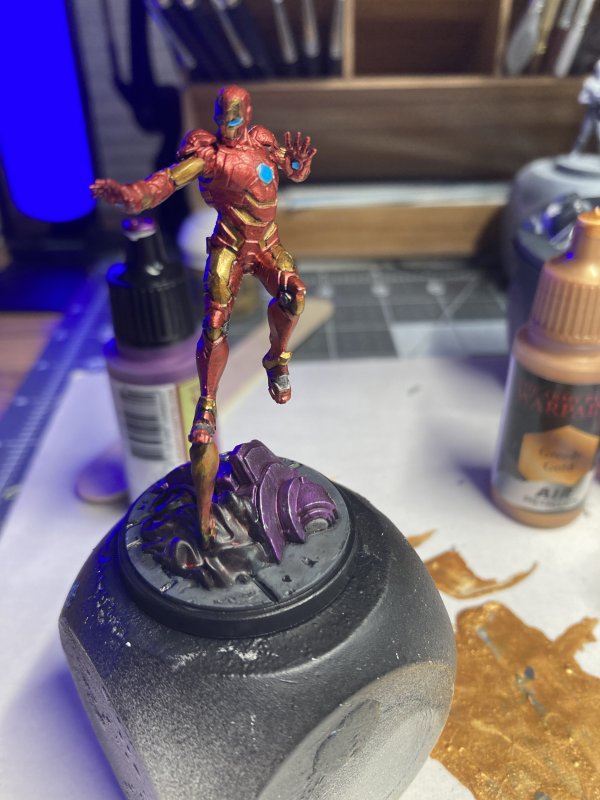
Once it was time to paint, I used YouTube for Hulkbuster, using Army Painter metallics. Although the video is just painting Hulkbuster, regular Iron Man was going through the same treatment. I deviated from the videos by not using a coat of speed paint on top of the metallics. Evidently I like my armor extra shiny. Additionally, I used a different YouTube for the Arc reactor glows to go with a blue-glow more than green-glow.
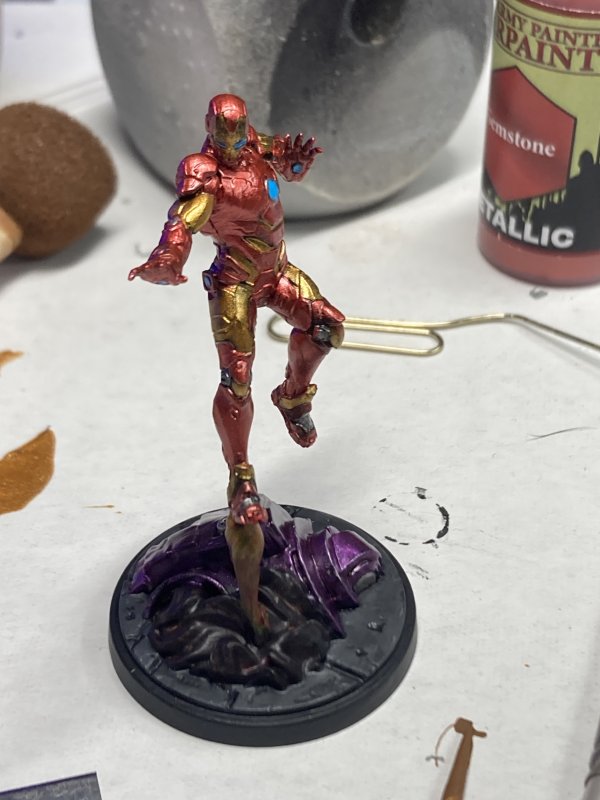
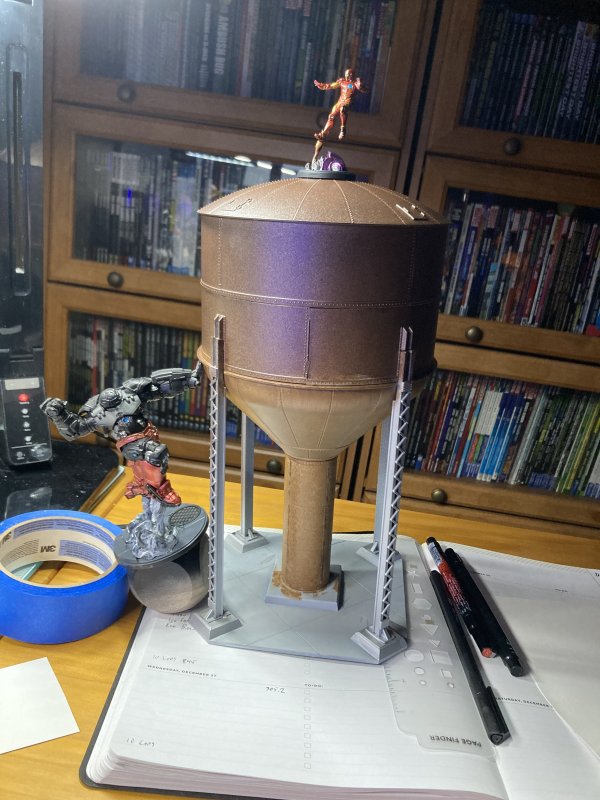
While I started with priming Iron Man and Hulkbuster at the same time, I quickly turned to mainly painting the very much smaller Iron Man more, and finishing him up. The metallic Army Painter paint requires a couple of coats to get proper coverage and smooth things out - this stuff has the consistency of nail policy. Granted, this is my first time to use this paint and I'm obviously still learning here. With Iron Man finished, I decided to work on Hulkbuster from the bottom-up so as to focus more on getting details and coverage instead of the eventual hurry-up-to-get-done that usually comes with using 1 color at a time. Hulkbuster boots took about 6 passes to get the coverage I was happy with. Well, happy enough.
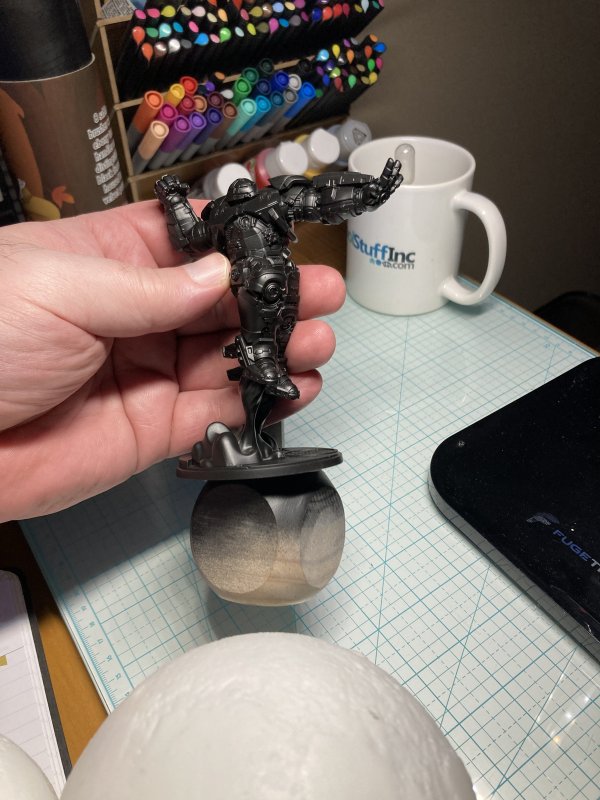
What was I saying about hurrying up to get done?
Hulkbuster is still in progress. Most of the legs are done - maybe 70%. This is one I'm definitely going to have to take my time and not rush. Not rush to the point I may throw in painting other things to completion while working on this one here and there.
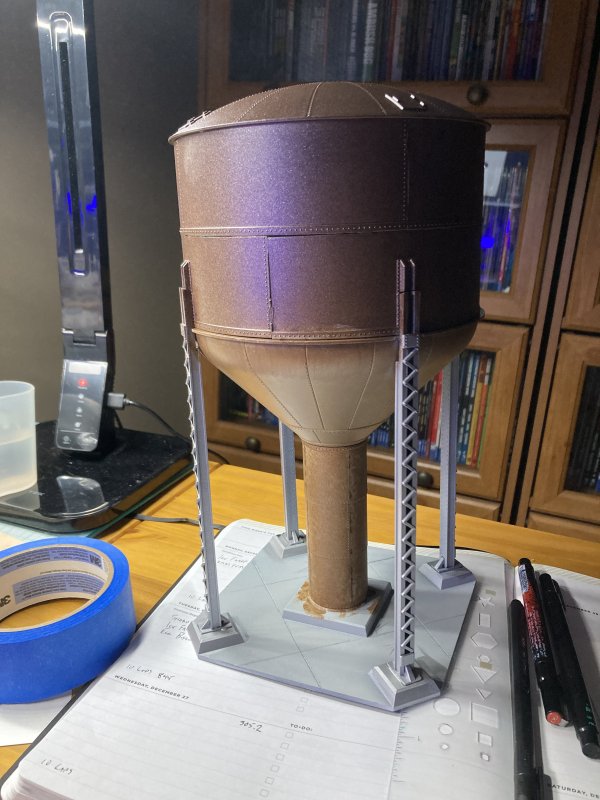
Speaking of other things, one of the semi-impulse purchases I made during Christmas sales was an O Gauge Water Tower for train layouts. O is the comparable scale that fits with 28-32mm gaming minis, and for some reason I've always wanted a non-homemade water tower, probably because my homemade water tower isn't very good. But now, a legit water tower can populate my zombie infested town ship! This is another currently in-progress kit. Getting circular parts to line up on multiple levels was the challenge here, and I knew going in that any gaps or problems with alignment would turn into rust damage. As progress went on, this rusted tower kept sticking in my head and I decided to overdo the rust. This is the step I'm currently on, which boils down to "how much was too much, and how do I backpedal?" This kit is probably about half done now, and still needs a lot of detail work added.
Permalink
Atlas O Gauge gaming miniatures Marvel Crisis Protocol models
Aliens - The Beginning
12.11.2023
At some point in the past couple of years I picked up the pieces of the Gale Force 9 Aliens game because (1) it had cool minis and (2) I knew if I waited everything would be out of stock/production/license moved on. The first wave promptly sold out upon release, and then a 2nd printing with updated rules came along. There seemed to be a small buying window for everything, except the Alien Warriors. Maybe they just made too many of the 12-Warrior sets, but I kept seeing these pop up on sale almost everywhere for $15-%17. So I picked up a set I mean a couple fine I got 4 boxes. And being me, those boxes sat on a shelf for a long, long time.
Then one day I had an urge to paint something relatively simple besides zombies. That will come back to bite me in the ass. Simple, not zombies.
My first thought when I bought these kits that required assembly was to use magnets to adhere the tails to the bodies. The tails look rather fragile, so magnets would help there plus make things interchangeable! The problem here is that my tiniest magnets are still of larger circumference than the tails. So, glue it is.
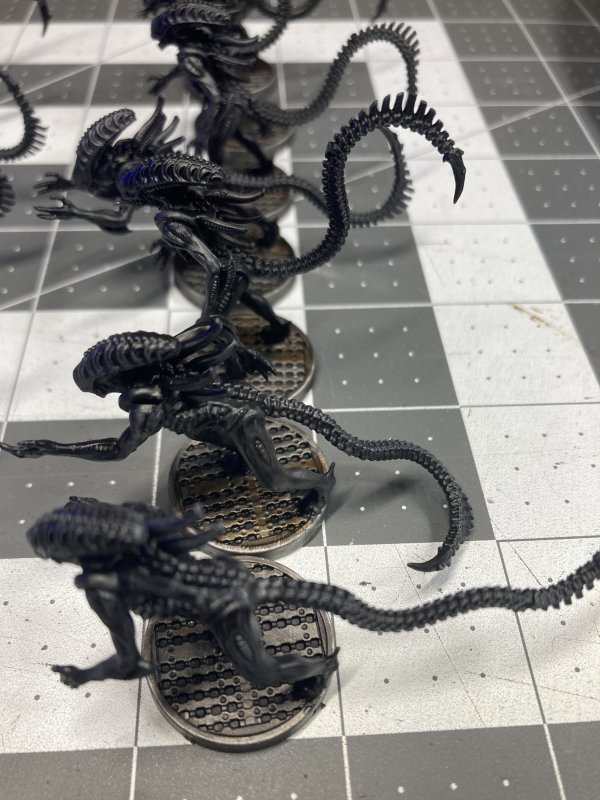
Assembly is pretty straightforward. The body (torso, legs) is left & right sides that just fit together. Head and spine slide in. Arms and tail variations have a universal fit between all bodies. The front of the feet are part of the base, and then the back of the feet on the legs glue in. I thought the tail was going to be fragile, but the small 2 points of contact between the body and base - too thin and angled for pinning - won out there.
I used plastic cement for the body halves, head, and arms. I went with (thick) super glue for the tail and attaching to the base, hoping for a sturdier bond. I actually tried plastic cement once, and the body and tail eventually drooped regardless of how much support and drying time I gave it.
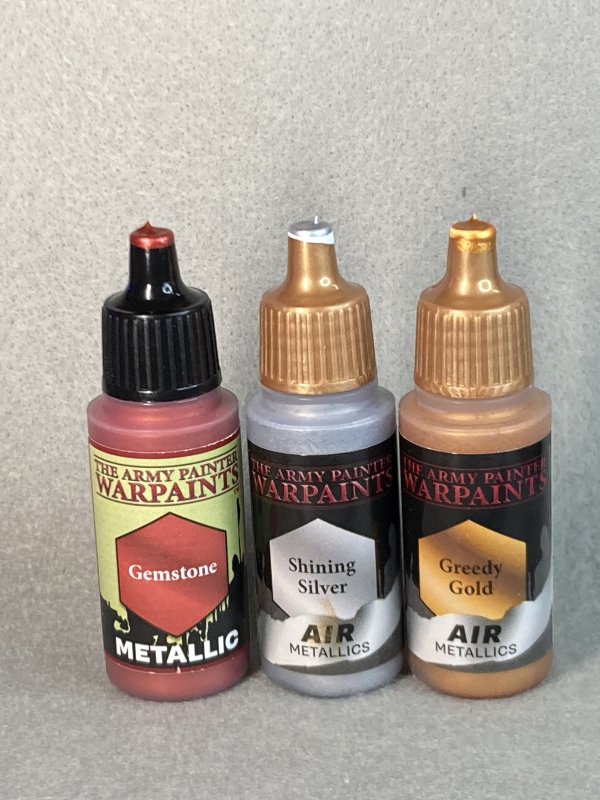
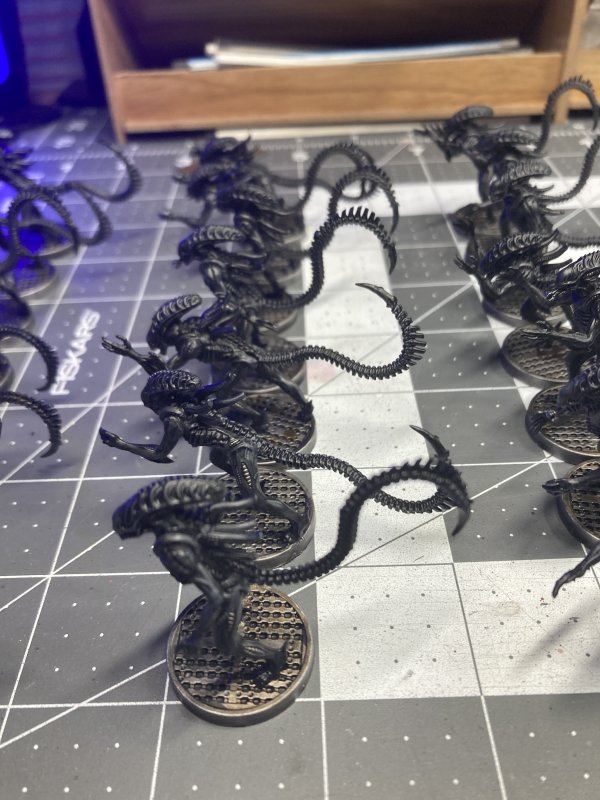
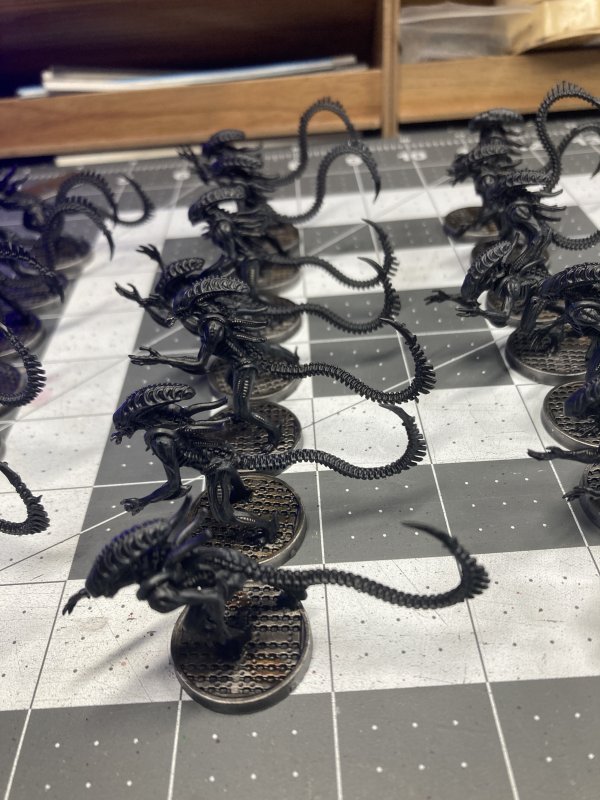
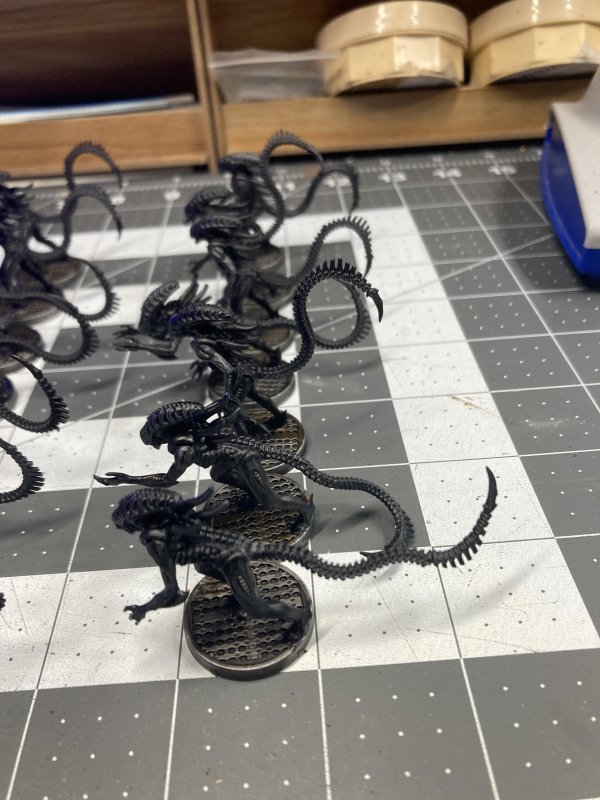
I had some aspirations for more than just a black/grey paint job. I while back I had watched a video using Turbo Dork paint that seemed spot on. I decided to test it out on one of these Alien Warriors.... and it looked like crap. The swirls of blue didn't... swirl right? Since the video used and Alien queen instead of these itsy bitsy warriors, the smaller scale and paint seemed to not be working for me. That was ass bite number 1.
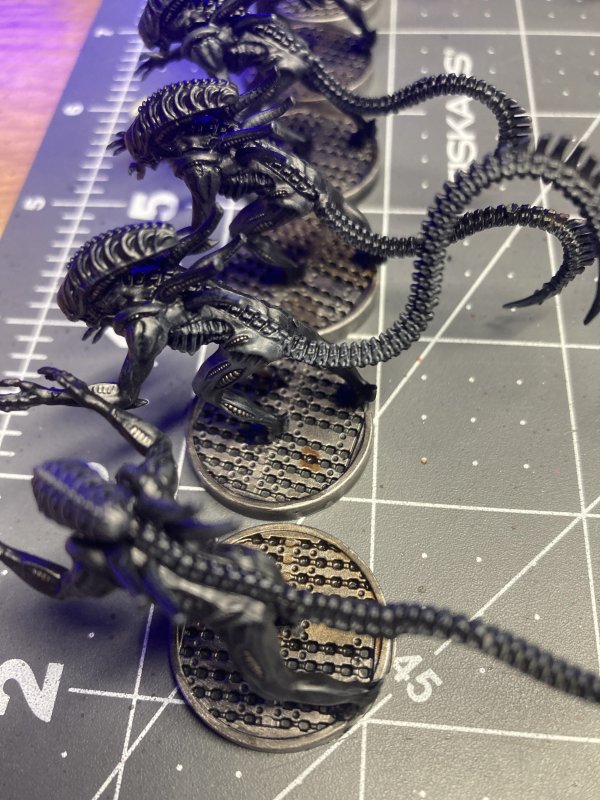
Everyone knows Aliens are slimy and shiny. That equated to a glossy sealant coat when I thought about it. I started out testing 4 Aliens with various things - including the Turbo Dork paint scheme. Black primer with a dark grey drybrush seemed to be working out ok, and I had a couple of different variations on how hard/much drybrush I applied. On 1 with a little too much drybrush, I added what ended up being a little too much Nuln Oil wash, and everything was "streaky". Ok, don't do that. Out of the 4 I had 1 that I like well enough to move forward with, and then I gloss coated everything. At that point, from about 2 feet away, I had 4 shiny black(ish) blobs with no details visible. The gloss and sheen just covered everything up. Bite number 2.
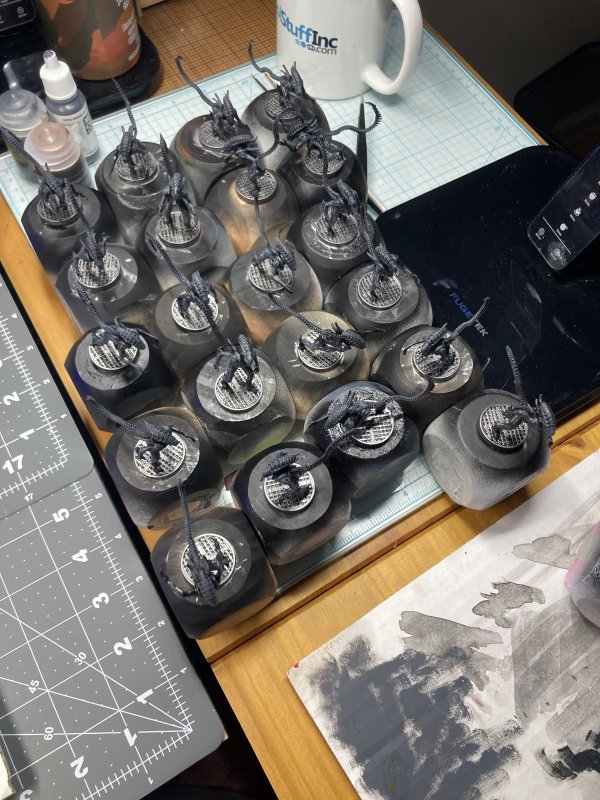
With lessons learned, I basically went to my tried and true routes, even going so far as to re-prime the 4 that were mostly finished - and I always wondered how much detail in a mini is loss as you add more and more layers of paint and sealant. Turns out, it's very noticeable.
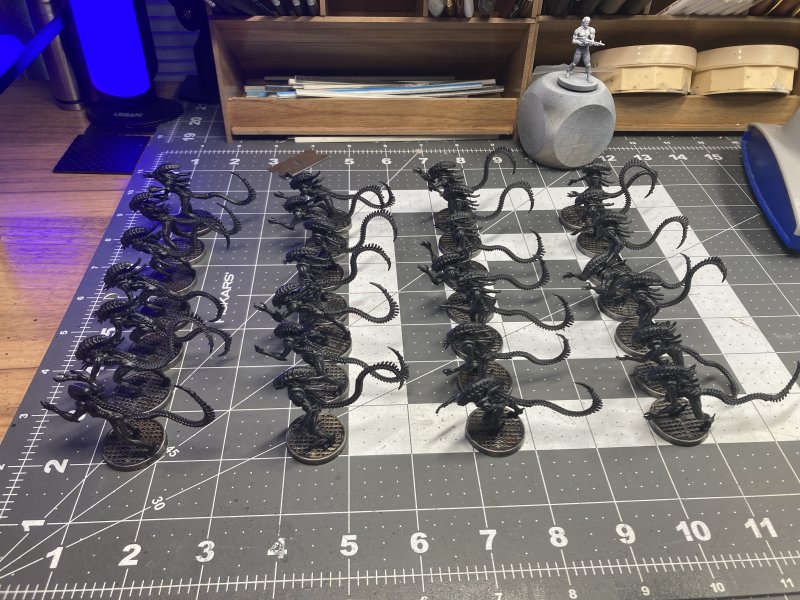
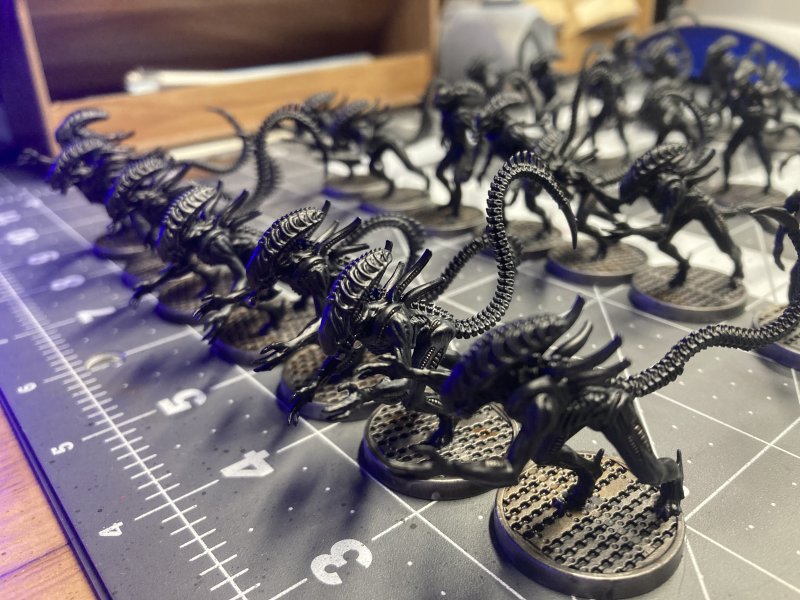
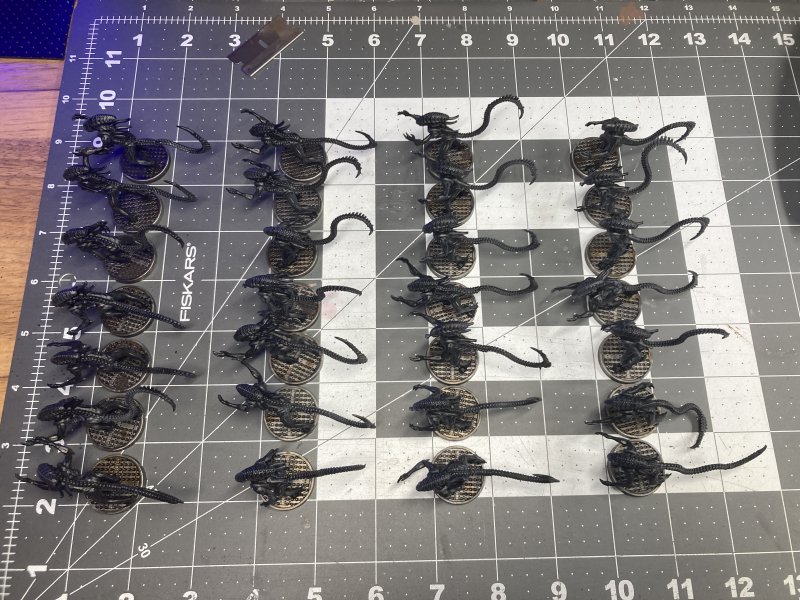
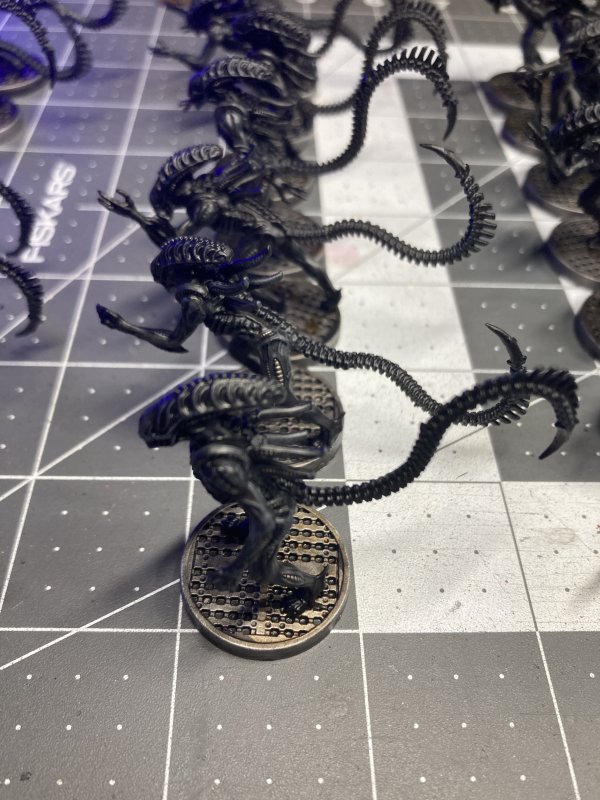
In the end, I went with black printer and dark grey drybrush that I tried to keep a light hand on. There were more than a couple of times the brush wasn't dry enough when I started, but that turned out ok. Citadel Iron Warriors went through multiple rounds of bringing out little bits - teeth and what looked to me like bands showing through the skin. Nuln Oil wash after that and the bodies were done. The grate for the bases got a coat of Iron Warriors, then a Nuln Oil wash to tone it down. Sepia wash was randomly added to show some rust, which worked really well. And then I added some Typhus Corrosion to a few bases randomly, most of which ended up with a little Nuln Oil added on top later. I'm not really sure why, but I went back and painted the rim of all the bases silver and then added (yet again) some nuln oil. It makes a subtle difference between the top and side of the base, but I like it even if I may be the only one to ever look close enough to notice.
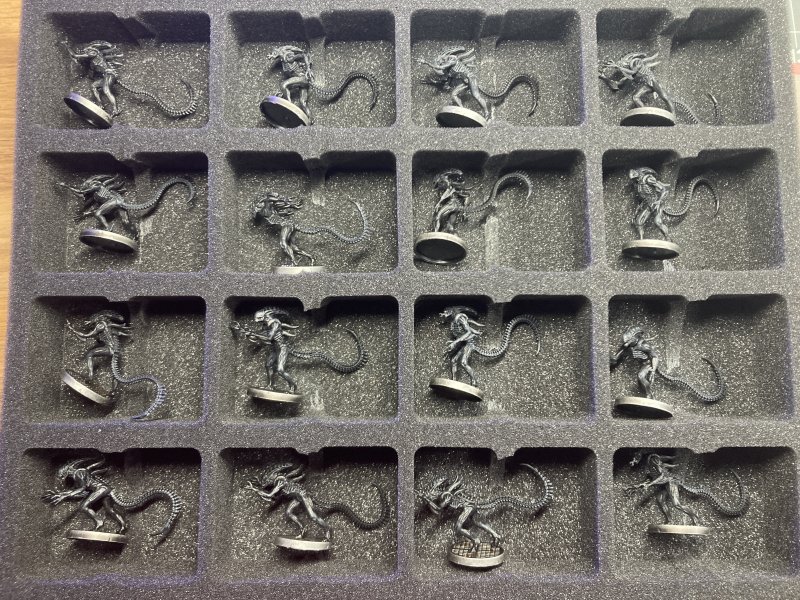
And with that, there are 28 Alien minis ready to drool and spill acidic blood to and fro.

Permalink
Aliens Gale Force Nine gaming miniatures
Cobra Sneaks In
11.15.2023
These minis were primed at the same time as the last minis I posted, and I continued my trend of just painting a couple at a time instead of everything I primed. And again, I think it works better than doing a bigger batch of painting. 2 or 3 minis at a time seems to be my sweet spot. Now if only I can remember that and not think the painting details I'm happy with when painting 2/3 will scale up when I paint 5 or 8.
Still keeping with Reaper minis, this time we have :
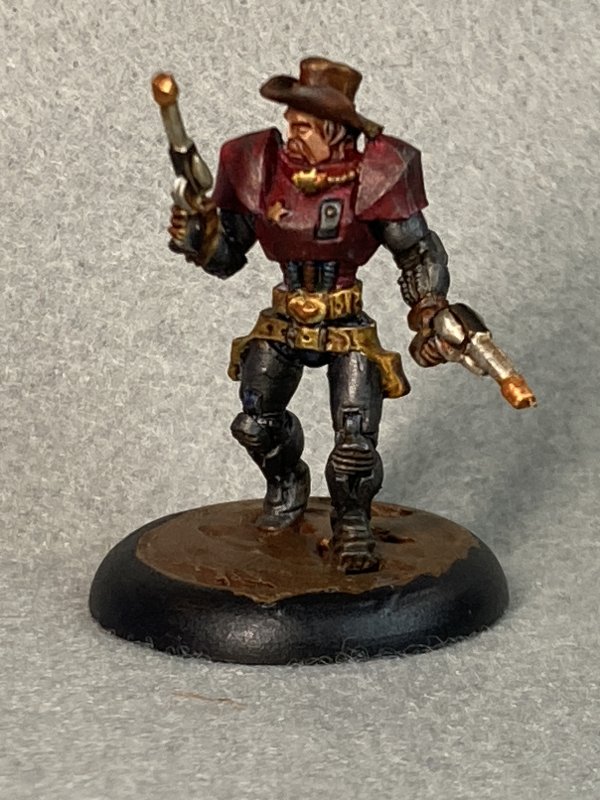
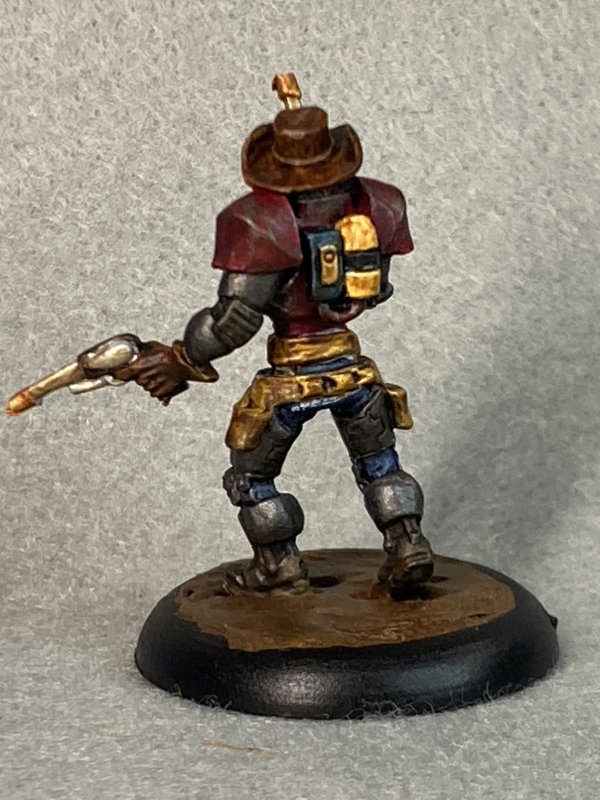
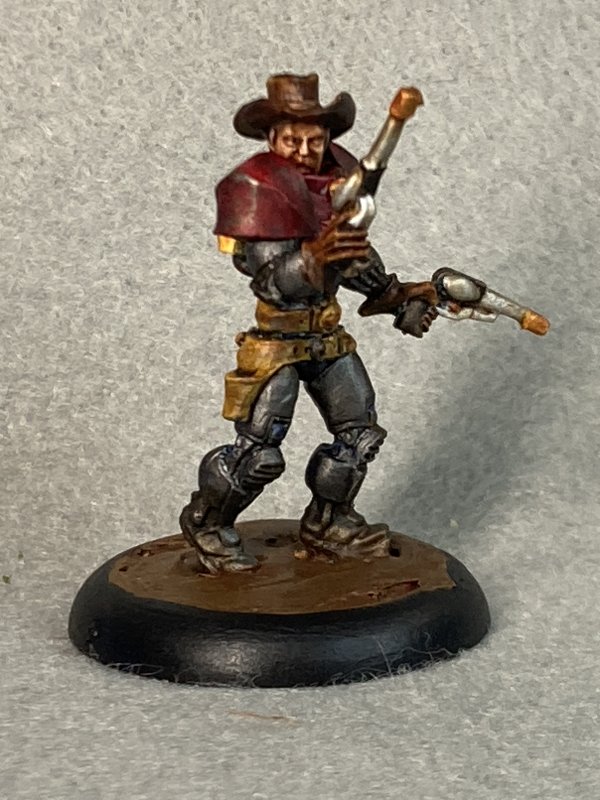
John Bishop, Space Marshal. Cyborg robot cowboy of the future past!
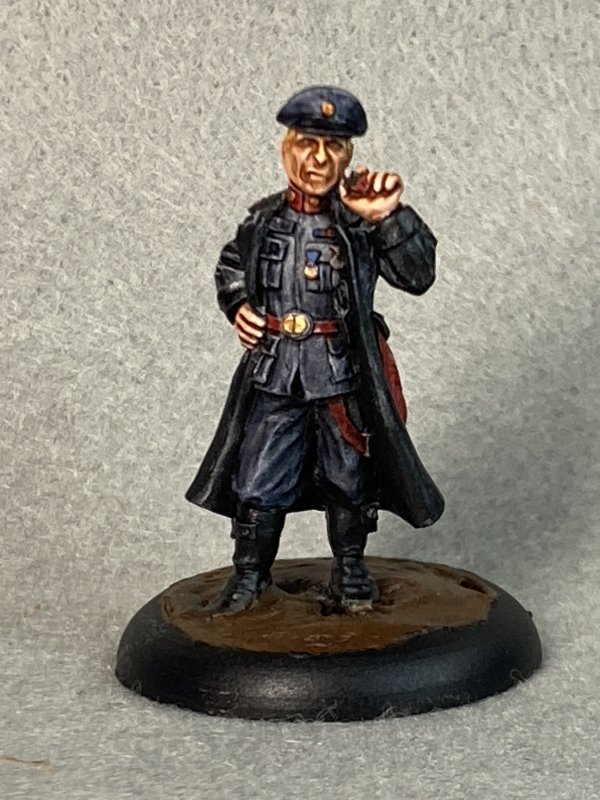
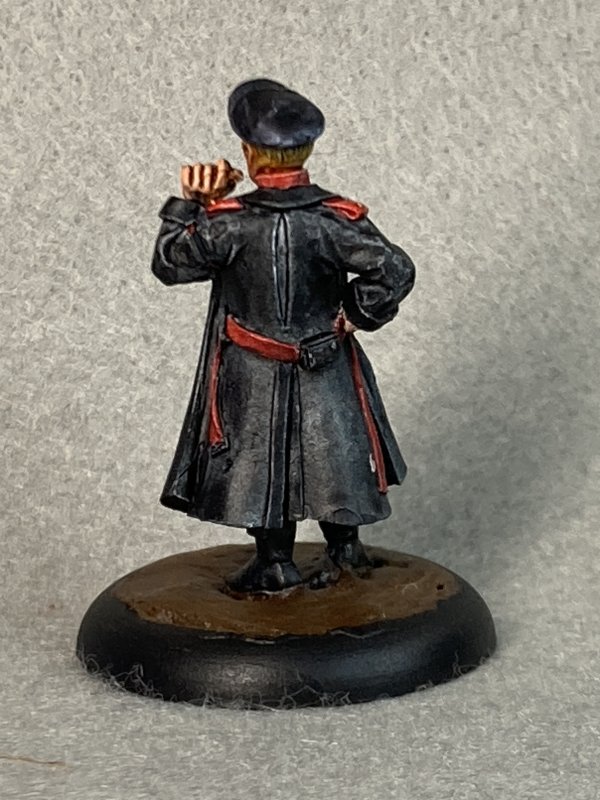
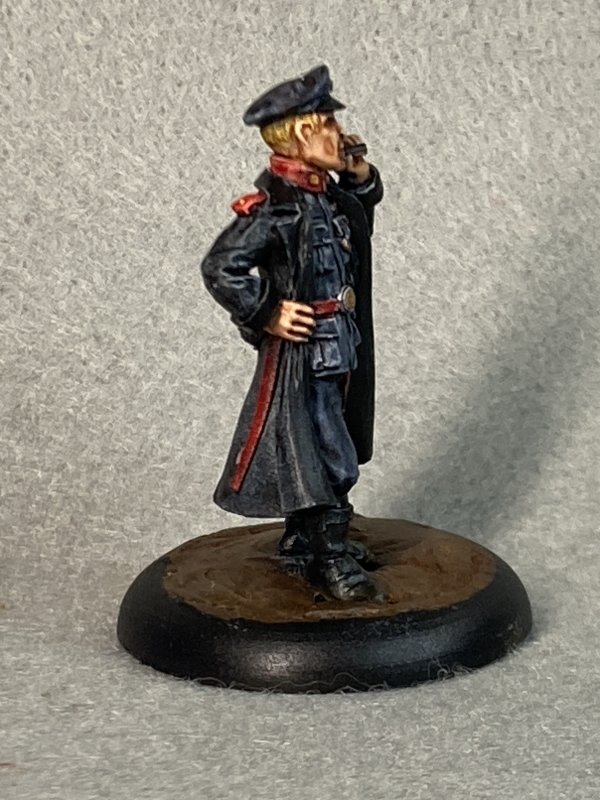
General Drake. 2nd time I've painted this one. This time, not green.
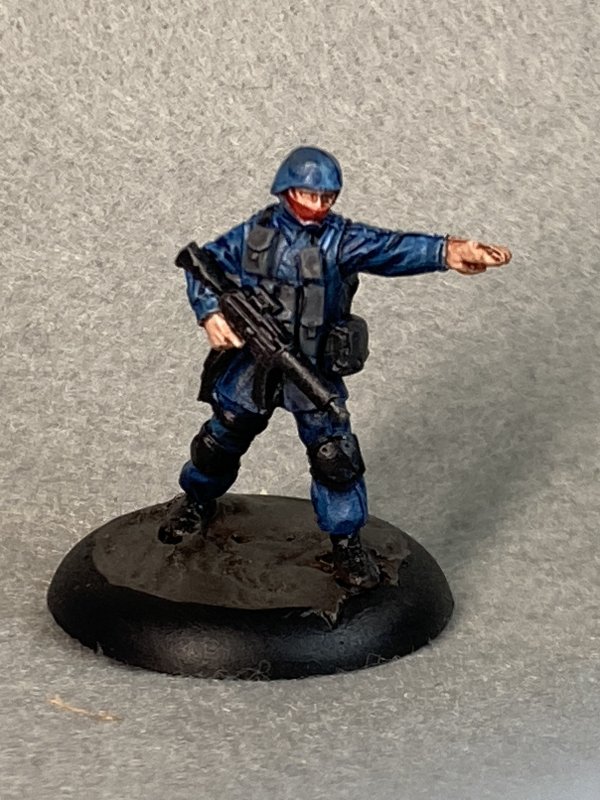
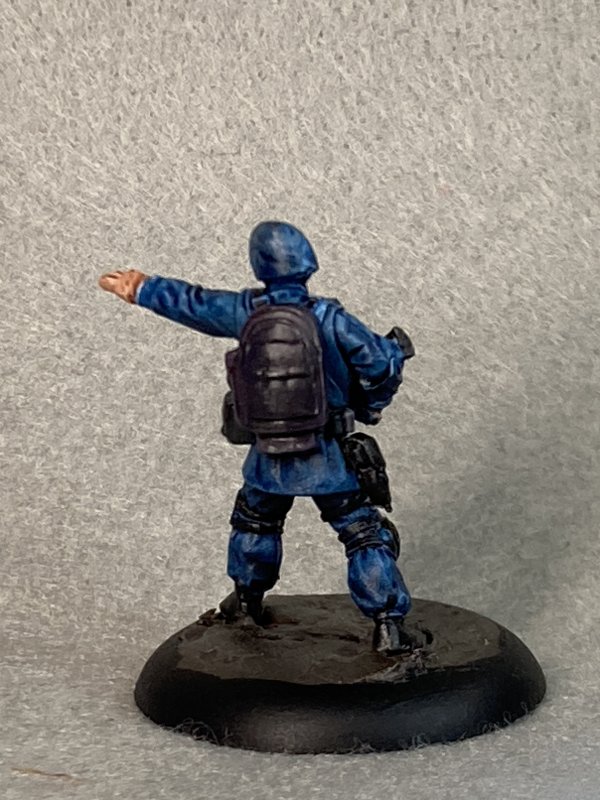
Delta Force Commando. I decided Delta Force is Cobra The Enemy.
I don't have too much behind the scene details on these as everything was pretty straight forward. I didn't have high expectations on Delta Force Commando as the sculpt seemed a little "mushy" - the left arm and head seemed to lack details. While it was sitting in the background as I painted the other 2, "Cobra Trooper" popped into my head. Yeah, it seems obvious now. A quick Google led me to use Citadel Kantor Blue for Cobra Blue. Luckily I had Kantor Blue within my 10 boxes of paint. There's not a lot of detail in the paint job - blue base, red mask, black boots, kneepads, gun, and then some greys on other bits just to break things up. I think it works, though.
Permalink
gaming miniatures reaper chronoscape
Sascha and Hunter
11.07.2023
While I primed a batch of 6 minis, I concentrated on a couple instead of trying a little bit of each one along the way. I ended up concentrating on 2 to start with, so I just stuck with staying on those 2 and going all the way through to completion. It worked out well, especially as I didn't like the bases that I started out with (that came with the minis) so I had my first in-progress base-ectomy... when I thought I was pretty much done.
The 2 minis this time were:
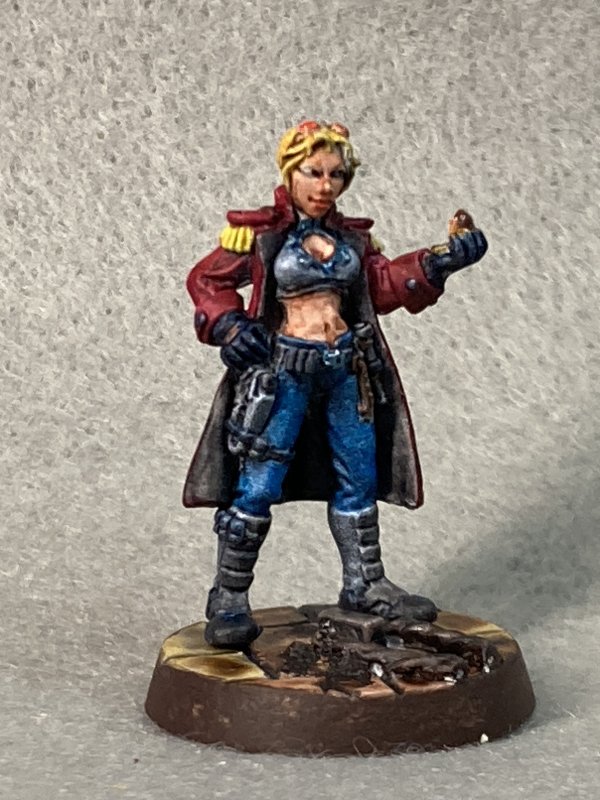
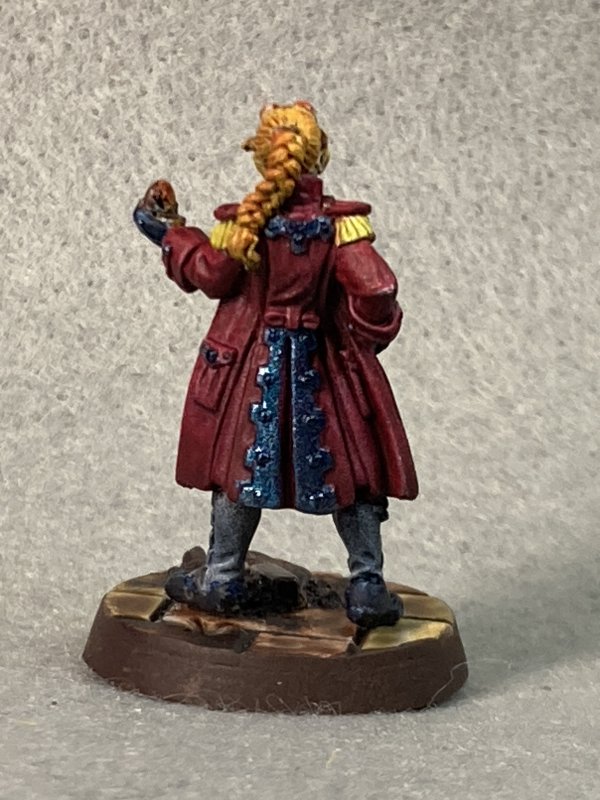
Sascha Dubois, Time Chaser. She chases time. And time waits for no one.
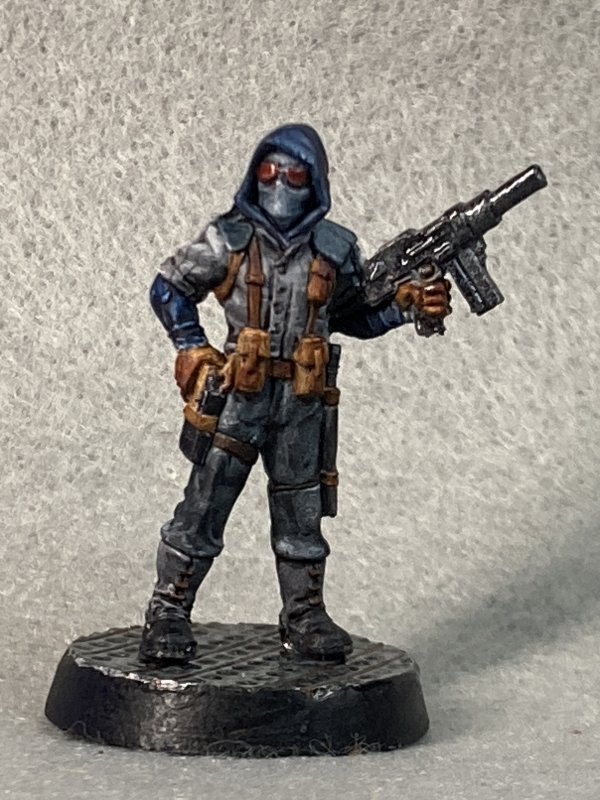
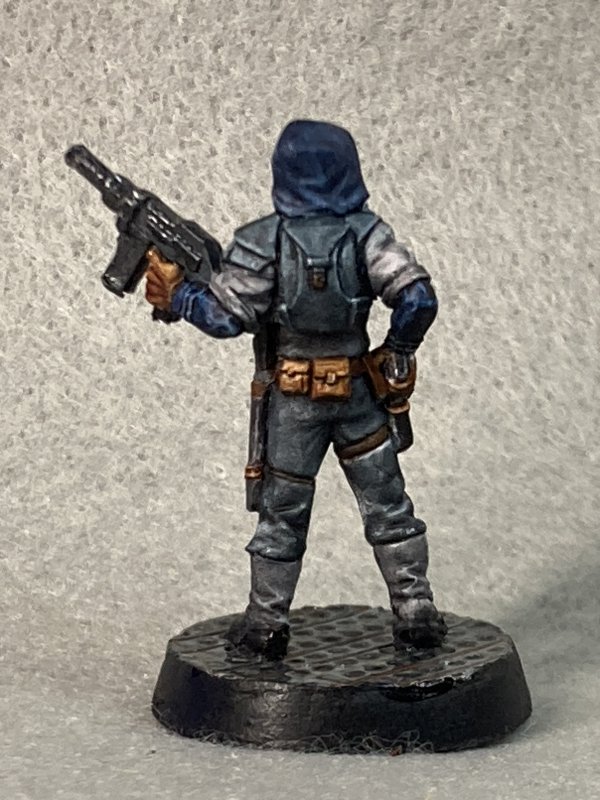
Post Apocalyptic Hunter. Poor guy doesn't even have a name.
I think I've painted each of these before. They felt familiar. Most of what I primed in the overall batch were minis I painted before, and this was to force me to use not-the-first color scheme that came to mind. That gave me an excuse to have fun, yet still try not to get into clown-gaudy. Sascha is a little more colorful that the pics shown on the Reaper website, but that's ok. I pulled out the blue gunmetal Vallejo, and like normal I went a little overboard with it. I think it works, but I should have used it a little less. Most important - she's got some of the best eyes I've done. They actually seem to be looking at her left-hand probably-a-clock.
Nameless PAH stayed muted in his colors. I was on the verge of just using grey-scale for this one, and dark blue seemed like a good alternate color to fit in. I'm not sure why he would have blue sleeves and hood, but it kind of works. Each mini got red lenses on their goggles thanks to a Citadel jewel stone something or other color. I'm so good with remembering details.
Blog Archive
As always, correct spelling is optional in any blog entry. Keep in mind that any links more than a year old may not be active, especially the ones pointing back to Russellmania (I like to move things around!).
Tags have been added to posts back to 2005. There may be an occasional old blog that gets added to the tag list, but in reality what could be noteworthy from that far back?
Blog Tags
3D Printer (29)
4ground (32)
4ground-mall (40)
5PFH (1)
action figures/toys (10)
airbrush (7)
Aliens (1)
Amazon (12)
antenocitisworkshop (11)
Atlas O Gauge (2)
Batman Miniature Game (2)
Battletech (1)
belt sander (12)
Blood Bowl (4)
boardgames (79)
books/comics (19)
computers hate me (5)
conveyances (15)
Cyberpunk Red Zone (4)
diet (53)
dreams (7)
fallout (1)
feng shui (1)
Firefight (1)
Foundry (3)
Gale Force Nine (1)
game dev (23)
gaming miniatures (240)
gaslands (10)
gastric sleeve (34)
Green Stuff World (2)
Hasslefree (9)
Hero Forge (1)
HeroQuest (4)
hobbies (102)
Jailbirds Minis (2)
kevin smith (1)
Knight Models (2)
malifaux (3)
Marvel Crisis Protocol (2)
mckays (1)
models (12)
mom (32)
moon light (5)
Moonbus (1)
movies/tv/dvd (60)
Necromunda (4)
ninja division (1)
Pathfinder Deepcuts (1)
pilonidal cyst (5)
plastcraft (2)
programming/interweb (42)
rambling (61)
random (367)
random maintenance (3)
Reaper Bones (3)
reaper chronoscape (32)
renovation/remodelling (25)
road trip (27)
salesforce (1)
sarissa precission (2)
scenery (19)
Star Trek (2)
Star Trek Away Missions (3)
Star Wars Legion (1)
studio miniatures (3)
ttcombat (12)
video games (51)
vs Factions(PDFs) (1)
walking dead (37)
wargame foundry (3)
work (6)
wrestling (45)
zombicide (2)
Zombicide Invader (19)
zombie mall (23)